Antec ISK-600 mITX Chassis Review
Peter Donnell / 10 years ago
Introduction
Antec have an extensive history in the PC component industry, they’ve produced some of the most popular cases around and they’re reputation for durability and affordability has always served them well. The latest addition to their range, the ISK 600 looks set to continue that tread and is targeted towards the HTPC / small form factor gaming market, both of which are currently proving very popular, especially with the recent demand for Steambox style gaming systems as people take their PC gaming to the big screen.
The demand for affordable and compact cases is growing, people want the small form factor so that their systems fit into their home entertainment system, or even just something that can be easily transported for LAN gaming events. Despite the demand for small form factors, most people still want a full size power supply, plenty of storage, large graphics cards and room for a powerful CPU cooler, especially for overclocked systems and the ISK600 looks set to deliver on every single point, with the added bonus of being affordable at just £53 (best price on Google shopping at time of writing).
With support for mini-ITX motherboards, ATX power supplies, a decent size graphics card and even room for a 120mm AIO water cooler, the ISK600 packs enough features for a great gaming system, so lets get right to the good stuff and see what else this chassis has to offer.
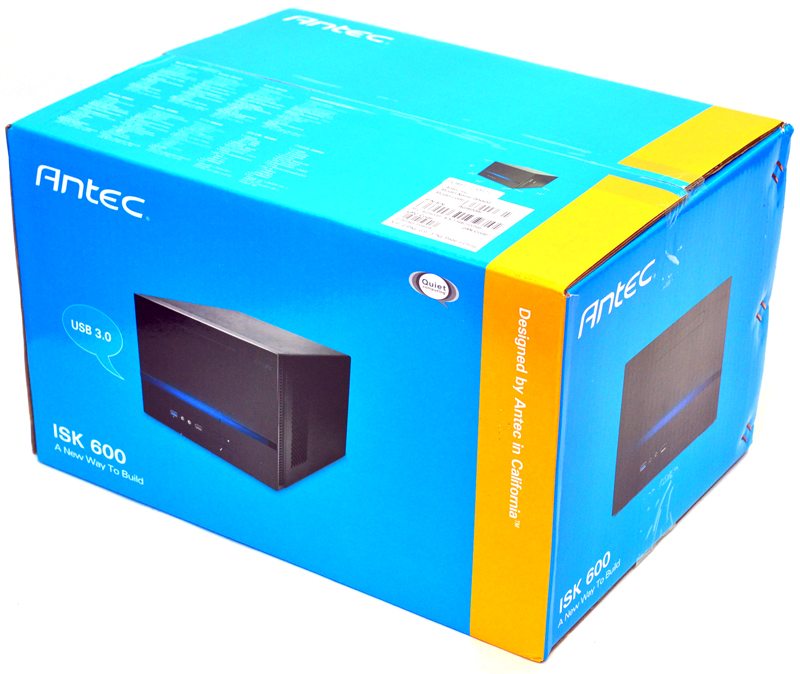
The ISK comes neatly packaged in a colourful box bearing the common Antec colours. There isn’t much on the box front other than a tidy image of the chassis as well as a speech bubble letting us know it supports USB 3.0.
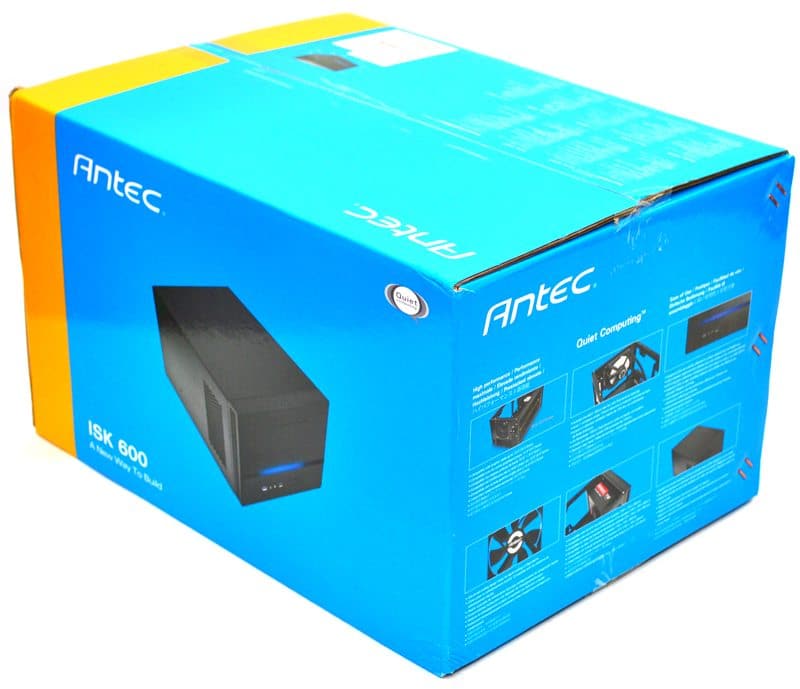
Around the side we have a nice run down of many of the features, such as water cooler support, front light bar, ATX PSU support and the 120mm fan that is included in the chassis.
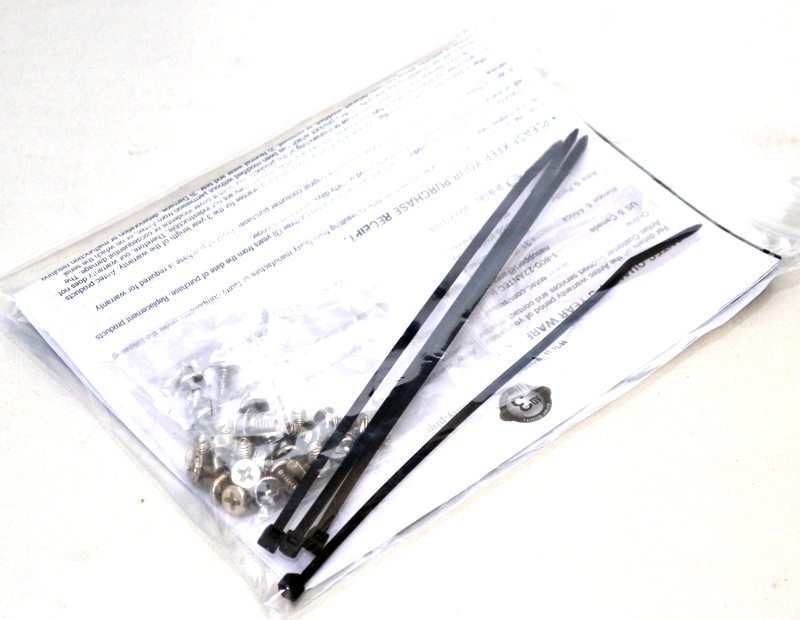
In the box you’ll find everything you need to get you started, including a quick guide leaflet, some cables ties and a collection of screws for your motherboard, PSU, hard drives, etc.
Exterior
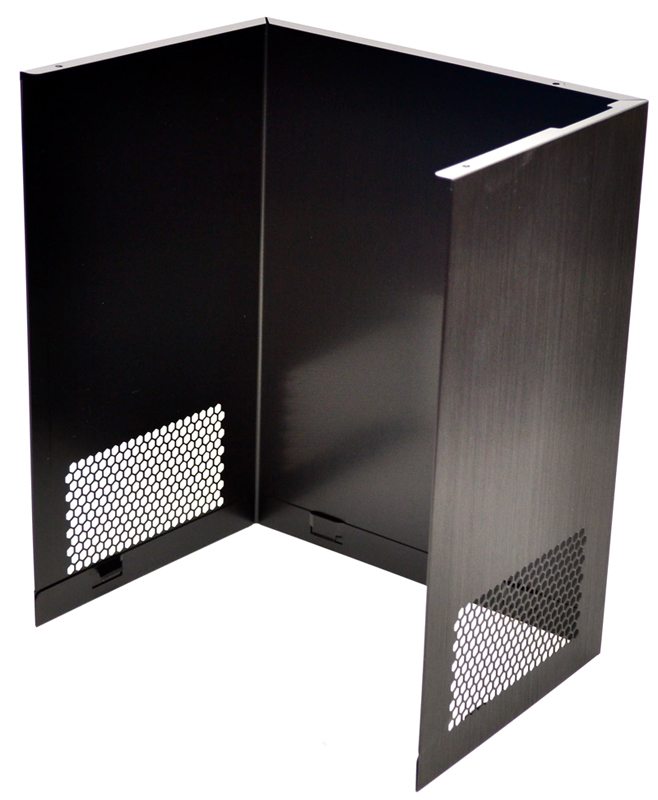
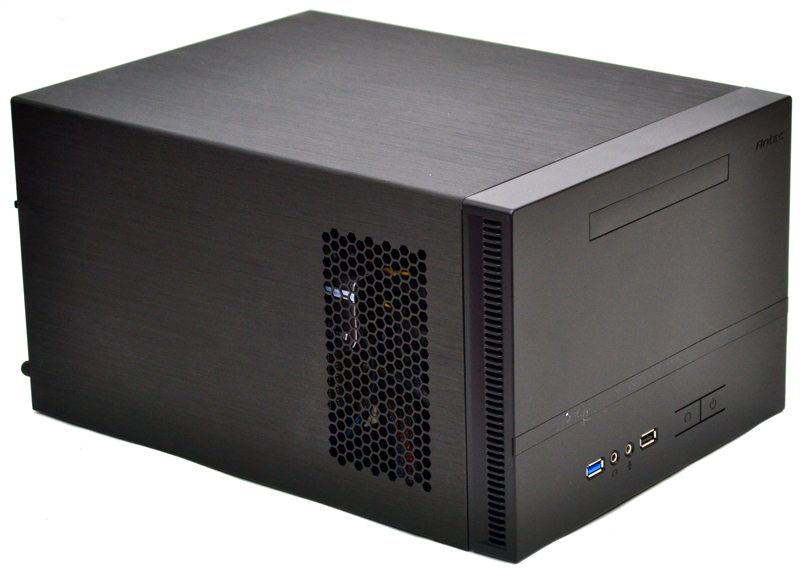
The left, top and right sides of the chassis are made from a single piece of aluminium and held in place by three thumb screws on the back of the chassis. There is some ventilation at the front left and some extra ventilation on the left side of the front panel.
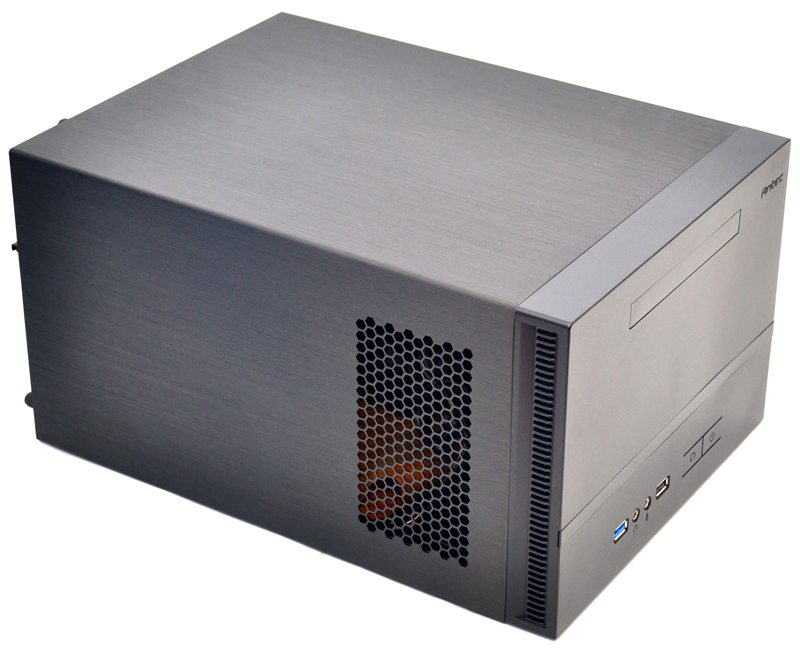
The right side mirrors the left offering two more ventilation areas.
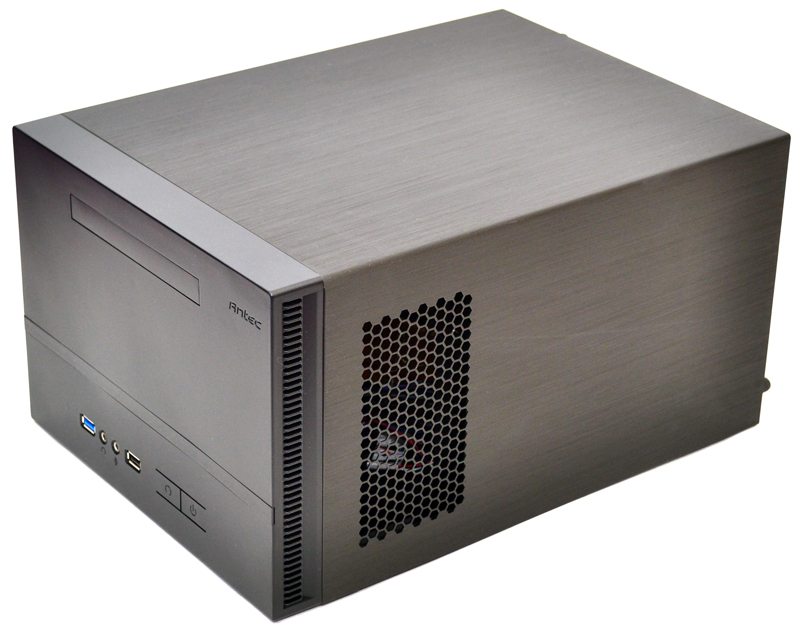
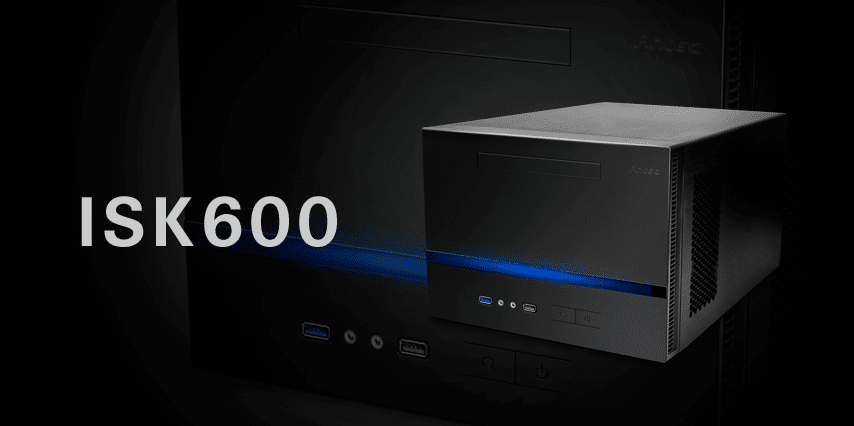
The front panel features a nice clean look, with a slim 5.25″ drive bay at the top, a clear strip in the middle with blue LED back lighting, and the main I/O panel at the bottom.
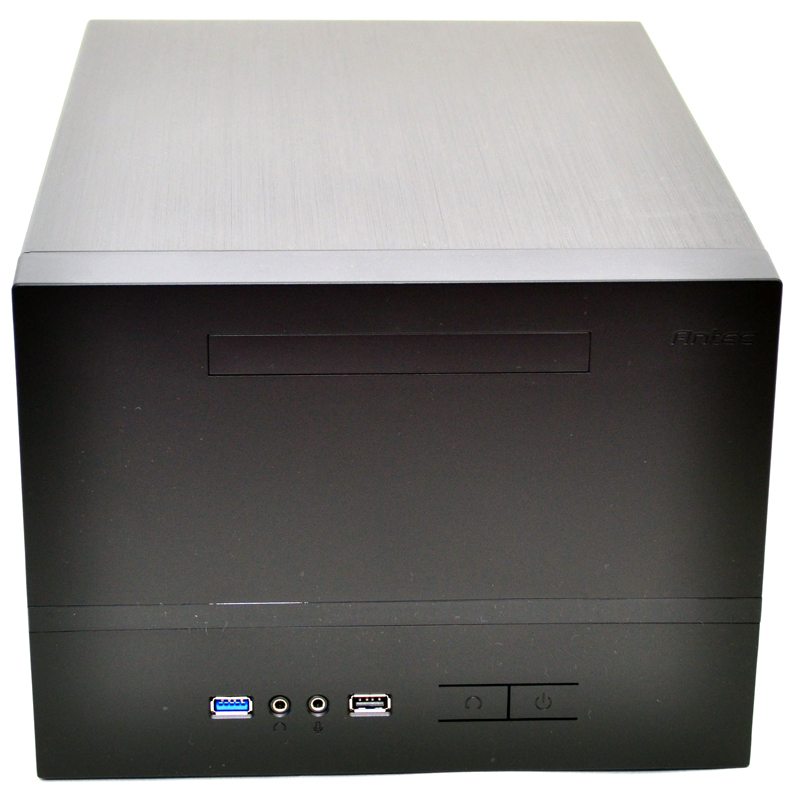
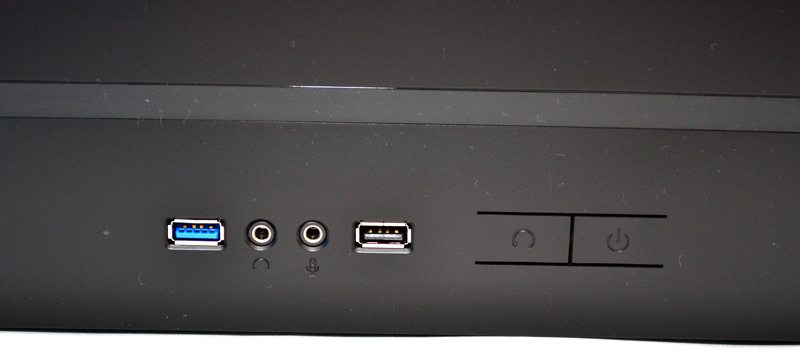
There is a single USB 3.0 port, HD audio connections, a USB 2.0 port, and the master reset and power buttons.
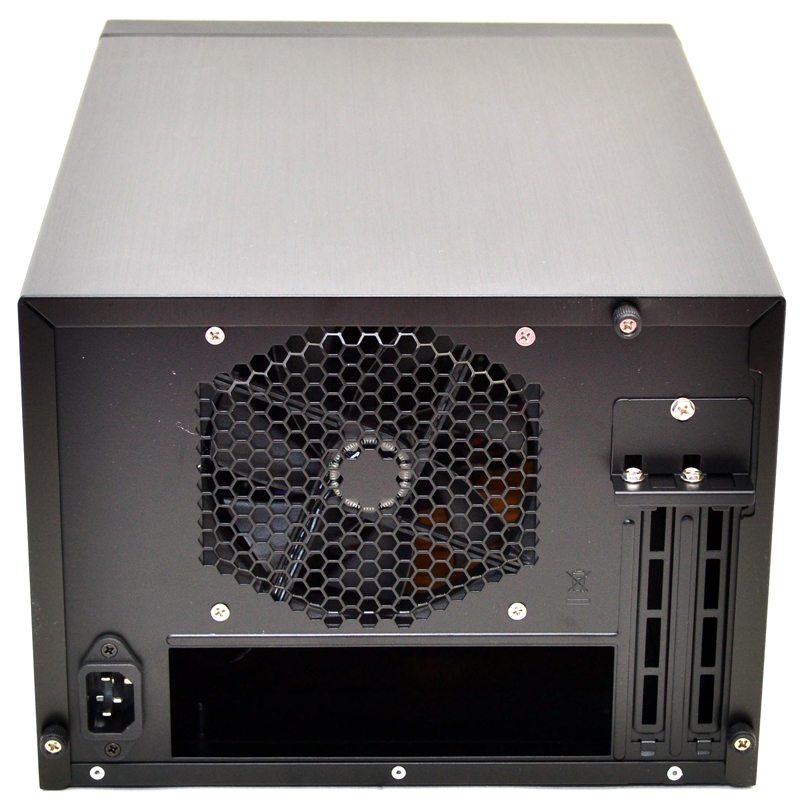
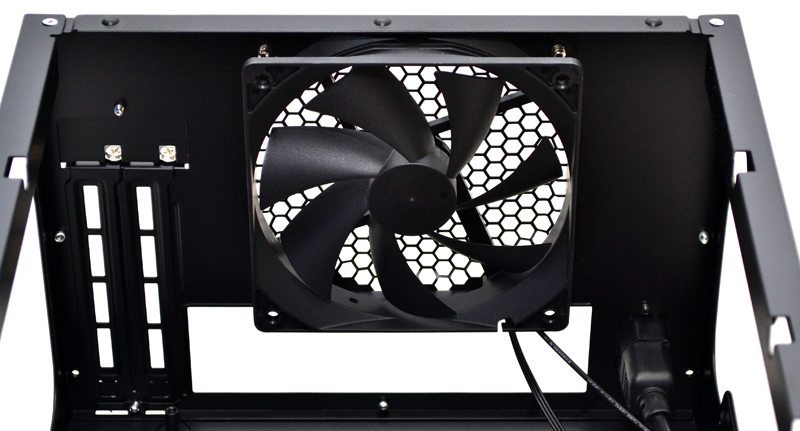
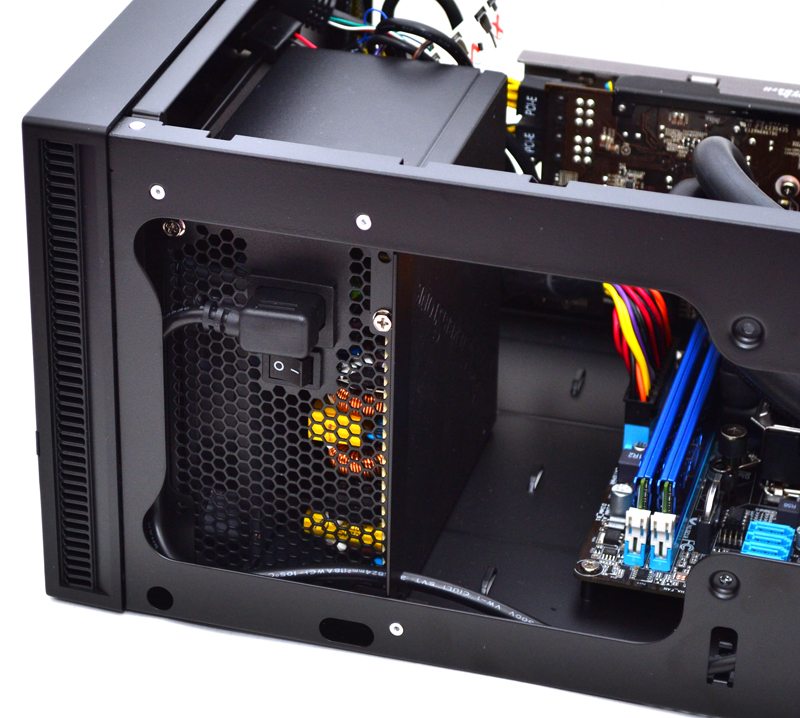
Around the back you’ll find a pre-installed 120mm exhaust fan, a PSU connection which is actually an internal extension cable as the PSU is mounted towards the front of the chassis. Finally we also have two expansion slots, perfect for a dual slot GPU or similar expansion card.
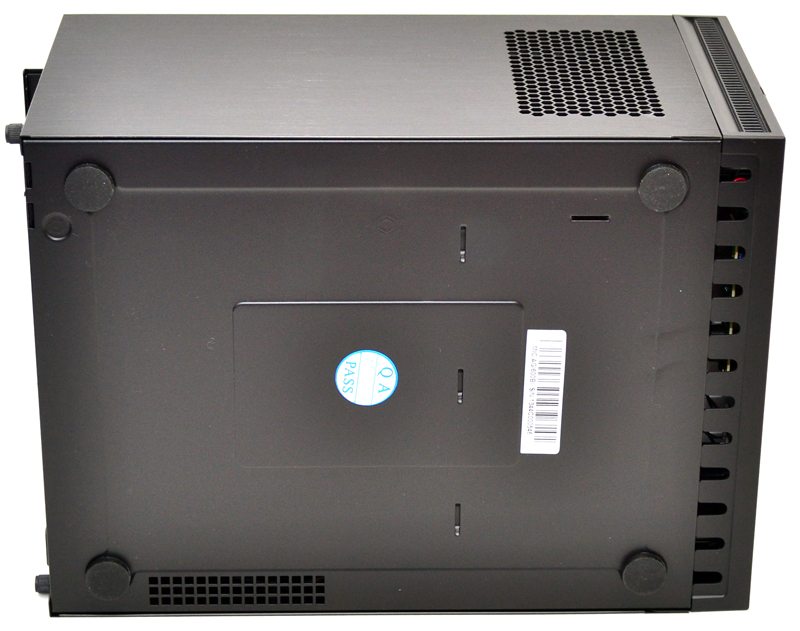
The bottom of the chassis features a little extra ventilation as well as four thick rubber feet that should help reduce vibration and also keep the chassis from sliding around on your desk / TV stand.
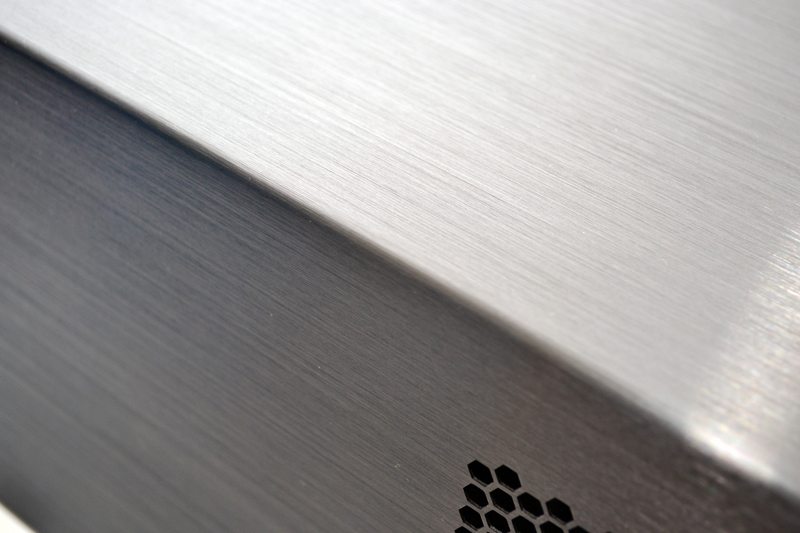
The aluminium panel is really nicely finished with a brushed effect, it’s actually got quite a bit of texture to it compared to most brushed aluminium and the grooves catch the light rather nicely.
Interior
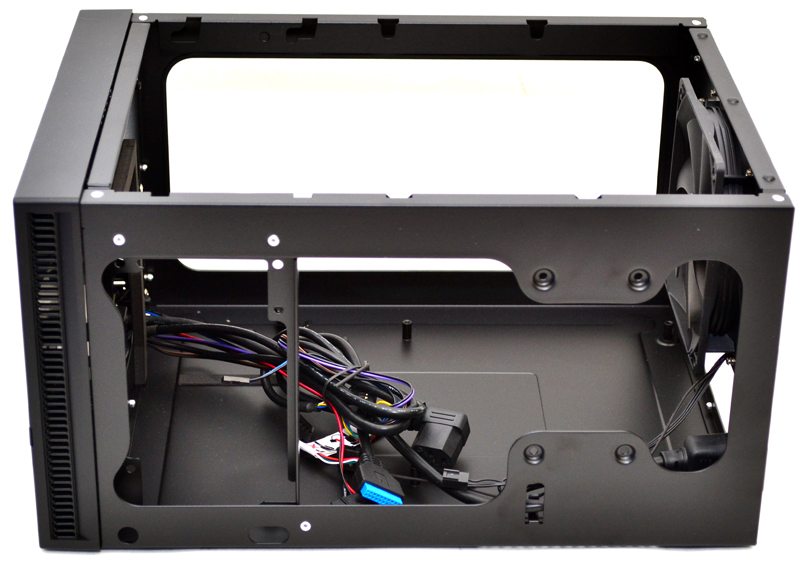
With the top panel off we can see the there is a huge area inside the case, there are not stacked hard drive bays or other obstructions, leaving lots of room for graphics cards and cooling components.

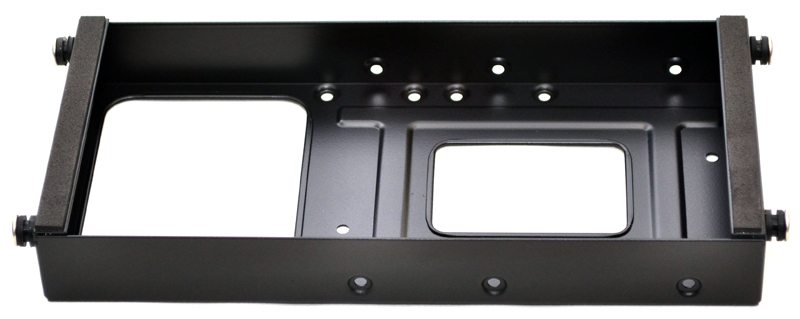
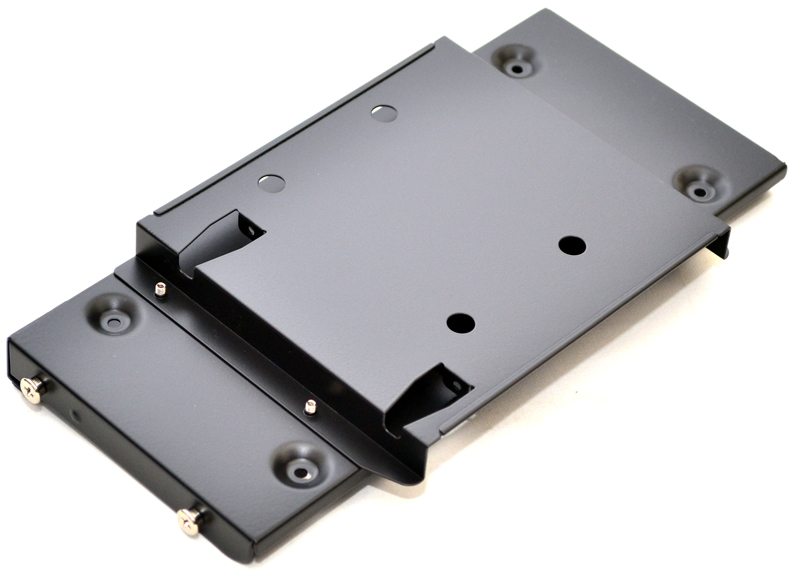
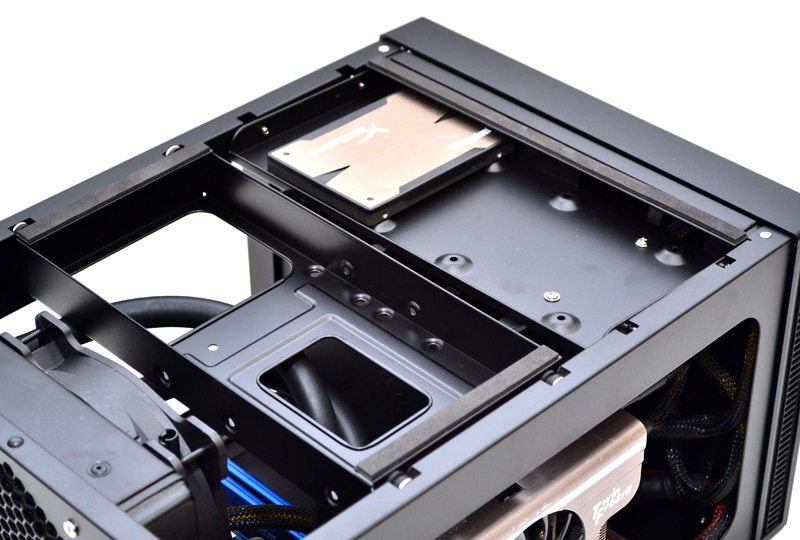
In the top you’ll find two suspended trays that that offer a multitude of hard drive mounts.
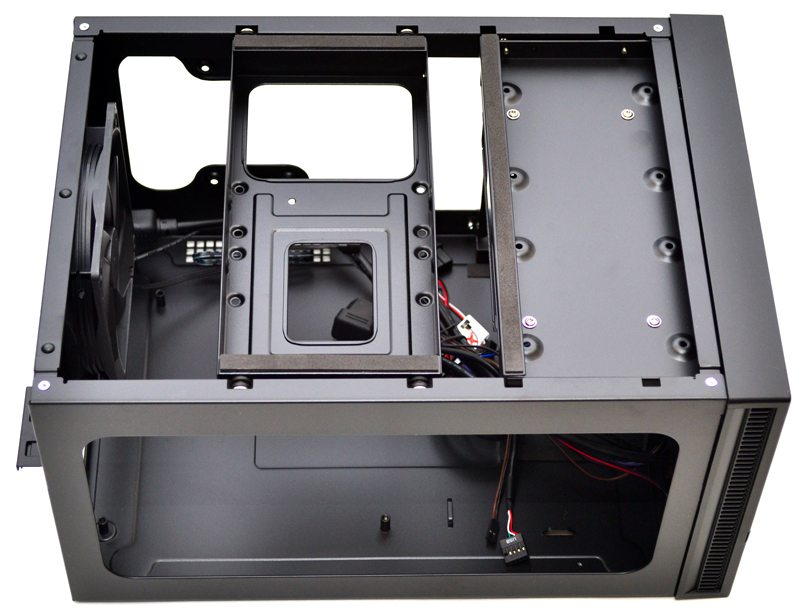
These bays can be lifted out without the use of tools and features thick rubber pads on the top to prevent hard drive vibrations from transferring throughout the chassis exterior.
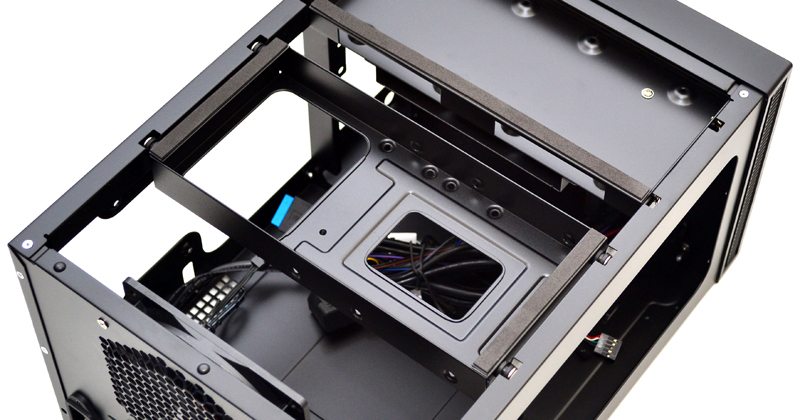
Lift the bays out and you’ve got lots of room to work with, handy when you’re trying to install your motherboard.
The trays are pre-drilled to support 2.5″ and 3.5″ drives and being able to lift the bay out of the chassis makes installing storage drives incredibly easy.
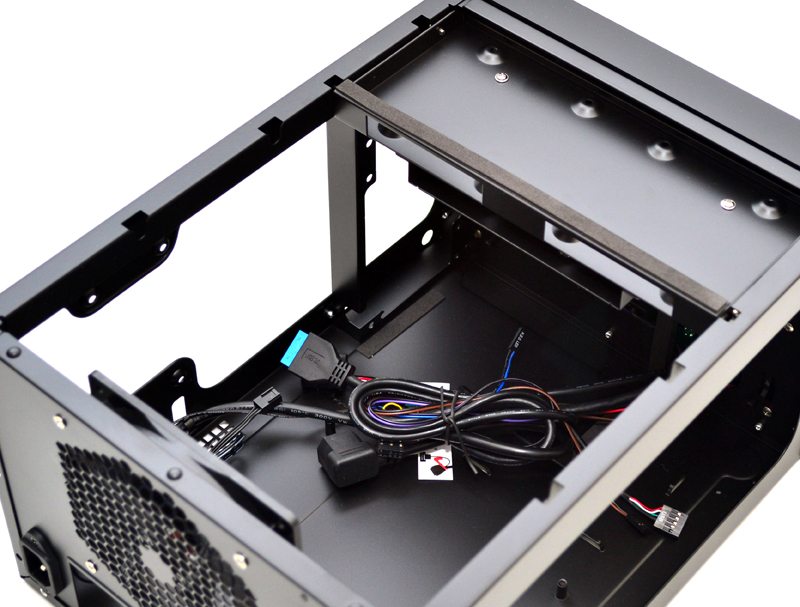
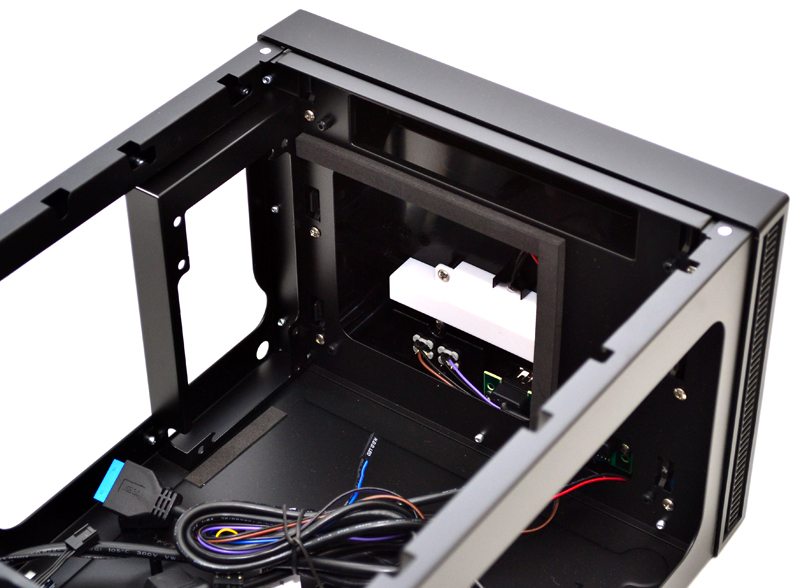
With both bays removed, you can see the front mounted PSU area. The PSU will draw air in through the sides of the front panel and exhaust out of the right side ventilation of the exterior panel. There is some thick rubber padding on the back of the front panel that will help provide a snug fit and again help to reduce vibrations.
The front storage tray features a slim 5.25″ drive bay, perfect for a slot loading optical drive, although should you need the clearance for what ever reason, you can remove the 5.25″ bracket and just keep the top HDD tray. In fact, it’s completely optional to have either storage tray installed, you could just as easily remove them completely if you wanted.
On the right side we have a lot of cut-away, leaving a little extra room for two 2.5″ hard drives thanks to some extra mounting holes.
The rear 120mm fan is a nice bonus and the size of the case and extra ventilation means you shouldn’t really need much more. You can remove this of course and install your own, or even a 120mm water cooler, which is what I’ll be doing in our build today.
As I said before, the top panel is a single piece of aluminium, it’s a little thin, but the finish and overall quality is really nice.
Complete System
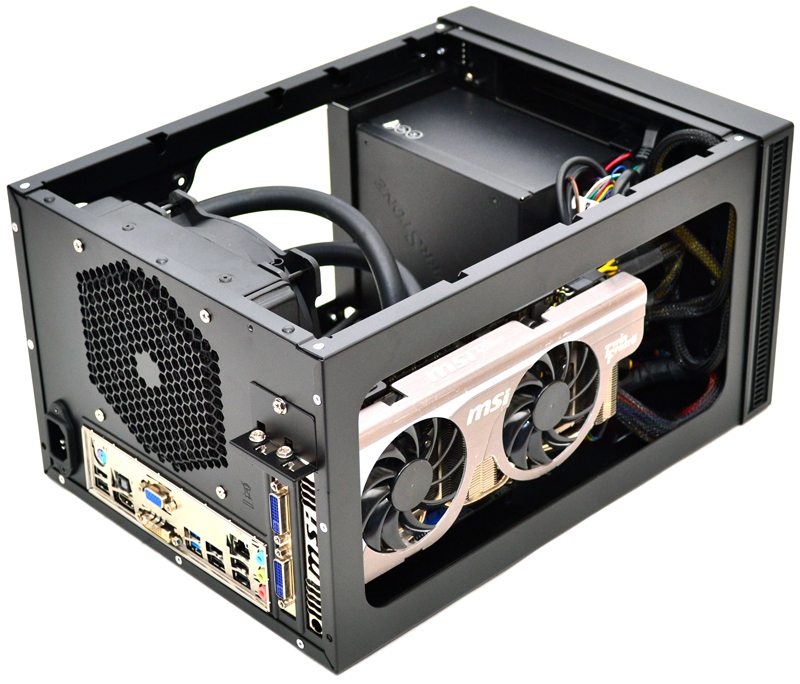
It took around 20 minutes to put the system together, which is pretty quick overall, but since there wasn’t much to do and plenty of work space inside I didn’t really run into any compatibility issues, everything bolted in to place with ease.
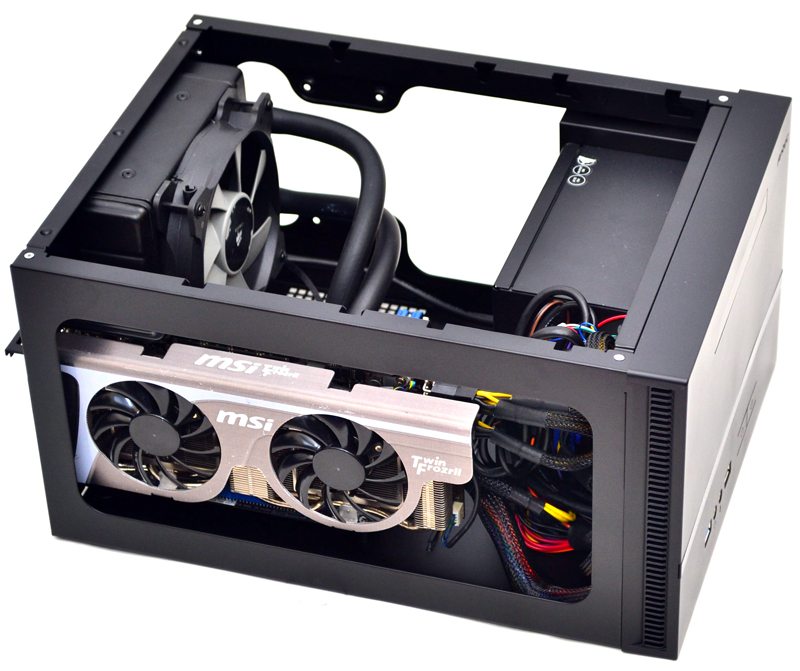
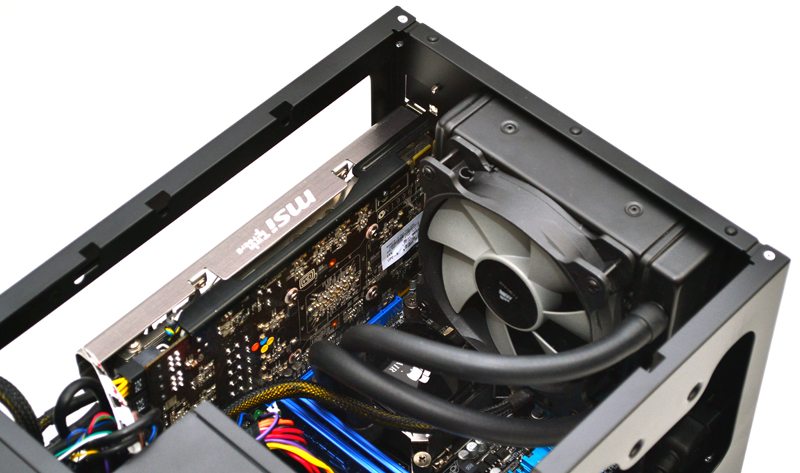
The Corsair H80i has quite a thick radiator for an AIO water cooler, but it fit with relative ease, and will give us more than enough cooling performance for an overclocked gaming rig, while also helping to keep acoustics as low as possible.
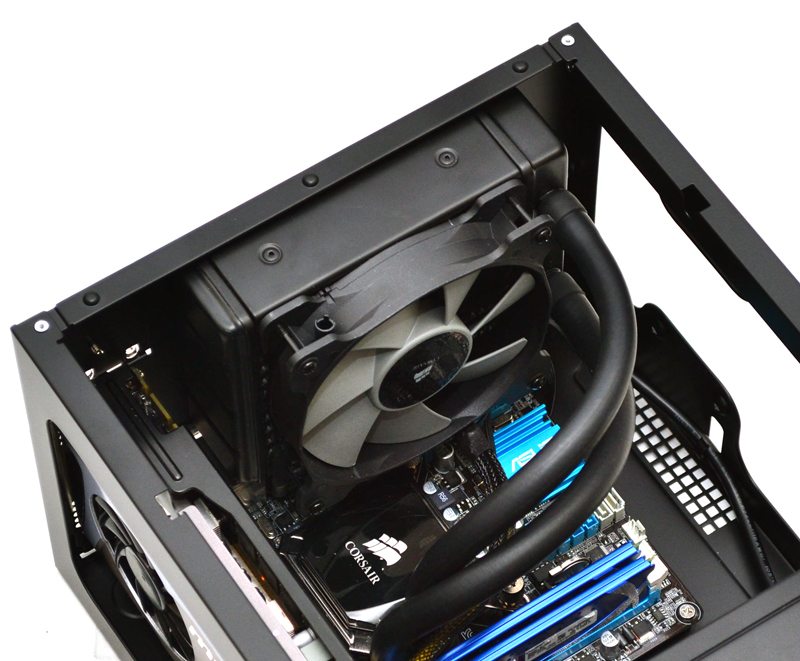
The water pipes are under a bit of tension, but there quite thick anyway and that shouldn’t be an issue.
Between the PSU and the motherboard there is a nice bit of clearance and a couple of cable tie loops, I didn’t need to use them, but if you have a few extra hard drives installed they’ll certainly come in handy for keeping things organised.
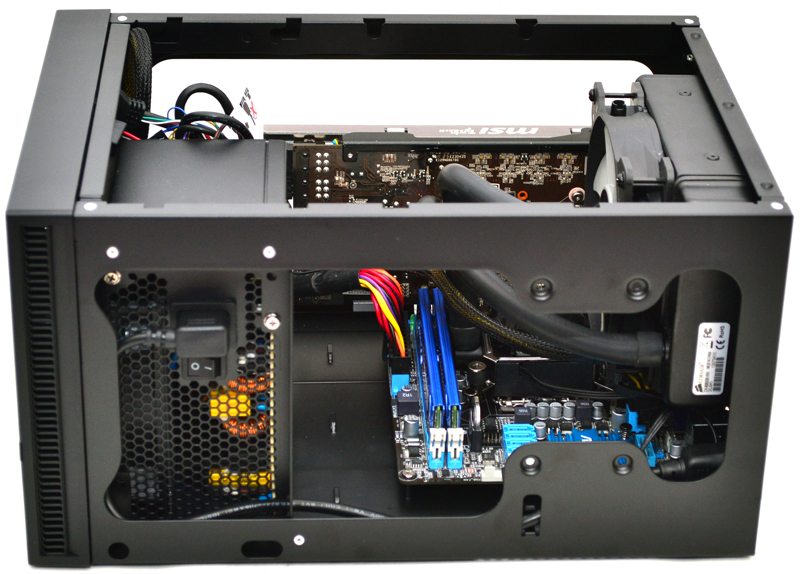
The PSU fits nice and snug and the pass through cable was enough enough to connect, and it’s a great solution for keeping the airflow of the PSU independent of the rest of the case, which should help keep temperatures of our other components lower.
The GTX 560 isn’t a small card, but it fit with room to spare, there are a few cables cramped behind the PSU, but if you really needed to you can move them to the space between the PSU and motherboard.
The hard drive bays drop back into place last and after that you’re able to hook up your SATA cables, pop the top panel on and enjoy your new rig.
The final result is a great looking build and if you look through the left side vents you’ll see the back of our GPU, which will benefit from the extra airflow the vents provide.
Final Thoughts
Price
The Antec ISK-600 is priced very competively given its overall component support and build quality, it’s available at CCL Computers for just £53.14 (including shipping) here in the UK and $57.90 + $10.19 in the US from Amazon. There are solutions from brands such as Cooler Master that are a little cheaper, but the aluminium side panels and clean looking front panel of the ISK 600 certainly justify the extra cost. Something similar from the likes of Lian Li will likely set you back around 50% more than the Antec chassis.
Overview
It’s been a while since we had a new Antec chassis in the eTeknix office and I’m really happy to see them come back with something as nice as the ISK-600, and at such a perfect time for the industry too. I know a lot of people that are working on building their own compact gaming rigs since the reveal of SteamOS and SteamBox type systems. There are a lot of people out there who enjoy console gaming on the big screen, myself included, but the “glorious PC master race” can’t get by without anything less than a GTX 690, and it’s this crowd that cases like the ISK-600 appeal to, allowing you to build a kick-ass gaming rig that you can pop under your big screen TV via a home cinema system, just plug in your favourite controller and off you go. That being said, the ISK-600 is pretty competent as a HTPC too thanks to its clean looks and competent storage capabilities, you could fill it with hard drives, a half decent GPU and use it as a home entertainment unit.
It seems then that Antec have hit on a little bit of everything with the ISK-600, it’s got a great design that makes it look perfectly at home in the office, under or on top of your own desk, under your TV, or even just to take with you as a LAN gaming rig. The style isn’t without its details, but it still manages to be understated. I really like the use of aluminium on the top and side panels and the deep brush finish as well as the clean front panel makes it look like a much more expensive product than it actually is, which is no bad thing at all.
Removable hard drive bays are always nice, and the ones here really do make for easy installations of your drives, while also making it easier to install other components when the bays are removed. I would have liked to see another fan mount somewhere near the front, but plenty of ventilation and room for a 120mm water cooler at the back is a good enough trade off and will be more than sufficient for almost any rig in this form factor.
There isn’t really anything I don’t like about this case and while I’m not under the impression that its the best case ever, it’s certainly one of the best ones within this price range and form factor.
Pros
- Great overall design
- Aluminium top panel
- USB 3.0 support
- Spacious interior
- Removable hard drive bays
- Water cooling capable
- Competitive price tag
Cons
- Full length ventilation on the left side panel would have been nice (for the GPU)
“The ISK-600 is a highly versatile chassis, it’ll look great in almost any environment and makes the perfect solution for a HTPC, gaming rig, or even just a day-to-day desktop PC and at this price it’s an absolute bargain, providing premium quality at low-to-mid budget prices.”

Antec ISK-600 mITX Chassis Review


