Gigabyte Z170X-UD5 TH (LGA 1151) Motherboard Review
John Williamson / 8 years ago
A Closer Look
The motherboard adopts a professional colour scheme which should fit with a decent range of hardware. From this wider shot, we can see the six fan headers, 8-pin EPS placement and PCIe spacing. The PCIe x16 slots are reinforced by a single durable piece of stainless steel shielding which offers enhanced protection against mechanical damage. More specifically, the PCIe shielding design is 1.7 times stronger in shearing tests and 3.2 times stronger during retention force tests compared to typical PCIe slots.
On another note, the M.2 connector supports a maximum data transfer speed of 32GB/s and easily accessed between the bottom two PCIe slots. The motherboard’s heatsinks look phenomenal and evokes a premium feel. Furthermore, Gigabyte’s latest heatsink designs offer excellent cooling efficiency across the PWM section and PCH.
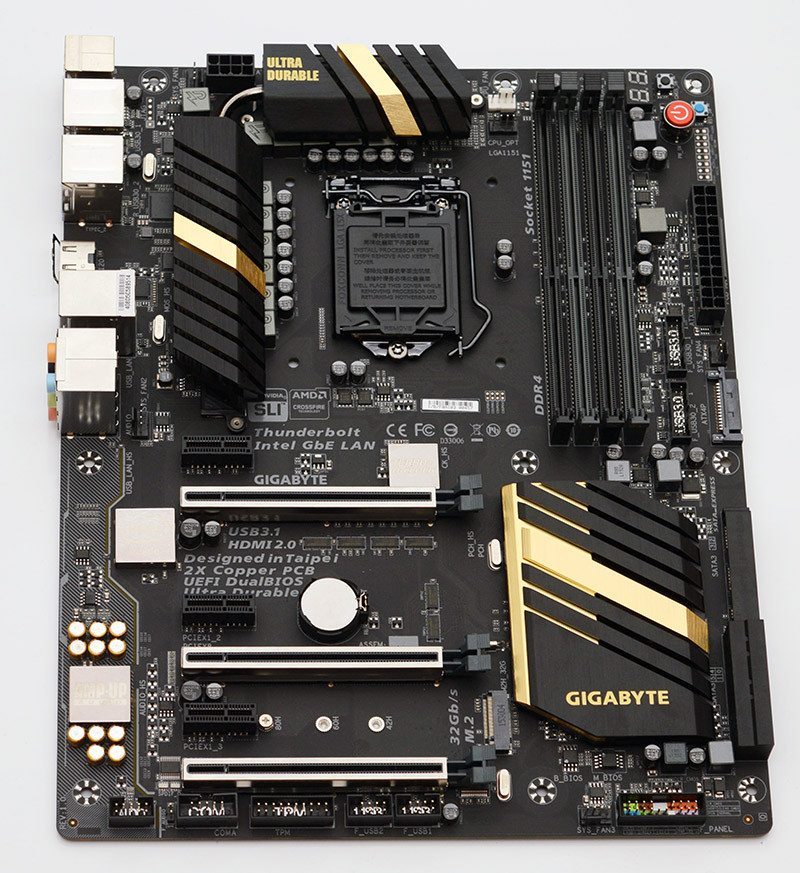
Gigabyte decided to utilize an 8+3 phase VRM and 10K capacitors which provides reliable power delivery even at relatively high core voltages. As a result, the motherboard doesn’t experience any problems reaching high frequencies and maintaining stability under extreme load.
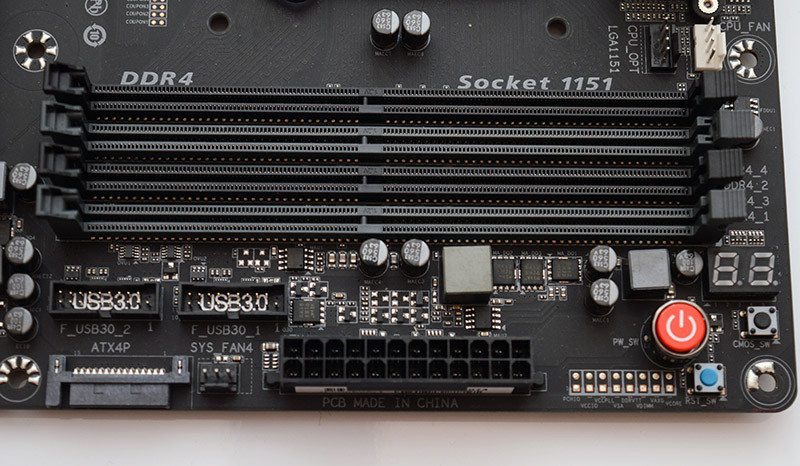
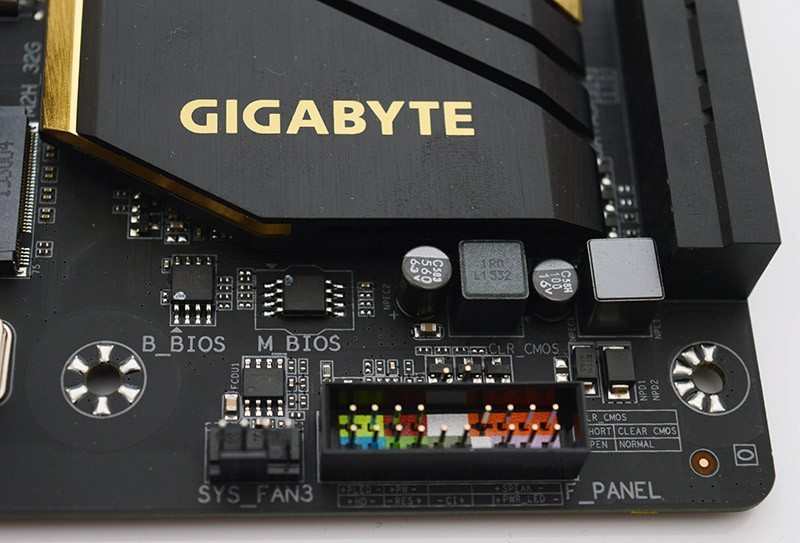
The motherboard incorporates a CMOS reset switch, diagnostic LED, power button, reset switch, voltage readout points, 24-pin connector in its optimal position, two USB 3.0 headers, and an internal SATA power connector. I’m not overly fond of the USB 3.0 headers’ positioning which should be nearer the PCB’s edge. Clearly, Gigabyte chose this layout to accommodate the SATA power connector but I would personally prefer a right-angled USB 3.0 to help with cable management. Although, this is all down to personal preference.
The Realtek ALC1150 audio chipset is separated on a dedicated audio path to the main PCB which reduces interference and helps protect the motherboard’s sensitive audio circuitry. Furthermore, the audio section utilizes Nichicon capacitors and an EMI shield to enhance audio clarity. There is also a headphone amplifier which delivers high-quality audio up to 115dB SNR. As you might expect, the audio path opts for an aesthetically pleasing yellow LED without being too overpowering. On another note, the audio section’s white pattern looks fantastic and contrasts superbly with the motherboard’s simple design.

Here we can see the front panel connectors which are labelled pretty well, and dual BIOS. This is essential when overclocking or even updating the BIOS, as it’s perfectly feasible to experience problems with a specific revision.
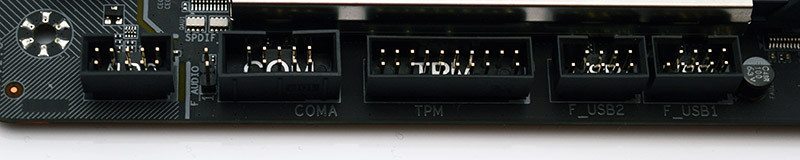
On the front, there is an audio connector, communications port, trusted platform module and front USB headers.
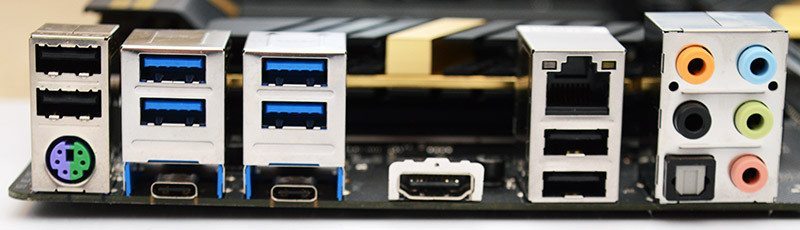
The rear I/O contains a keyboard/mouse port, four USB 2.0, four USB 3.0, two Thunderbolt 3, HDMI 2.0, RJ45 port, an optical S/PDIF Out connector and 5-channel audio.
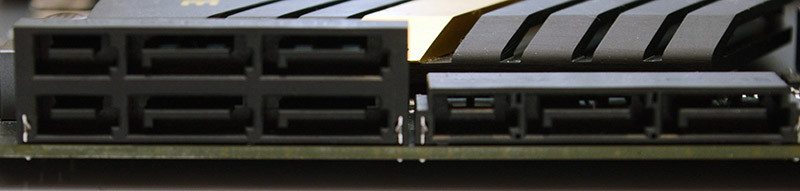
On the opposite side, there are 6 SATA ports, and 3 SATA Express capable of up to 16Gb/s.