Phantek Enthoo Mini XL Super Micro Tower Chassis Review
Peter Donnell / 9 years ago
Introduction
A few months ago, I reviewed the gorgeous Phanteks Enthoo EVOLV Micro-Tower Chassis and I loved it enough to award it with our Editors Choice Award. This week, we’ve gone a lot further up the Phanteks range, to take a look at their mighty Mini XL Now, the world mini might not imply that this is a big chassis, but it certainly isn’t mini at all, and we’ll show you why that is in just a moment.
Features
Enthoo Mini XL includes 2 x 140mm fan in front and 1 x 140mm fan in the rear. Ability to upgrade to additional fans is possible. All fans included are Phanteks’ new redesigned and better performing SP series fans.
Appearance
- Sandblasted aluminum faceplates with matte finish
- Multi-color LED light strips
- Stealth interior design
Cooling
- Extreme cooling capacity
- Support for up to 14x 120mm / 8x 140mm
- Comes with 3 Phanteks premium fans
- PWM fan hub plus 2x y-splitters allow for 8 fan connections* (11 fans max with additional y-splitters sold separately)
- Extensive water cooling support. Provides up to 5 different installation areas for slim and thick radiators varying from single to triple (120mm and 140mm form factors). Clearance for push-pull fan configurations.
Functionality
- Dual removable harddrive cages
- 2x removable Drop-N-Lock SSD brackets
- Fully equipped with dustfilters (1x top, 1x front, 2x bottom)
- Removable top panel for easy fan installation and dust filter cleaning
- Compartment for fan installation in top panel
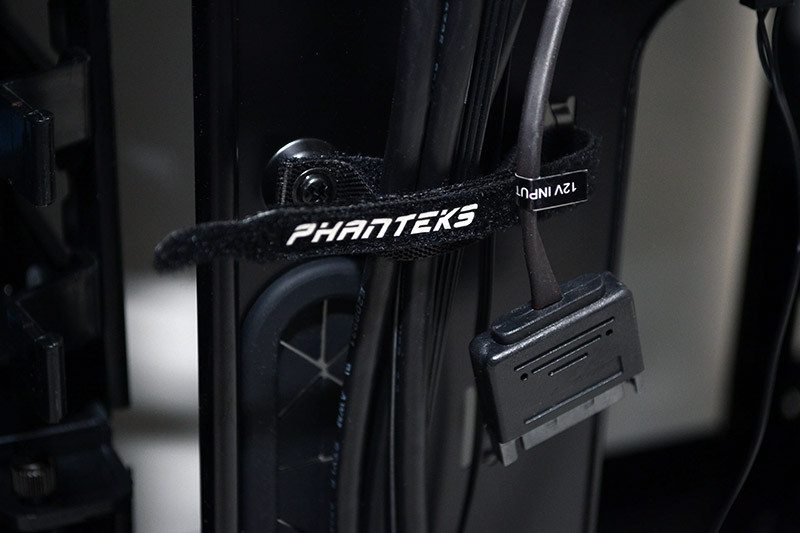
- Clean cable management using Phanteks’ preinstalled Hoop-N-Loop cable ties
- Mod friendly structure uses screws NOT rivets
- 10 color ambient lighting controller
- 2x USB 3.0, microphone, 3.5mm audio jack
The Mini XL comes with support for Micro-ATX motherboards, despite being a little bigger than most mid-towers and almost as tall as some full-towers. It also comes with support, through the purchase of some additional brackets which I have at my disposal today, for mini-ITX motherboards. What’s important to mention is that this isn’t an either-or situation, as it’ll support both a Micro-ATX and a Mini-ITX motherboard simultaneously!
“The MINI XL introduces a new form factor, super micro ATX. With its unique power supply location, the Mini XL case has been redesigned with optimal cooling in mind. Resembling the Enthoo Primo, it offers extensive water-cooling possibilities and supports the thickest radiators in the market (80mm). The case brings modularity to a new level. Almost every single panel or bracket can be removed or relocated to serve different purposes. For the ones who desire even more, the Mini XL leaves options for additional upgrades. Pherhaps the most interesting one is the possibility to transform the MINI XL into a dual motherboard system.” – Phanteks
One of the biggest features of this chassis is its water cooling support and the best way to demonstrate this would be the video below. It’s obvious that water cooling enthusiasts are going to love this chassis!
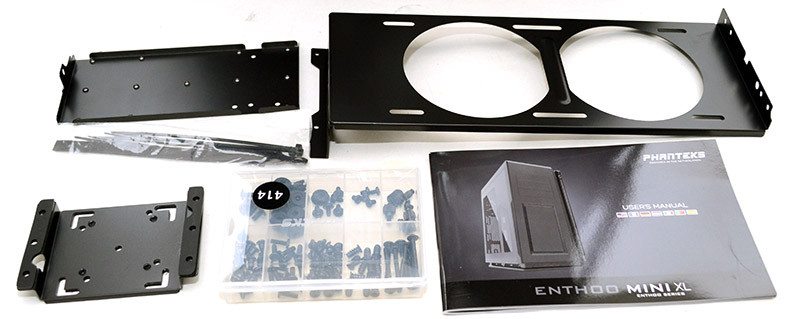
In the box, you get everything you need to get you started, from hard drive and water cooling adaptor brackets, as well as a lovely mini component box for all the screws you’re ever likely to require.
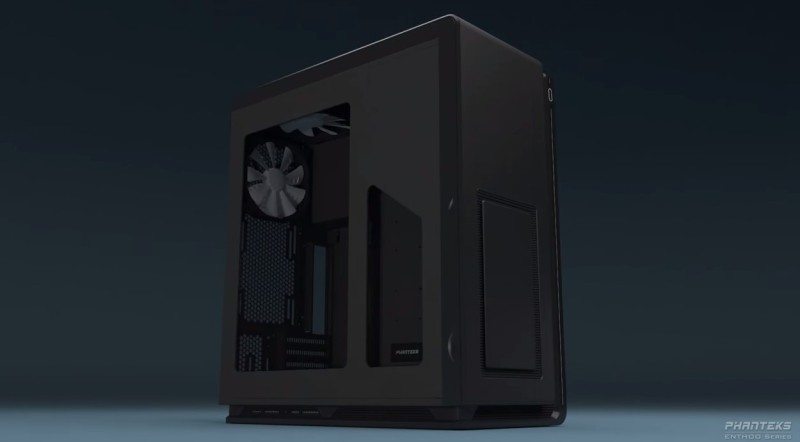
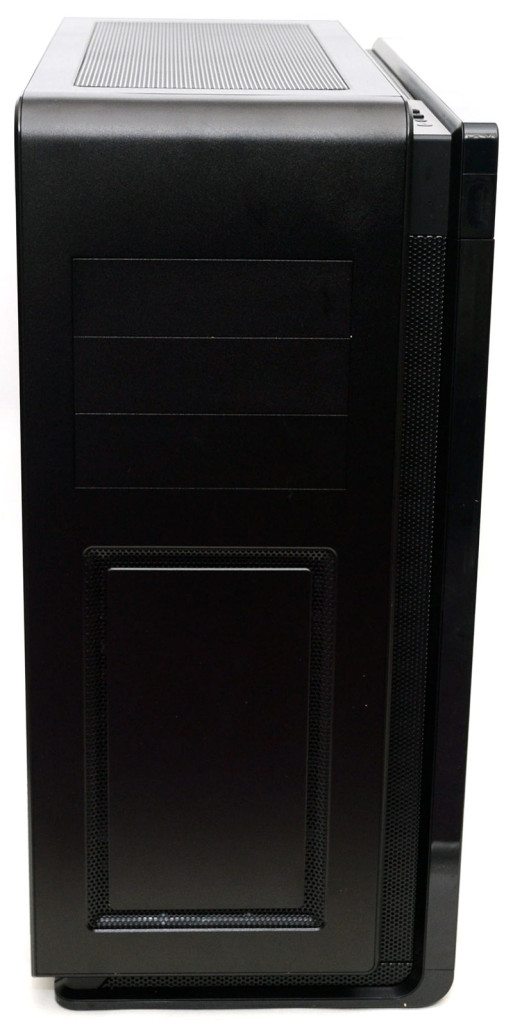
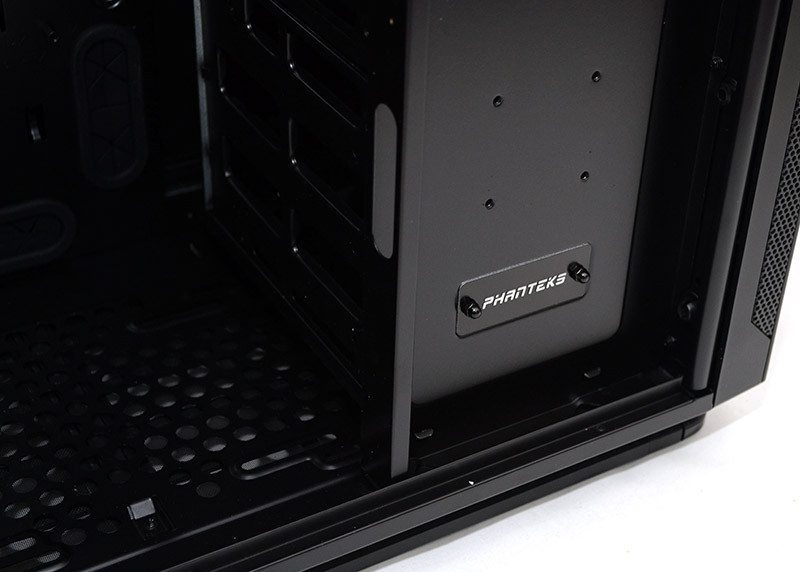
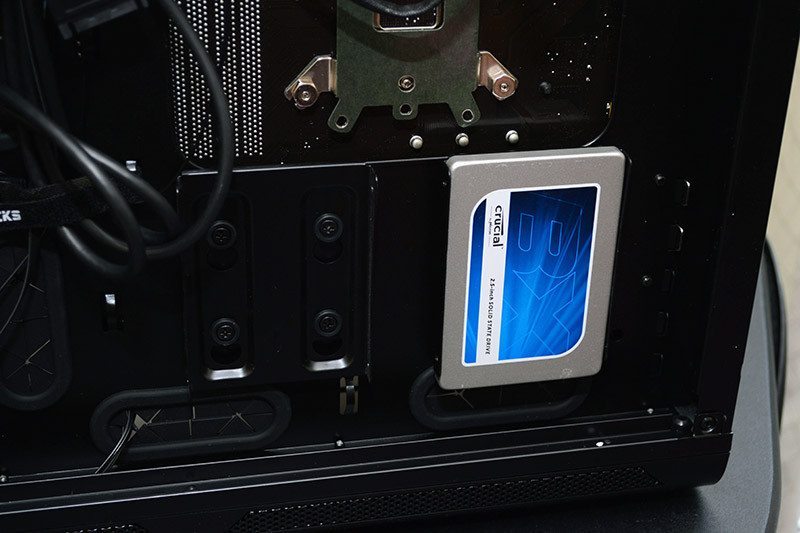
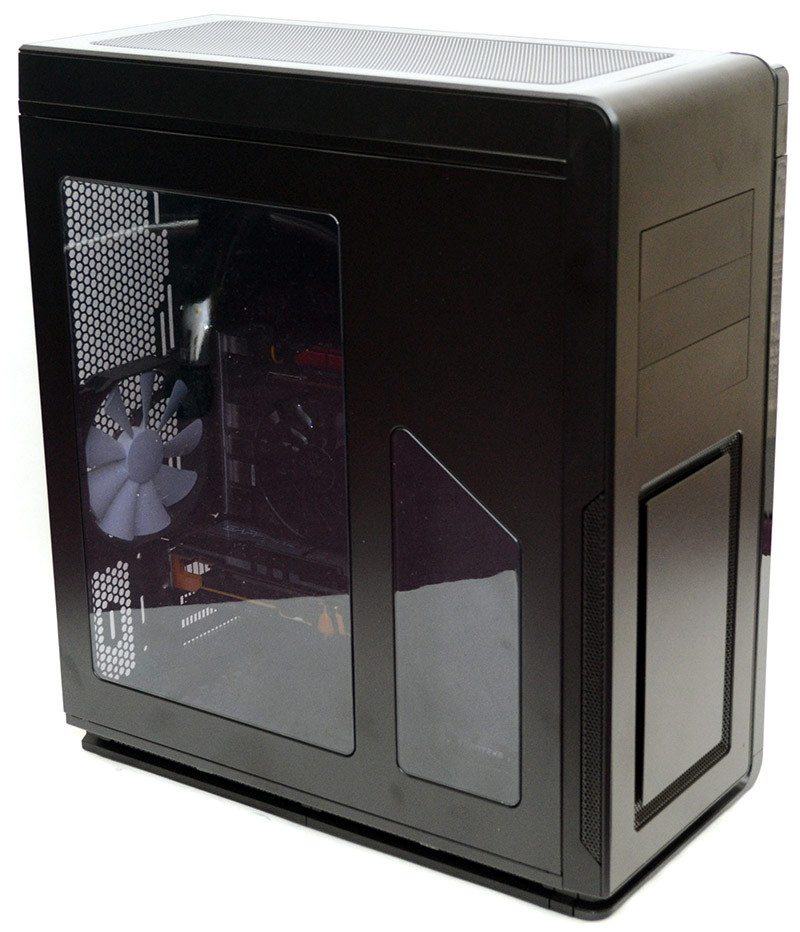
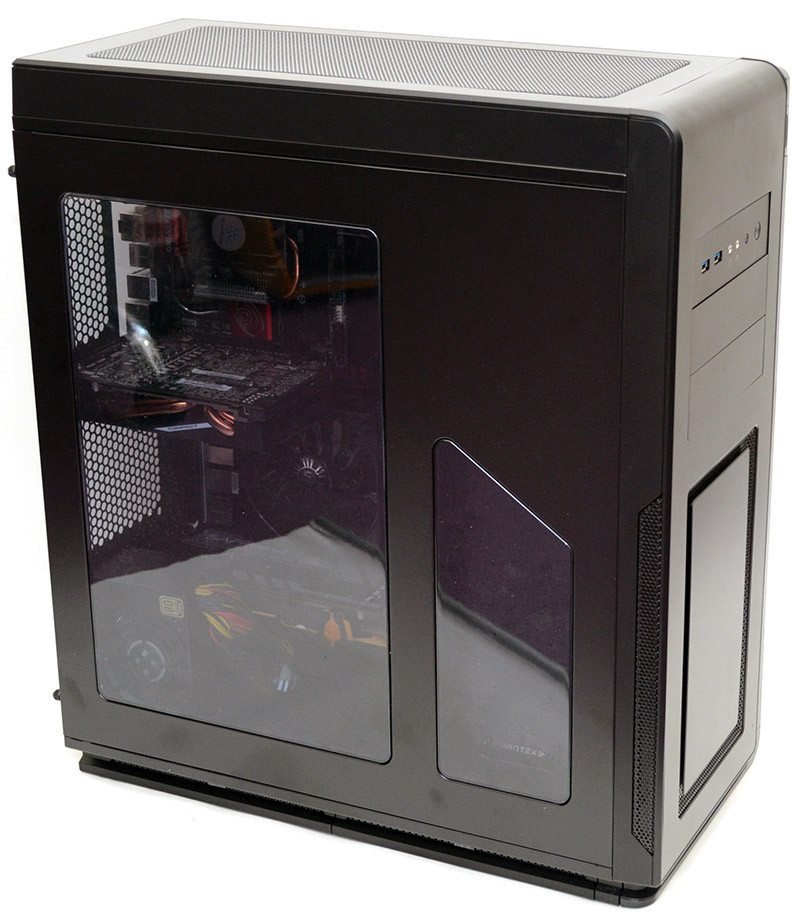
First things first, I’m pretty sure this chassis is coated in some kind of military grade paint used for stealth jets. In a well-lit room with a camera flash for extra light, it still manages to look dark black; that’s not a bad thing, but it’s terrible for some of my photographs. The left side panel features two windows, the larger one on the left, then a smaller one on the right to show off two extra SSD mounts and the Phanteks logo on the inside of the chassis; a great way to show off your fancy SSDs.

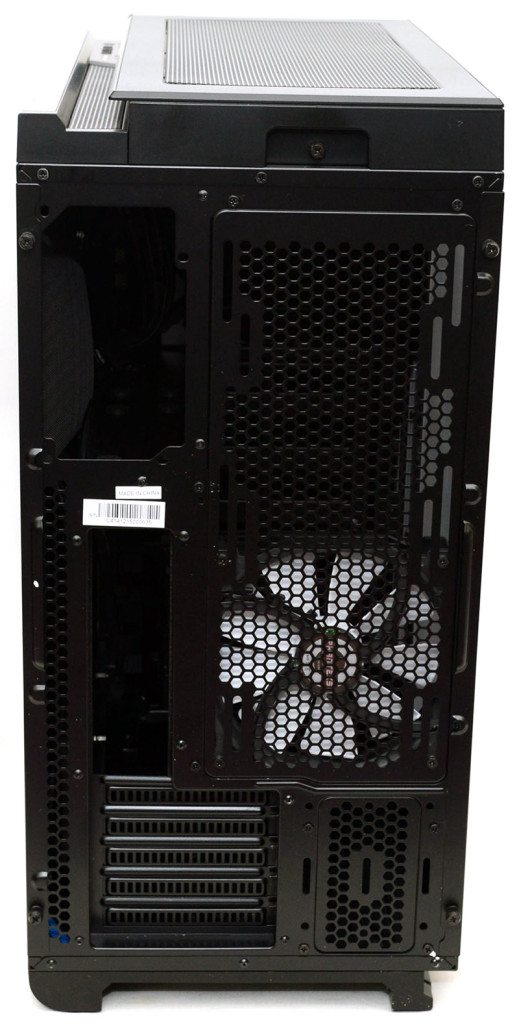
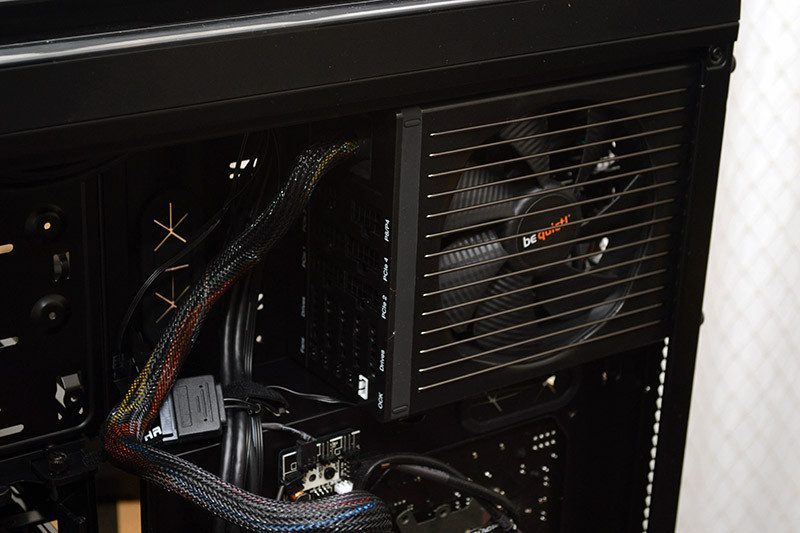
The right side panel comes with two ventilated sections with magnetic dust filters on the interior. The one near the front can be used for cooling fans or radiators, or just passive cooling for the hard drive bays dependent on your internal configuration of choice. The section at the rear is for the PSU, which is side mounted in the top right of the chassis.
The front panel looks really cool, with a mixture of curved edges and bold shapes. You can see that the has an extended took to it, with the main section sort of floating from the bottom and right sides of the chassis, which comes with a ten colour LED light strip, further adding to that “floating” effect. This extended design means the chassis is quite wide, but that will help drastically with radiator support, as well as the dual motherboard configurations that are compatible.
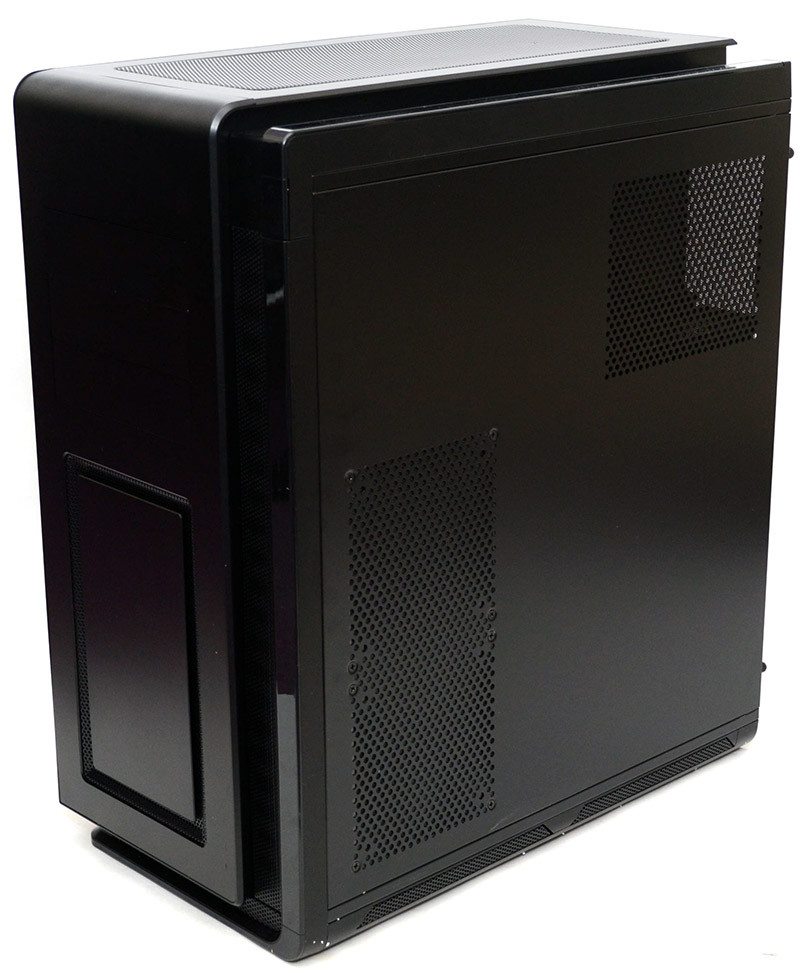
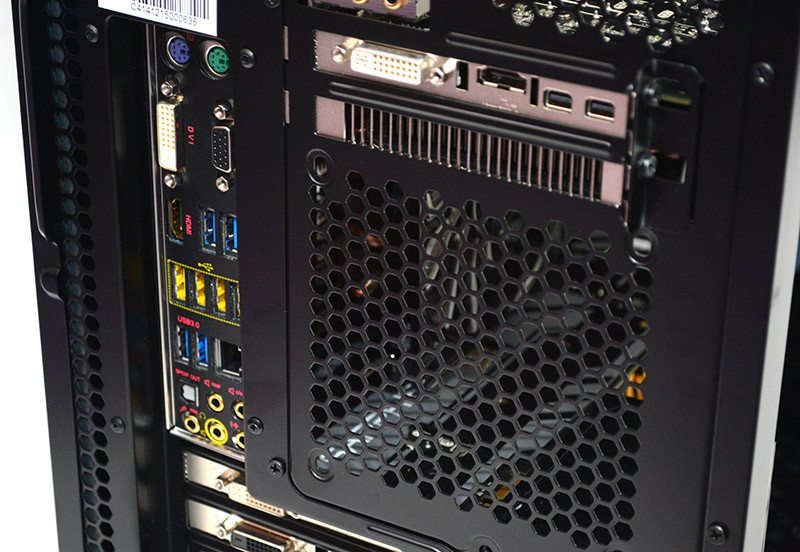
Around the back, you’ll see all kinds of crazy things going on. There’s a PSU mount in the top left corner, a universal 120/140mm spacing fan and radiator mount on the right, then down at the bottom you have your Micro-ATX motherboard mounting. Now, it’s worth mentioning that the radiator panel as well as the small panel in the bottom right corner can be unscrewed completely, lifted out of the chassis and replaced with an alternative panel to allow you to install an SFX PSU and Mini-ITX motherboard on top of all the usual hardware; don’t worry, we’ll be doing that shortly.
The top panel is vast, allowing huge amounts of ventilated airflow for a wide range of fan and radiator configurations as you saw in the video at the start of this review.
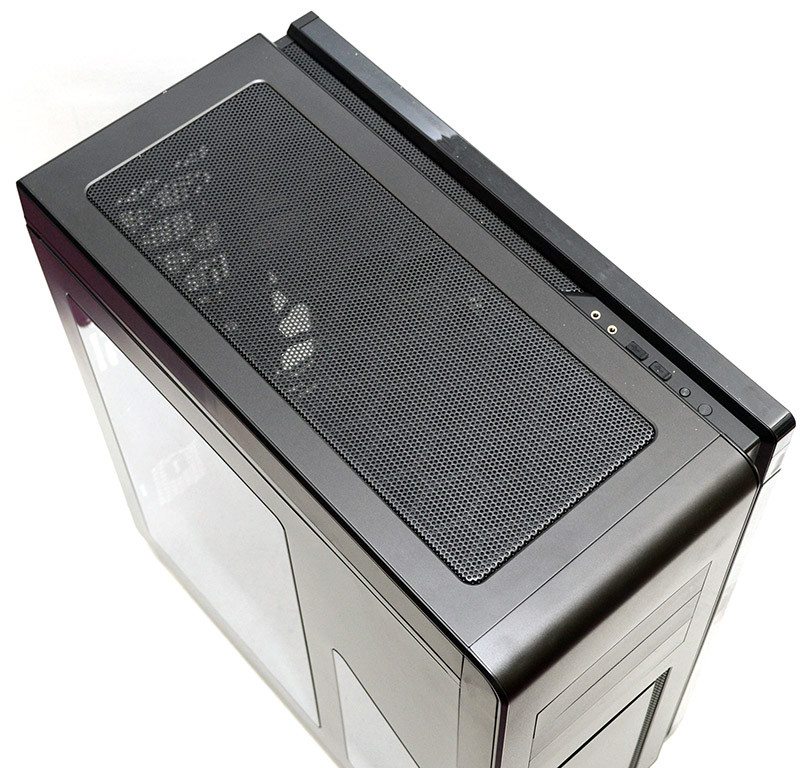
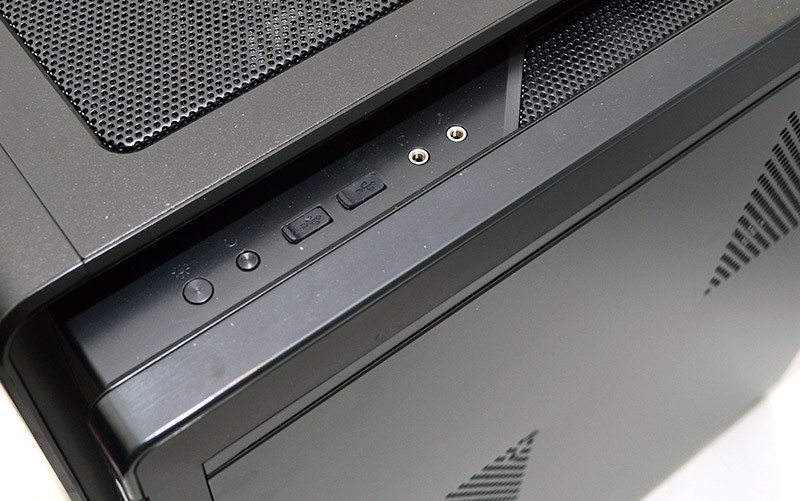
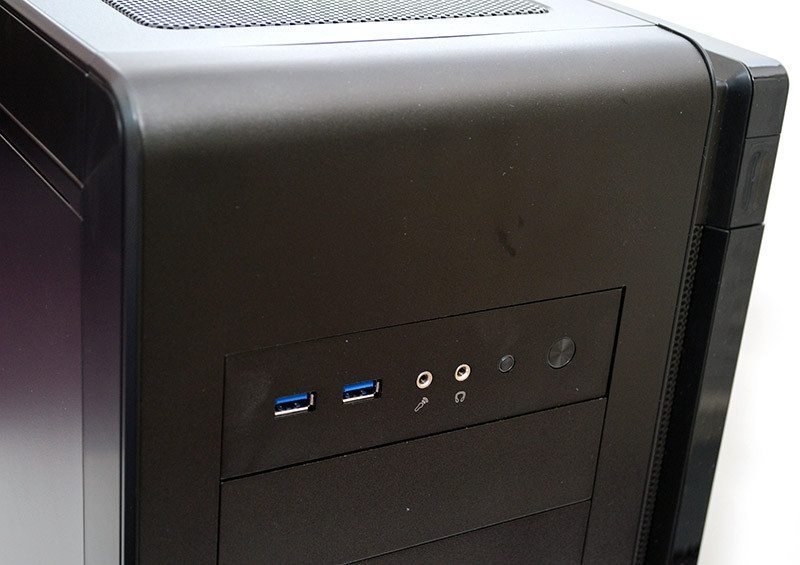
The front panel is tucked to the right side of the top of the chassis and comes with the usual power controls, two USB 3.0 ports and HD Audio jacks.
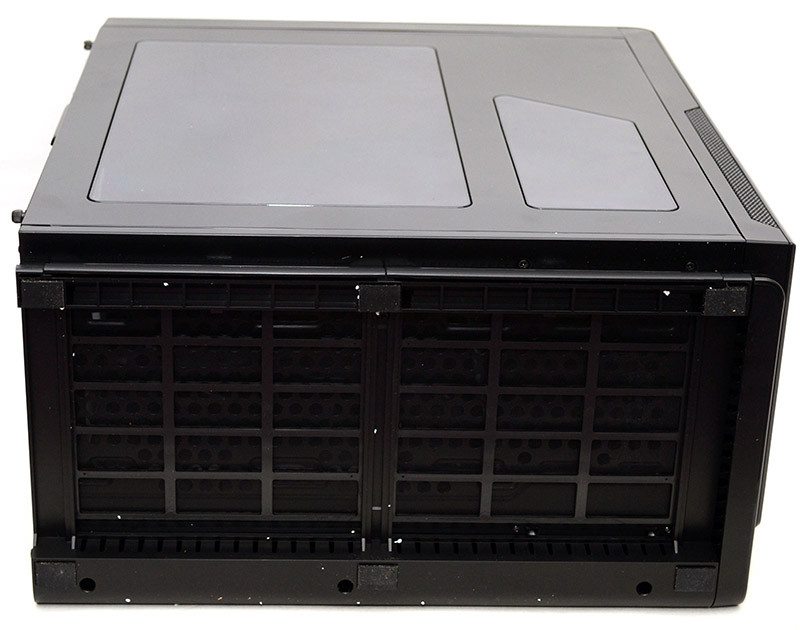
Instead of smaller feet, the chassis has two long feet that run the full length of the chassis, giving it extra stability; There are six tough rubber pads to help keep it firmly planted on your surface of choice. There are two dust filters that cover the full length of the chassis, and what’s really nice is that these filters can be removed from the left side of the chassis, making maintenance a much easier task.
Interior
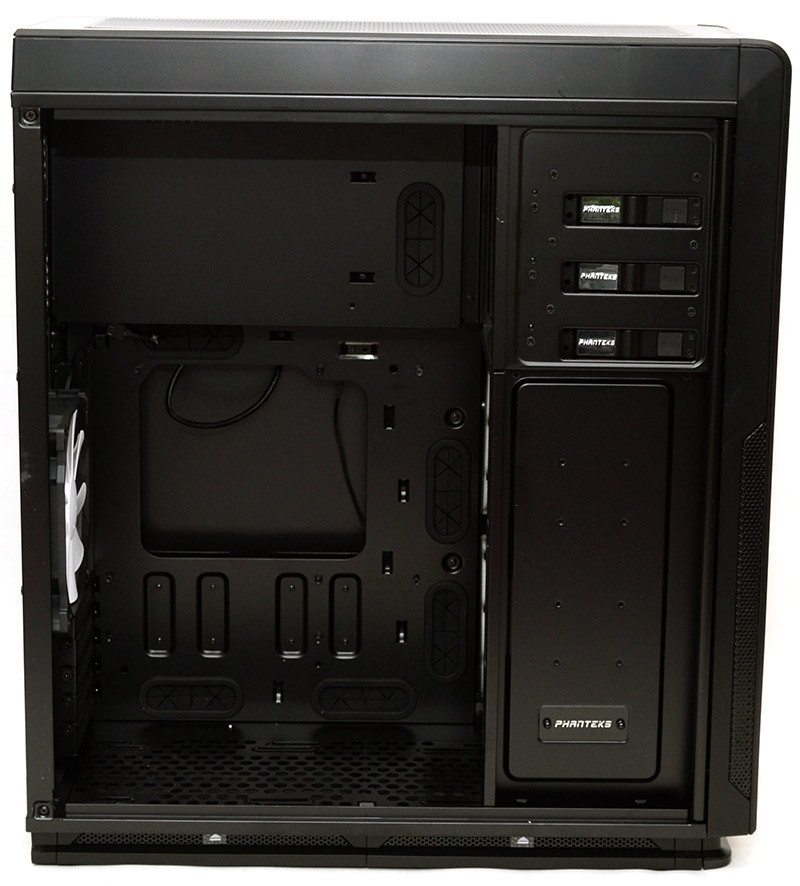
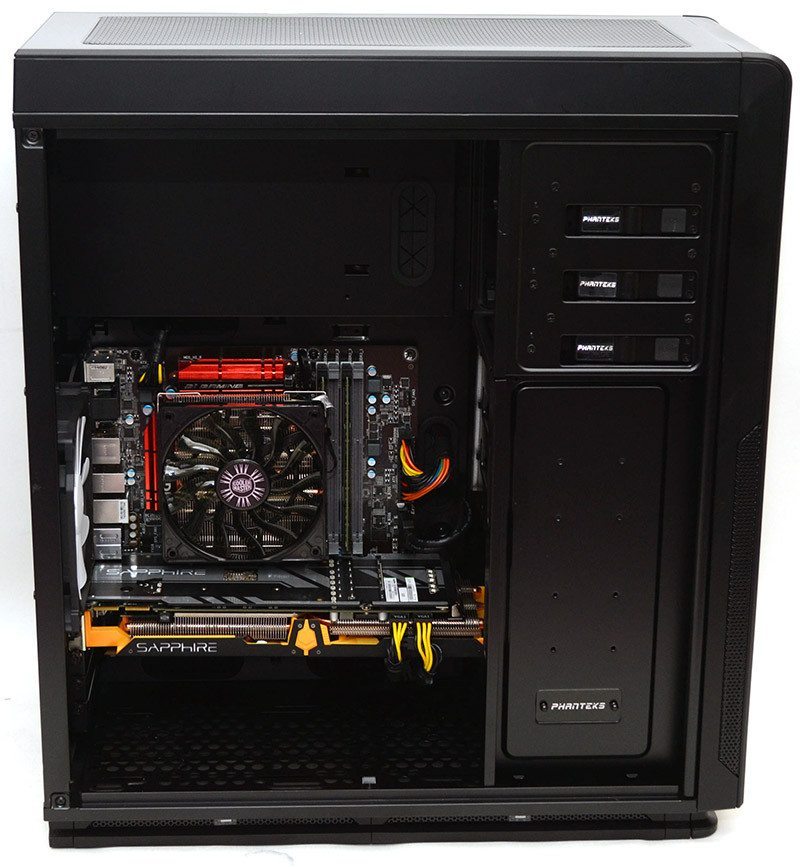
The interior of this chassis is vast and you’re likely not going to have any issue fitting a humble Micro-ATX motherboard in this monster, although when it comes to flagship graphics cards and extreme water cooling, you’ll be grateful for all that extra space. There are six high-quality rubber grommets located in all the places you’re likely to find them useful; cable management should be very good overall.
There’s a huge amount of clearance above the motherboard section, allowing for extra thick radiator configurations with push-pull fans, although this will be limited with the optional mini-ITX motherboard configuration.

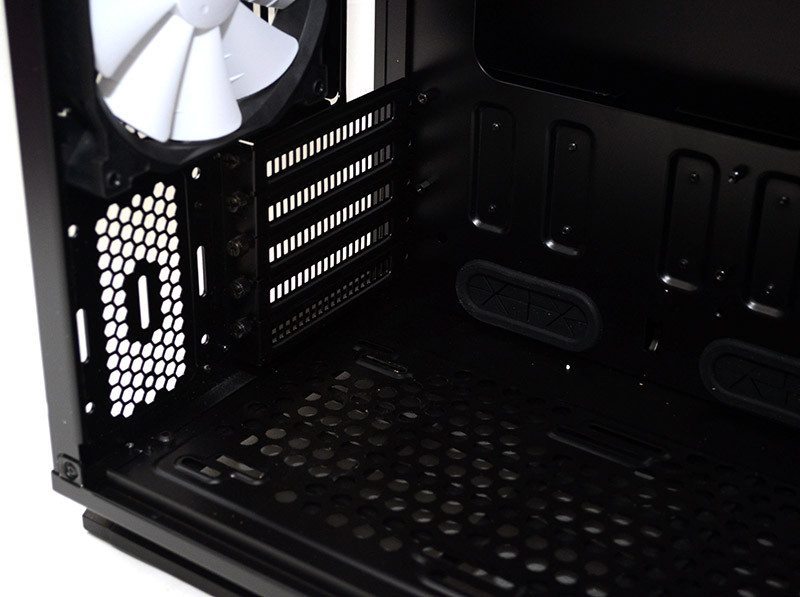
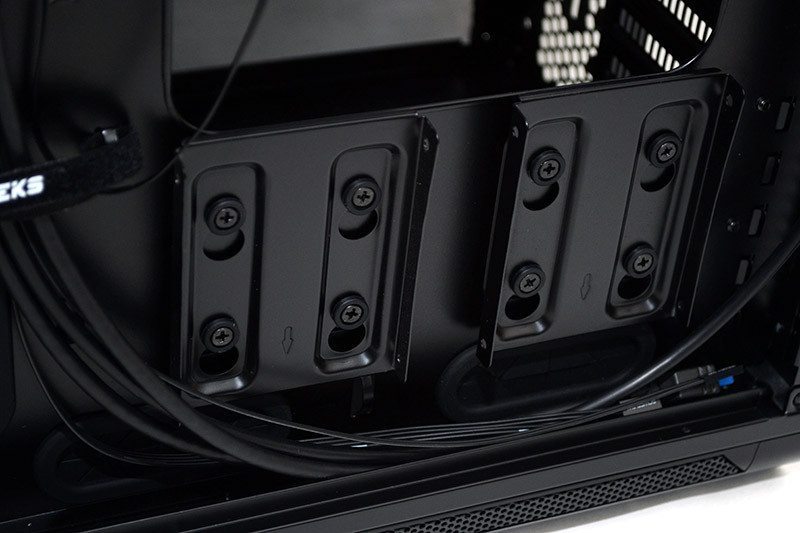
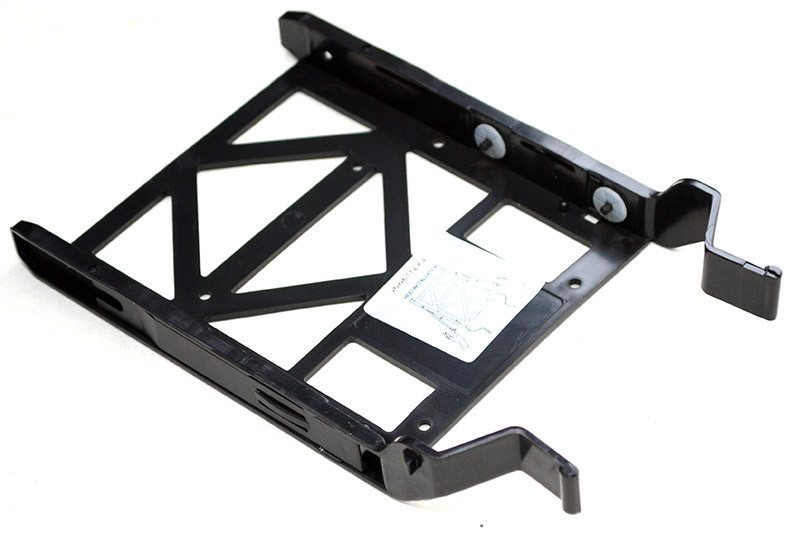
There’s a pair of optional 2.5″ drive mounts on the visible side of the primary hard drive trays.
Tool free quick lock mechanisms on the 5.25″ drive bays, which have enough clearance to allow for additional 5.25″ compatible water cooling components.
120/140mm spaced universal fan and radiator mounts in the base; just keep in mind that thicker radiators would start taking up space for graphics cards.
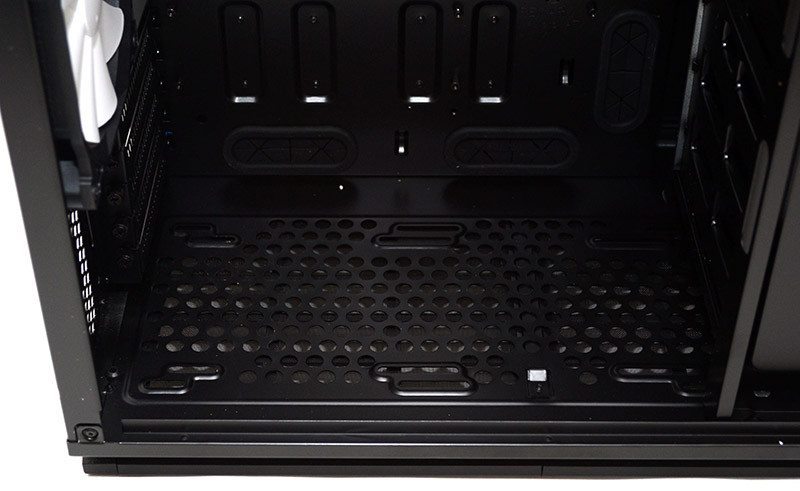
Ventilated and reusable metal covers for each of the five expansion slots, each fitted with easy access thumb screws.
As with everything else on this chassis, the rear 140mm exhaust fan is of a very high quality.
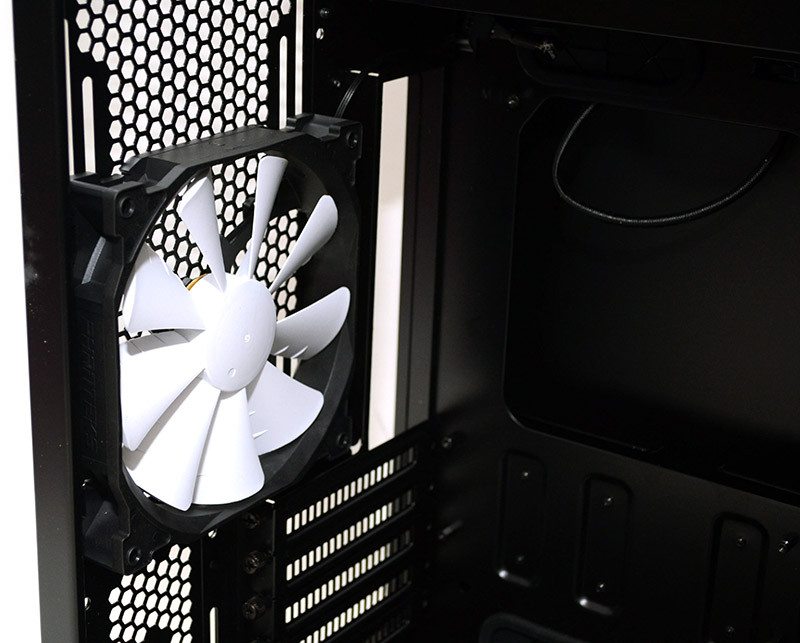
And there’s certainly enough room for another should you feel the need, although I suspect many will opt to use this for a large rear radiator.

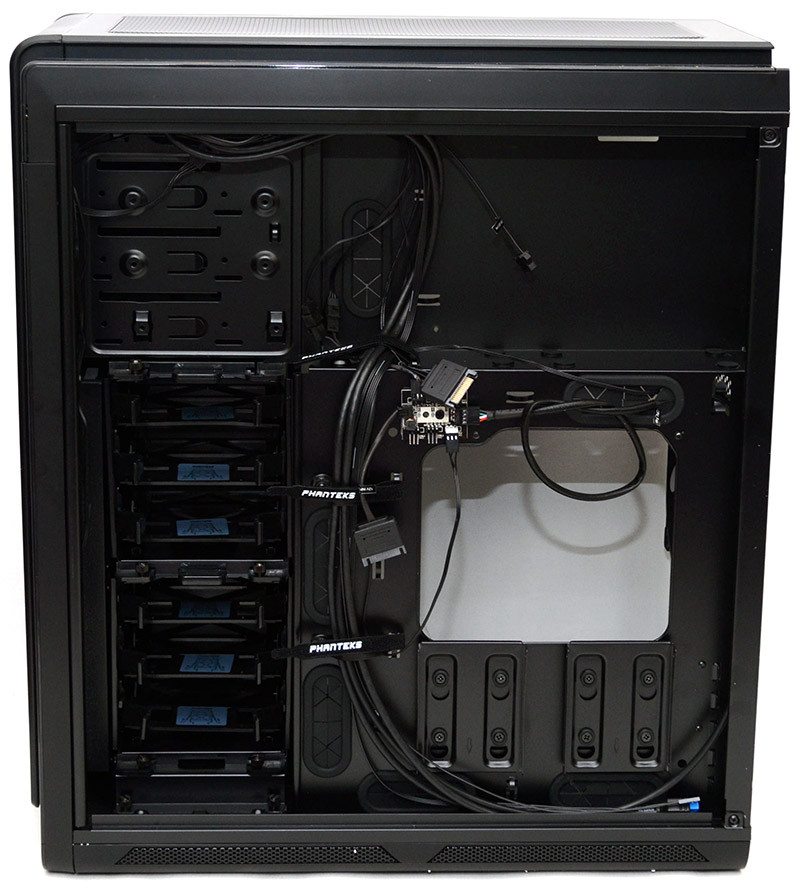
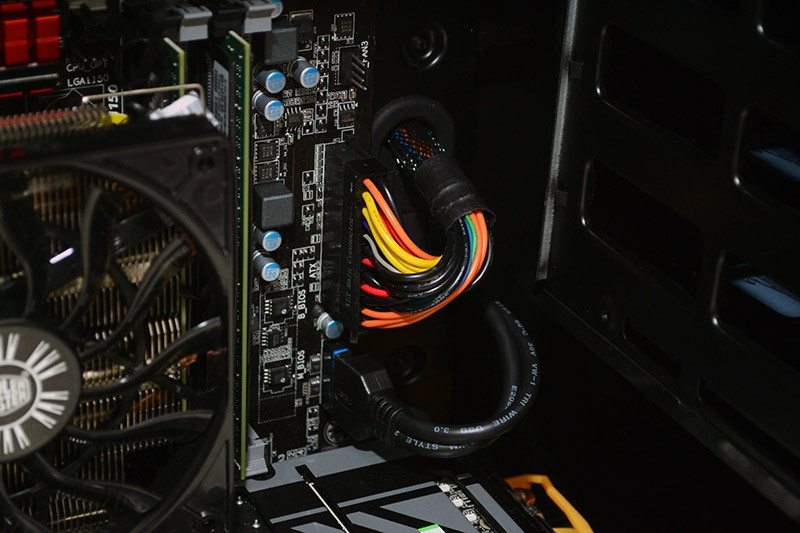
Behind the motherboard, you’ll find a good amount of space for cable routing.
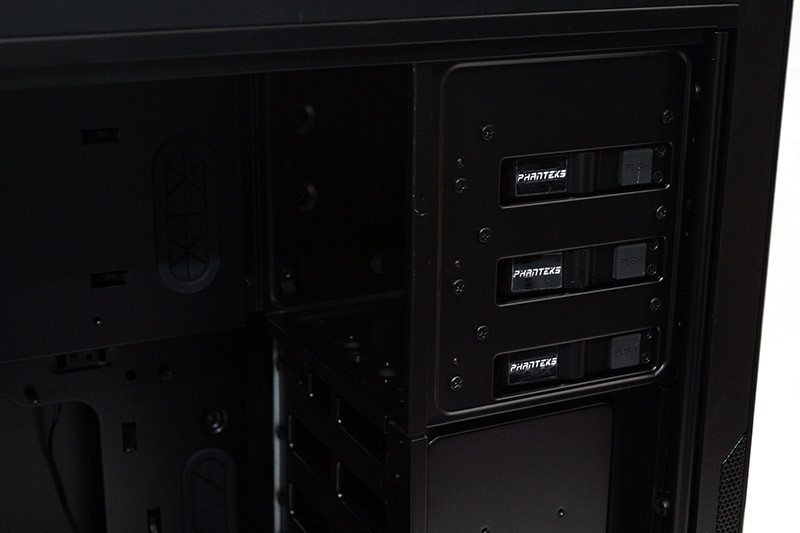
Two stealth mounted and tool-free 2.5″ drives, these will be very handy to those who need to remove the 3.5″ drive bays.
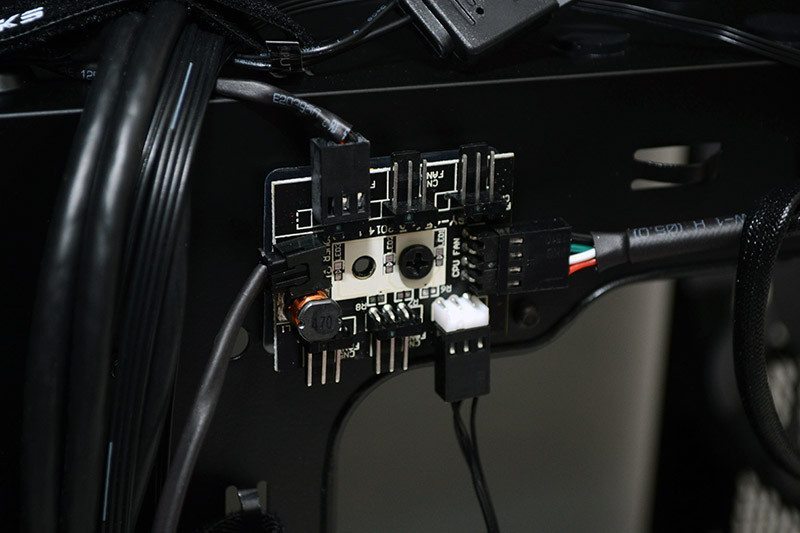
A PWM-controlled fan hub for up to six fans.
High-quality Velcro ties pre-fitted to help with cable management.
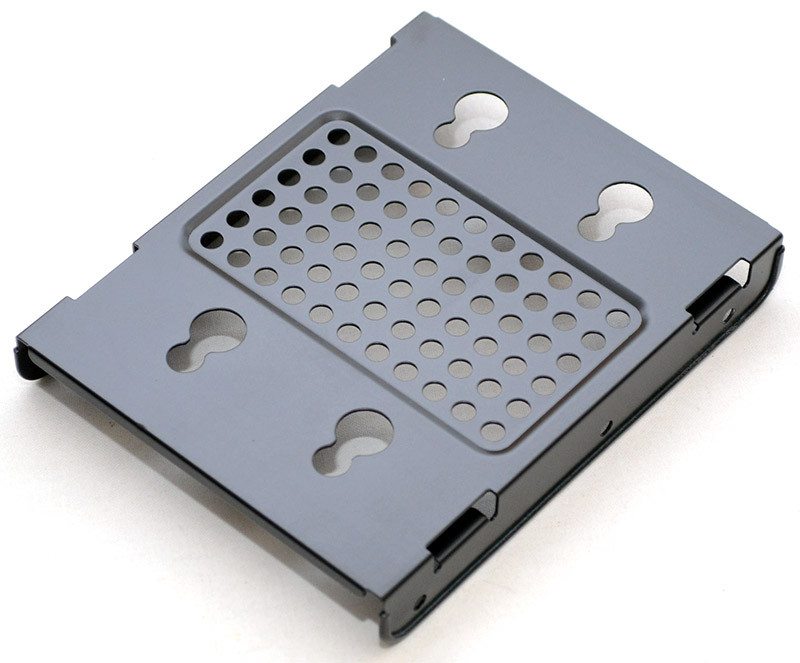
Dual 3+3 hard drive cages with support for both 3.5″ and 2.5″ drives.

A few thumb screws as the base is all that you need to remove to slide out each of the drive cages, allowing you more room for water cooling, longer graphics cards and other mods.
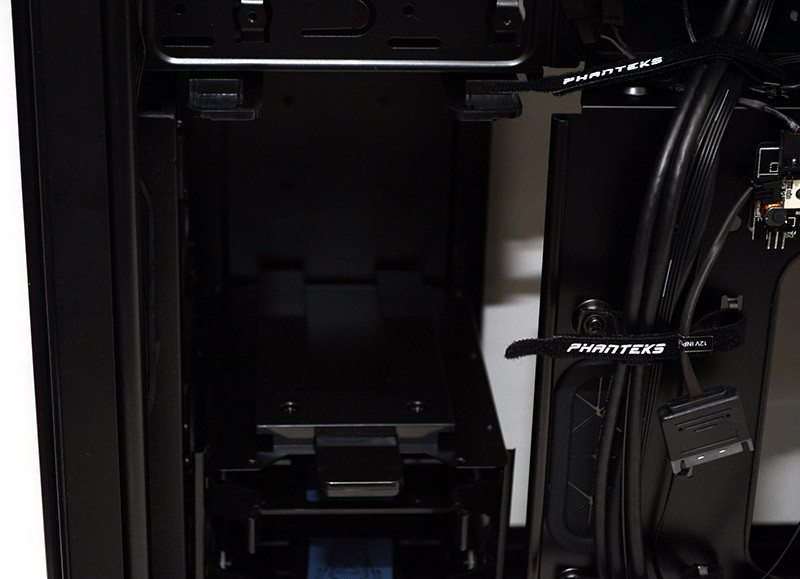
The drive cages are nice and strong, but also very easy to remove and re-install should you need to make quick and easy adjustments to your system.
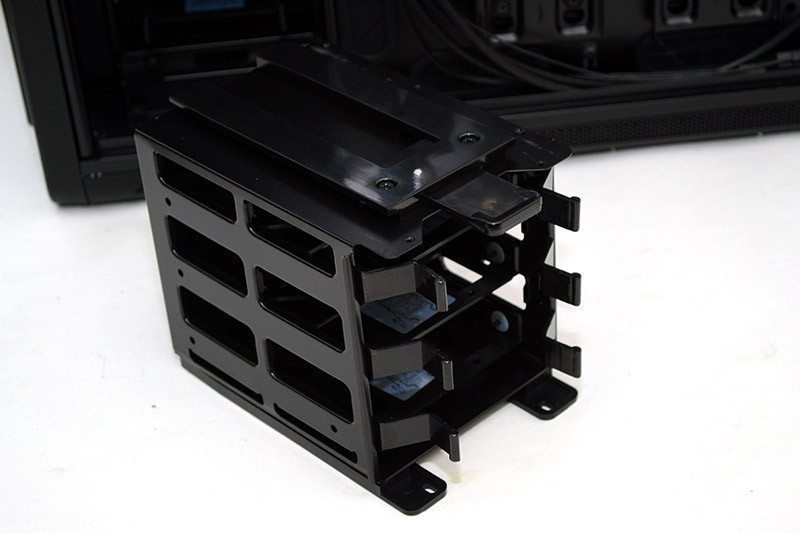
The drive trays are tool-free for 3.5″ drives, but there are screws included in the box for mounting 2.5″ drives.
Complete System
The extra 2.5″ hard drive mounts are nice and easy to work with and the extra cable routing spaces will come in handy for getting everything connected.
The hard drive mount is a little odd, but it does free up a huge amount of space in the front of the chassis and makes cable management a lot easier, since the bulk of cables are already hidden out of sight.
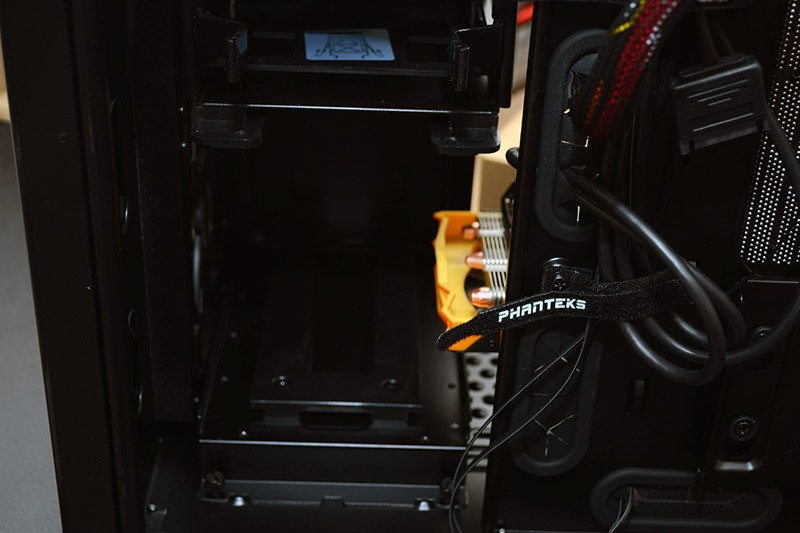
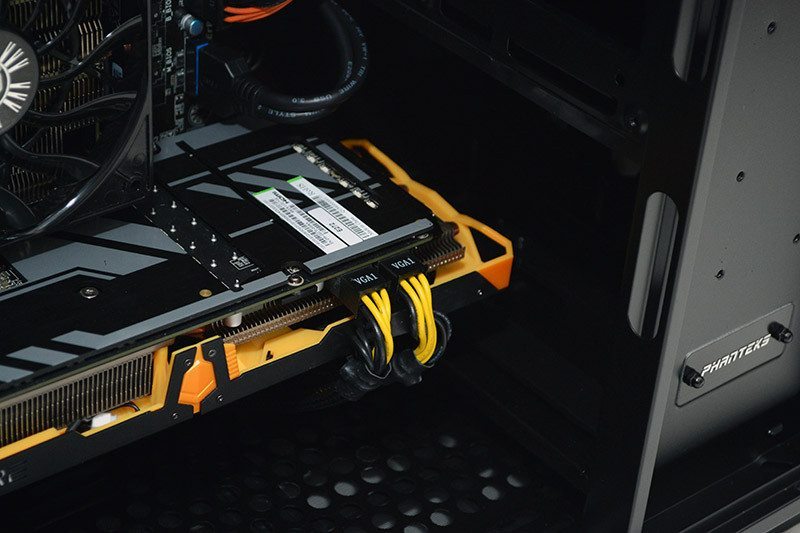
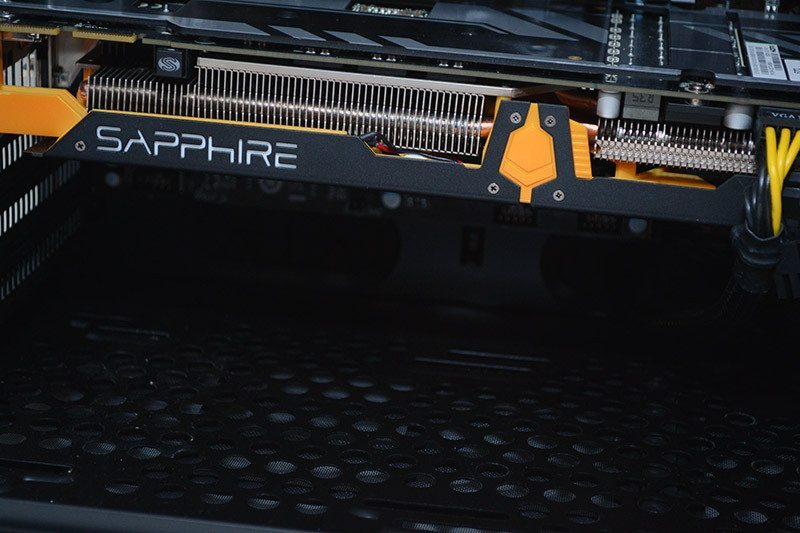
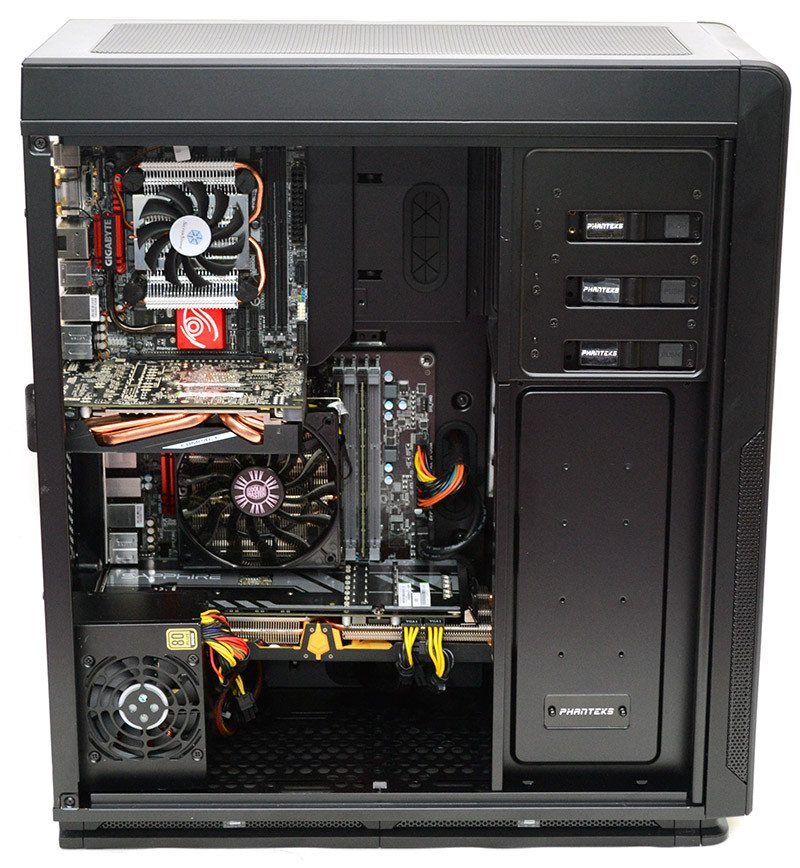
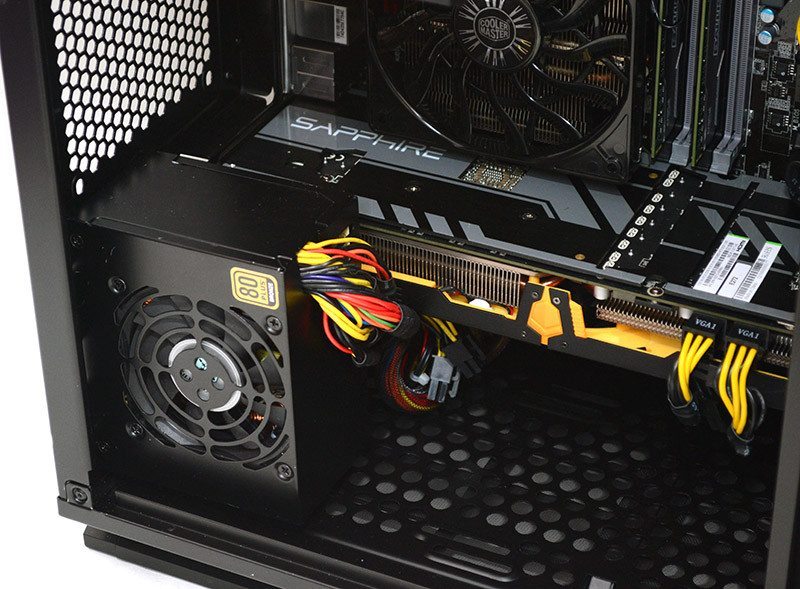
Our Sapphire R9 270X graphics card is quite long, so we had to remove one of the hard drive bays to accommodate it.
From the front, the build does look a little strange, as there are a lot of blank surfaces on the interior of the chassis. Of course, this would look very different with water cooling as all that visible space in the bottom, rear and top of the chassis can be fitted with radiators.
With the hard drive bays removed, there’s room for the largest graphics cards on the market with lots of room to spare in the front for additional cooling. You’ll also notice here some cable routing holes on the right, perfect for those using the front visible 2.5″ drive mounts.
Cable routing is fantastic, especially with the PSU tucked out of sight. Although, I do wish they had used a flat-type USB 3.0 cable, as these thicker ones can be a little unwieldy at the best of times.
Lots of room for a dual GPU setup, but again, if you’re using a second graphics card you’re not going to get a radiator or large fans in the base of the chassis; you will still get some passive ventilation though.
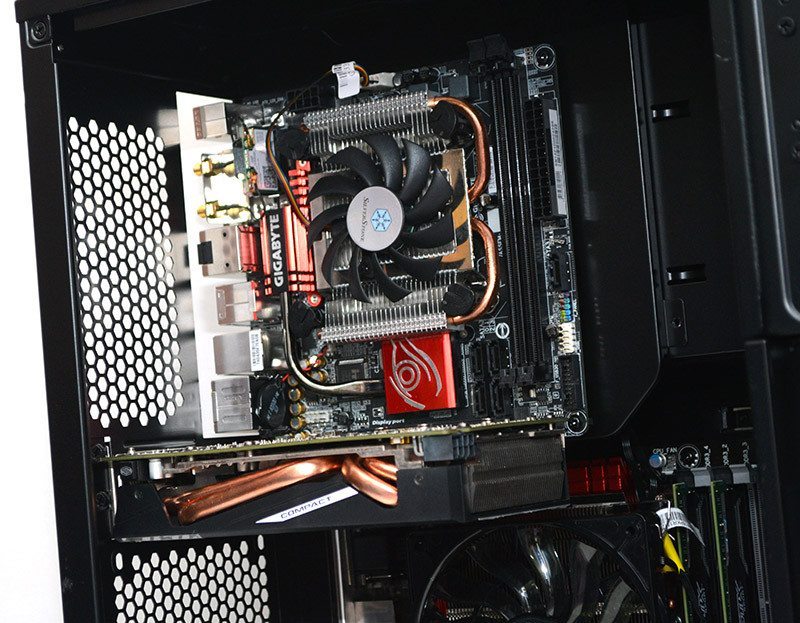
This section here does look strange, but guess what we’re going to install there? The mini-ITX motherboard!

All panels back in place, the chassis does look stunning, but let’s not call it a day yet, as it’s time to take it to the next level!
Complete System – With Mini-ITX Upgrade
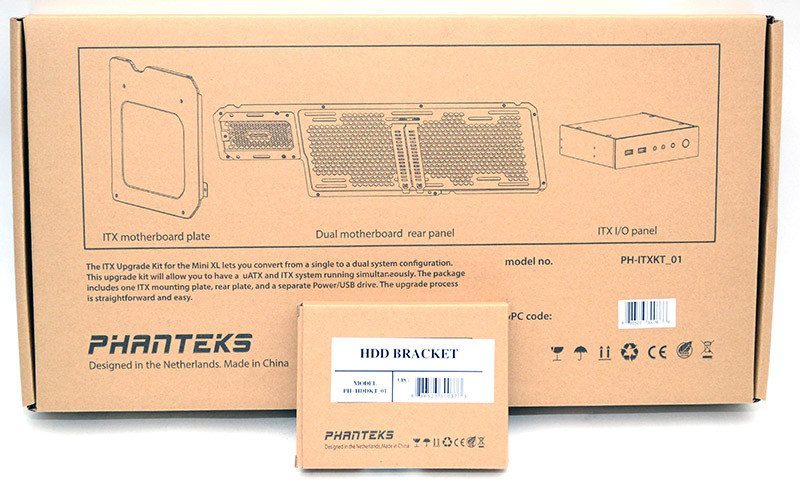
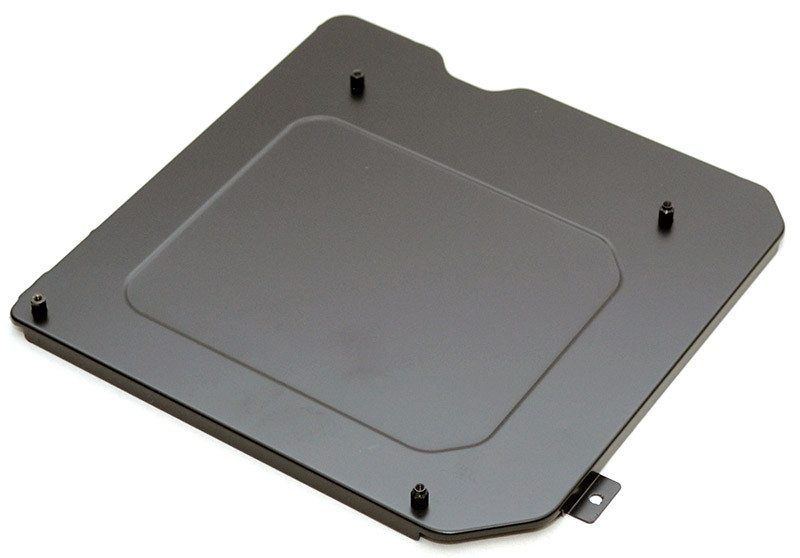
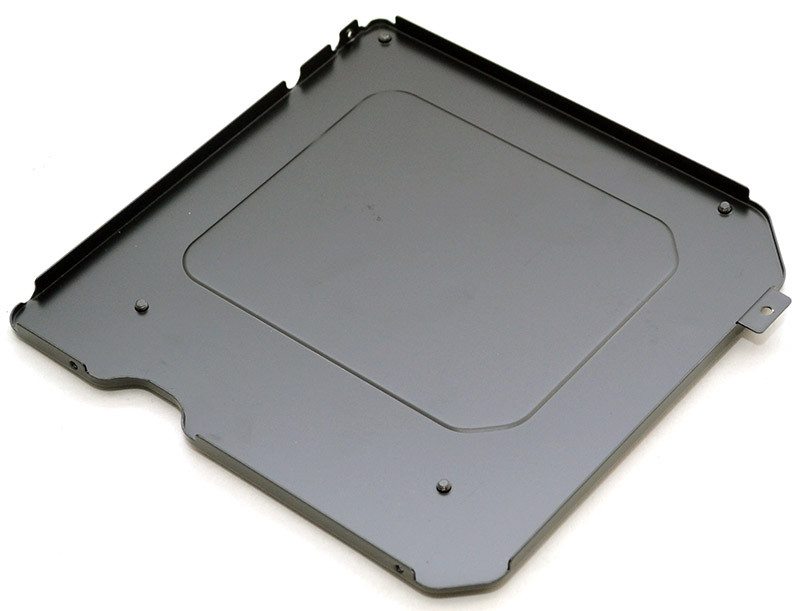
To achieve a dual motherboard design, we’re going to need the Phanteks ITX upgrade pack, we also have a HDD bracket, which I don’t actually need for this build, but it’s nice to see what other kinds of options you’ll have at your disposal for your build.
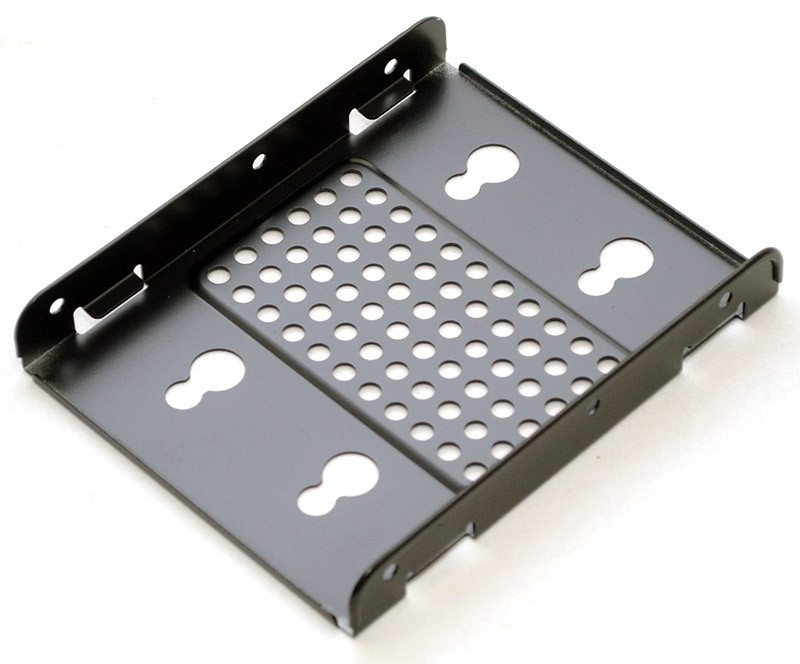
The hard drive bracket is simple enough, it comes with the same drop n lock systems as the other stealth drives mounts, but adds support for 3.5″ drives for those that need more than just SSDs in their system, without the use of the main hard drive cages.
The really cool part is the new backplate for the chassis; it adds a second motherboard I/O, revised ventilation and an SFX PSU mount.
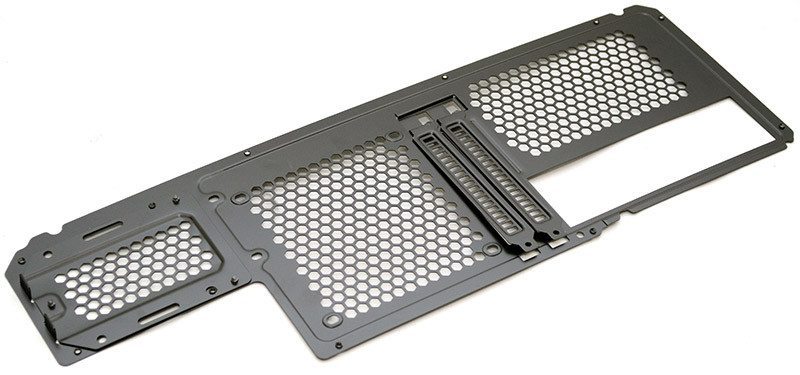
The build quality is just as great as the main chassis and comes with two ventilated expansion slots for an additional add-on card such as a GPU.
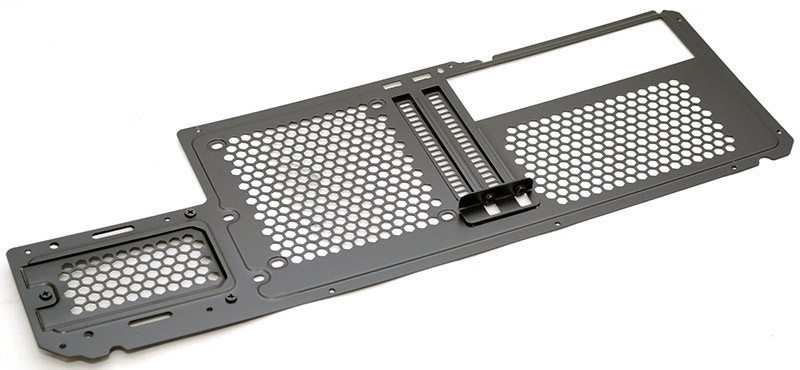
The motherboard mount comes with the stand-offs pre-installed and is mounted into the chassis with three included screws.
There’s a small cut-out at the top edge to allow 4/4+4 pin motherboard cable pass-through.
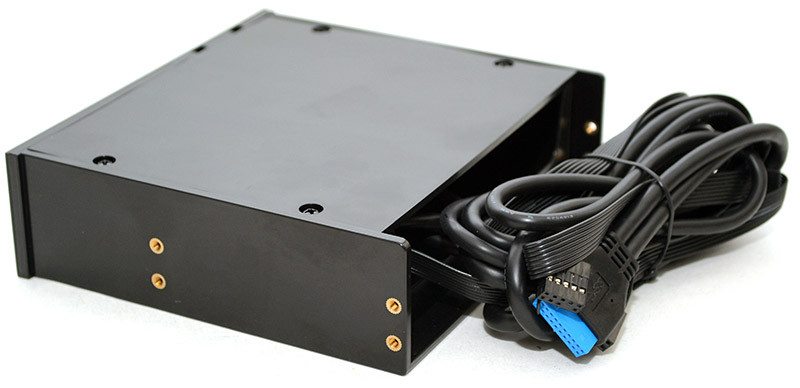
Two systems in one chassis? You’re going to need a second front panel! Fortunately, the kit comes with one included and you’ll find native USB 3.0, HD audio and power buttons on this 5.25″ compatible add-on.
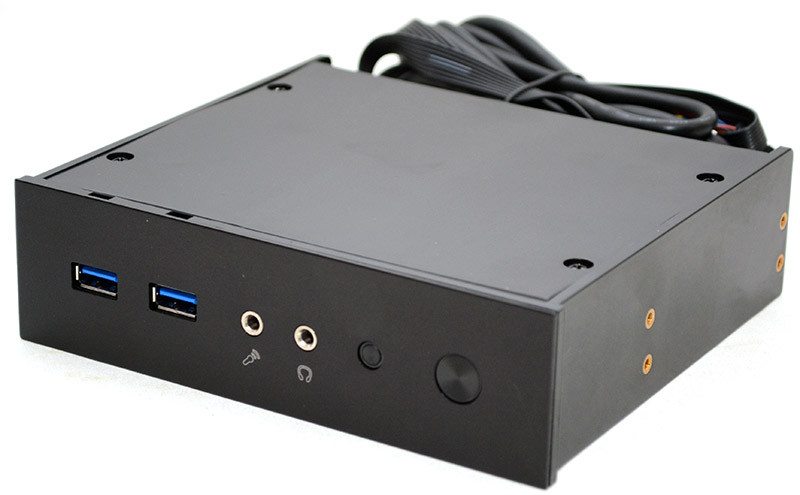
All the cables you would need are here, USB 3.0, front panel headers, audio, etc.
Total build time was about 20 minutes for the main Micro-ATX system, then another 30 minutes to accommodate the Mini-ITX components. What I really loved, is that you don’t have to remove any components from your main system to make this upgrade, making it a very easy process.
The downside is that you need the SFX PSU in the base. You have two options here, you can run the cables directly up to the motherboard, or through the cable routing behind the micro-ATX board. This presents you with two sets of problems, cables on show or issues with short cables. Both can be overcome with a mixture of cable extensions, cable ties and more, but it’s worth taking into consideration early in your planning and building stages.
There’s room for a large graphics card here. Yes, I know we’ve got some parts missing, but I’m not normally equipped to build two systems at a time, let alone in the same chassis, but you certainly get the general idea of how all this works.
It certainly looks strange configured like this, but the concept is a great one and it’s very well executed to allow room for water cooling, air cooler, high-end hardware and much more for both of the systems.
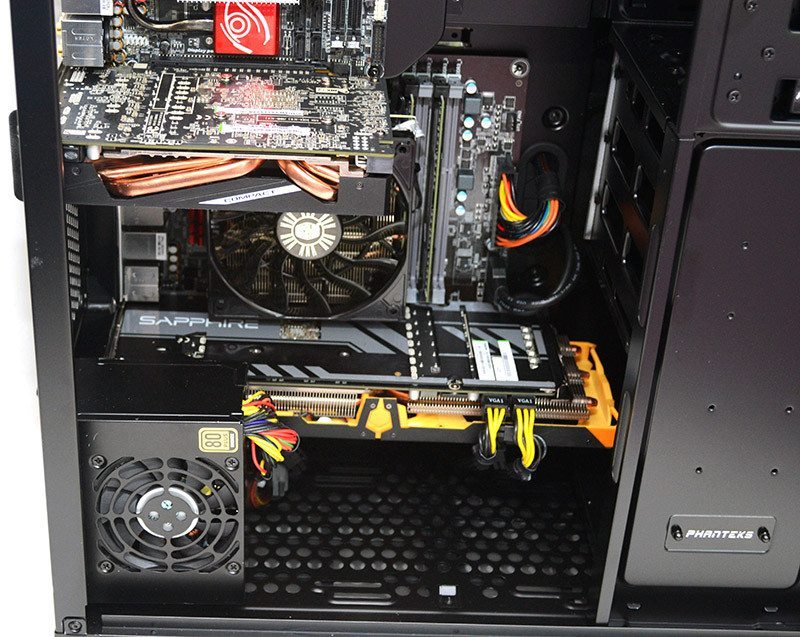
As you can see, the tall fan/radiator mount is now reduced, but you can still mount a 120mm fan on the back.
The 140mm fan that was pre-installed has had to be removed, but there’s absolutely no reason why you couldn’t install it in another fan mount within the chassis.
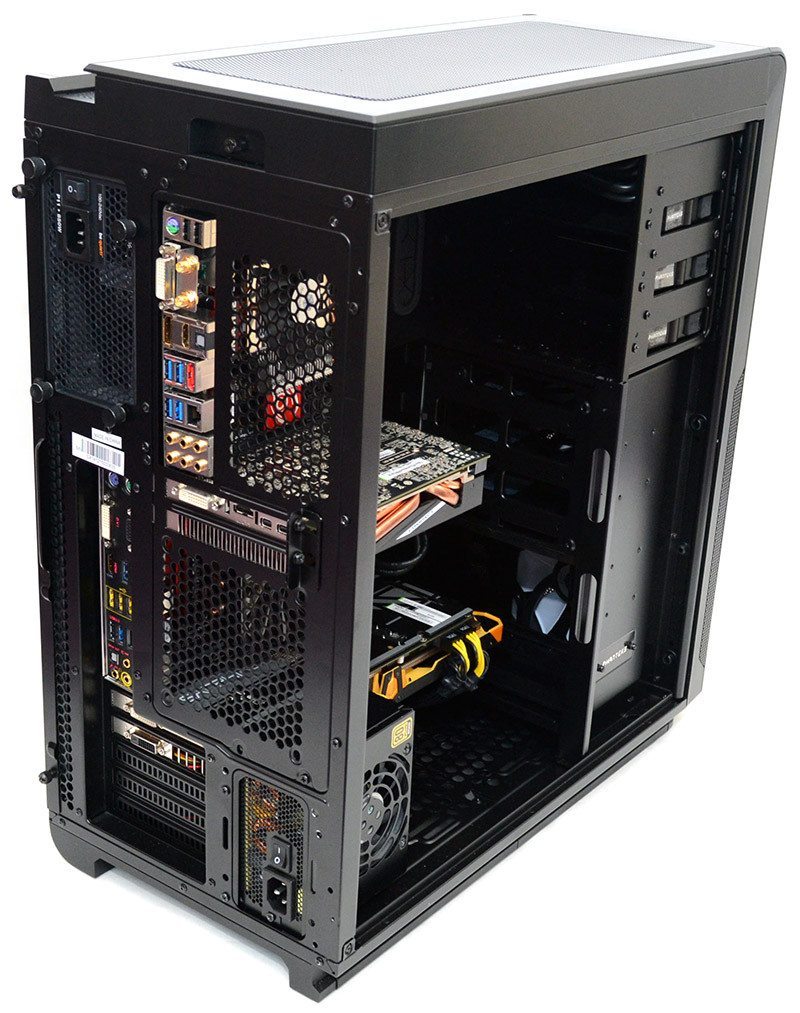
All panels back in place and you get a great view of both systems, so there is certainly some motivation to make each build look their best. Fortunately, the good cable routing and storage options available do make that a fairly easy task.
Let’s not forget the final addition to this build, the second front panel! It blends in nicely and now that I think about it, it’s really up to you which motherboard uses with I/O panel, the one on the chassis or the 5.25″ drive bay one.
Final Thoughts
Pricing
The Phanteks Mini XL chassis is available from Overclockers UK for £144.95, which isn’t cheap, but keep in mind the features and component support this chassis has to offer. The Phanteks Enthoo Mini XL ITX Upgrade Kit and the HDD bracket adaptor are also available from Overclockers UK for £20.99 and £5.99 respectively. Readers in the US can pick up the chassis for $159.99, the upgrade kit for $31.99 and the HDD bracket for $9.99 from Newegg.
Overview
This chassis is absolutely bonkers, which is certainly something I love about it, because on the surface it seems pretty normal, but it’s certainly anything but. There’s been a lot of fuss about dual chamber chassis recently, especially with cube-style form factors. There’s also been a lot of popularity surrounding dual-system chassis, such as those from Thermaltake, the CoolerMaster HAF Stacker, Lian-Li, etc. What we have here is the best of both worlds. You’ve got the dual chamber design that allows for some storage and the PSU to be separate from the main system and you have the option to install two complete motherboards, graphics card configurations and more, while only requiring the space for something the size of a standard full-tower; that’s pretty incredible!
Build quality is stunning, no doubt about that and it’s certainly something that adds to the visual appeal. It’s not easy to make a dual system chassis with huge windows look understated, but Phanteks have managed to pull it off. The component compatibility is amazing too, aside from two full rigs, it’ll house extra-long graphics cards, plenty of storage and super thick water cooling radiators or extensive fan configurations. The fact that the internals of the chassis can be moved and removed on helps advance that compatibility for all kinds of upgrades, now and in the future.
Of course, not everyone needs a dual-system like this, but the Mini-XL is still great just for one system, the mini-ITX add-on is completely optional. Of course, should you need an efficient and fast booting system for day-to-day work, then a coal-burning GPU powerhouse for gaming, video rendering and more, you can quickly reap the benefits of both worlds.
Pros
- LED lighting
- High-quality fans pre-installed
- Extensive cooling support
- Modular components
- Mini-ITX add-on kit
- All major intakes fitted with dust filters
- Excellent cable routing
- ATX PSU is hidden from sight
- Exceptional build quality
- Huge side panel windows
- Competitive price (given specifications)
- Built-in fan hub
Cons
- SFX PSU cable routing can be tricky
Neutral
- Dual system may mean sacrificing some radiator sizes in top and rear, but that’s a fair trade-off
“The Phanteks Mini-XL is one of the most original chassis I’ve ever seen. Sure, it’s not ideal for everyone, but it’s great to see an innovative, practical, versatile and stylish product at a very reasonable price, this may very well be one of the coolest cases money can buy.”

Phantek Enthoo Mini XL Super Micro Tower Chassis Review
Thank you Overclockers UK for providing us with this sample.


