Thermaltake Core X31 Mid Tower Chassis Review
Peter Donnell / 8 years ago
Introduction

Thermaltake are the masters when it comes to pushing heavy-duty chassis to market at fiercely competitive prices. Now they’re at it again with their latest mid-tower, the X31, which promises extensive water and air cooling support, room for up to an ATX motherboard, lots of storage, and huge graphics cards and all of that comes at a price around £80.
“The Core X31 features outstanding cooling performance with compatibility for liquid cooling components. With its unprecedented space for high-end hardware and liquid cooling expansion, the Core X31 supports the latest ATX, Micro ATX, Mini-ITX motherboards, and all high-end GPU cards. Moreover, the Core X31’s integrated power cover helps tidy the entire bottom area by allowing users to easily organize unused cables, and in return provide the maximum interior space needed for advance cooling performance or liquid system build.”
AS you can see from the specifications, the X31 isn’t too big, but it’s certainly capable in terms of hardware support. Aside from the general capabilities, it also comes equipped with two pre-installed 120mm fans, although it certainly has room for a lot more.
A Closer Look – Exterior
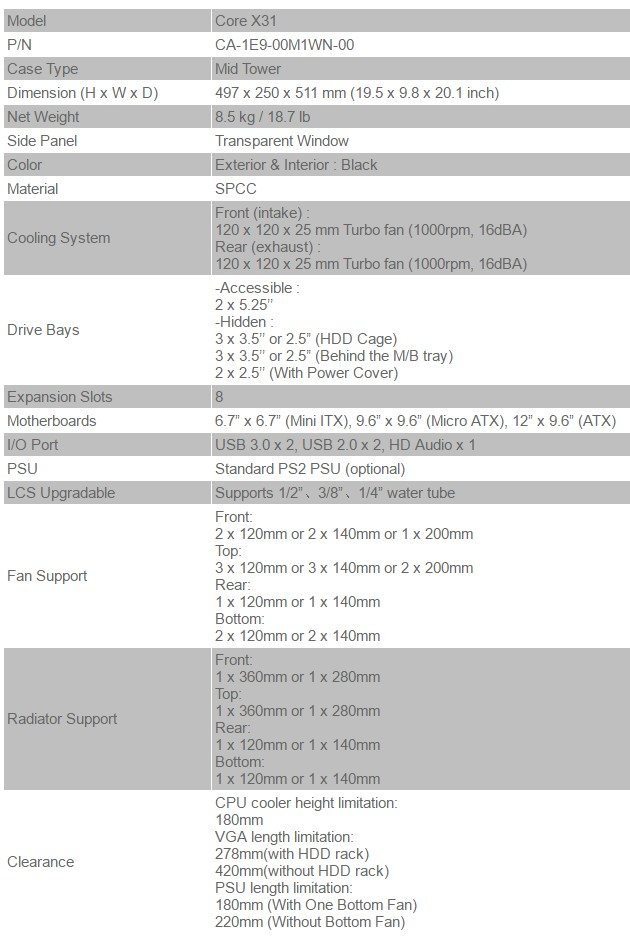
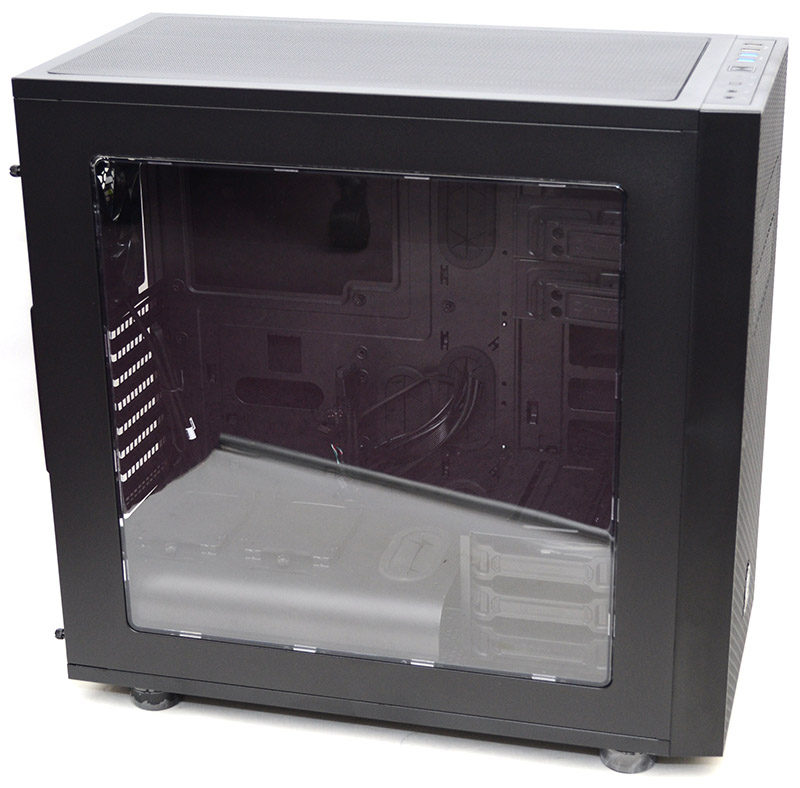
The Core series chassis do mostly look the same, just varying in overall size and component capabilities on the interior, but they’re certainly a statement piece none the less. The chassis has a very bold and industrial look about it and features a huge side panel window; perfect for showing off your new build.
The right side panel is just a blank, but fairly heavy-duty panel. What’s interesting is that both side panels are held in place by two thumbscrews, but also two regular component screws. I’m sure you could just leave the latter out if you wish, but no one will be opening your chassis in a hurry with both in place, which could be handy for system security at LAN gaming events.
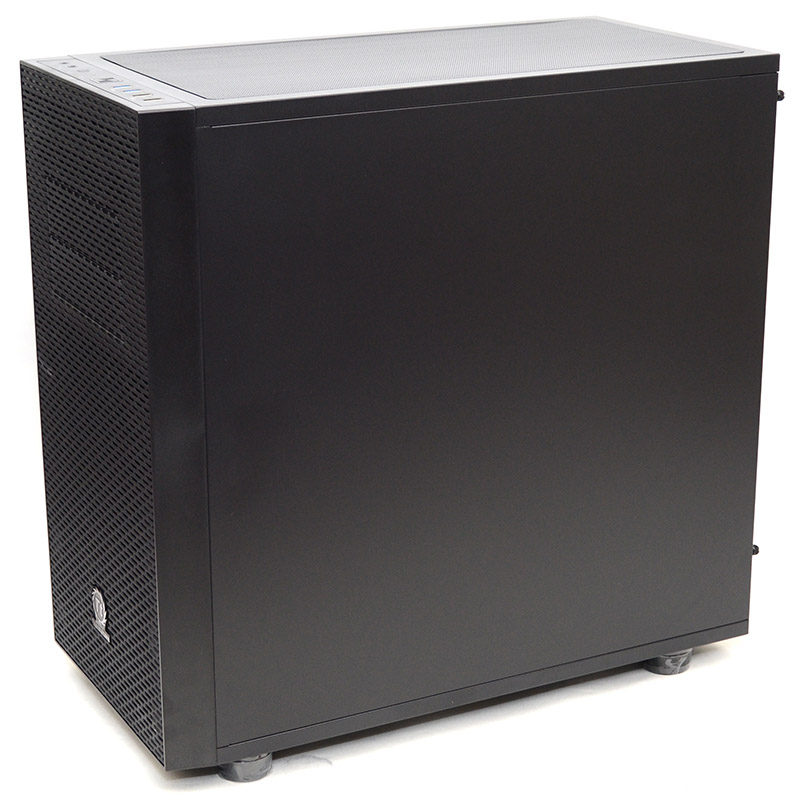
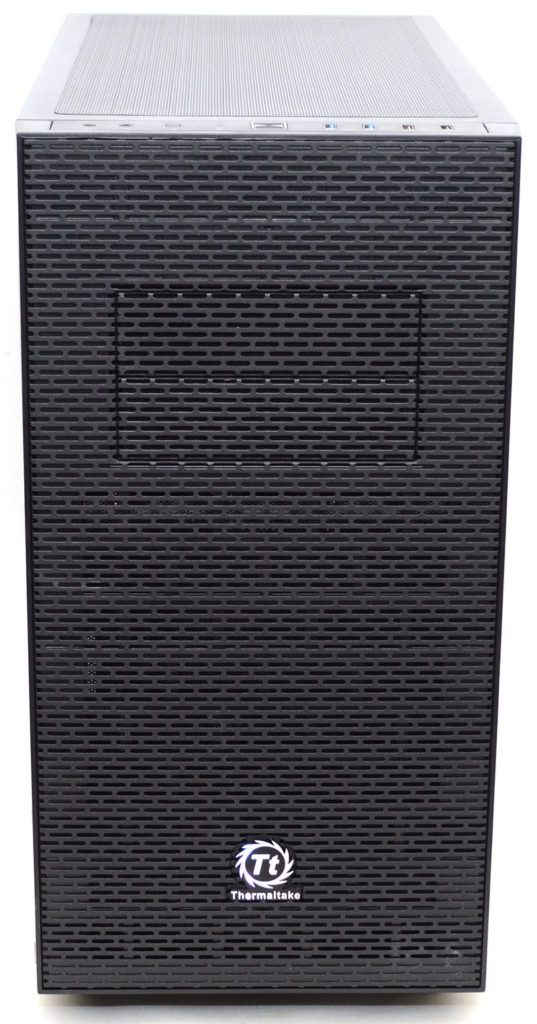
The dominating front panel shows just how wide the chassis is, with those two 5.25″ bays floating in the middle. There’s a huge amount of ventilation here, perfect for catering to the plethora of fan/radiator mounts that lurk behind it.
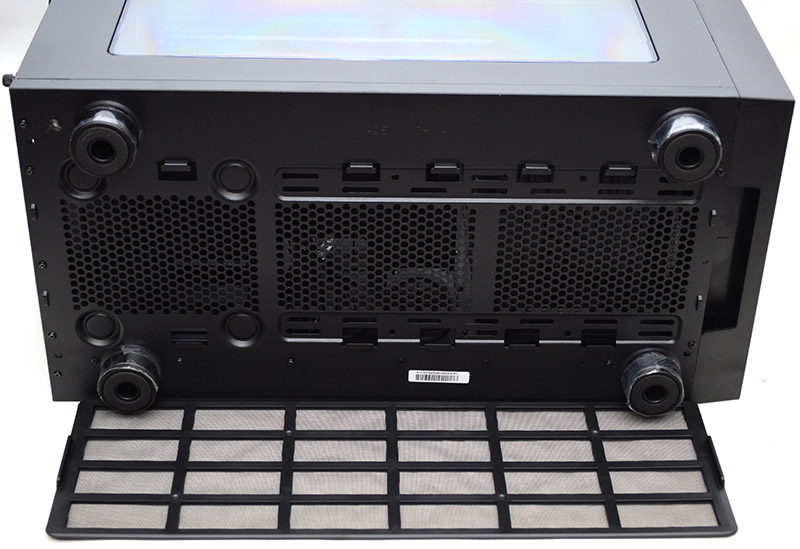
Around the back, a height-adjustable 120/140mm fan/radiator mount, eight ventilated and reusable expansion slot covers, a cable routing grommet, and the PSU cut-out. Nothing too fancy, but it’s all the stuff you’ll be needing one way or another.
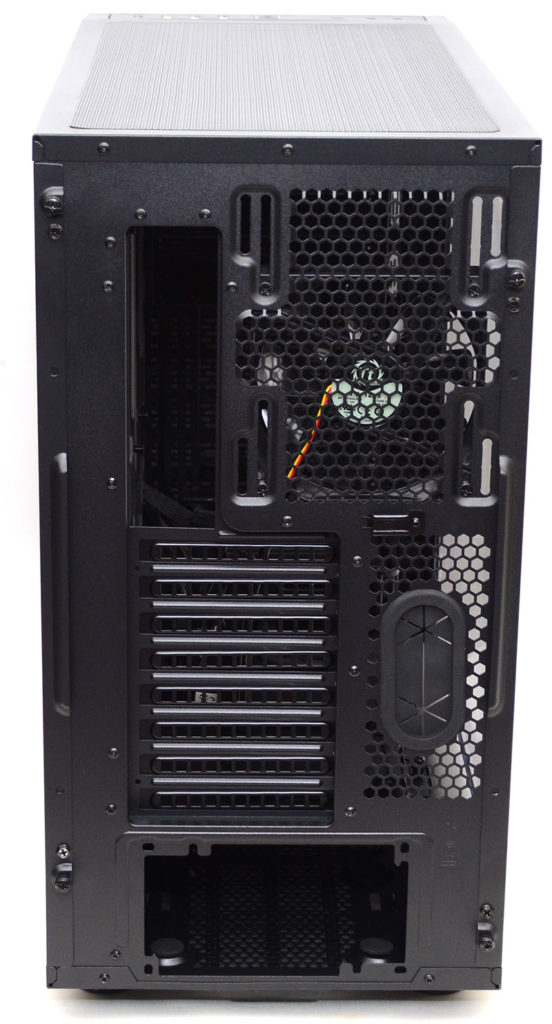
The top panel has even more ventilation, as well as a full-size magnetic dust filter to help ensure your system stays clean and easy to maintain.
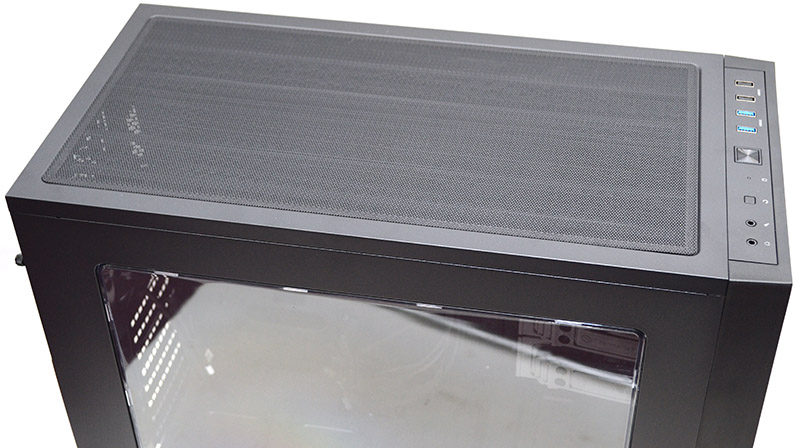
Below that cover, a plethora of fan and radiator mounts, so there’s not going to be much on the market that can’t be mounted here.
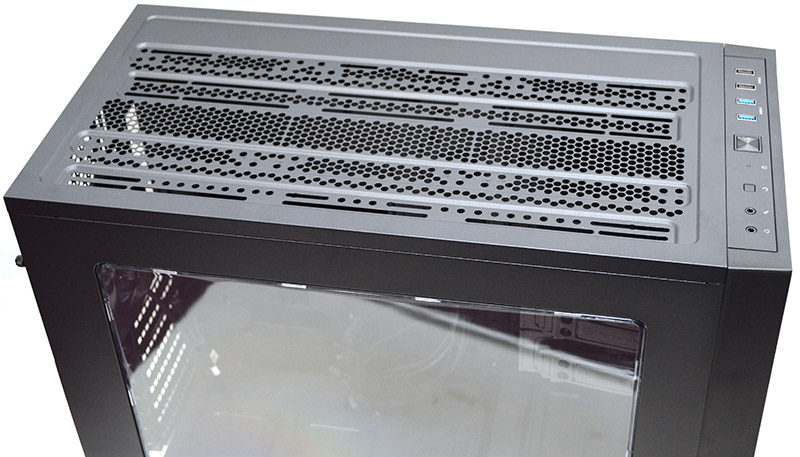
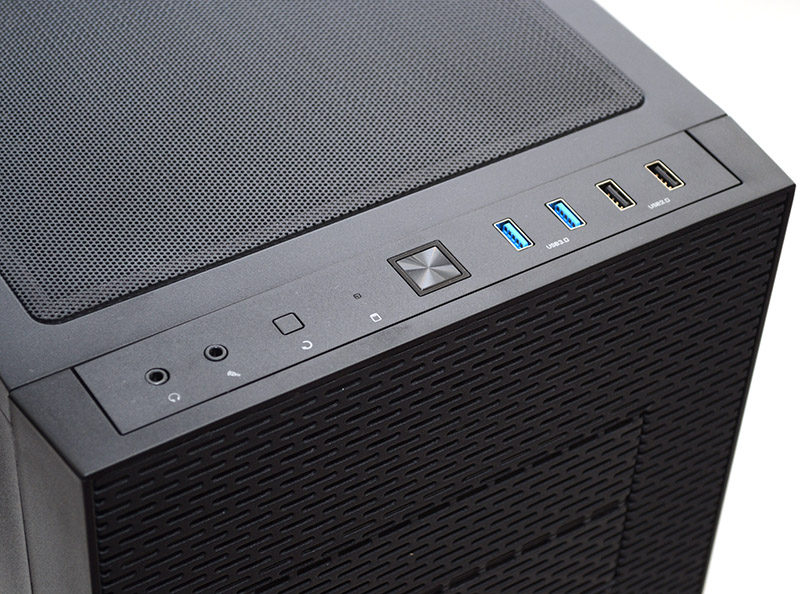
The neat and tidy front I/O is spaced over the full width of the chassis, with HD audio, dual USB 2.0 and 3.0 ports, as well as the usual power buttons all nicely laid out.
On the base of the chassis, four large feet with hard-wearing rubber grips for extra stability, but also good ground clearance for airflow.
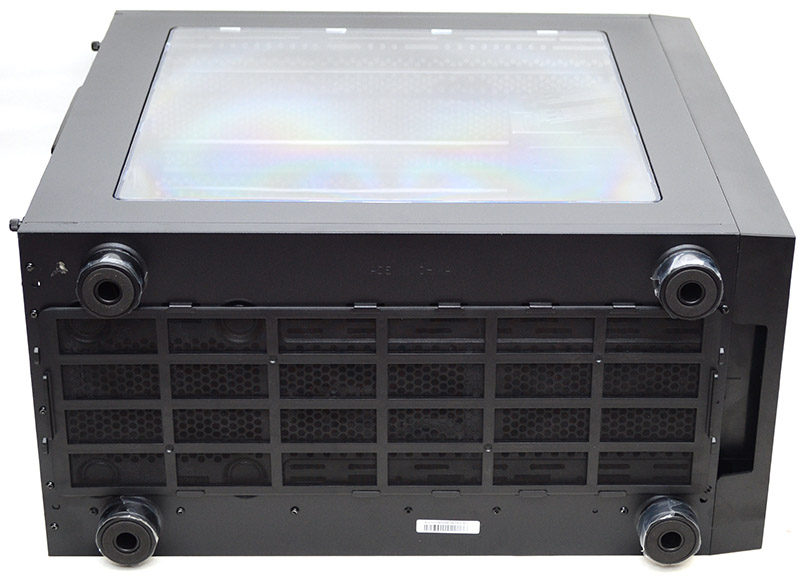
Another full-length dust filter, which I absolutely love, because it can be slid out from the front or the back of the chassis. Behind that, you’ll find the PSU ventilation, as well as another bank of fan/radiator mounts. One thing this chassis isn’t lacking is airflow and filters!
A Closer Look – Interior
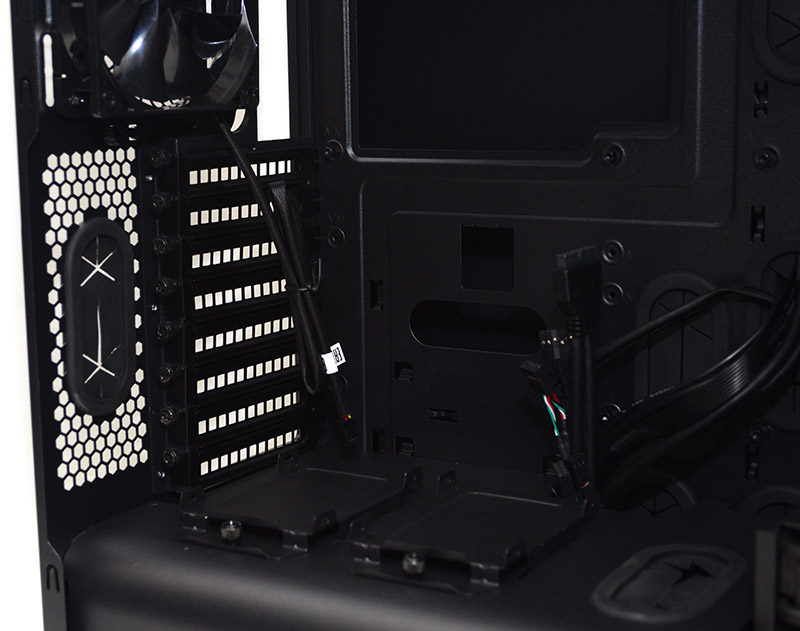
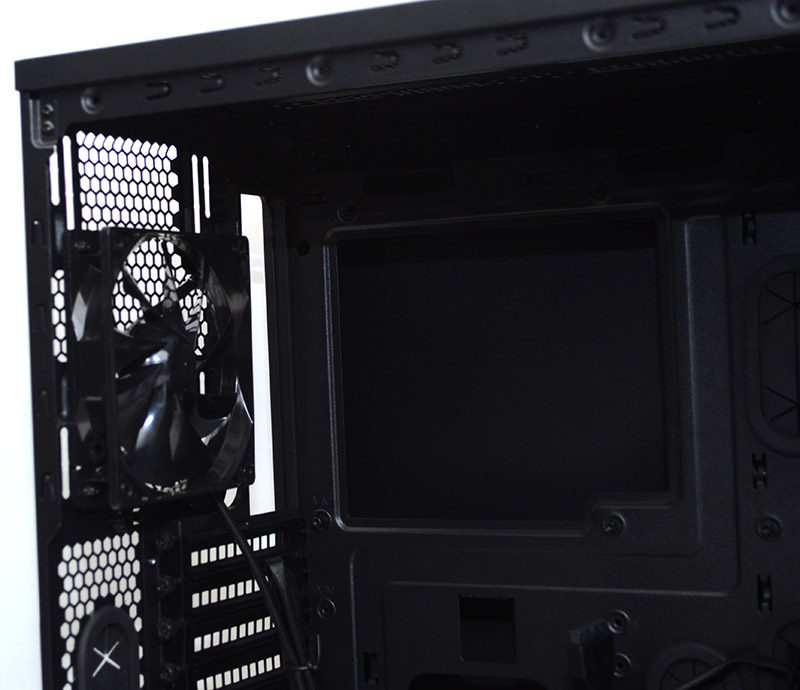
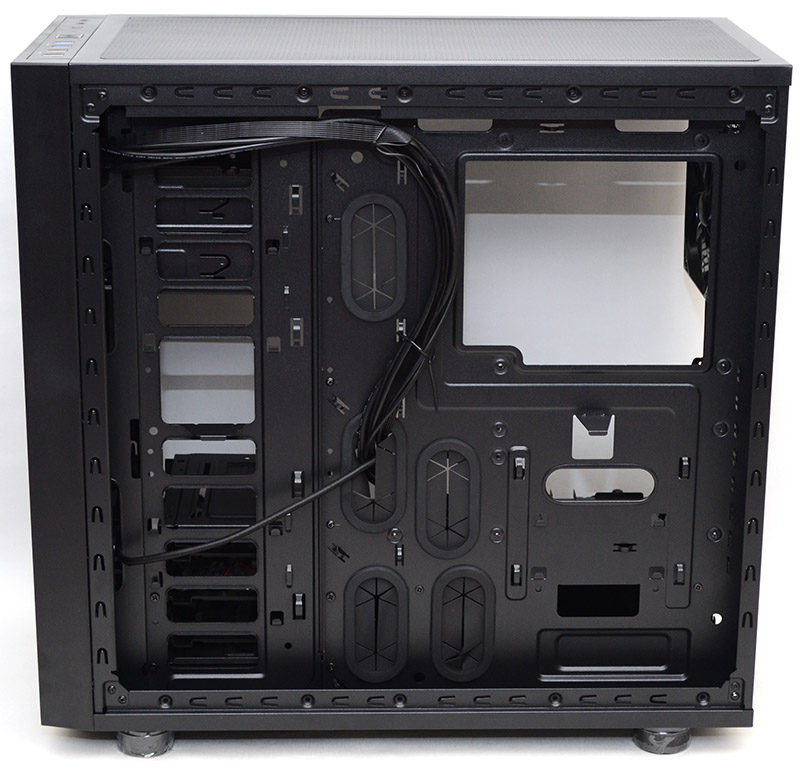
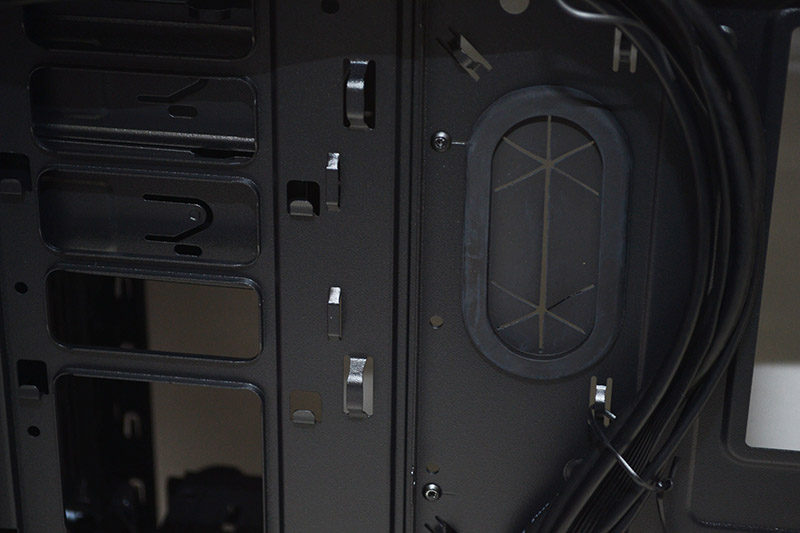
With the size panel removed, we can see that there’s definitely a lot of room to play around with on the interior. Especially for those who require room for extra-long graphics cards. There’s a large cutout behind the motherboard for the CPU cooler mount, and there are extensive cable routing grommets dotted around to help keep your cable management in check.
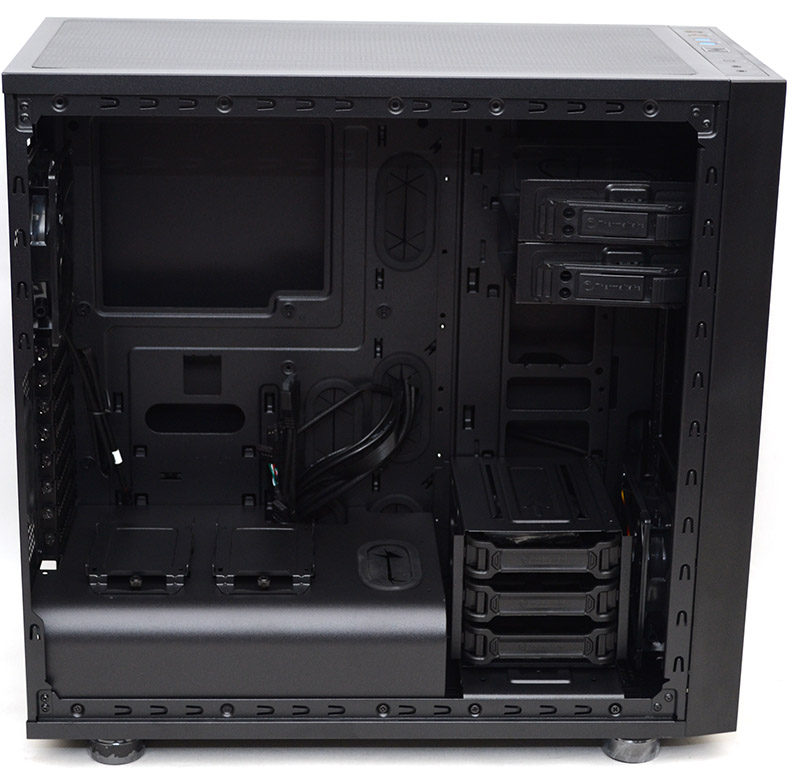
In the front, you’ll find the two 5.25″ drive bays, which can be easily removed via thumbscrews, meaning you can open up the full height of the front panel for water cooling hardware.
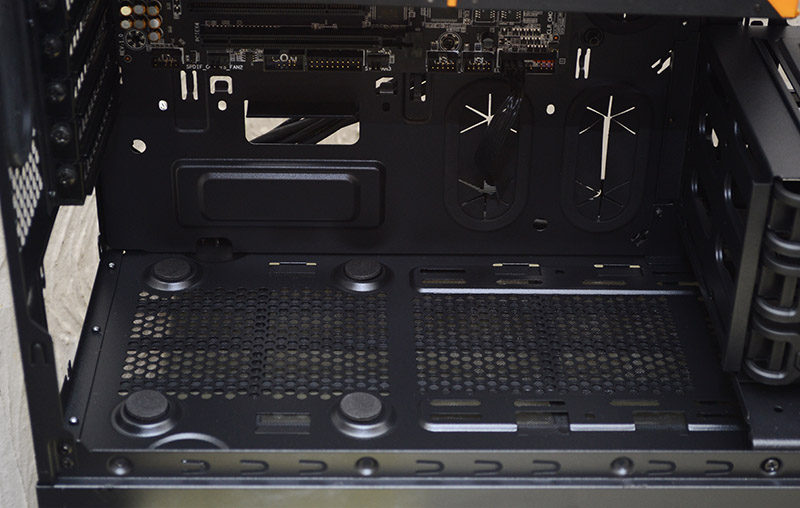
There’s a large opening in the midsection, so those wanting more room for large expansion cards certainly won’t be left feeling sold short.
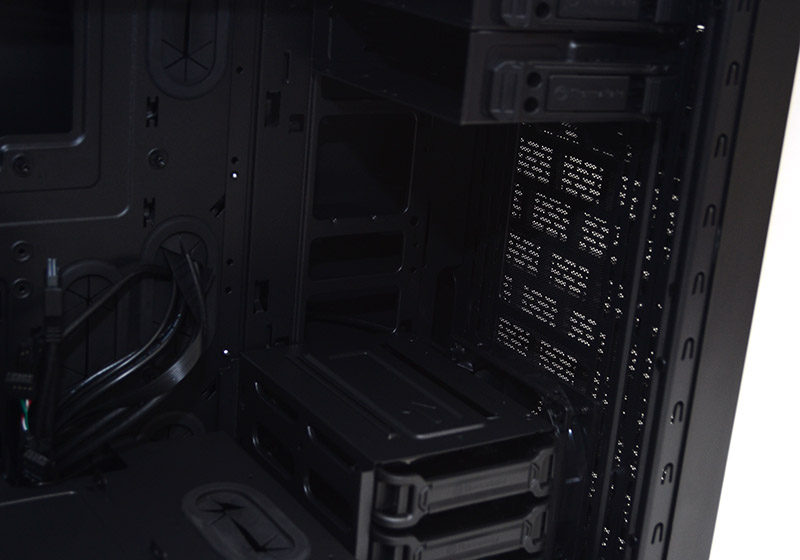
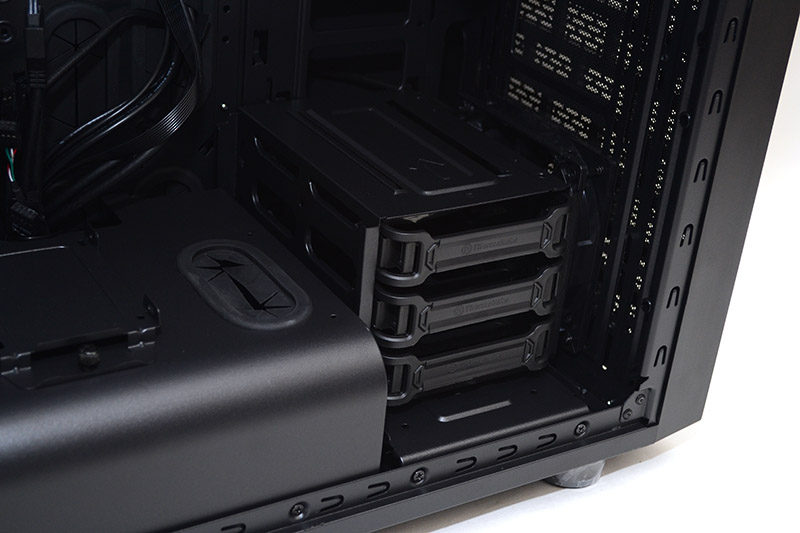
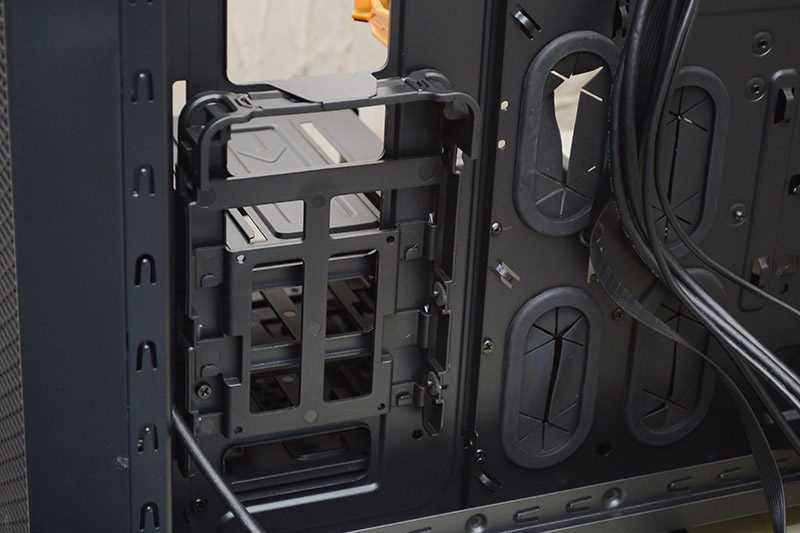
A fully removable hard drive bay with tool-free 3.5″ drive trays, although these can also accommodate 2.5″ drives if you need them to. There’s another neat trick to these drive trays too, which we’ll show you shortly.
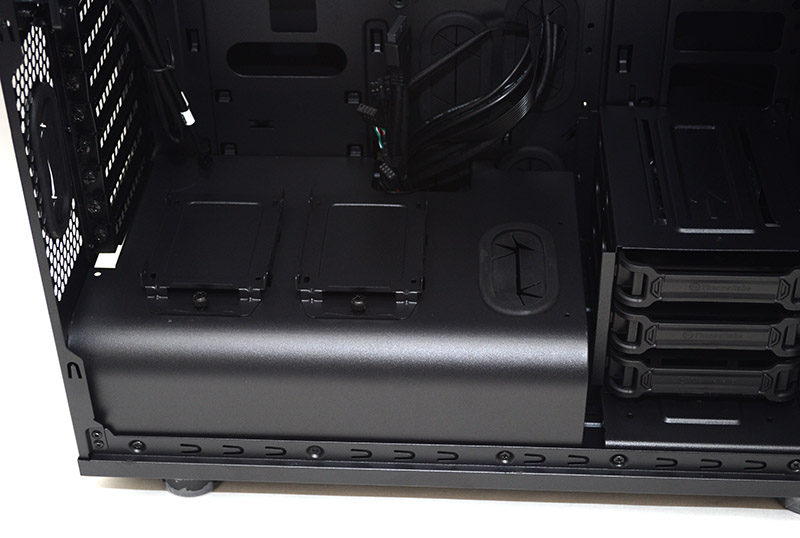
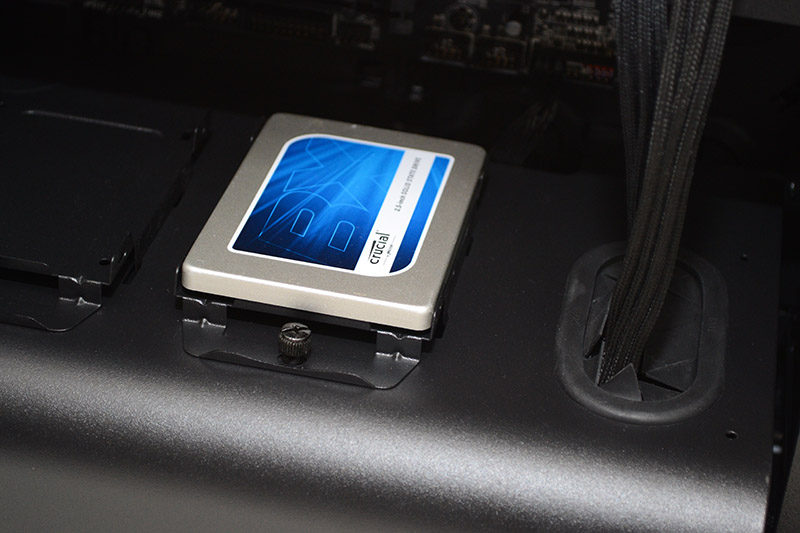
A 2/3 length shroud covers the PSU area and will also hide a decent amount of excess cables. On the top, you’ll find two dedicated 2.5″ drive mounts and another cable routing grommet for passing through PSU cables to your expansion cards; awesome if you have side-loading power connectors on your graphics card.
There’s a vast amount of room here for expansion cards, and it’s unlikely width will ever be an issue, even if you’ve got a lot of water cooling tubing routed around the build.
The rear fan is a 120mm, but you can easily install a 140mm fan or radiator here if you wish. Those elongated screw holes are great too, as it means you can adjust the height of anything mounted to prevent hardware conflicts.
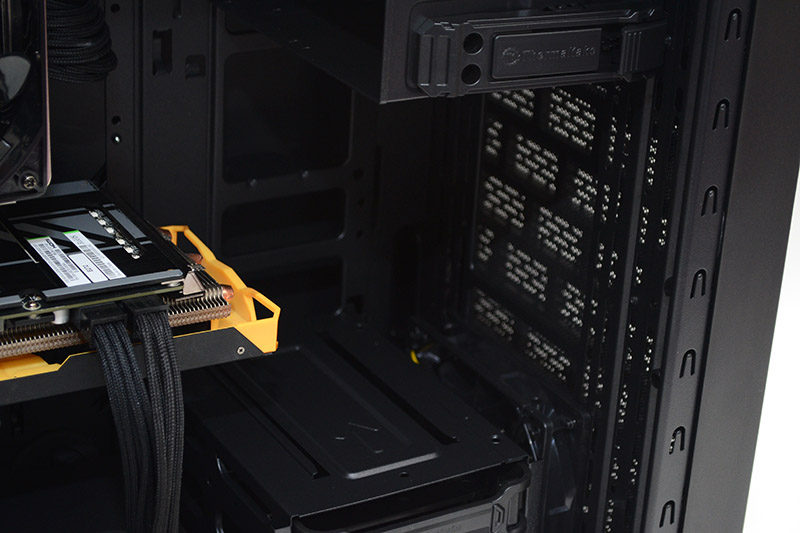
Around the back, there’s an almost embarrassing amount of cable routing space, so you’ll have no excuses for excess cables being on show in the main compartment.
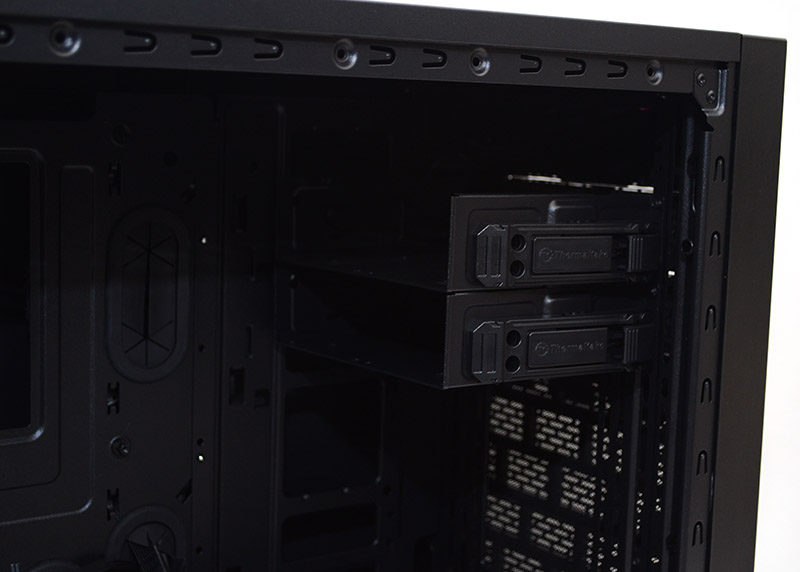
The extra depth here isn’t just for cables, however, there are some special mounts where you can suspend the 3.5″ drive trays behind the motherboard. This is great if you’re using the whole front panel for water cooling, as it means you can stealth mount the big ugly 3.5″ drives behind the motherboard.
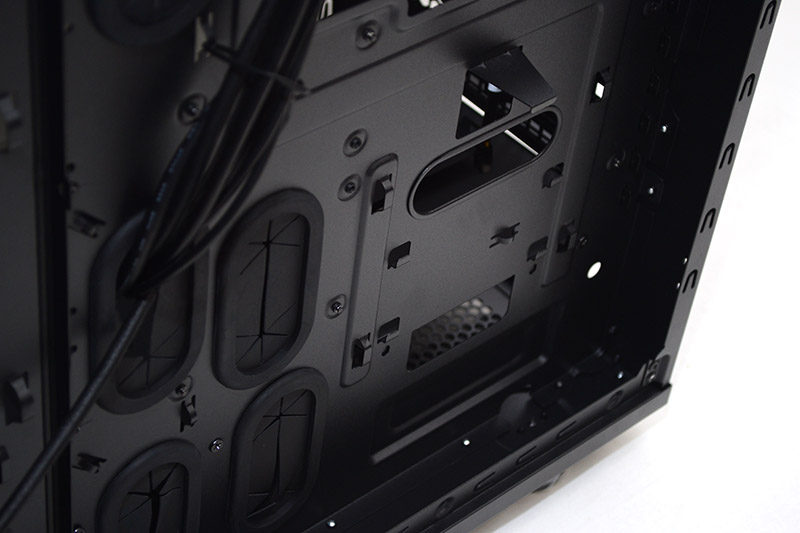
One 3.5″ HDD in the bottom rear (above) and one towards the front (below).
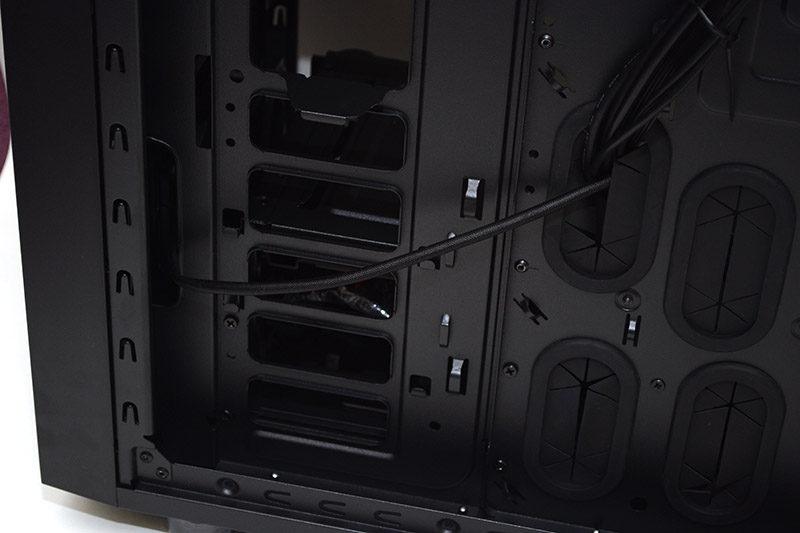
Aside from the extensive cable routing grommets, you’ll also find a huge amount of cable tie loops and plenty of cable ties included in the box, so once again, more reasons to get perfect cable management.
Complete System
As I said before, one of the neat tricks about this chassis is that you can remove the front hard drive caddy completely if you need to, then you can use the trays behind the motherboard, giving you two additional 3.5″ drive mounts should you need them.
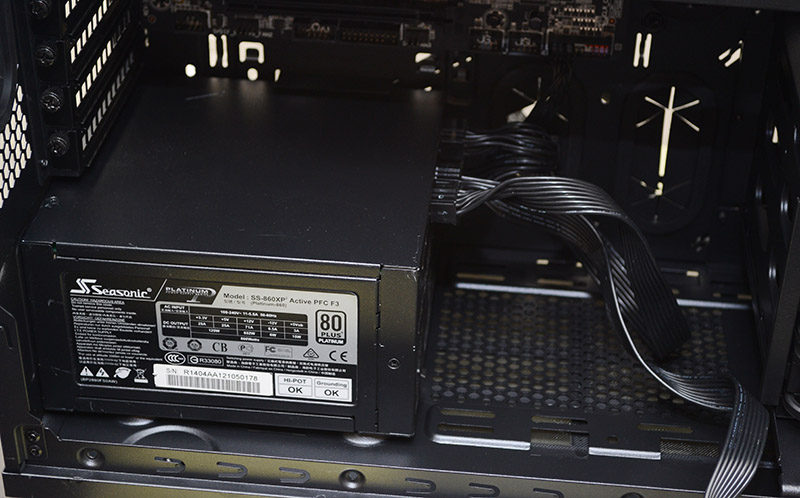
To install the PSU, or access the base fan/radiator mounts, you’ll need to remove the PSU shroud. Using the shroud is completely optional, but we’ll be putting it back when we’re done.
Plenty of room here for a good size PSU, with more than enough room for extra cables to be stored too.
With everything now installed, this is one seriously slick-looking build. The cable management on this chassis is as good as it gets. There’s a freaking massive amount of space behind the motherboard and under that PSU shroud, so even a first-time builder should be able to get a clean-looking system.
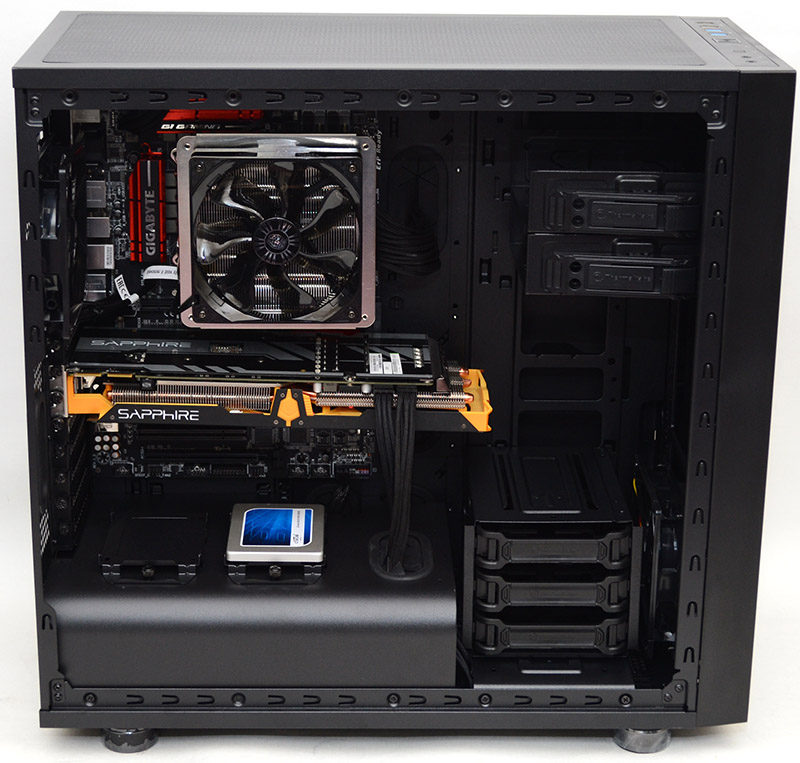
There’s quite a bit of width to this chassis, which will no doubt prove useful for those wanting to run a lot of water cooling gear, as it means you can give plenty of room for smooth curves in your tubing from pumps and radiators, especially around the GPU area.
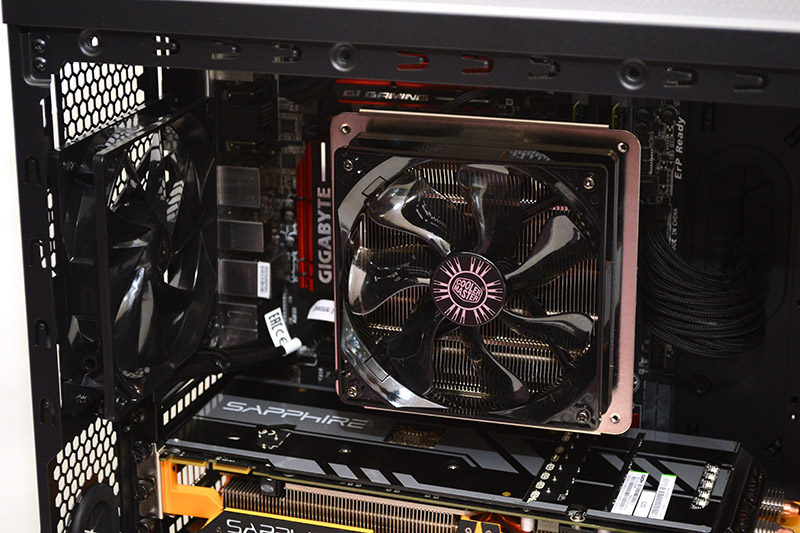
The PSU shroud does more than simply hide the PSU, as you can see we’ve taken advantage of the 2.5″ drive mounts on the top, which offer up a great way to show off your sexy SSD without compromising on space for GPUs or radiators in other parts of the chassis.
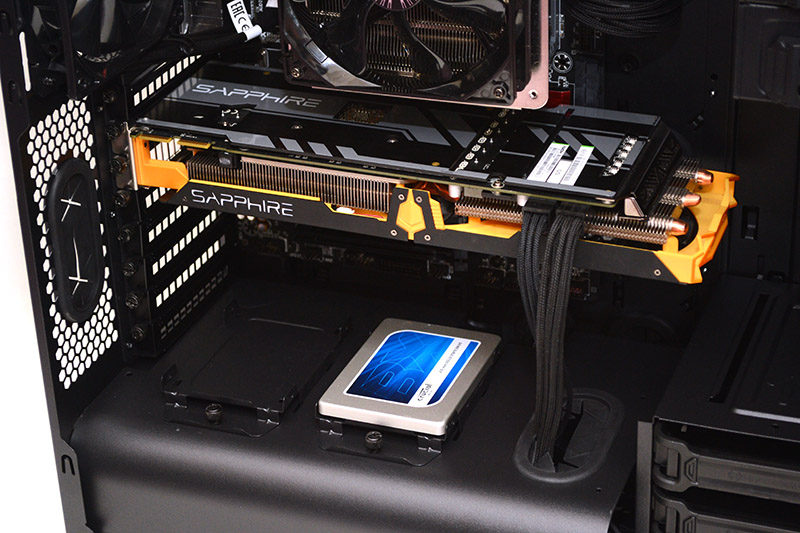
Another nice perk of the shroud is that it has that horizontal cable routing grommet, which allows pass-through of cables to your expansion cards, saving cables trailing over or under your GPU, which often looks scruffy.
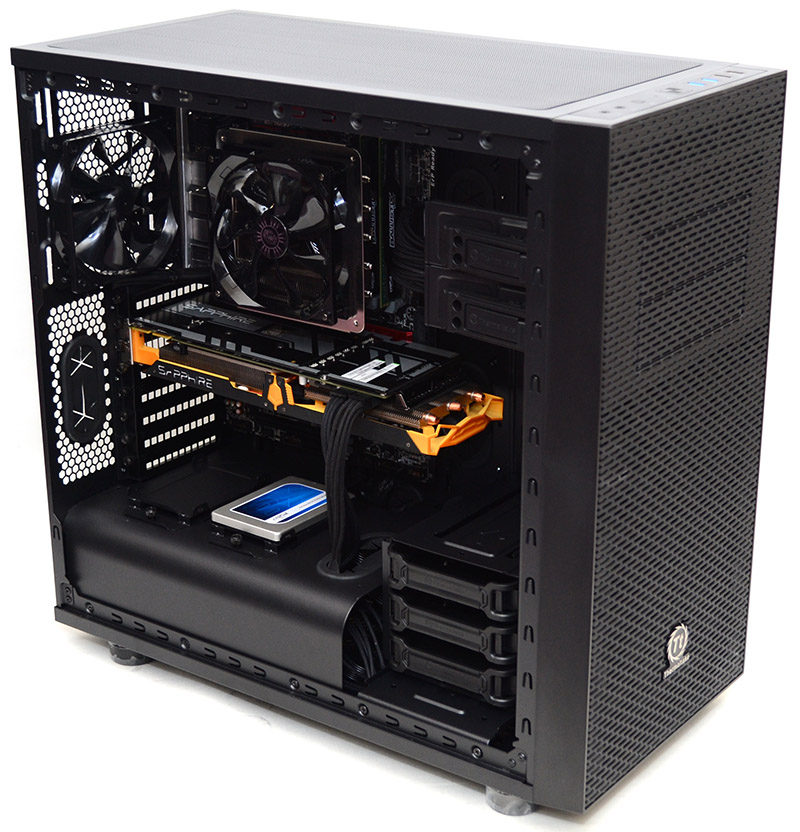
There’s a vast amount of room for a CPU air cooler, so even the biggest air coolers on the market should fit with ease, and there’s certainly more than enough room for a 120/140mm radiator on the back fan mount, perfect for custom loop or AIO coolers. The same is true of the top mounts, with ample clearance above the motherboard for additional cooling hardware.
With a single GPU, size is not an issue with extensive room for long cards, although a second or even a third card may conflict with the HDD bays, the bays can be removed to make more room if required.
All panels back in place, and you get an uncompromising view of the interior thanks to that crystal clear window panel.
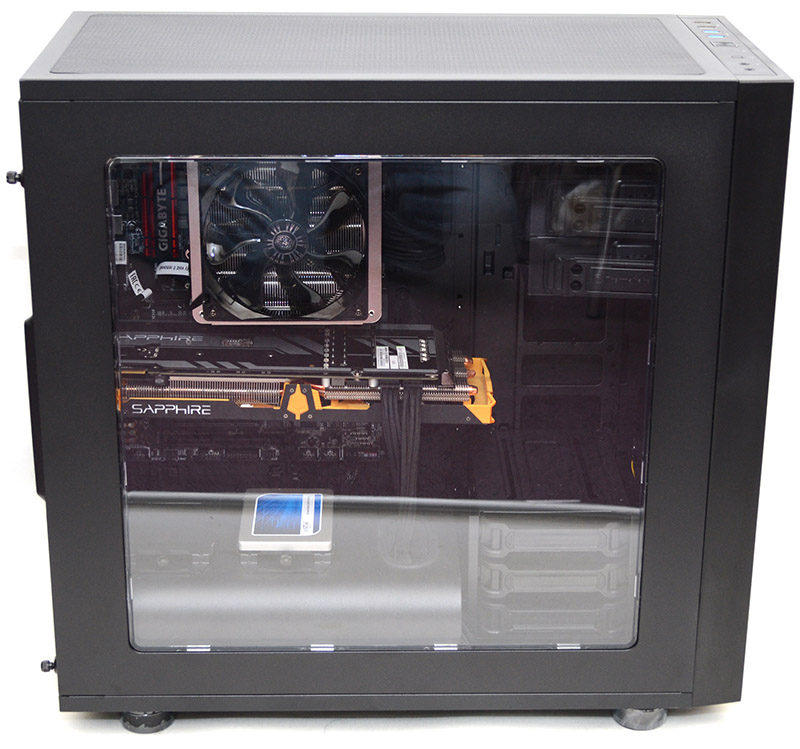
Clear window panels are often a pain, as a mild tint can help hide cable management issues and more, but since the X31 has flawless cable routing, it just looks even better with the interior being so visible, making it perfect for those who love to show off their new hardware.

Final Thoughts
Price
The Thermaltake Core X31 is available from most major retailers for +/- £5 from £100, which isn’t cheap, but given the durable build quality and level of features on offer, it’s certainly competitive for those looking to build a high-end workstation or gaming system.
Overview
Thermaltake haven’t exactly pushed the level of innovation with their X31, but then again, they don’t really have to. The design is familiar to those who’ve seen any of the other modern Core series of chassis, with its boxy exterior, straight edges, and industrial-looking front panel design. Throughout the range, you’ll see the same finish, albeit in a range of sizes to suit different types of builds. I don’t mind this, it means that you can stick with the design you love and keep your builds looking uniform easily enough.
The industrial design is partly a style choice for this chassis, but it’s also a byproduct of practicality. The huge and rather flat looking front panel is mostly ventilation, allowing for uncompromising airflow to the extensive fan and radiator mounts that reside behind it and its dust filter. The same goes for the top, bottom and rear of the chassis, which have as many cooling mounts as is physically possible for a chassis of this size. If you’re looking to install an extreme workstation or gaming rig, where massive amounts of radiators or fans are preferred to keep everything running ice cold, then this is certainly the way to go.
Hardware compatibility is just as high as cooling support too, with room for huge graphics cards, ATX motherboards, plenty of storage and more. What I do love is that you can mount the 3.5″ drives behind the motherboard, keeping them out of sight and freeing up more room for radiators and longer expansion cards. There’s also some 2.5″ mounts on the PSU shroud, which is great for displaying them, and the shroud does a great job of improving cable management and keeping the build looking clean.
Build quality is rock solid too, so even if you’re loading thick radiators in, I wouldn’t be concerned about structural integrity here. Sure the design is a little bland on the exterior, but it’s practical and with that huge side panel window, it’s what you fit on the inside that is really going to stand out here, giving you a huge display case to show off your new water cooling, graphics cards, SSDs and more.
Pros
- Durable build quality
- Huge amounts of airflow
- Extensive fan/radiator support
- Removable HDD bay/ODD bay/PSU Shroud
- Huge and clear side panel window
- Flawless cable management
- 2.5″ drive mounts on PSU shroud
- 3.5″ drive mounts behind motherboard
- Dust filters on front, top and bottom of chassis
Cons
- None
Neutral
- The exterior design is a little bland, but it is very practical
“The Thermaltake Core X31 is one of the most capable chassis in its class, ideal for a modest gaming rig right up to an enthusiast-grade extreme gaming PC or workstation. It may not have the most exciting design in the world, but it’ll still look great at home or even in the office.”

Thermaltake Core X31 Mid Tower Chassis Review


