Aerocool Dead Silence DS200 Mid-Tower Chassis Review
Peter Donnell / 10 years ago
Introduction
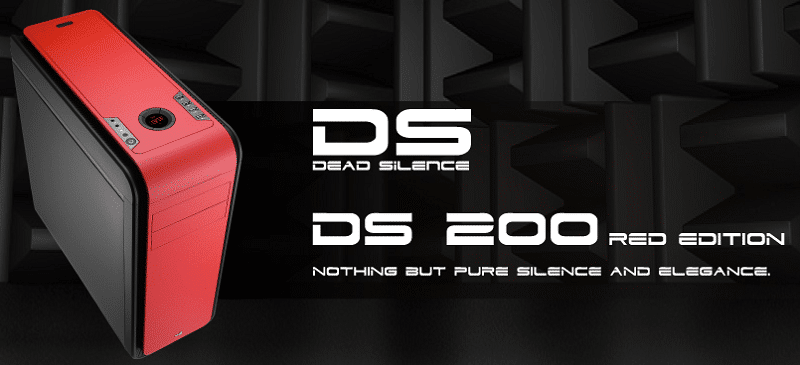
Aerocool are back once again with a new entry in their Dead Silence chassis series. We absolutely loved their Dead Silence Cube chassis which we reviewed a few months ago, as it is easily one of the best compact gaming chassis on the market today. Now they’re back with a similar aesthetic and a much bigger form factor with the DS200, a premium grade mid-tower with support for ATX motherboards. Aerocool are certainly one of the more up and coming names in the chassis business, sure they’ve been at it for years and already have some stunning products such as their PGS series, with the BX500 and Xpredator being two of my favourite cases, but it’s in these last two years that they’ve really been putting up a fight against the likes of Corsair, NZXT, Thermaltake, Coolermaster and many more who have long dominated the gaming chassis market.
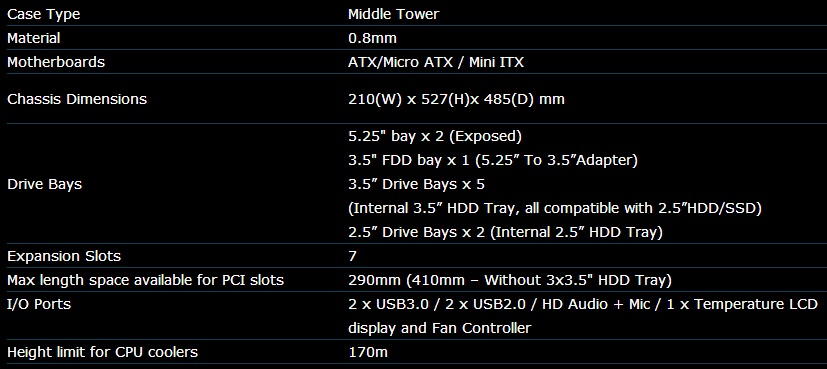
Aerocools new case comes in a stunning choice of colours, some of which match up nicely with the colours offered on their massively popular Dead Silence fans. The DS200 comes with support for just about everything you could need from a decent gaming chassis, with room for mini-ITX, Micro-ATX and ATX size motherboards, seven expansion slots, room for extra-long graphics cards, plenty of space for storage with dedicated 2.5″ drive bays, built-in fan controller and temperature read-out, cable management a more.
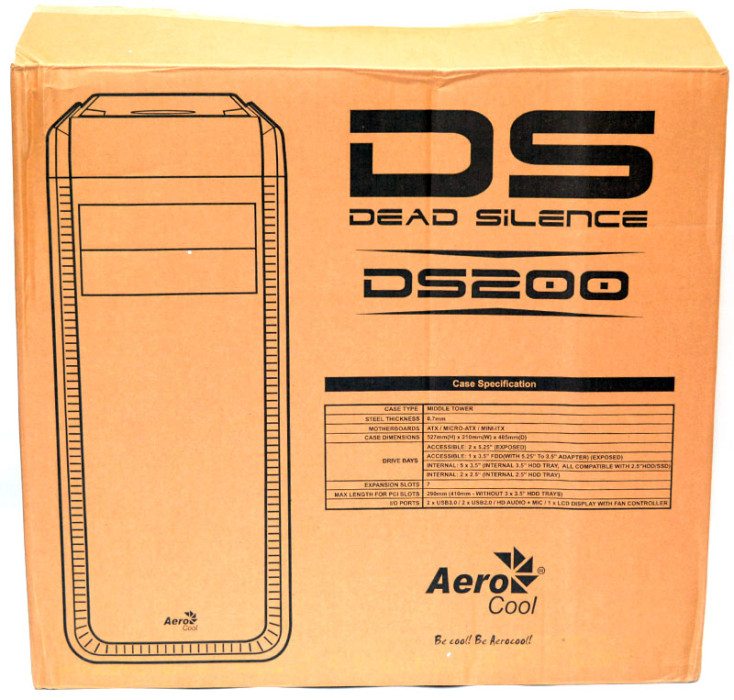
The box is nothing overly fancy, featuring a nice high-contrast image of the chassis front panel as well as a quick run-down of the main specifications.
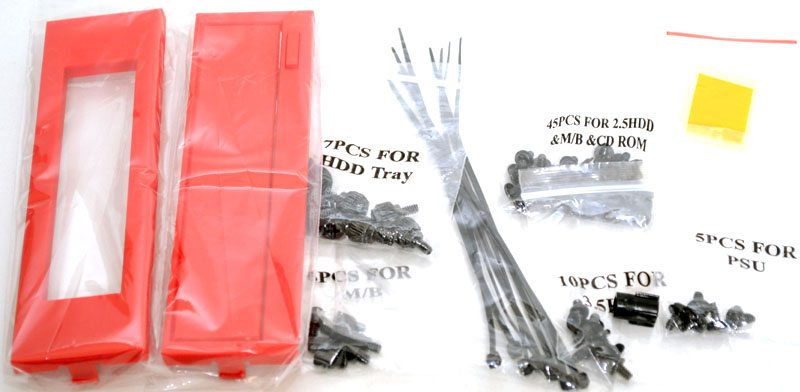
In the box I found a bundle of components, these included two 5.25″ drive bay adaptor that match the colour and finish of the front panel, all the screws and bolts needed to install all major components, a collection of cable ties and a sticky pad to help secure the thermal monitor sensor.
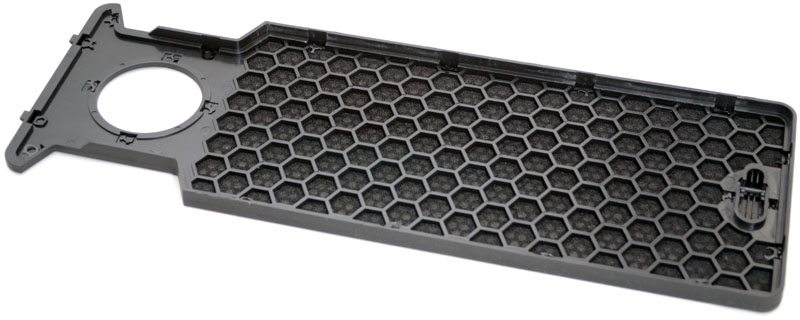
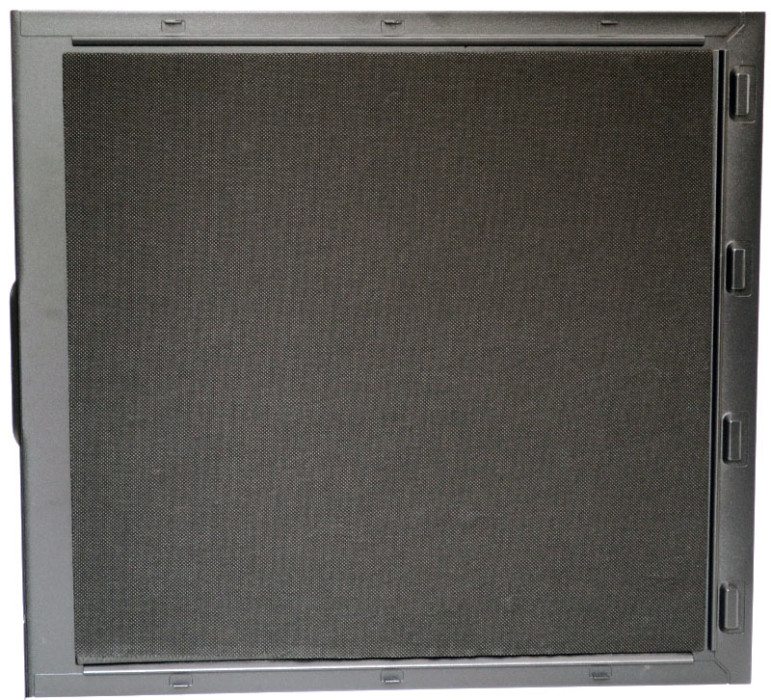
Also in the box is a replacement top panel, which can be swapped out easily to suit different chassis configurations.

It’s filtered too, so lifting it off and giving it a quick brush should make maintaining the filter nice and easy.
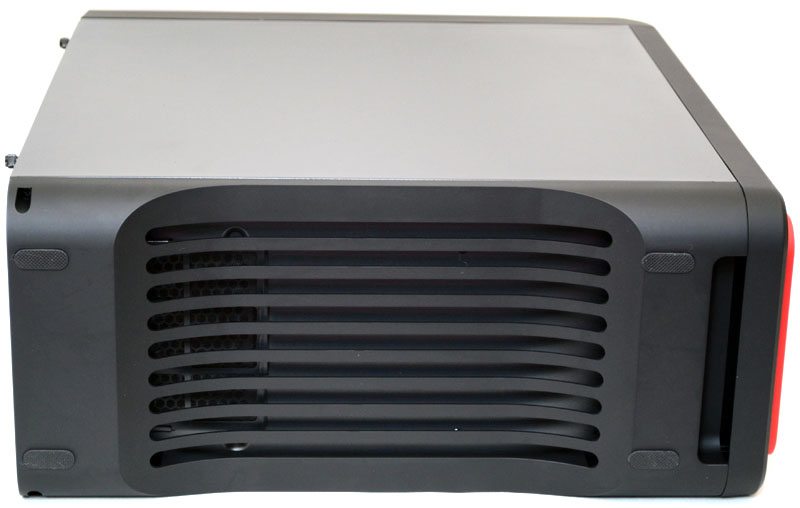
Exterior
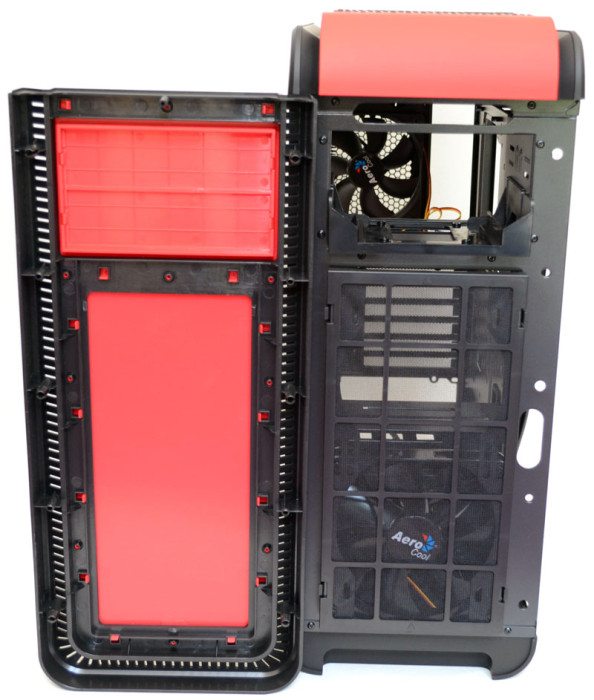
The left side panel is finished in powdered black and held in place by a pair of quick release thumb screws. You can purchase one with a side panel window, but that really is just a matter of preference.
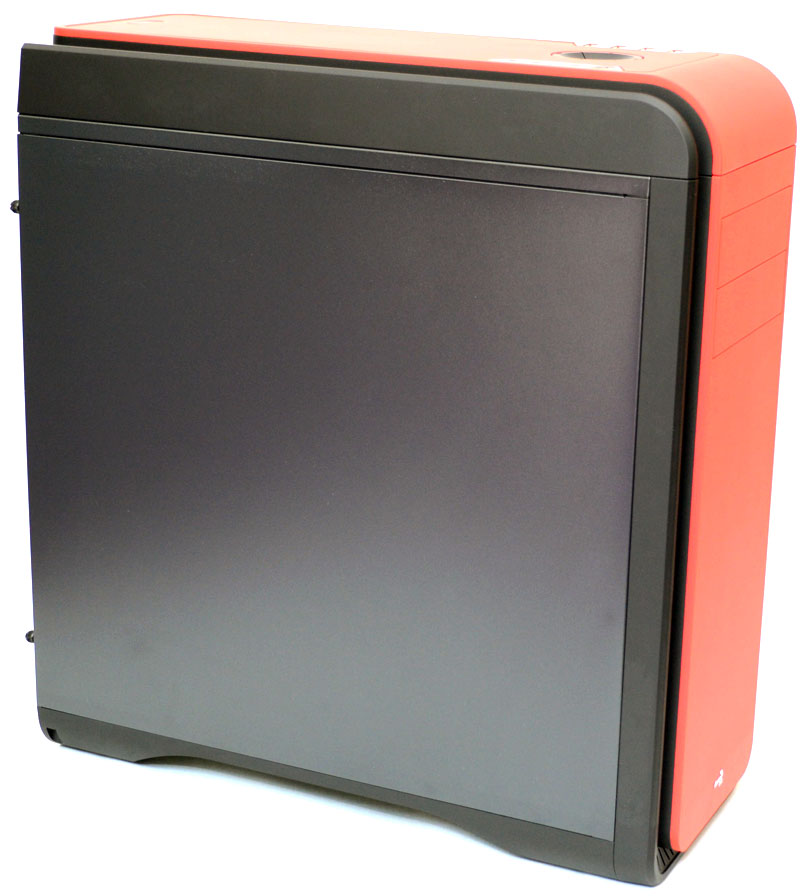
The right side panel is the same as the left.
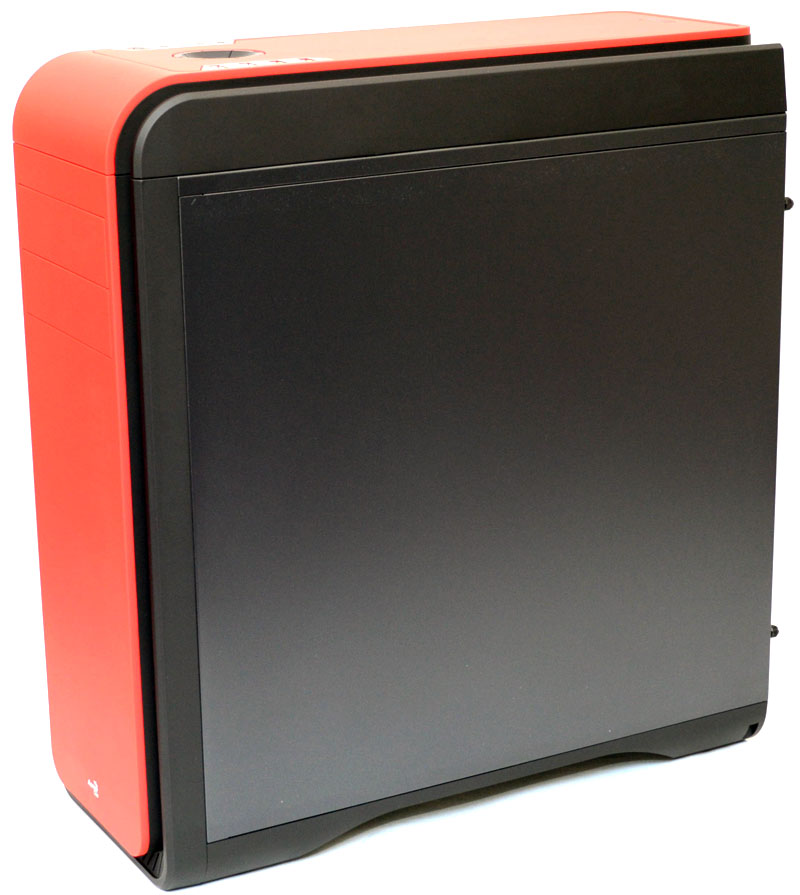
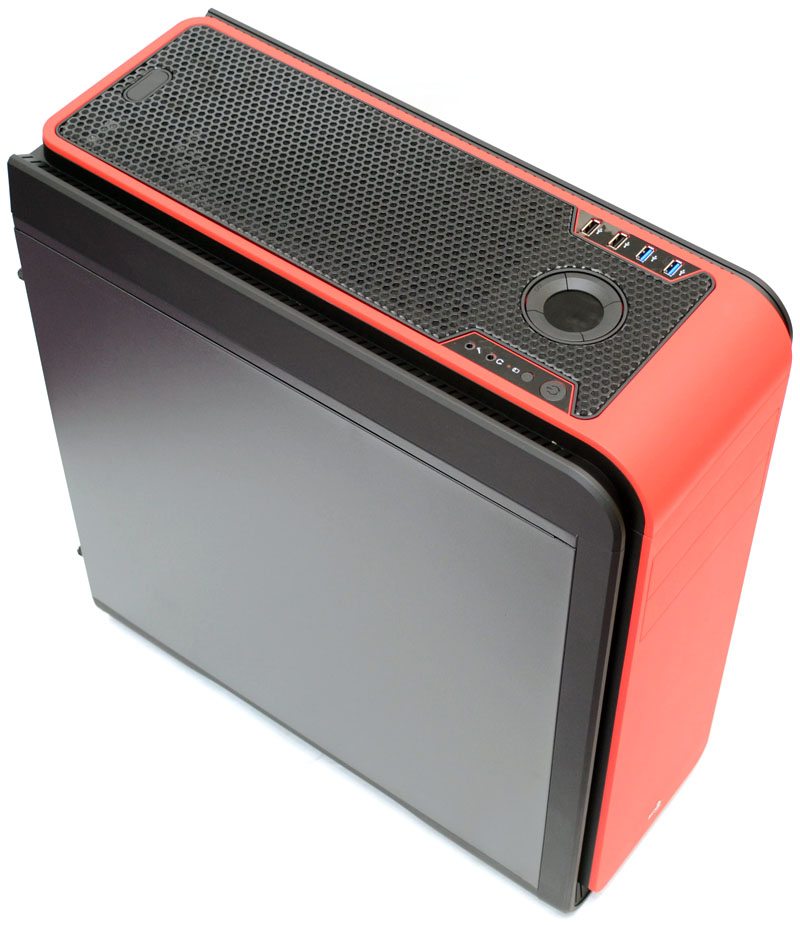
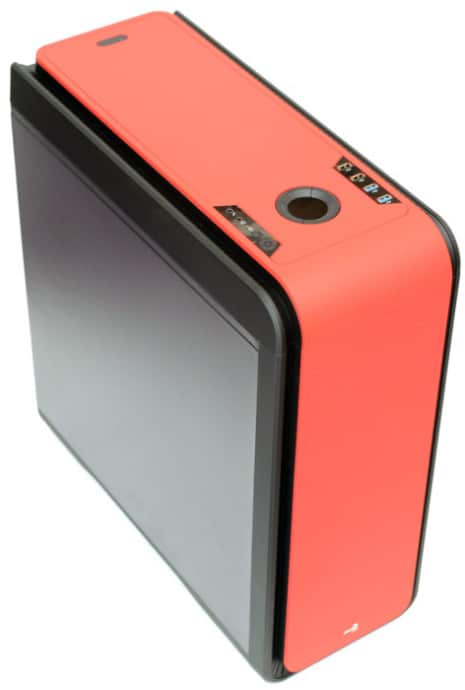
The front panel is really nicely finished with a soft leather-touch material in bright red. It may be a little too red for some, but I do like it and there are several other colour options available to suit individual taste.
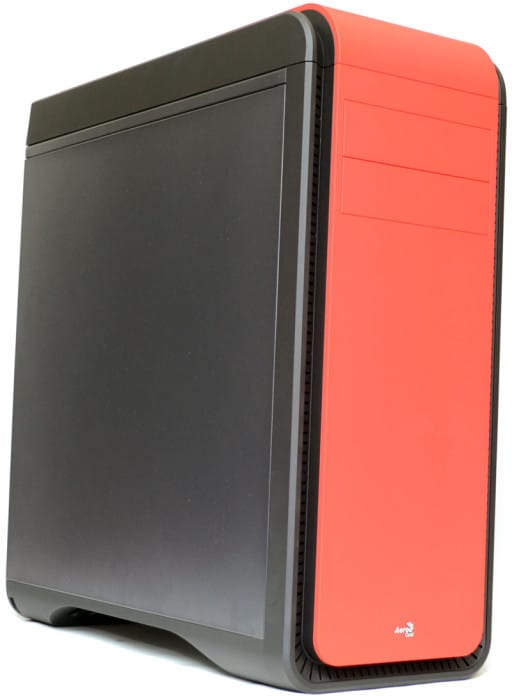
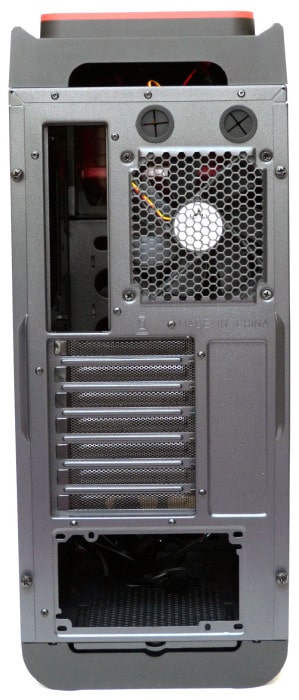
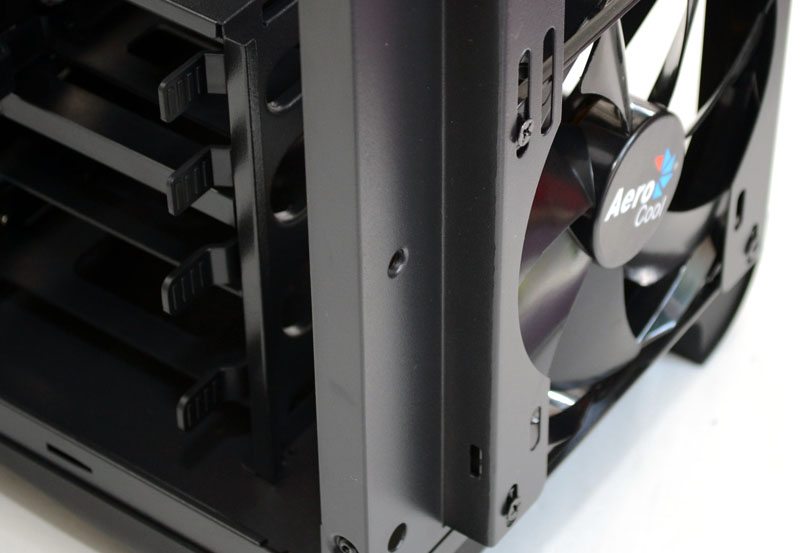
Around the back you’ll notice the top panel is raised to allow room for a top mounted radiator or extra fans. The back panel features two routing grommets, a 120mm fan mount, seven ventilated expansion slot covers and a bottom mounted PSU with dust filter.
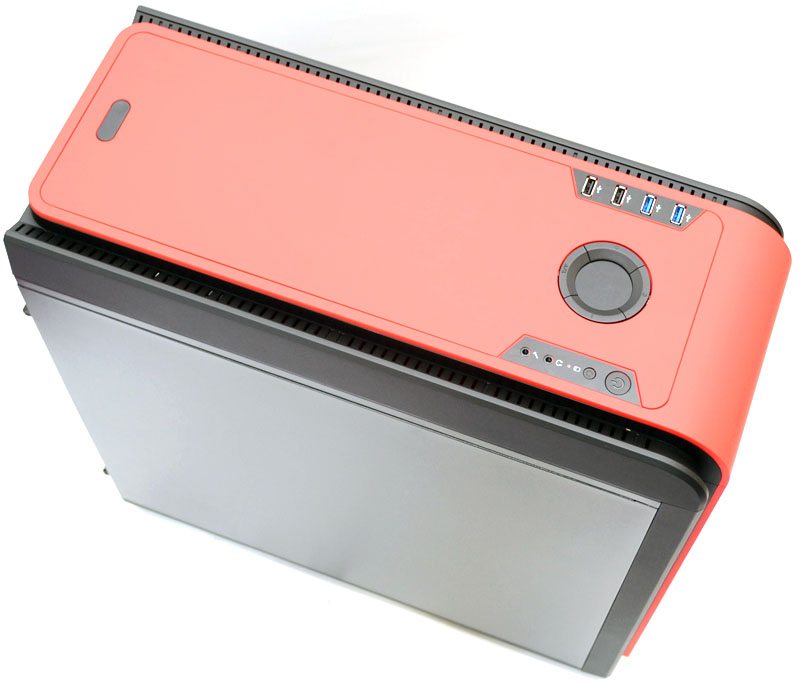
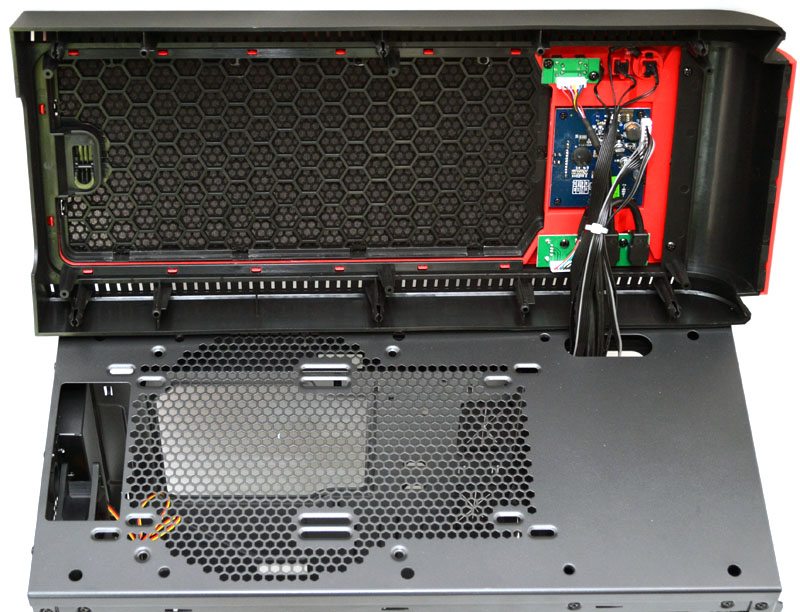
The top panel has all kind of stuff going on; at the front we’ve got a four USB ports (2 x 3.0 and 2 x 2.0), a fan controller / temperature read out hub with multi-colour LCD display as well as the usual power, reset and HD audio ports.
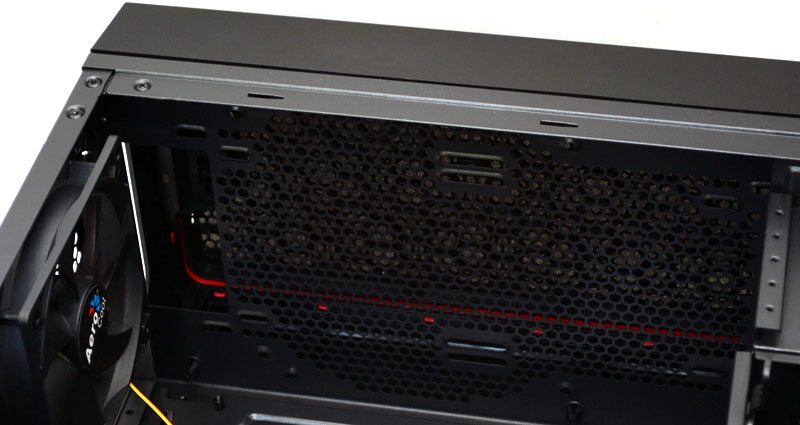
A button at the back allows you to easily unlock the flat top cover and access the interior fan / radiator mounts. Elongated screw holes allow for different fan spacings to improve compatibility and a big cut-out near the back allows you to pass through the pump of an AIO water cooler.
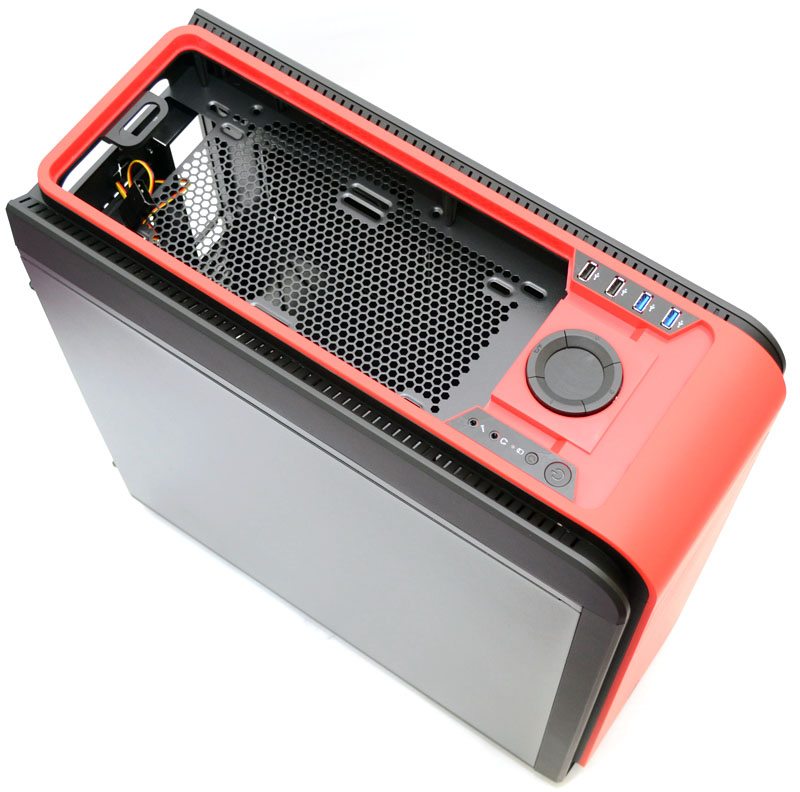
The ventilated top panel clips in easy enough and allows you access to top panel airflow.
A curved underside panel forms two full width feet to provide a stable base for the chassis, whilst four tough rubber grips should help keep the chassis from sliding around on harder surfaces.
The PSU dust filter slides out from the back of the chassis for easy maintenance.
Interior
The interior of the DS200 is really nicely laid out, with a large CPU cooler mounting cut-out on the backplate and a pristine all black paint job, something will look really nice should you invest in the model with the window side panel.
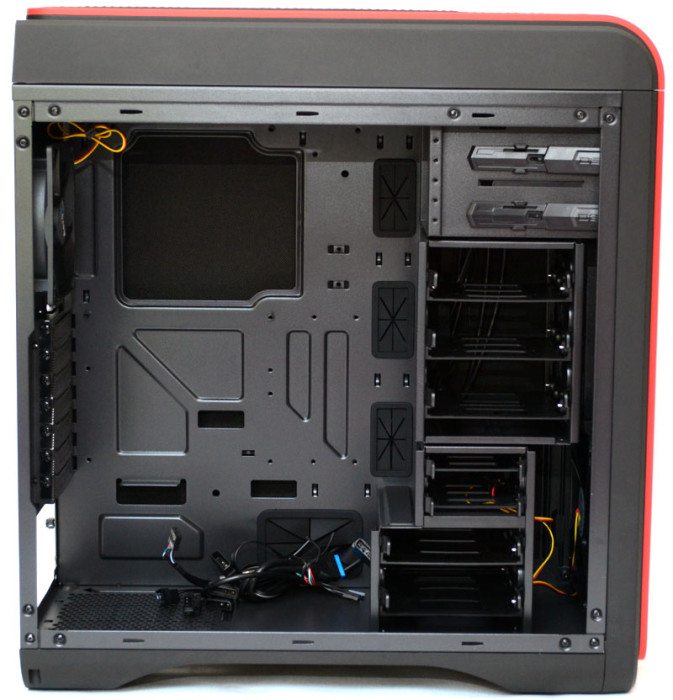
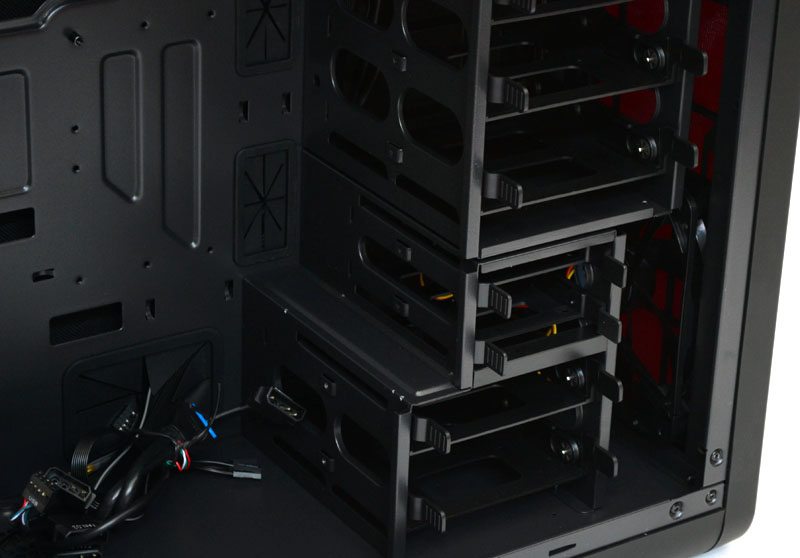
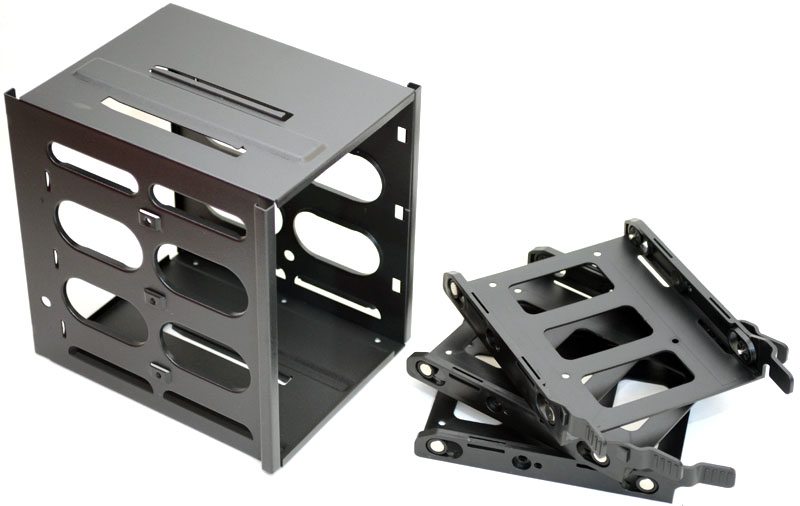
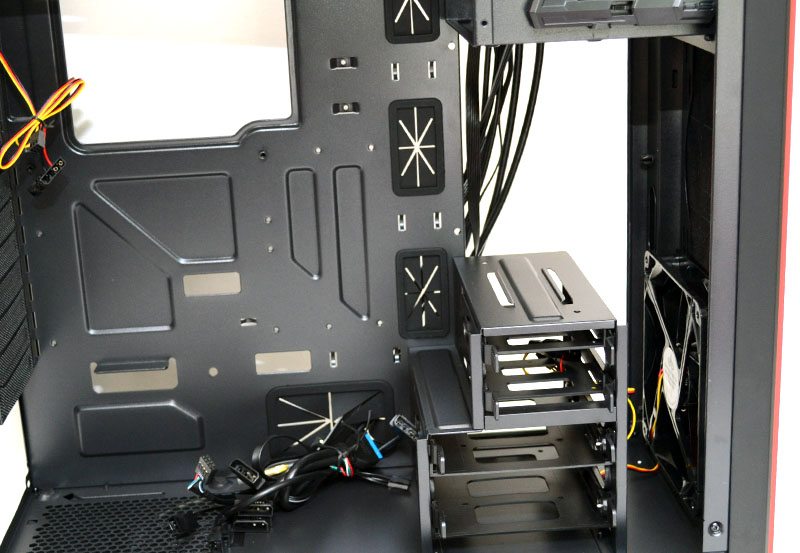
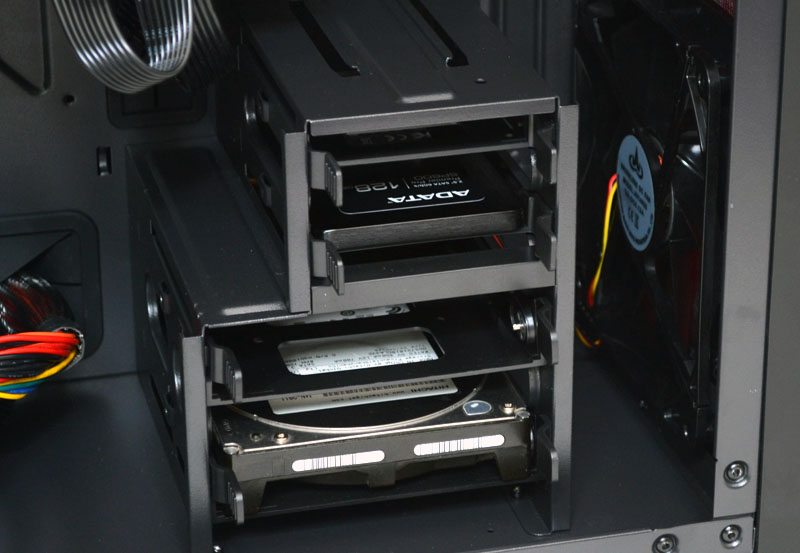
There are three hard drive bays in total; the bottom one supports 2 x 2.5″ or 3.5″ drives, the middle one supports 2 x 2.5″ drives and the top one supports 3 x 2.5″ or 3.5″ drives. The top drive bay is fully removable, whilst the bottom two are permanently fixed. The offset nature of the top two allow for longer graphics cards.
The bottom drive bays are set away from the front panel, allowing room for radiators, remove the top bay and you’ll easily get a double height water cooling radiator in here.

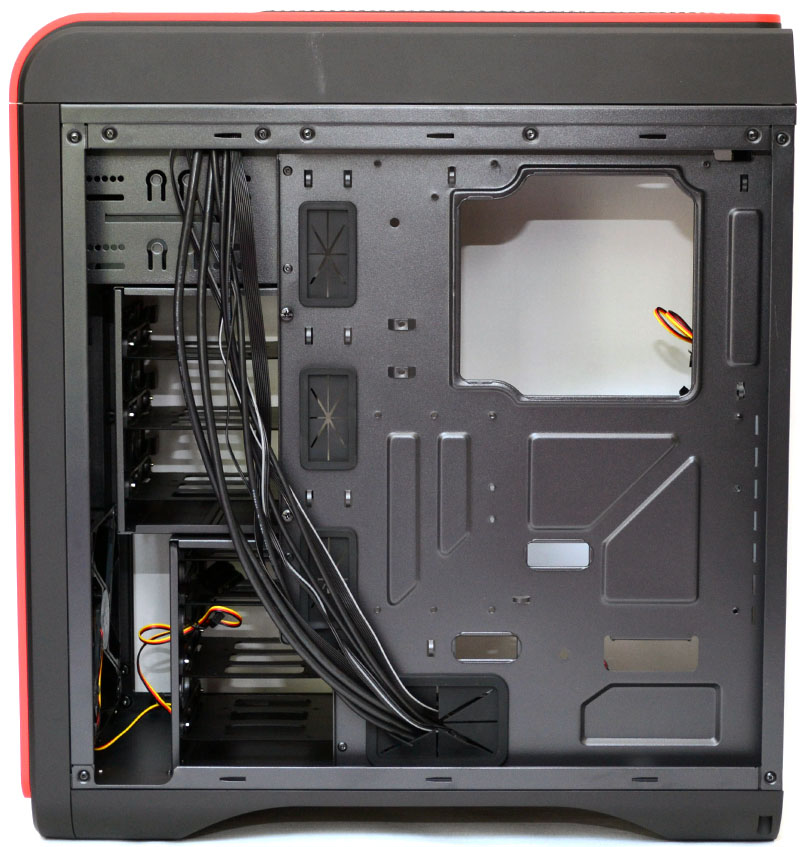
The interior of the chassis is fitted with several high quality rubber grommets for cable routing.
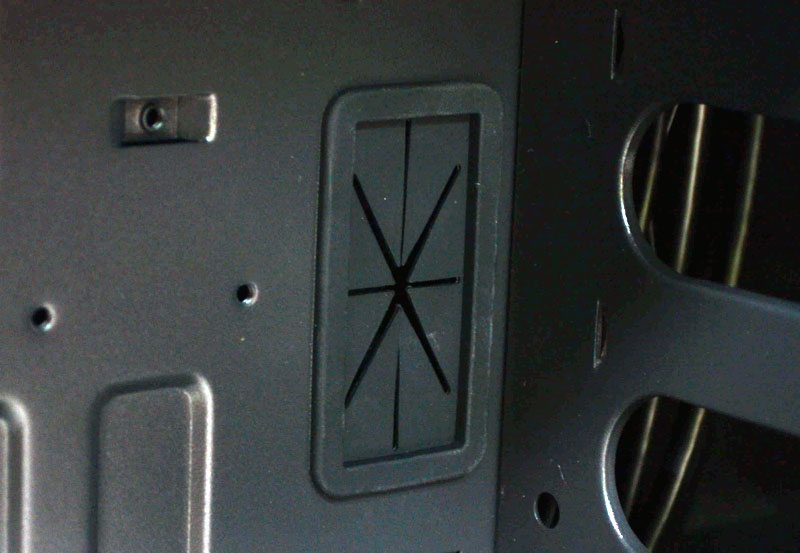
In the back you’ll find a 120mm fan pre-installed with ample clearance above and below it to allow for 120mm water cooling radiators. The expansion bays feature thumb screws and seven ventilated and reusable covers.
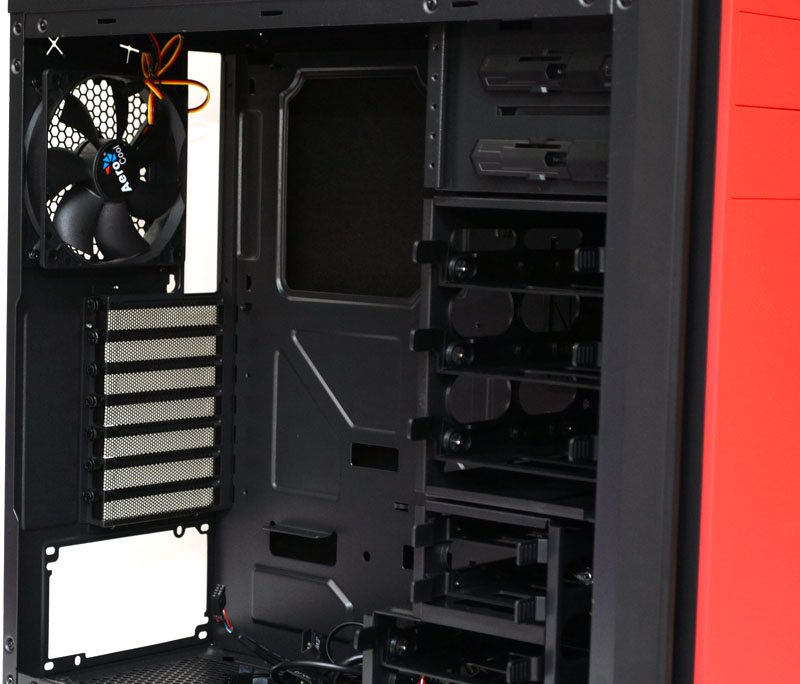
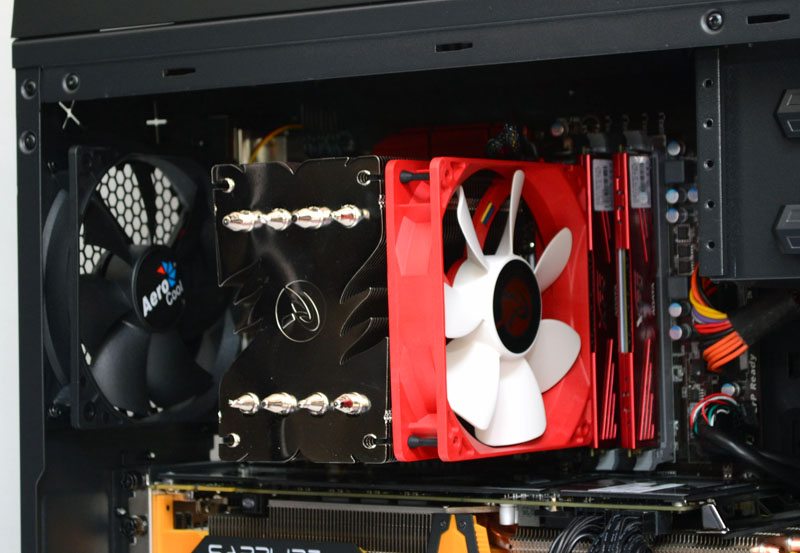
Plenty of clearance above the motherboard for a rack of fans or a slim radiator.
Around the back you’ll find loads of space for cable routing, as well as several cable tie loops to help secure everything in neat and tidy.
The top hard drive assembly can be removed by taking out two easily accessed thumb screws at the back.
With the bay removed you can fit a huge graphics card in there as well as a front panel radiator.
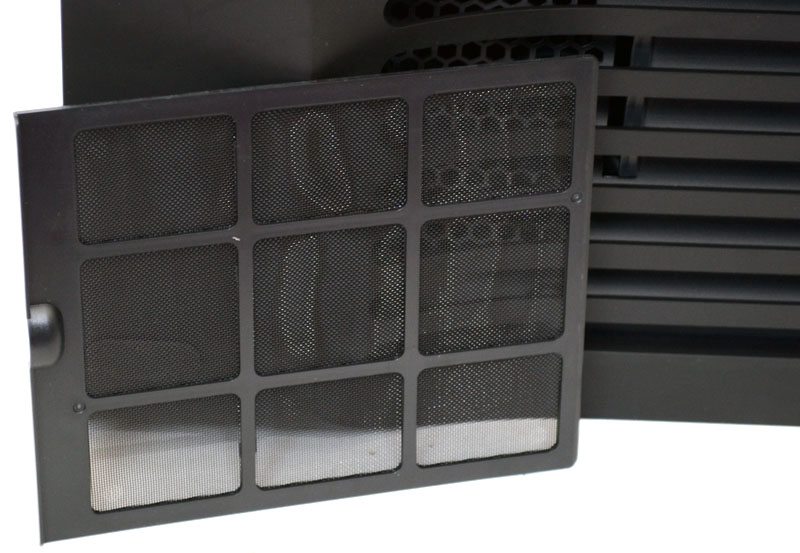
The front panel features ventilation on three edges to feed the front fans and behind that is a high quality clip-in dust filter to help keep things nice and clean on the interior.
Behind the filter you’ll find a single 140mm fan with room for a second, or of course related sizes of water cooling radiator.
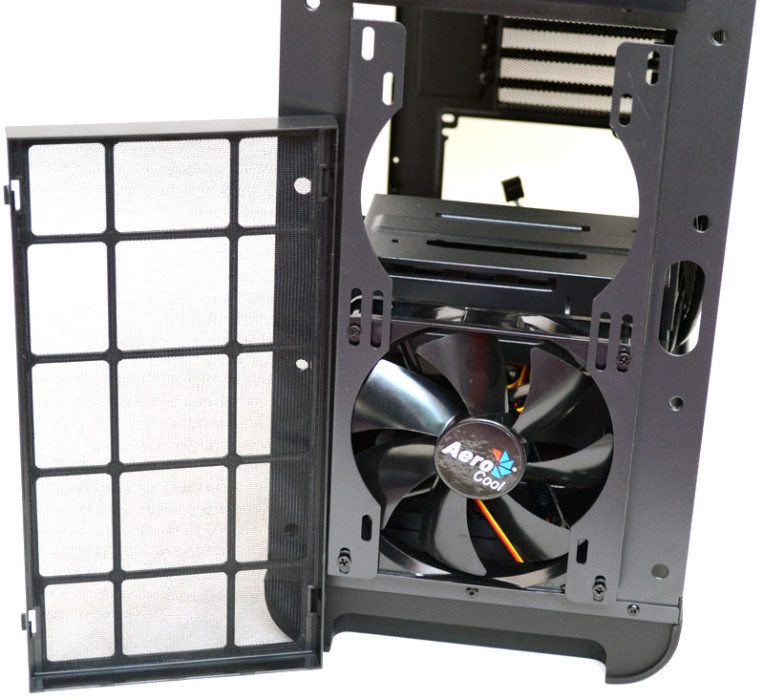
The front fan / radiator mount pushes out from the main chassis, allowing a little extra clearance without conflicting the hard drive bays.
The top cover can be completely removed, but it means tracking the cables through the top cut-out. Here you will find room for two 120mm or 140mm fans, up to a 280mm radiator or if you just want maximum air cooling, you can install a 180mm fan in the top.
Both side panels are incredibly durable and heavy. They’re both made from thick cut steel and feature a very heavy-duty sound dampening material.
Complete System
Total build time on the DS200 was just twenty minutes, it was a quick and pain free installation overall and the case is an absolute joy to work with.
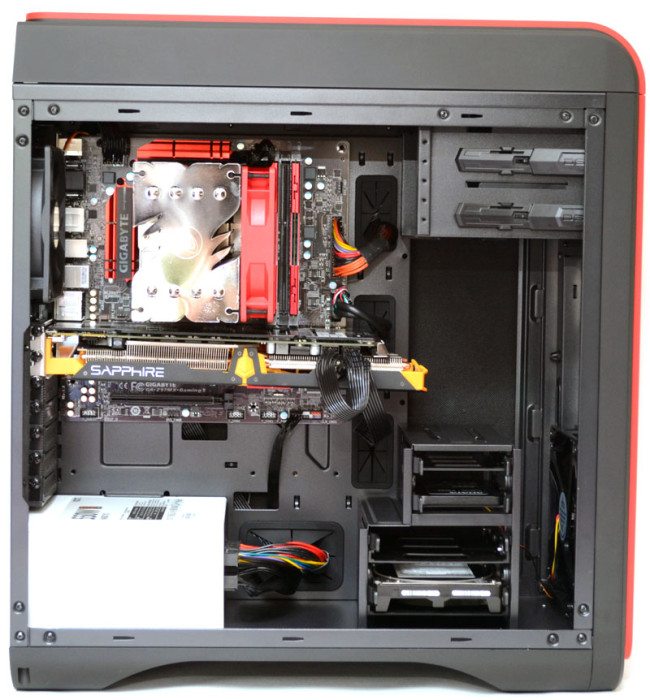
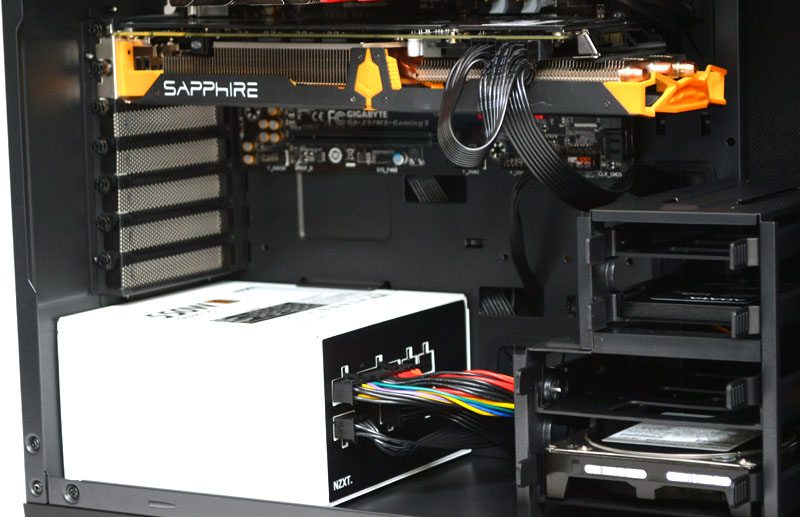
I stripped out the top hard drive bay to make room for our Sapphire R9 270X which would have conflicted with the bays. However that still leaves us with four hard drive bays in total and that’s more than enough for most builds.
There is loads of room for our graphics card to breath and while we couldn’t get two of these Sapphire cards in here due to their massive cooler that extends off the back, there is easily enough room for a multi-GPU configuration and wider cards such as the new Asus models.
CPU cooler clearance is really nice too, the Raijintek Themis only just fit, but it’s a lovely colour match for the chassis front panels and it really makes me wish we had the window side panel for the DS200.
Overall the build is really clean, took very little effort to put together and all the interior components are really nicely laid out with good airflow and filtering.
Final Thoughts
Price
The Aerocool DS200 isn’t all that cheap, clocking in at £74.38 from Scan.co.uk and this puts it along side some very fierce competition from the likes of NZXT, Coolermaster, Thermaltake, Nanoxia and many others, who all offer award-winning and very popular chassis within this price range. Aerocools case is certainly competitive on features, but for the most part it’s really down to a preference on style when choosing if this is the right chassis for you.
Overview
There is a whole lot to love about this case and it’s clear that Aerocool have put a lot of thought into the general aesthetics and feature set of the DS200. From a style point of view it’s fairly unique looking and the leather touch finish on the front and top panel really stands out from the competition, and the bold colour choices certainly help enhance that eye-catching appeal even further. The inclusion of two 5.25″ drive bay adaptors to allow an optical drive bay flip-cover or size adaptor for a card reader are really nice touches too, as they mean you don’t have to break up the colourful aesthetics when building your system. Then we have other stylish points like the colour changing fan-control and temperature readout on the front panel which is a nice way of breaking up the usually boring I/O panel and the thermal probe is super easy to attach to your CPU cooler other any other component you wish to keep an eye on.
Water cooling and air cooling support is great too, with full air filtering on the front, top and bottom panels providing clear airflow for a multitude of cooling configurations. There are only two fans pre-installed, which is a shame at this price point, but chances are that most people spending in this region will be investing in after-market fans anyway. Radiators are supported in the back, top and front of the chassis and with a little careful planning you could get a pretty serious custom loop unit in the DS200. The top panel is really nicely designed and I especially like that I can keep the flat cover on for a build that doesn’t feature top mounted cooling, but if I want to add a top 280mm radiator in the future, I can swap the covered and open up the airflow here.
The modular hard drive bays are a big win, but not without their downsides as only one bay is fully removable. The downside being that the bottom bays are moved further back in the case to allow more room for a front radiator, leaving us with no room to install a second Sapphire R9 270X; However I won’t hold that against Aerocool as the 270X we had is a pretty huge card.
The feature set is robust, we’ve got water cooling support, modular storage, two good quality fans pre-installed, a modular top panel, fan controller, thermal monitor, cable routing, sound dampening material pre-applied, dust filters and a soft touch finish, which go a long way to justifying the £80 you’ll be spending at retail.
“Aerocools DS200 is a perfect choice for those who want high-end build quality and features, but want to take a break from the usual big names in the industry. If you want something competitive that stands out from the crowd, then you’ll be very happy with what this chassis has to offer.”
Pros
- Superb build quality
- Stylish overall design
- Competitive range of features
- Built in fan controller
- Built in thermal monitor
- Sound proofed design
- Good radiator support
- Good choice of colours
Cons
- Bottom drive bays are not removable

Aerocool Dead Silence DS200 Mid-Tower Chassis Review
Thank you Aerocool for providing us with this information.


