Akasa Plato X Slim Fanless Chassis i5/i7 NUC Chassis Review
Peter Donnell / 8 years ago
Complete System
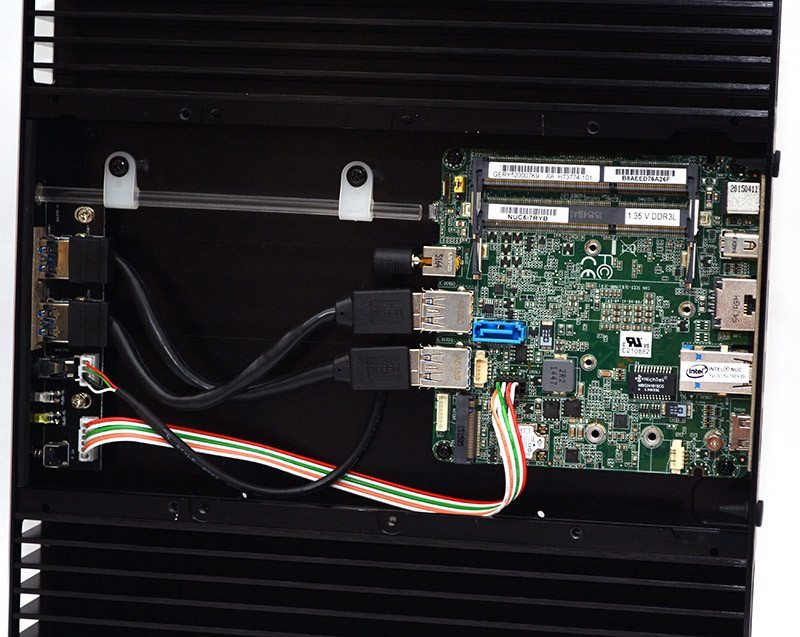
Installing the motherboard is very easy, just apply the thermal compounds to the CPU on the reverse side and hold the board in place with the four included screws. The pass through cables look a little cramped but were quite easy to fit. There’s even a small pass through bar for the IR sensor on the motherboard.
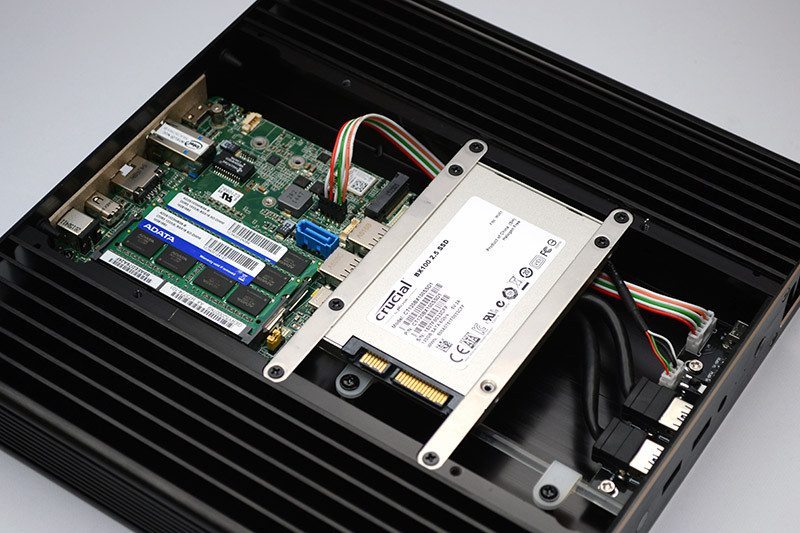
Of course, there’s room for an M.2 drive on this motherboard, but should you need to give your storage a boost, there’s a bracket included that’ll let you cram a 2.5″ drive in here too, making great use of all that extra space available. This is great for those building an HTPC solution, as you could have a fast M.2 for boot drive and a large capacity HDD or SSD here for storage.
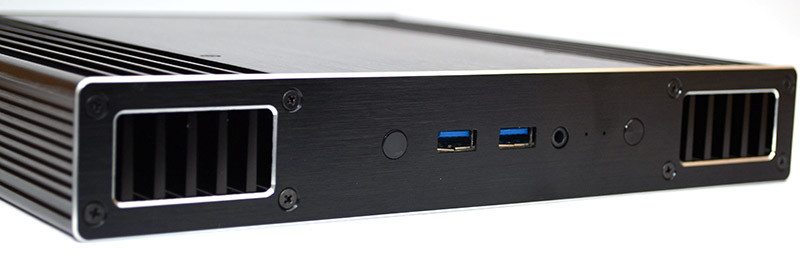
All panels back in place and we’re back to the chassis looking just as sleek as it did when I took it out of the box.