ASUS Z170I PRO GAMING (LGA 1151) Motherboard Review
John Williamson / 8 years ago
BIOS and Overclocking
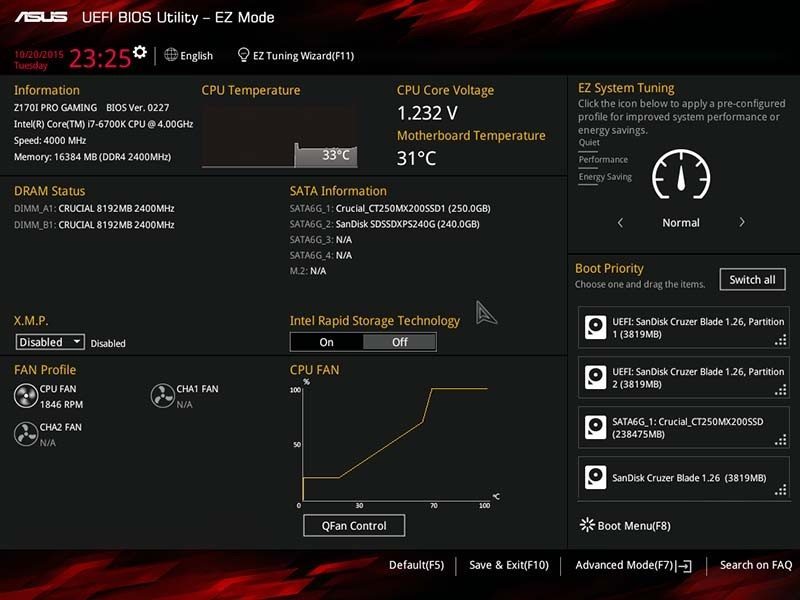
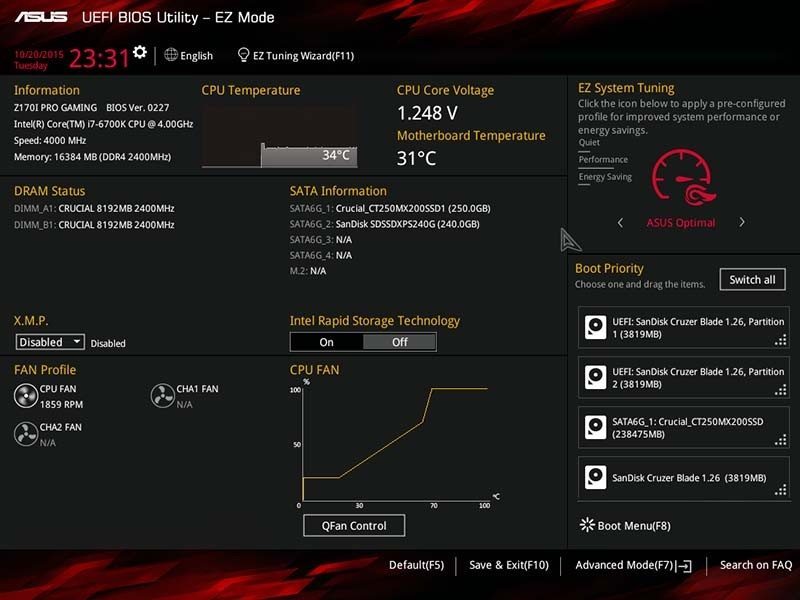
ASUS’s award-winning UEFI BIOS is remarkably simple to navigate and categorizes common tasks into the EZ Mode for beginners. Here, you can monitor the CPU core voltage, temperature and adjust the boot priority. Furthermore, XMP is enabled within two clicks and each fan’s RPM values can be tweaked using the QFan control software.
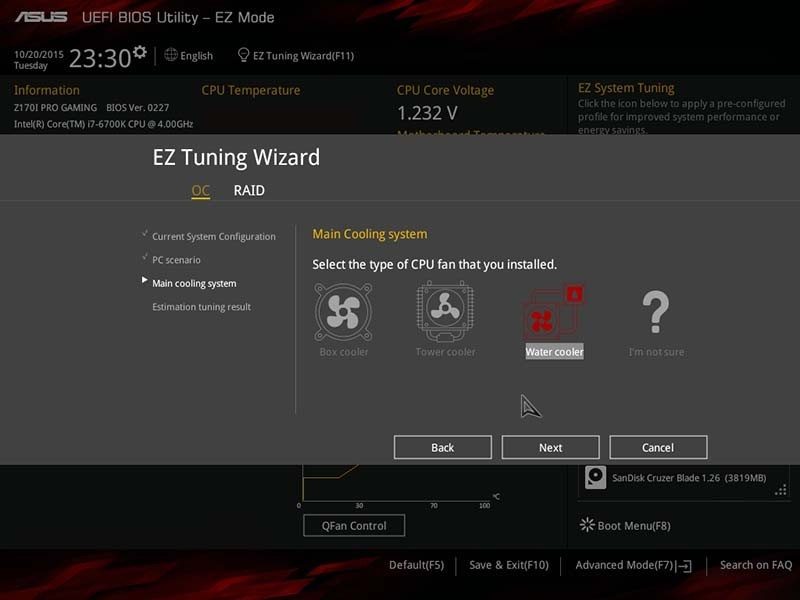
There is an EZ Tuning Wizard which asks a number of basic questions about your system and sets parameters to automatically set a sensible overclock. Although, finding the limit of your CPU manually and adjusting the voltage is highly recommend. Nevertheless, it’s a great option for users who feel uncomfortable with the overclocking process.
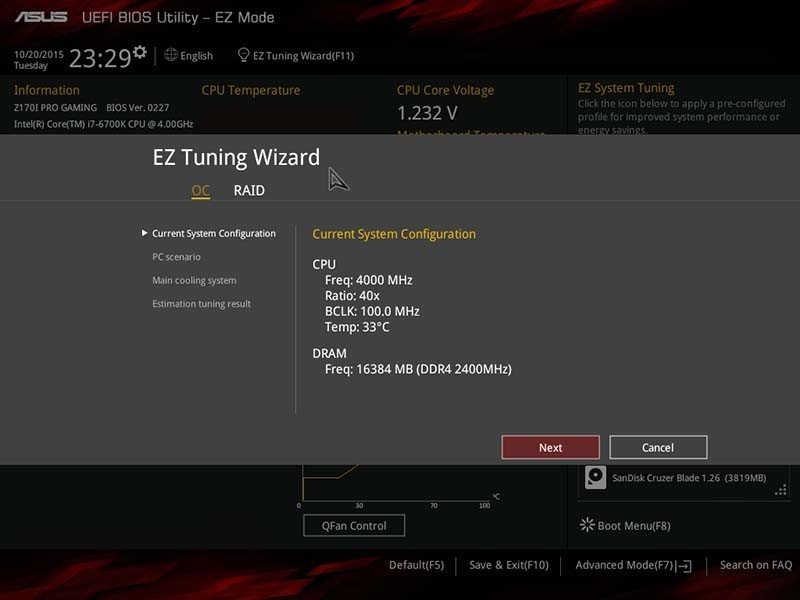
The BIOS gauges the required performance enhancements depending on your typical usage scenario.
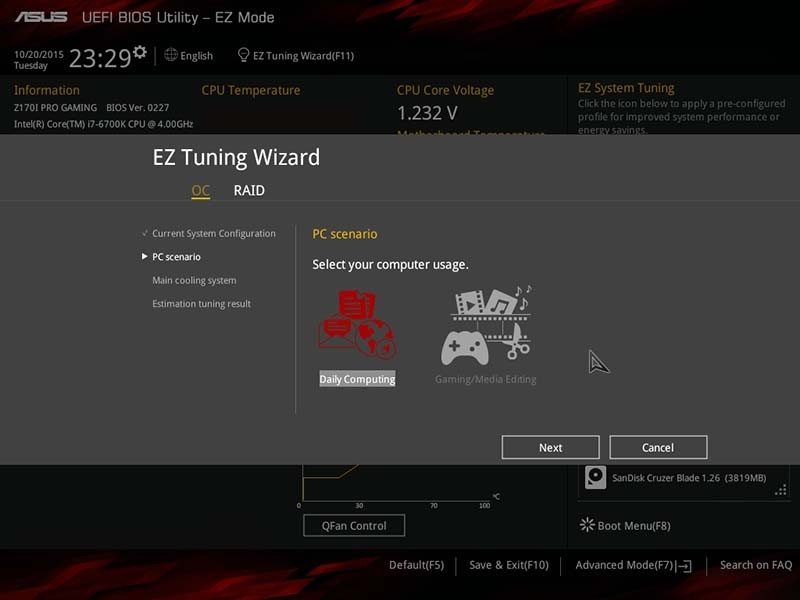
Once complete, you need to select your system’s cooling apparatus which gives an indication about typical load temperatures.
Then, the software explains the CPU and memory performance enhancements in a statistical way.

ASUS’ Q-Fan control is an absolutely wonderful addition and contains a number of profiles designed to optimize fan RPM values. The options means you can prioritize silence over raw cooling performance or allow the BIOS to determine a suitable balance. Additionally, the BIOS features a manual mode and graphical chart to easily set a customized fan curve.
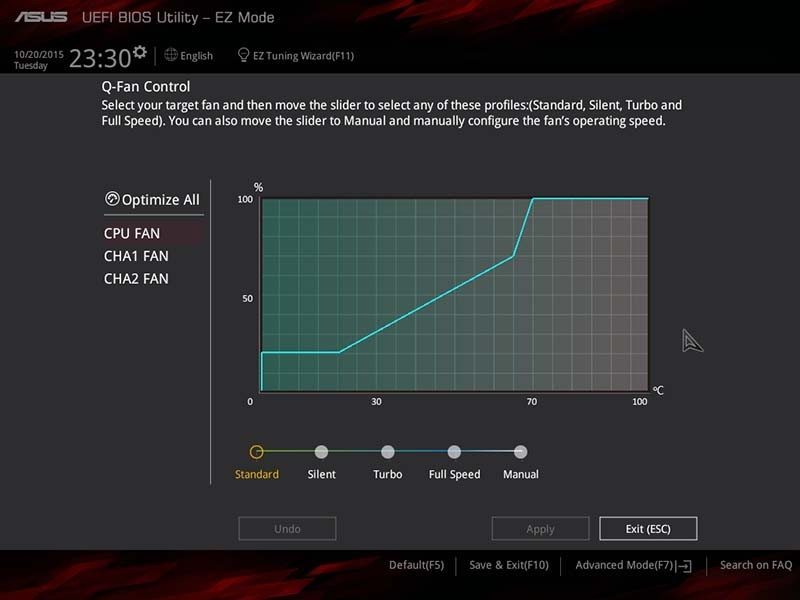
The BIOS utilizes the three default profiles which alters noise, power consumption and performance.
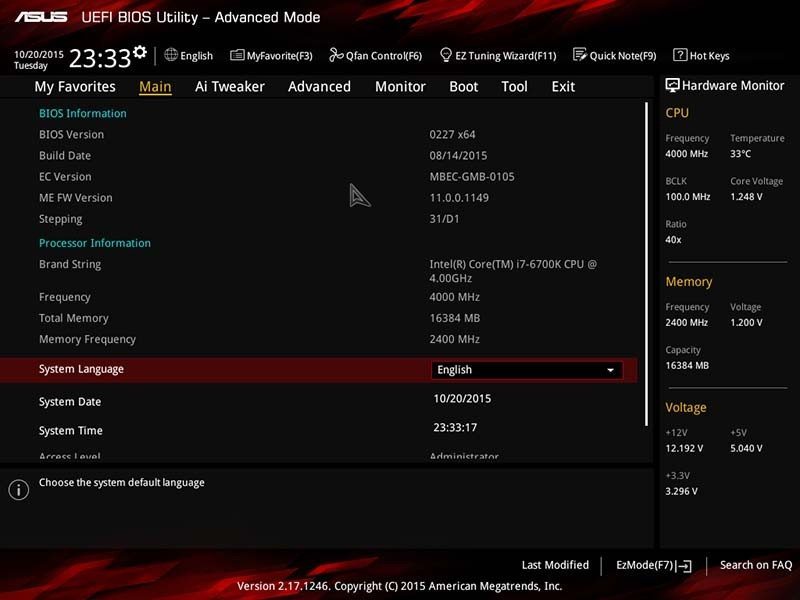
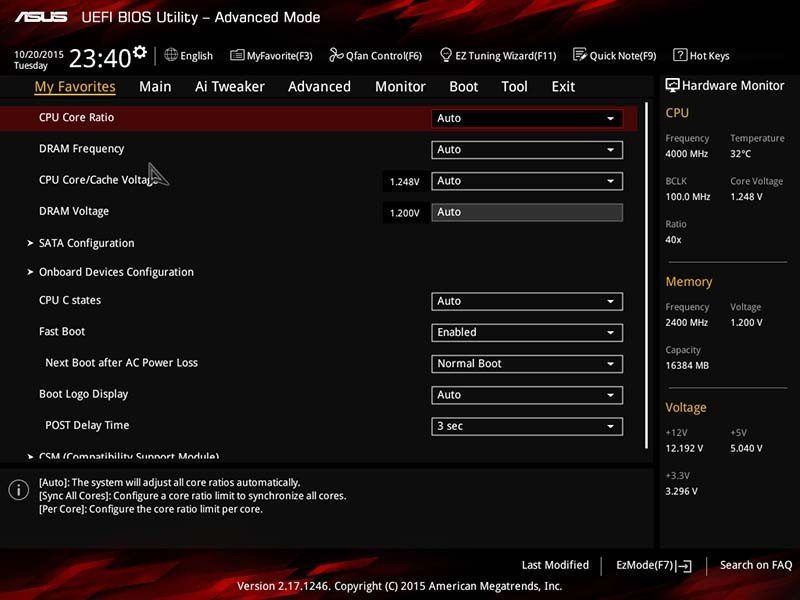
The first primary tab lists key information about your system, the BIOS revision and other rudimentary tasks. Also, the Hardware Monitor on the right is beautifully positioned and constantly in view while adjusting settings.
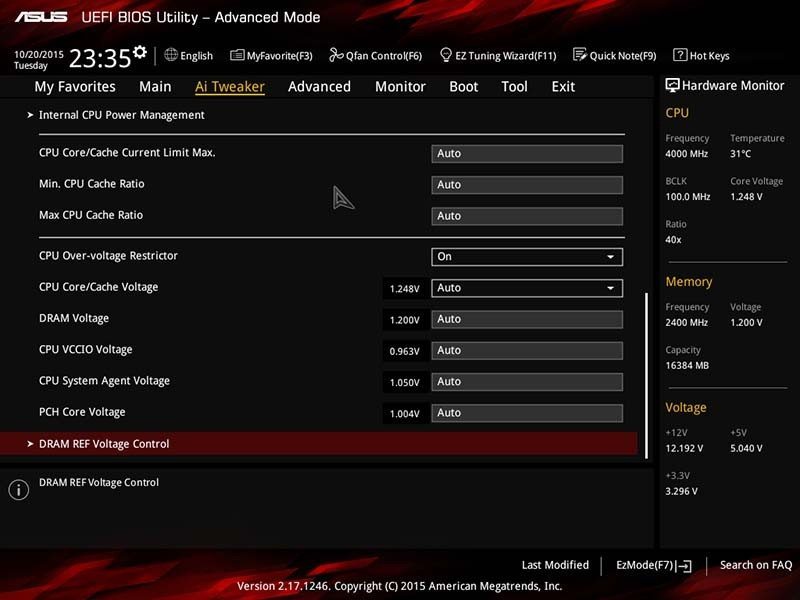
In terms of overclocking options, the AI Tweaker is extraordinarily detailed and features a number of advanced overclocking tweaks. While this isn’t necessary for most people, the BIOS caters to extreme overclockers without making the menus too daunting.
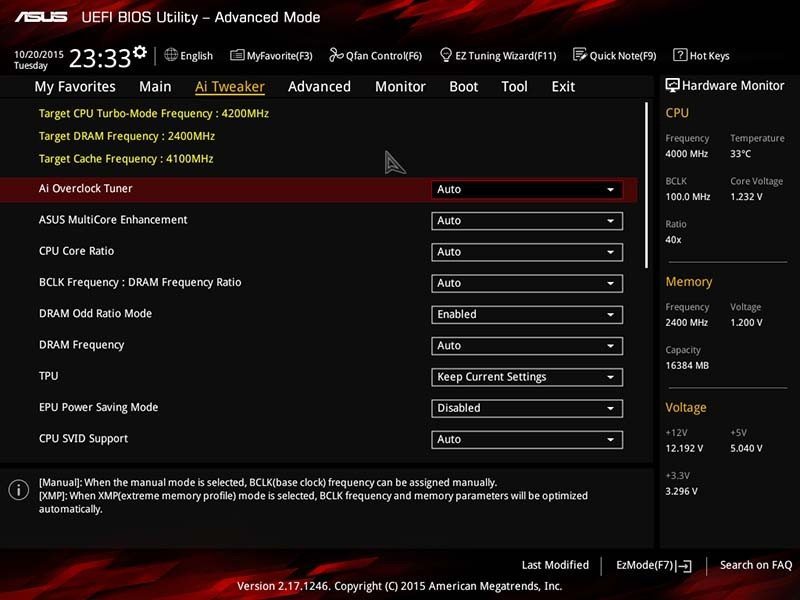
Further down the menu is a section for voltage control to maximize stability when benchmarking and making acute BLCK adjustments.
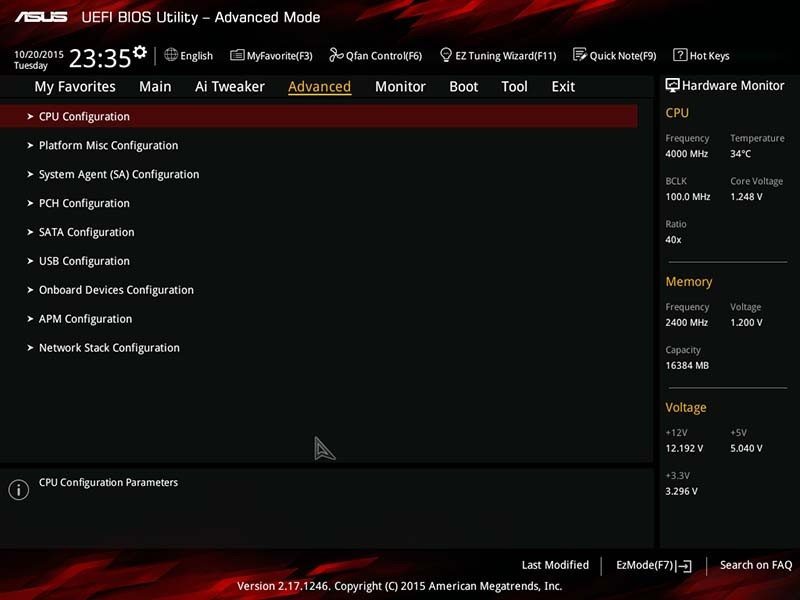
The Advanced tab houses a number of settings if you want to change the attributes of many integral devices. Personally, I would leave the majority of these on the default setup.
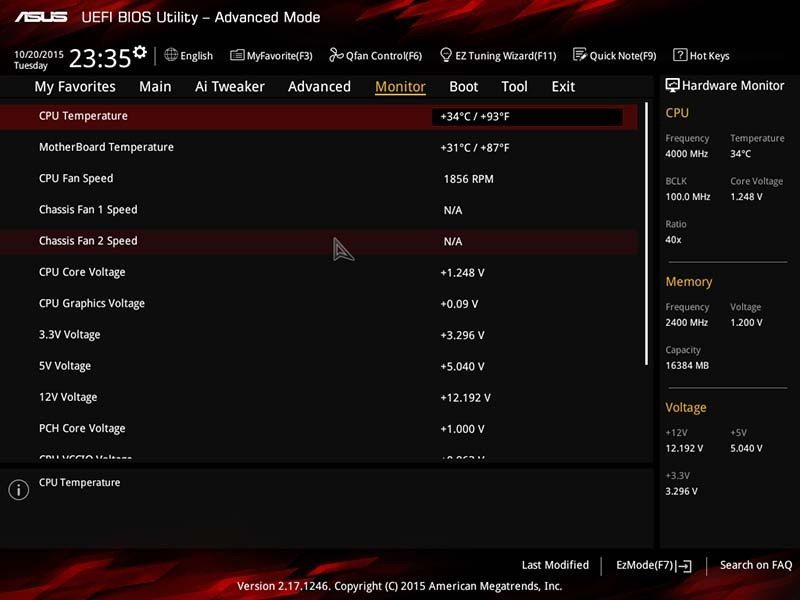
The Monitor tab displays a comprehensive array of voltages, fan speeds, and various temperatures. This is useful when performing diagnostics and maximizing your CPU’s potential.
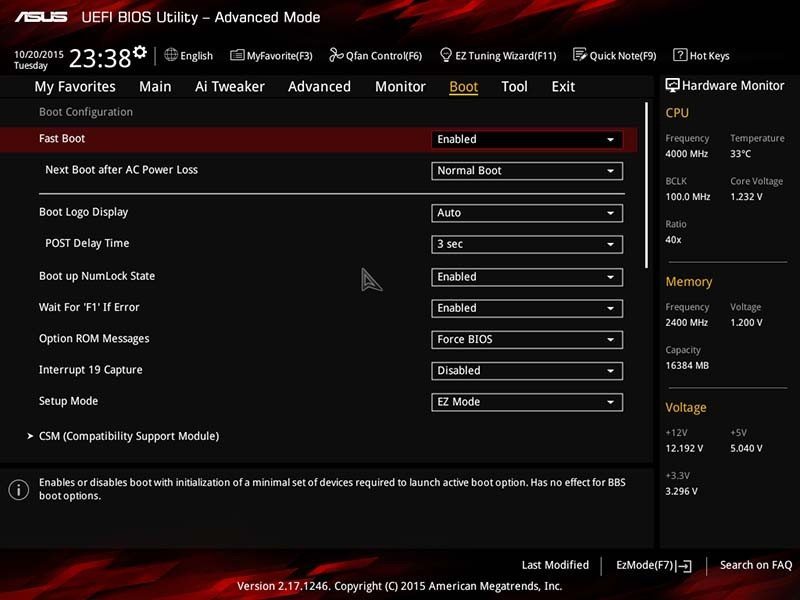
Disabling Fast Boot is recommended if you spend a lot of time in the BIOS working towards a very ambitious target frequency.
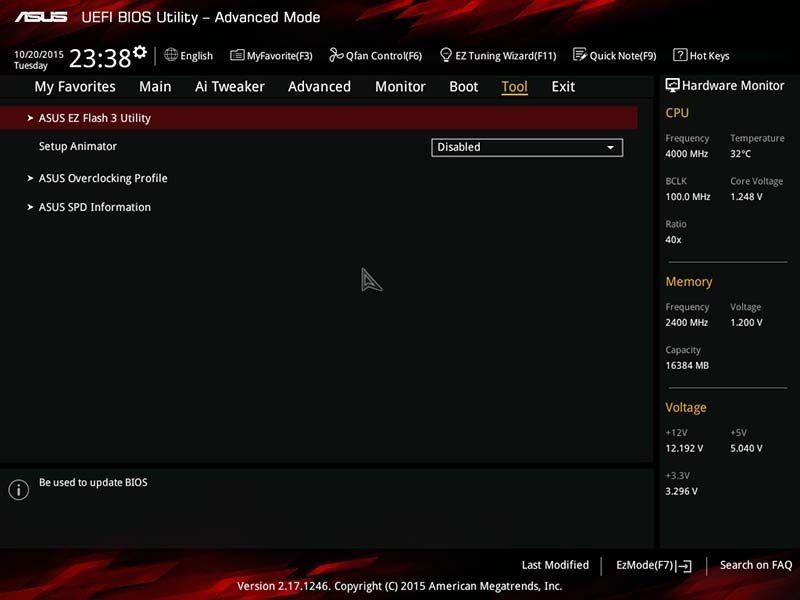
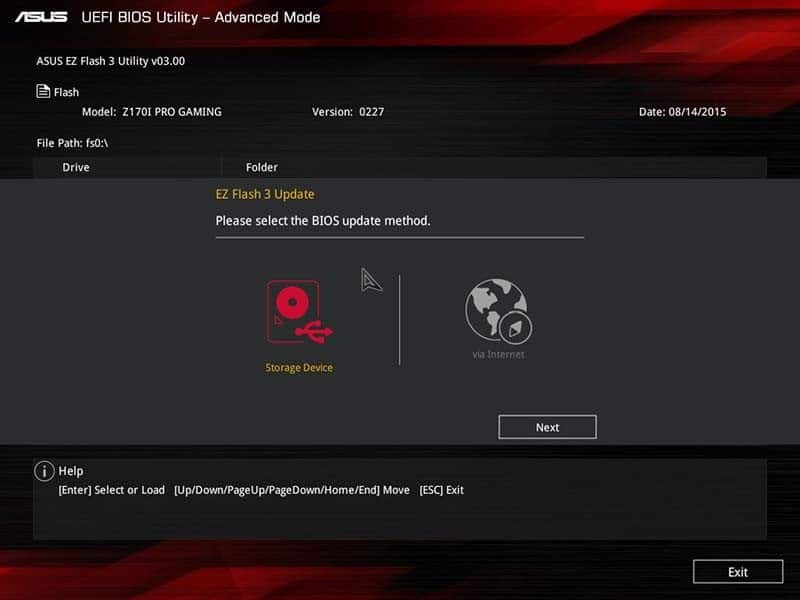
Updating the BIOS via ASUS EZ Flash 3 Utility is a breeze and should only take a few moment to complete.
You can either manually download the BIOS file and transfer it to a USB stick or proceed with the update directly over the internet.
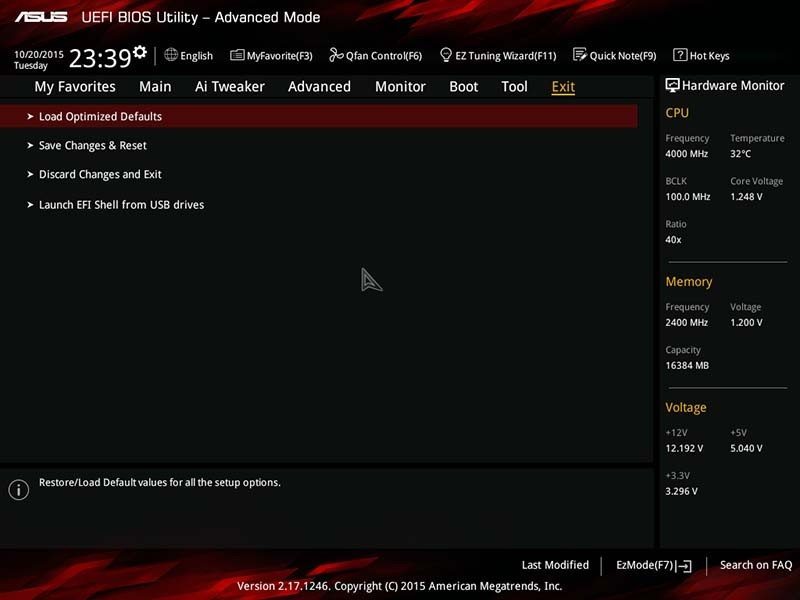
The Exit tab allows you to restore the BIOS to default values or save any changes.
In addition to the predefined tabs, you can fully customize the Favorites menu to quickly access essential commands. This is fantastic if you only want to focus on the Multiplier, core voltage and CPU monitoring to perform a fast yet stable overclock.
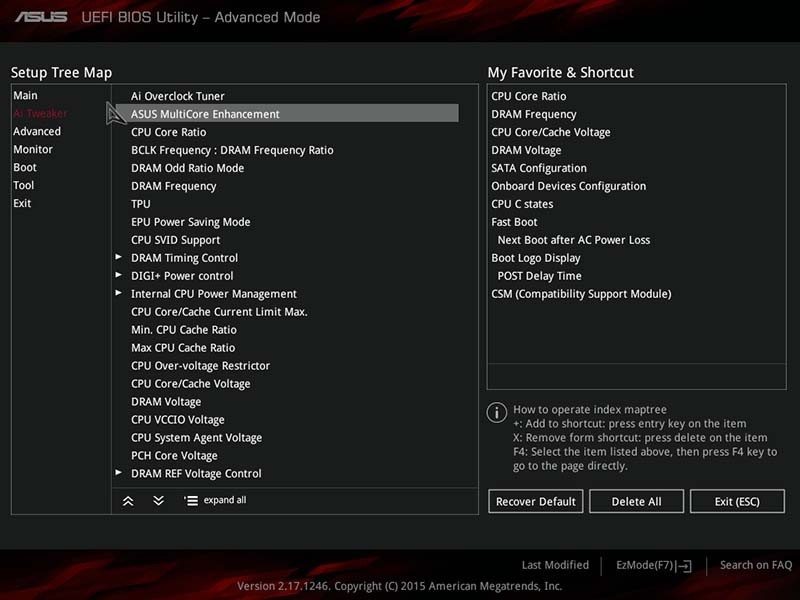
If I was using the motherboard on a daily basis, the Favorites tab would dramatically reduce the average time when fine tuning a manual overclock.
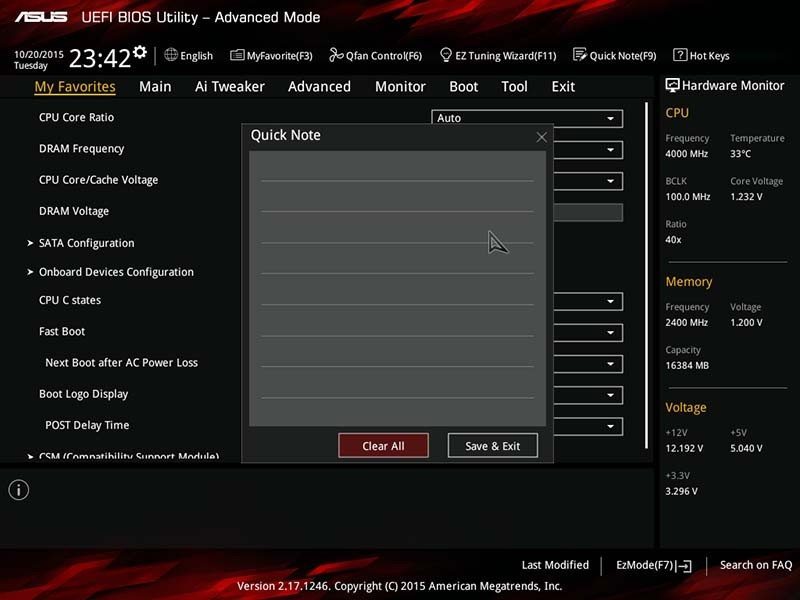
The Quick Note overlay is incredibly useful when noting down small voltage adjustments and memory timings.
Overclocking
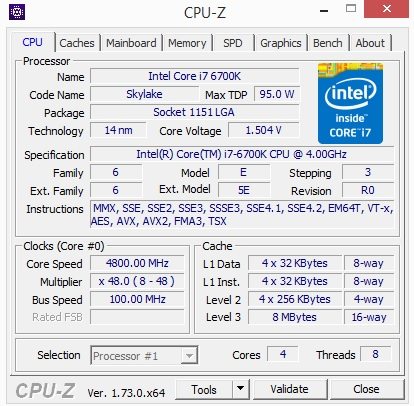
The overclocking procedure is a doddle and revolves around a multiplier increase of x48 and core voltage bump to 1.504v. I did attempt to reach a frequency of 4.9GHz but this was beyond the thermal limitations of this chip due to too much voltage. Additionally, the CPU requires over 1.5v to remain stable but this follows the pattern of the latest motherboards we’ve previously tested. Thankfully, the process is so simple, anyone could do it with a patient and analytical approach.