ASUSTOR AS6202T Enthusiast 2-Bay 4K-Capable NAS Review
Bohs Hansen / 8 years ago
A closer look
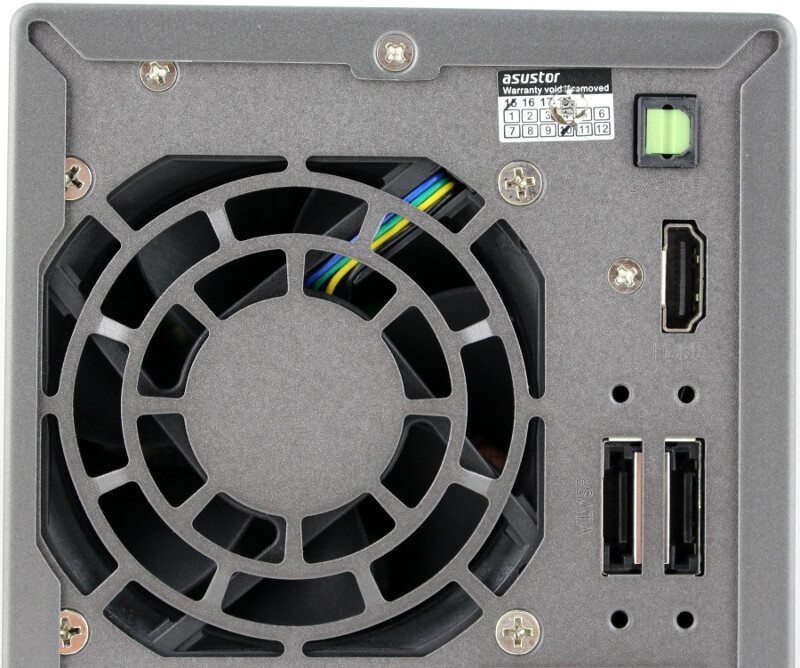
It is time to take a closer look at the AS6202T NAS, starting with the rear. The media connection is located at the top next to the system fan. We get an SPDIF audio connector as well as an HDMI 1.4b connector that supports up to 4K resolutions.
The two eSATA ports are located right below the HDMI port. I love this part as eSATA is my preferred method of using portable storage. It removes the bottleneck created by USB conversion and improves compatibility with apps that don’t work well with removable storage devices. Having two eSATA ports available is a big bonus for me.
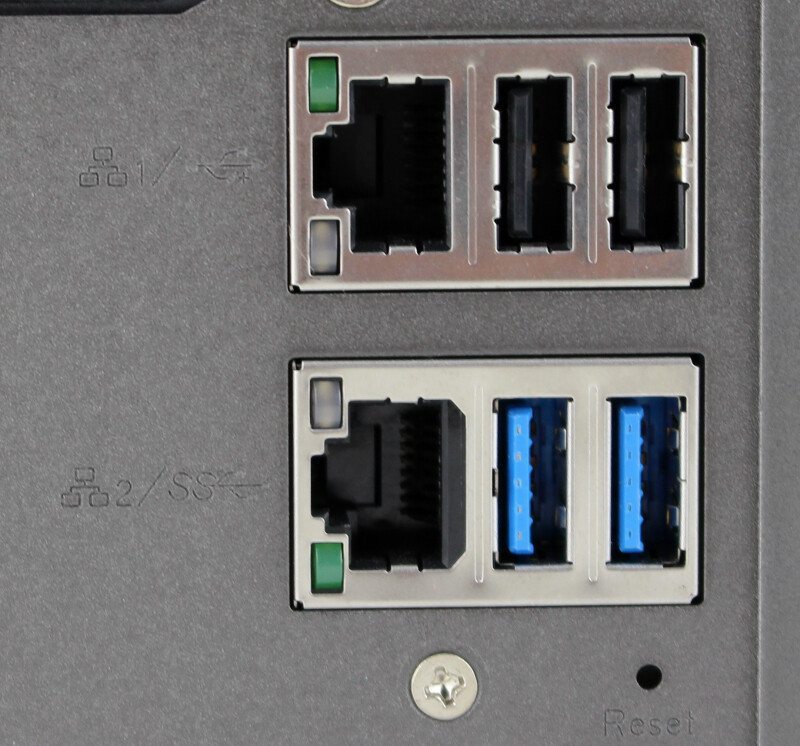
Just because the NAS has two eSATA doesn’t mean that it doesn’t feature plenty of USB ports too. There are two USB 2.0 ports on the rear that are perfect for use with keyboard and mouse and two USB 3.0 ports which are optimal for modern storage drives. You can naturally also connect all sorts of other devices such as printers, cameras, network dongles, tv dongles, and much more.
Next to the USB ports are the two Gigabit Ethernet RJ45 LAN ports that support link aggregation for faster speeds or fail-over protection.
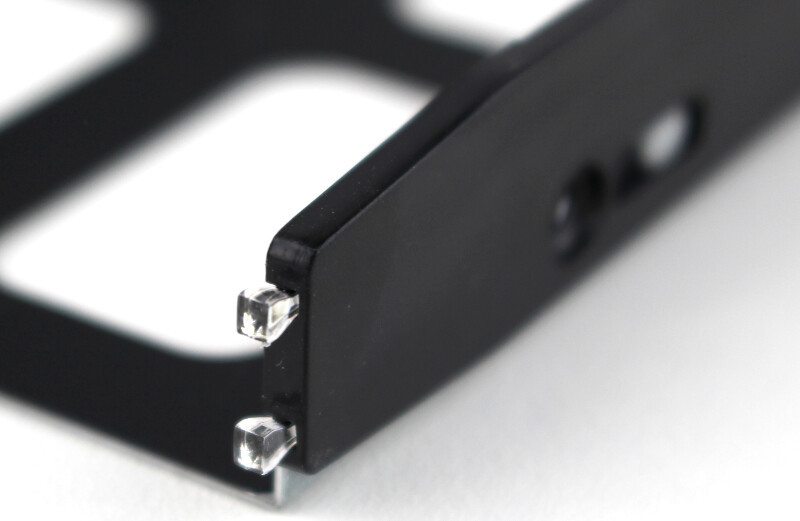
The front of the NAS has more features then you’ll see at the first glance because it’s been cleverly integrated into the overall design. Instead of having a long row of LEDs on the side, ASUSTOR distributed the LEDs into the features they belong to. The power button at the top has an integrated LED strip and the overall activity LED strip is located right below it. The two LAN ports are located on the rear, where they also have LEDs, so their LEDs are located by themselves. At the bottom is another USB 3.0 port with surrounding one-touch copy button and integrated LED strip. The drive trays have two LEDs each for power status and activity.
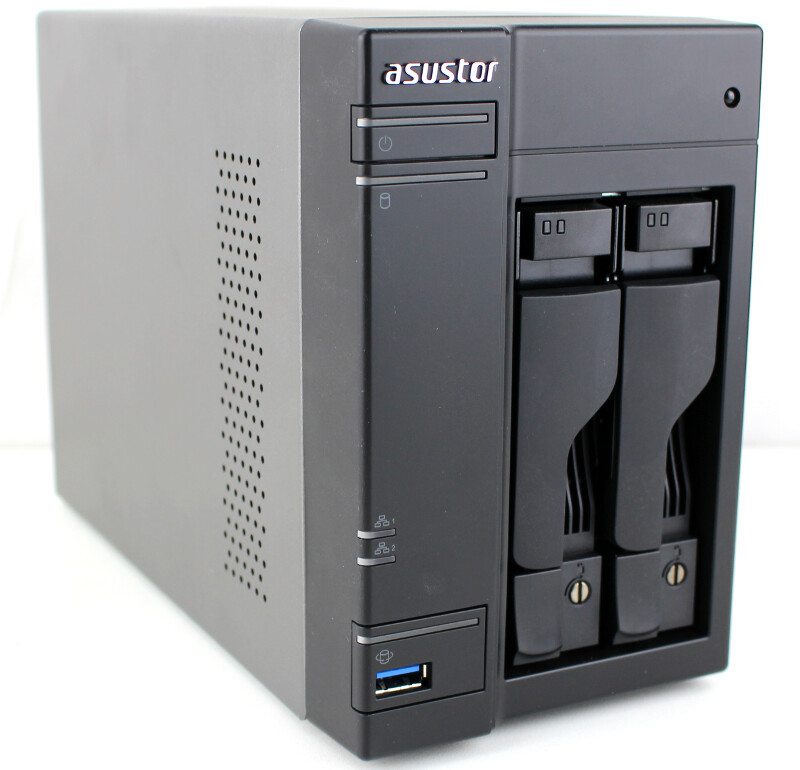
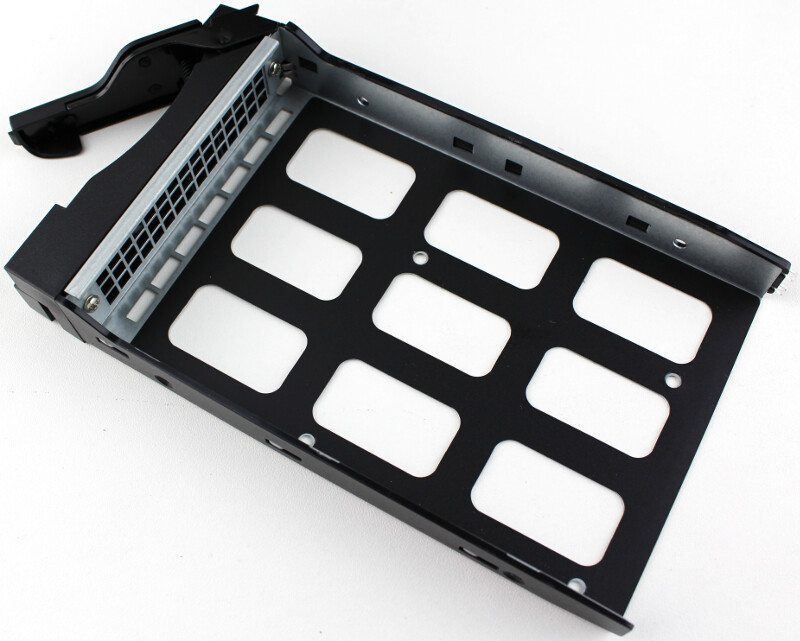
This is a premium NAS and that also shows on the drive trays. The are made from sturdy metal and covered with plastic and rubber to protect the drive and give them their appearance. The front allows for air intake to cool the drives.
The previously mentioned LED lights in the drive trays aren’t actually in the trays, but on the backplane inside the NAS. The light is just transferred to the front through the tray.
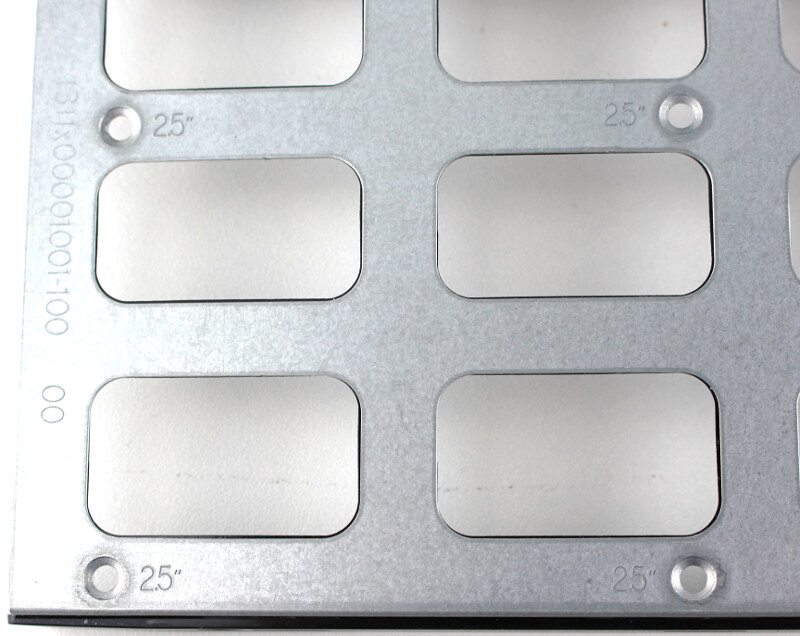
You can also mount 2.5-inch drives in these trays, increasing the available storage options a lot. Whether you want to use SSDs or HDDs, 2.5-inch or 3.5-inch, you can.
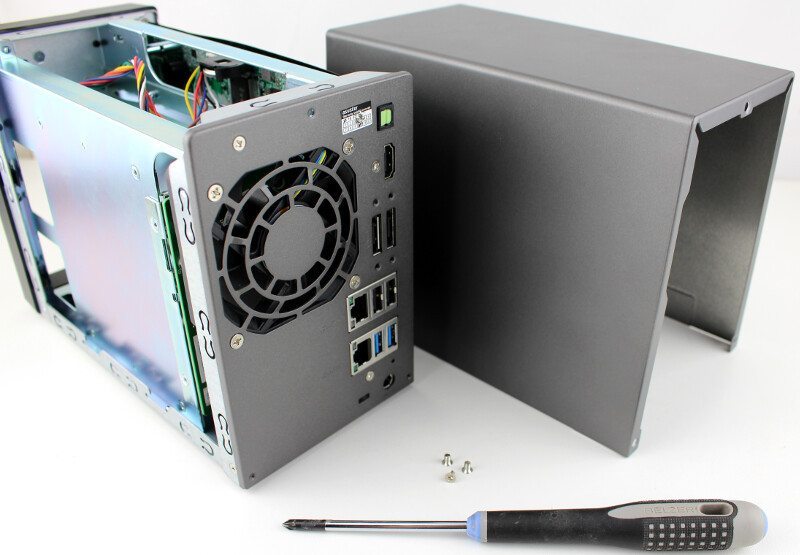
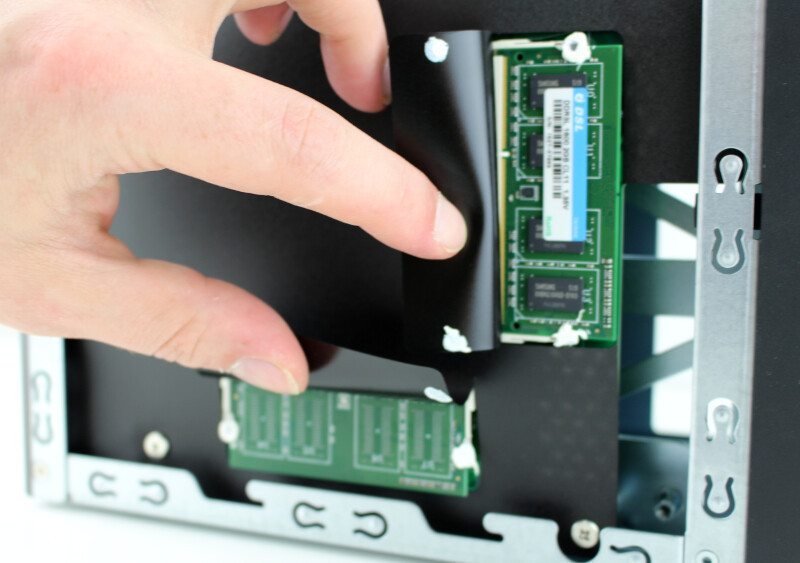
The AS6202T already comes with 4GB of dual-channel DDR3 memory, but you can upgrade to more should this be too little. That process is truly easy with this NAS as it only requires you to remove three screws from the back and slide the cover open.
Once open, turn it to the side and bend back the protective covers over the memory modules. The modules are secured with adhesive, so removing them can be a bit tricky. Be careful not to break the SO-DIMM brackets.
There is no need for any normal user to take it further apart, but we can do so easy too should we want to. The backside of the chassis is well secured with many screws, but once they are out, the rest is easy.
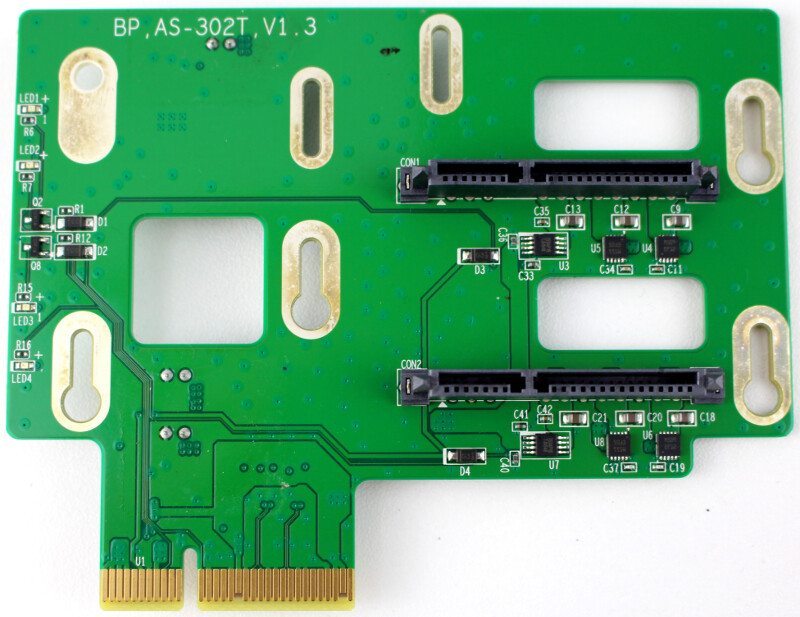
First, we remove the SATA bridge for the drives, a simple PCB with two SATA connector on one side and a few capacitors on the other side. The PCB also holds the LEDs for the drive trays.
Now we can remove the motherboard and have a closer look at that. The board is well filled on both sides with chips and data lines.
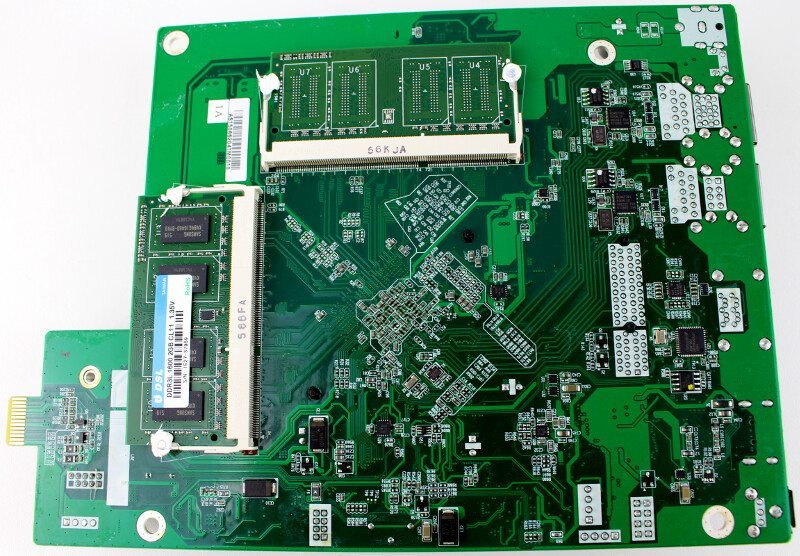
In itself, there isn’t anything spectacular about the motherboard. It has everything it needs to have and it’s secured to the chassis with ESD tape from the rear IO.
There is one more connector on the motherboard that is a little unusual in DIY terms and it is used to connect the front panel to the rest of the system. LEDs, button and front USB.
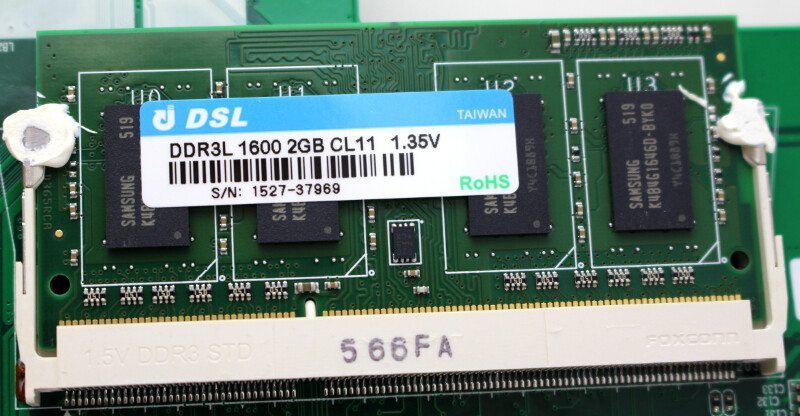
The two memory modules used in this AS6202T are from DSL Memory, also known as Data Specialties Co LTD. 1600MHz clock speed, 2GB capacity each, CL11 timings, and 1.35V power requirements.
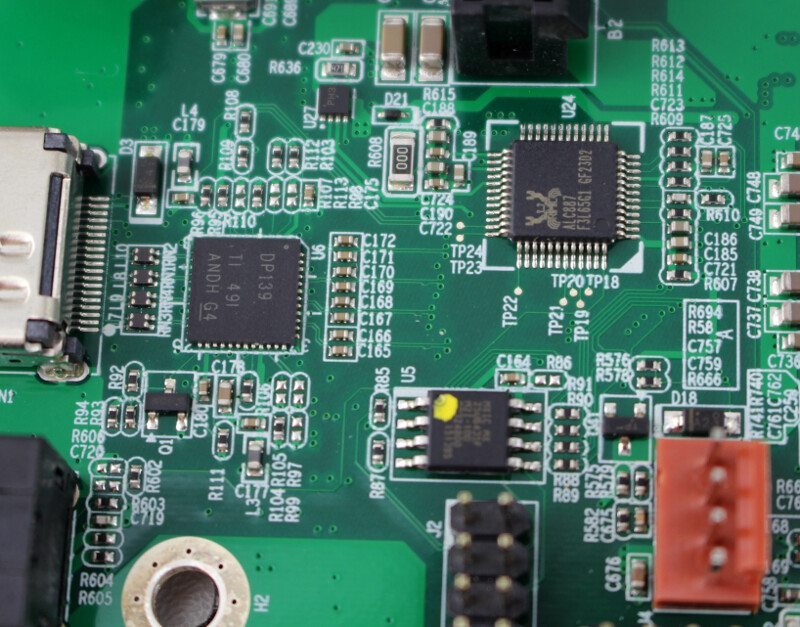
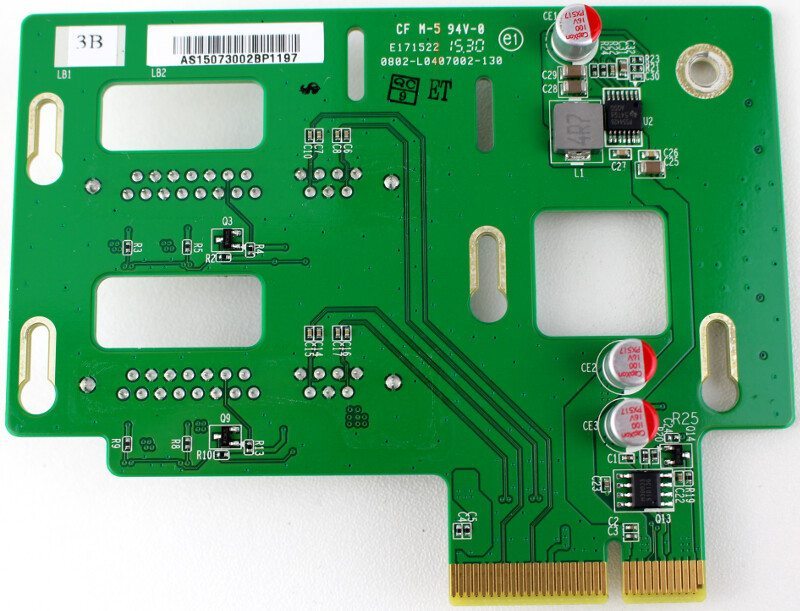
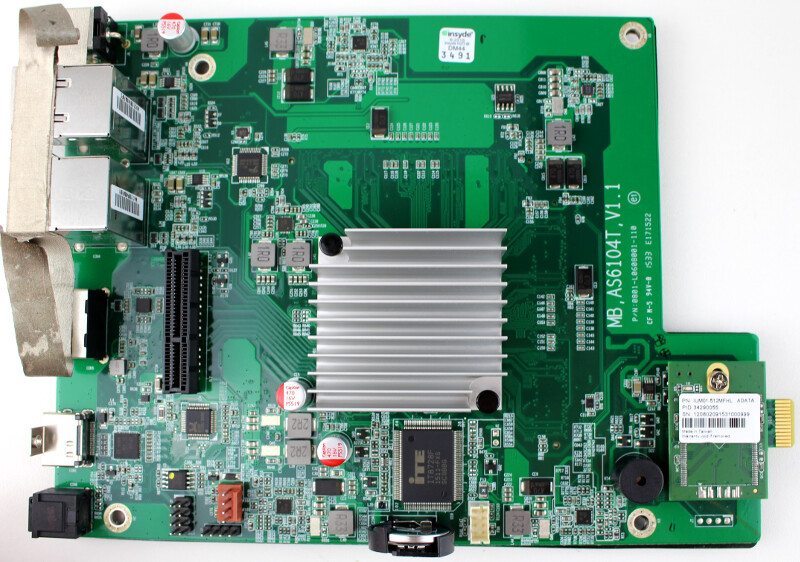
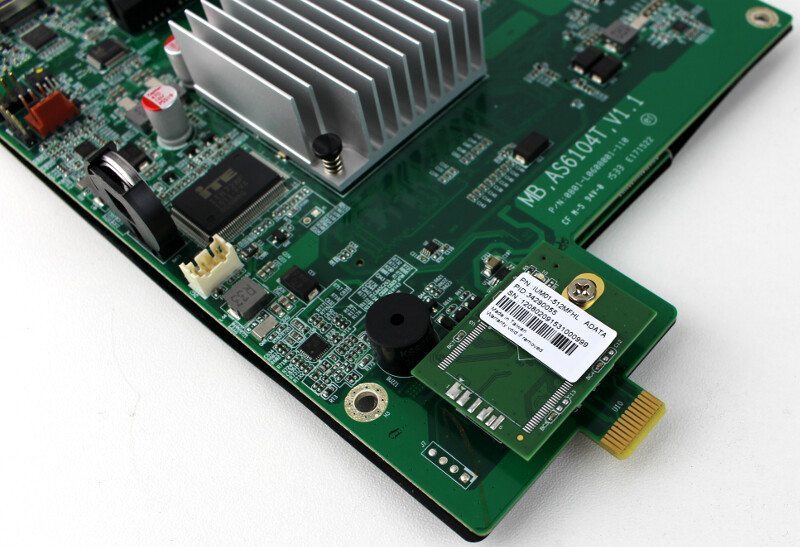
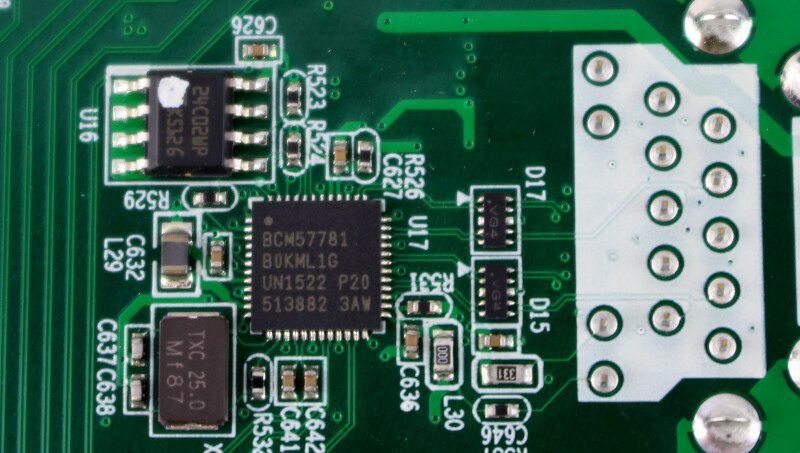
On the rear of the motherboard are two Broadcom BCM57781 Gigabit Ethernet controllers for the two LAN ports.
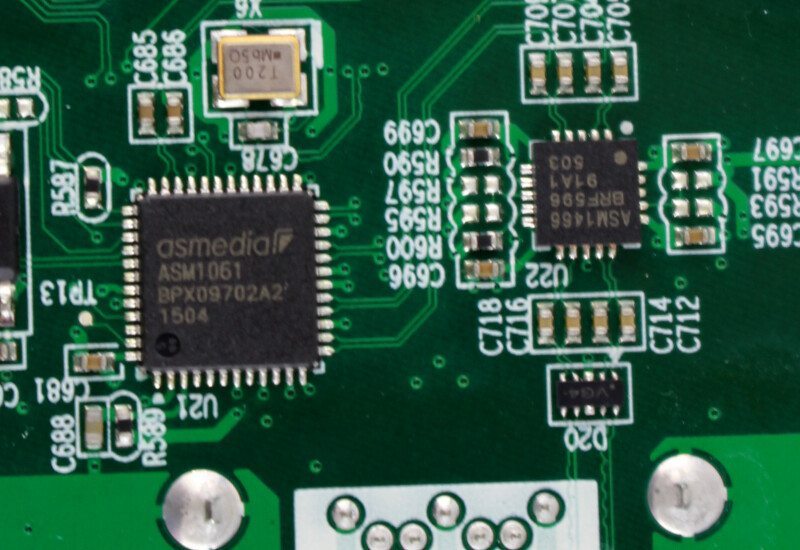
The ASMedia ASM1061 chip takes care of the PCI to SATA conversion of two ports. Next to it is an ASMedia ASM1466 SATA repeater used to improve the signal.
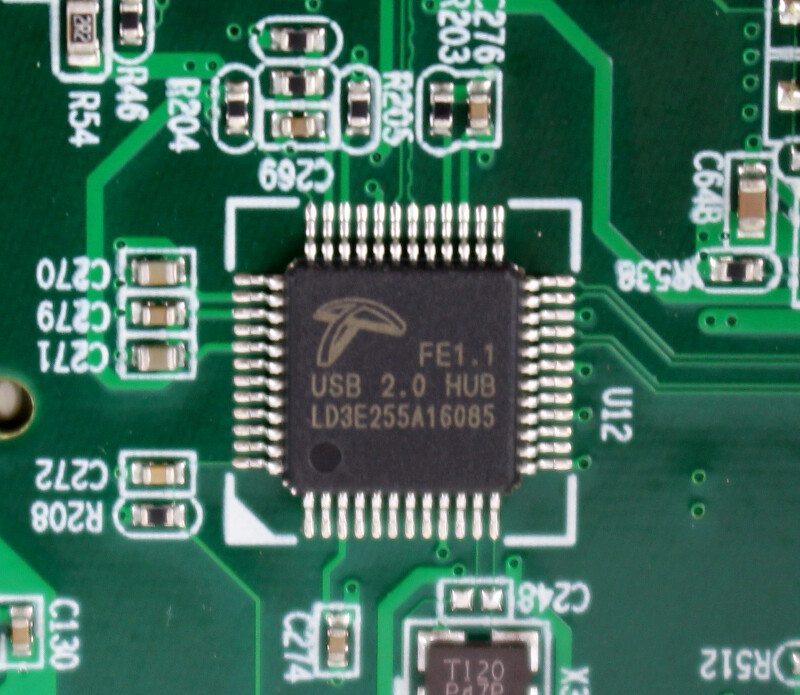
The FE1.1 USB 2.0 HUB chip kind off gives away its purpose in the name. It is a USB 2.0 4-port Hub controller.
The Realtek ALC887 chip is for the audio features in the NAS. Overall, a list of quality components.