BitFenix Pandora Micro-ATX With ICON Display Review
Peter Donnell / 9 years ago
Introduction

BitFenix has quite the reputation for creating innovative chassis designs, just look at their BitFenix Prodigy, Colossus and Ronin for examples; each has a unique aspect that sets them apart from their competition. BitFenix look set to continue their innovation trend with the release of their new Pandora chassis, a slim mid-tower that really is rather unique in terms of design, but one that comes with an extra the likes we’ve never seen on a consumer chassis before.
The Pandora is available in several models, the stock budget model with no side panel window, the stock model with the side panel window, then there’s a very funky edition with an LCD display hidden in the front panel; which is also available in windowed and windowless format. The small display is a simple colour display with a 240 x 320 resolution, which you can apply your own colour images to, giving a unique level of customisation to your system.
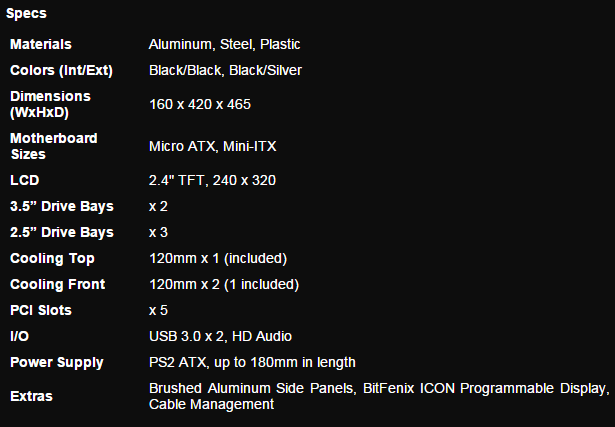
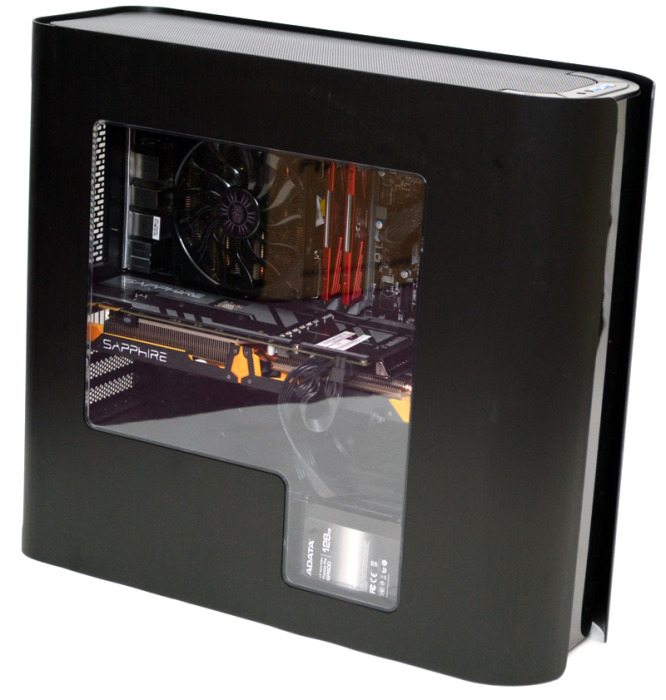
The Pandora features a large window on the left side, which has a smaller section of window in the bottom right which allows you to show off a 2.5″ drive.
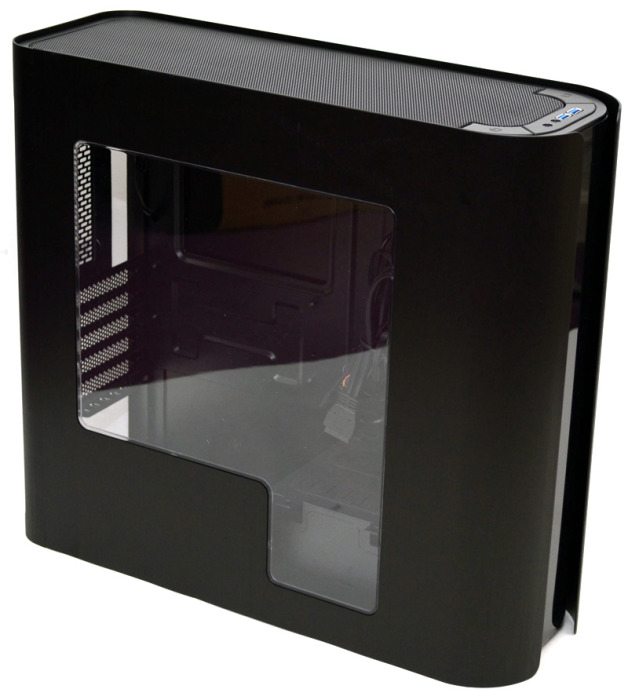
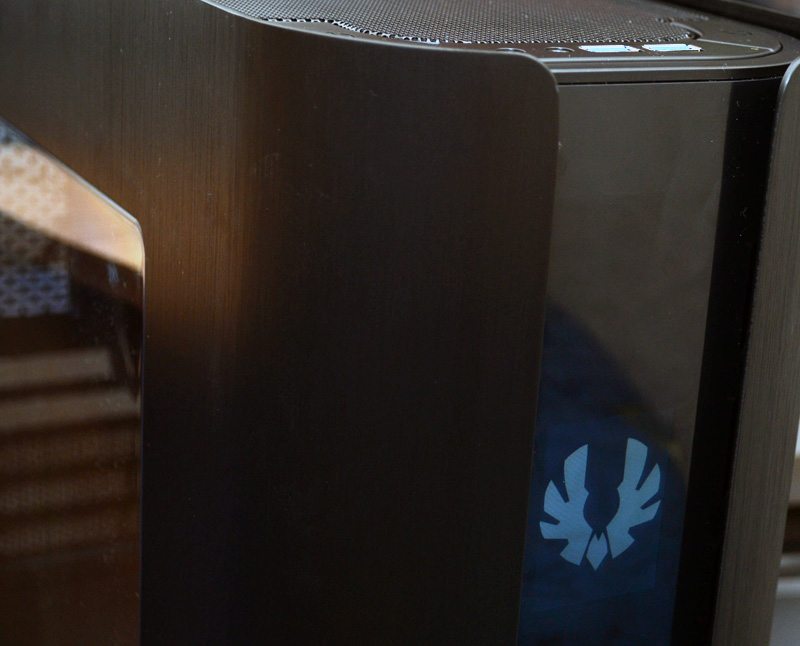
The right side panel in blank, but both the left and right panels are made from black brushed aluminium and it looks and feels incredible. The panels each curve a little around the front of the chassis, giving a sleek and unique look to the Pandora.
Behind the curved edges of the side panels, you’ll find a glossy black plastic front panel. The small LCD display is located on this glossy panel, but you can’t see it at all until you power it up, so we’ll take a look at that shortly.
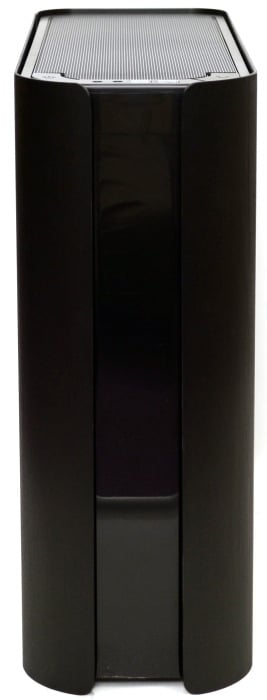
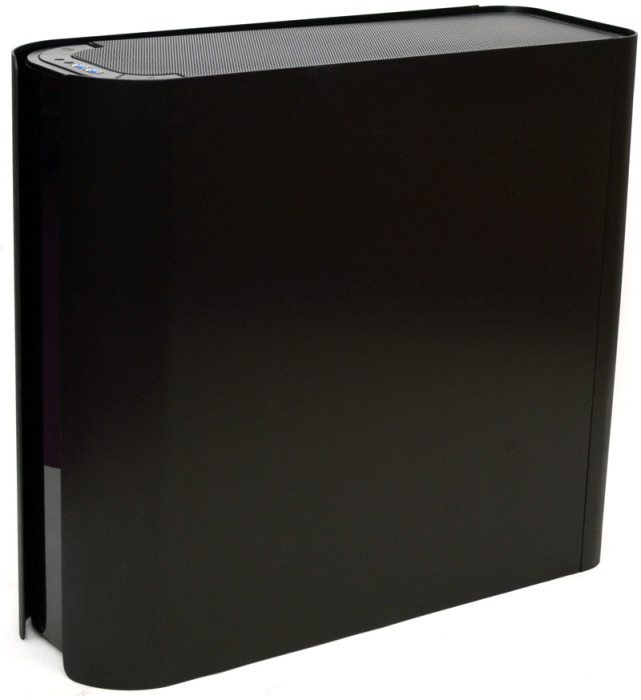
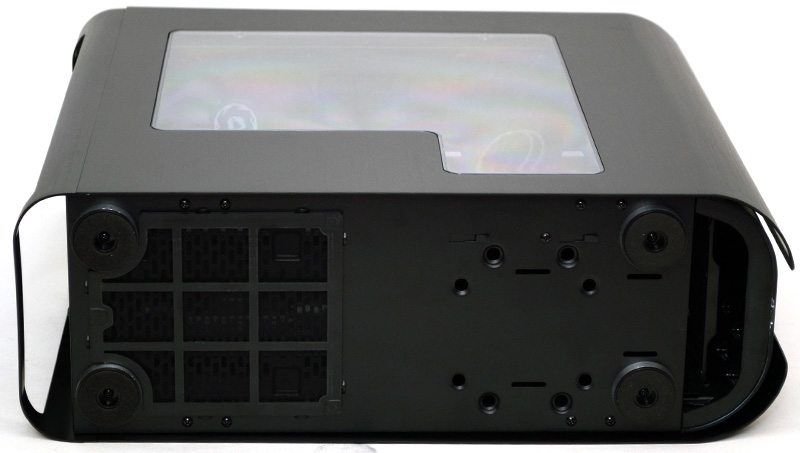
The rear of the chassis allows us to see just how slim this chassis really is. As you can see, it’s barely wider than the expansion slot covers; just wide enough for an ATX PSU. Keep in mind that expansion card width and CPU cooler height will be limited respectively.
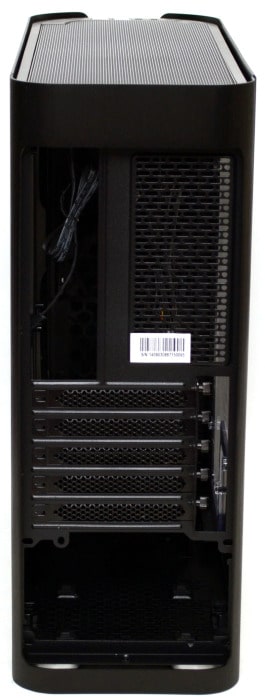
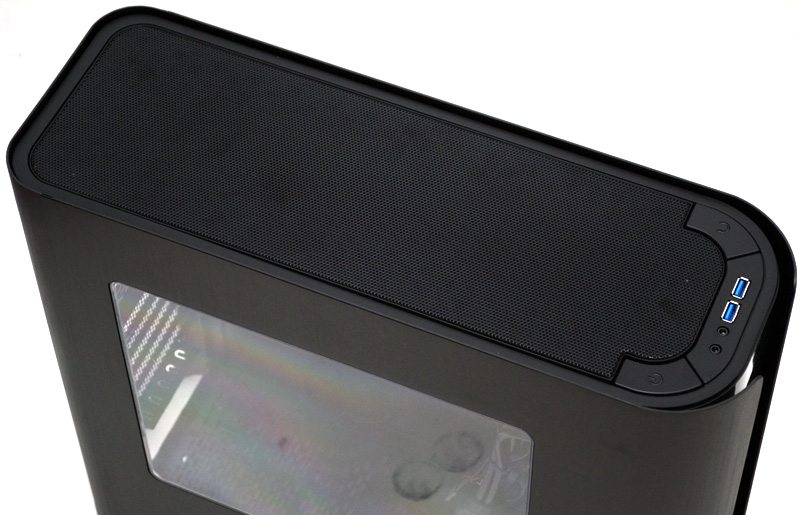
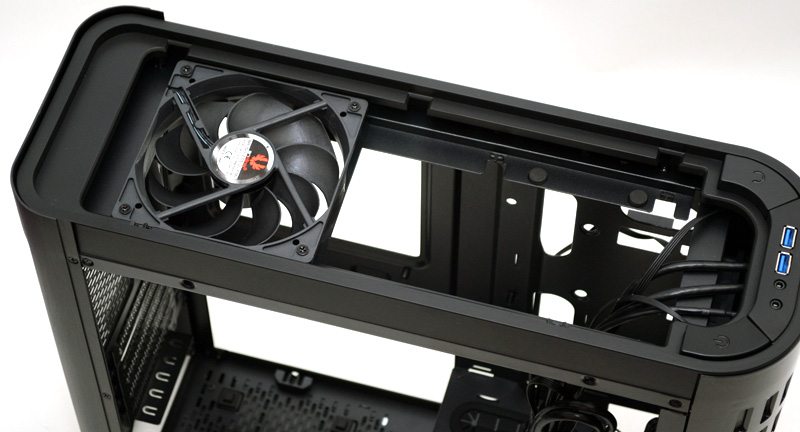
The top panel has a massive ventilated panel which can be removed via push-click clips on one side; this makes taking it off and putting it on extremely easy. The front I/O panel is straightforward enough, with all the major buttons, inputs and outputs you’ll need.
On the base of the chassis, you will find four feet that provide good ground clearance for the filtered PSU air intake, as well as some screw holes for mounting 3.5″ or 2.5″ drives on the interior.
Interior
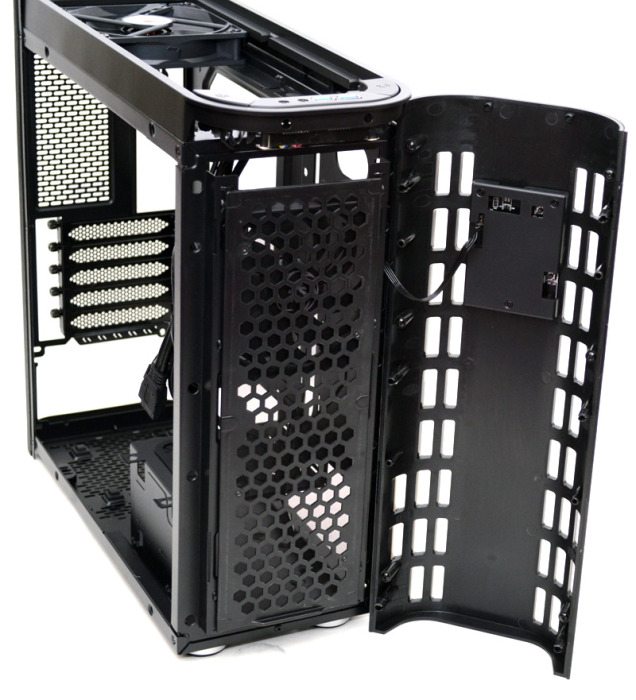
The side panels are not screwed in place, they’re mounted on pegs that simply push into the chassis. This means that you can remove the side panel by giving it a light tug, making it very easy to access the interior. On the inside of the Pandora you’ll find plenty of cable routing holes, as well as a large CPU cooler mounting cut-out behind the motherboard.
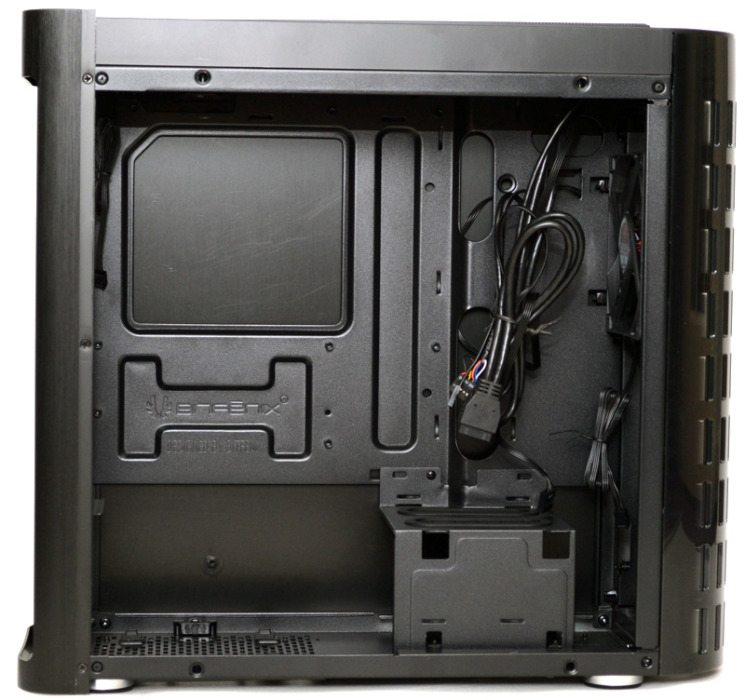
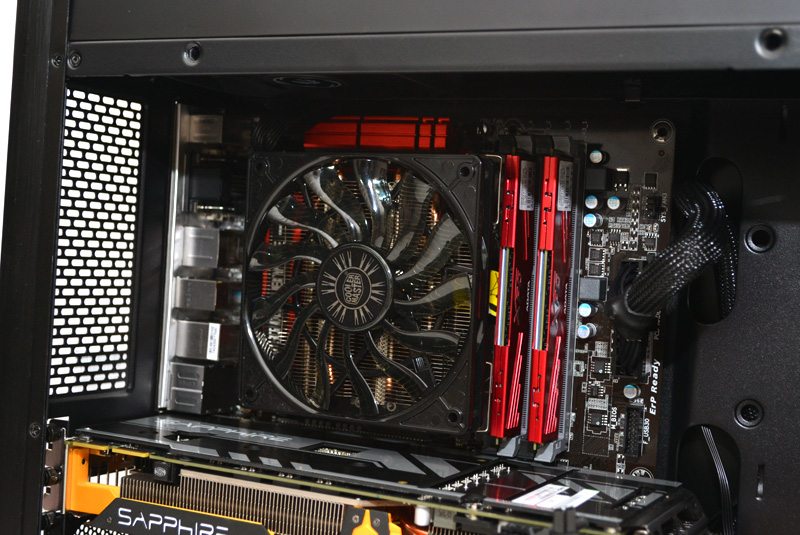
There’s a 120mm fan pre-installed in the top of the chassis and below that a small routing hole for the motherboard CPU power cable.
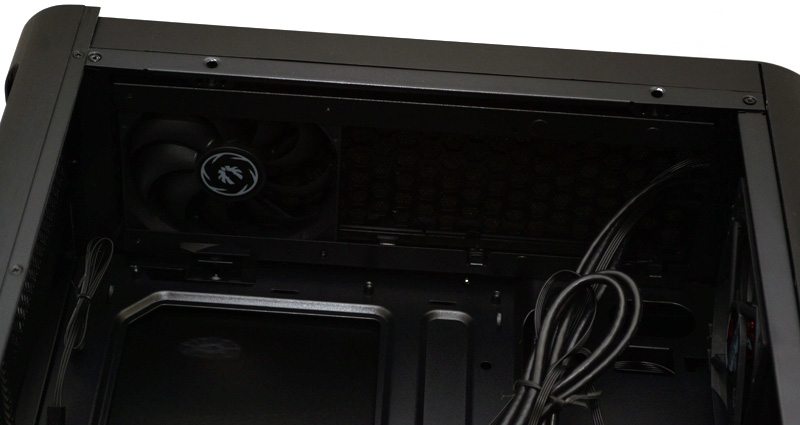
In the front of the Pandora, you will find a single 120mm fan pre-installed, with room for another below that. If you wanted to, you can also install a 240mm water cooling radiator in the front of the chassis.
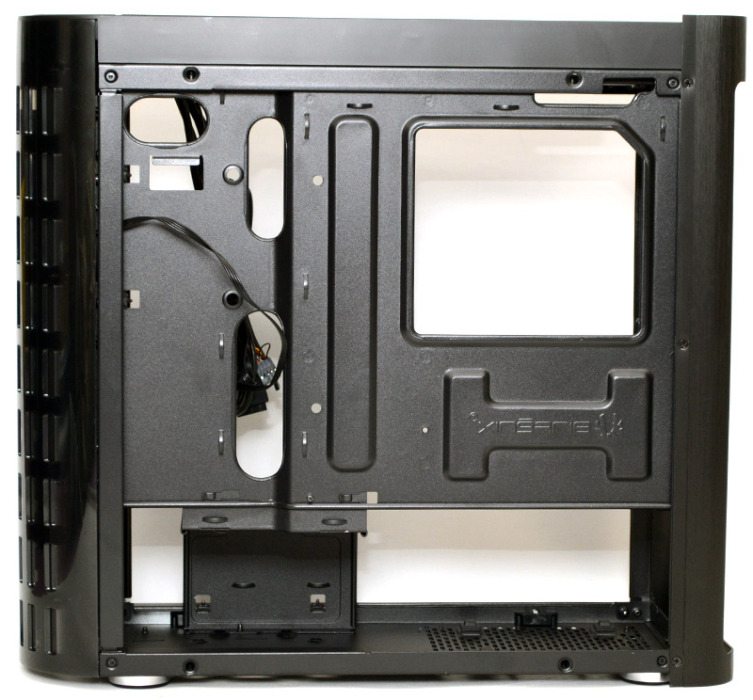
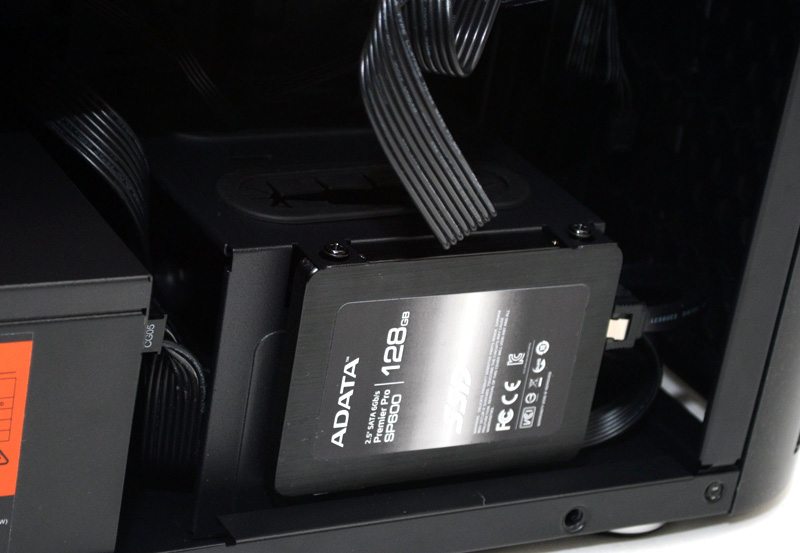
In the bottom right of the Pandora you’ll find the funky little structure. This acts as a shroud for your power supply cables, which should help keep things neat and tidy. It also has two cable routing grommets to help route cables to your motherboard and graphics cards, while also having a 2.5″ drive mount on the side; so many features in one small section!
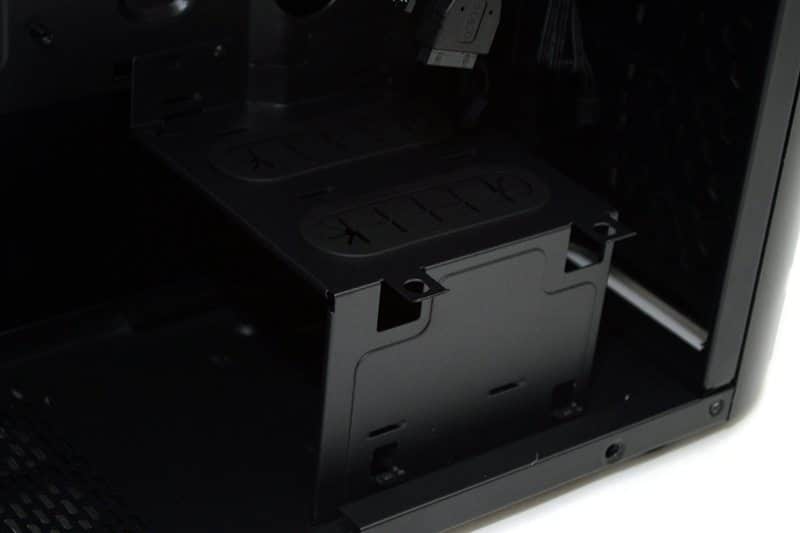
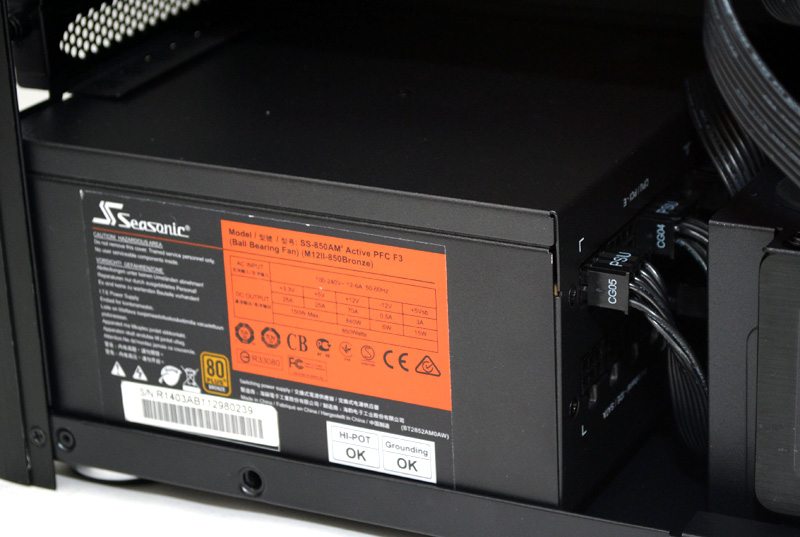
The power supply section benefits from a bottom mounted dust filter as well as four rubber pads to help reduce any vibrations from your PSU.
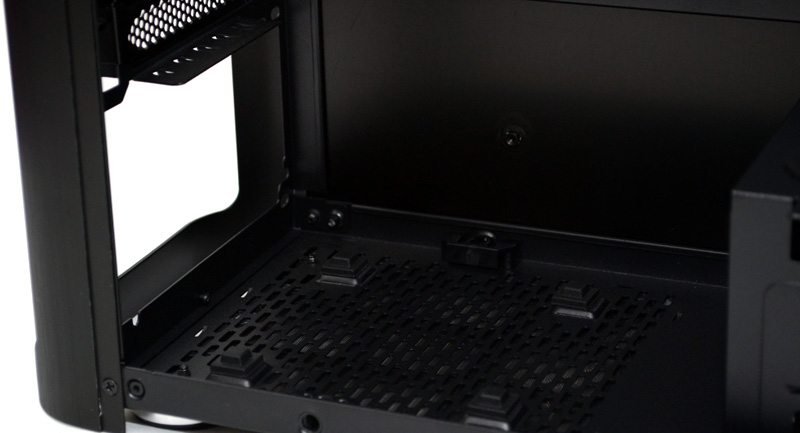
There’s no room for a rear mounted fan; not surprising given the slim form factor of this chassis. There is however some ventilation that should help move some excess heat from your system.
Behind the motherboard mounting plate, you will find a little bit of cable routing space on the left, but next to none behind the motherboard. There are some cable tie loops to help keep things tidy and you’ll certainly need them if you hope to get your side panel back into place.
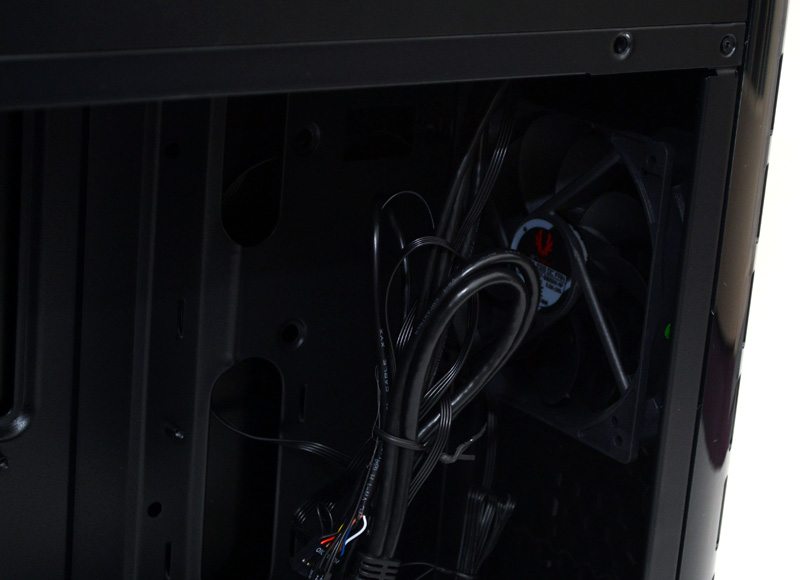
Here you can see the top panel is removed, giving you easy access to the top-rear 120mm fan mount.
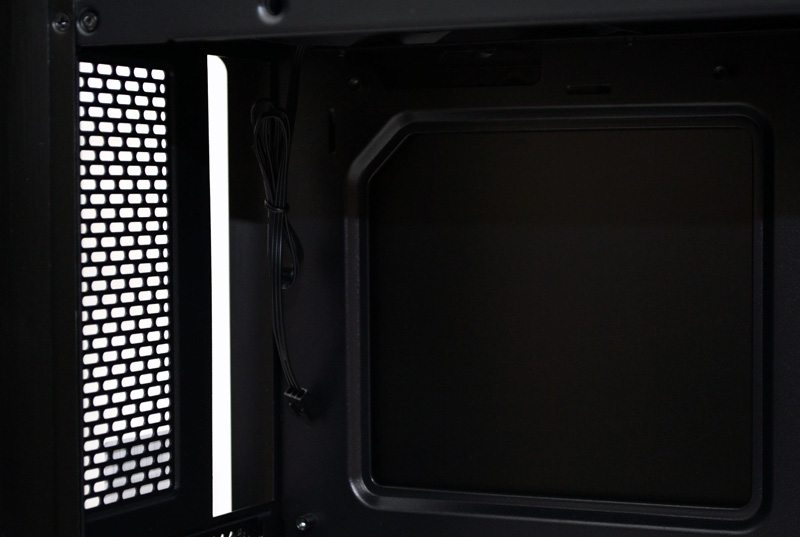
Behind the front panel you can see the back of the small LCD display which is mounted on the right, with a USB-motherboard header cable attached.
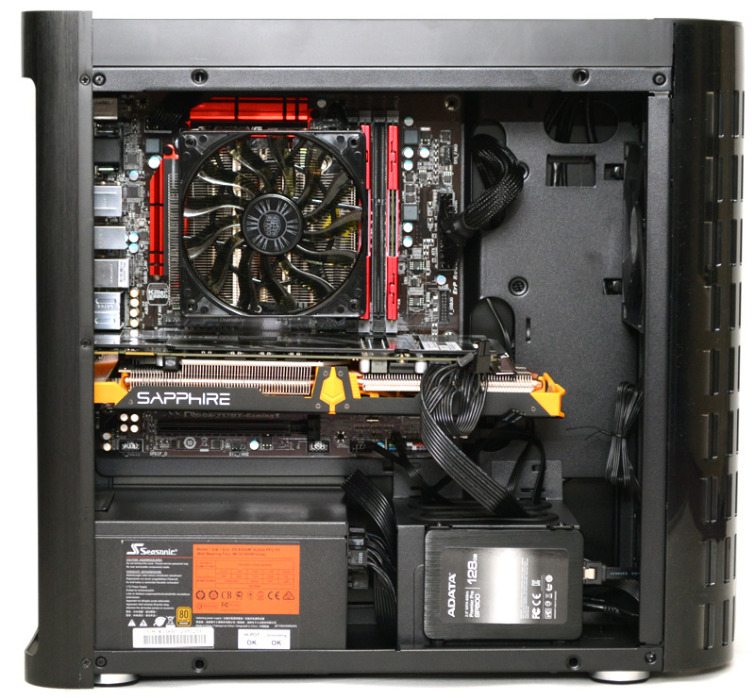
Complete System
Total build time on the BitFenix Pandora was 35 minutes, a little slow for such a simple looking build, but there were a few minor headache to navigate along the way. The first problem would be cable management, space behind the motherboard is near zero and cramming excess cables under the shroud in a fashion that didn’t cause conflicts with the side panels wasn’t easy; although it wasn’t impossible.
I really like this side mounted 2.5″ drive bay, it’s a great way of showing off your fancy SSD and even more so given that the Pandora has that extra bit of side panel window just for this purpose.
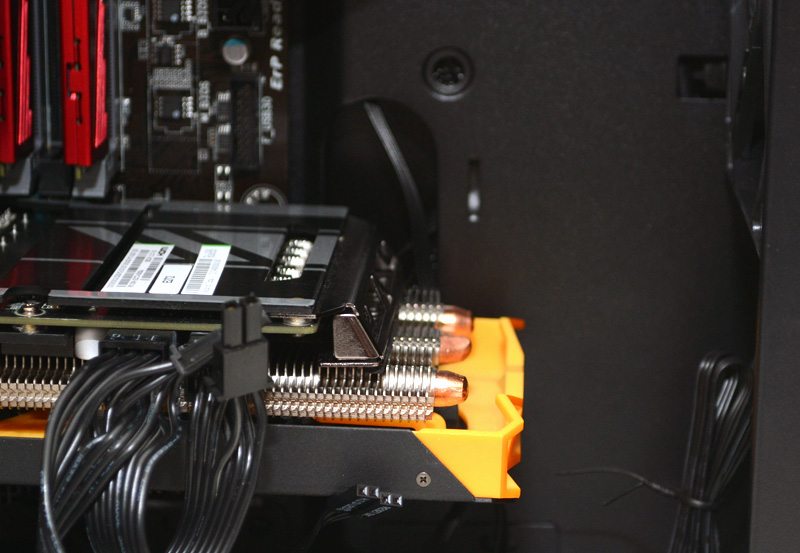
The Sapphire R9 270X graphics card I’ve used is pretty huge, but it fits in the Pandora with plenty of room to spare. Of course, this extra room could also be used to mount a front panel radiator, just make sure you measure twice before you try to install a long graphics card and a radiator combo.
The PSU area looks neat and tidy thanks to the shroud. You can still see the cable fittings, but the bulk of the cable is tucked mostly out of sight.
CPU cooler height is limited, but there’s more than enough space for a good quality low-profile cooler. Anyone wanting to overclock their CPU heavily may want to invest in a water cooling radiator.
Installing the left side panel was nice and easy, but I must admit that the right side panel was a bit of a pain to keep in place due to excess cables pushing against it. Stringent use of cable ties and preferably a modular PSU with flat cables is going to make your life a whole lot easier; keep that in mind when picking your components.
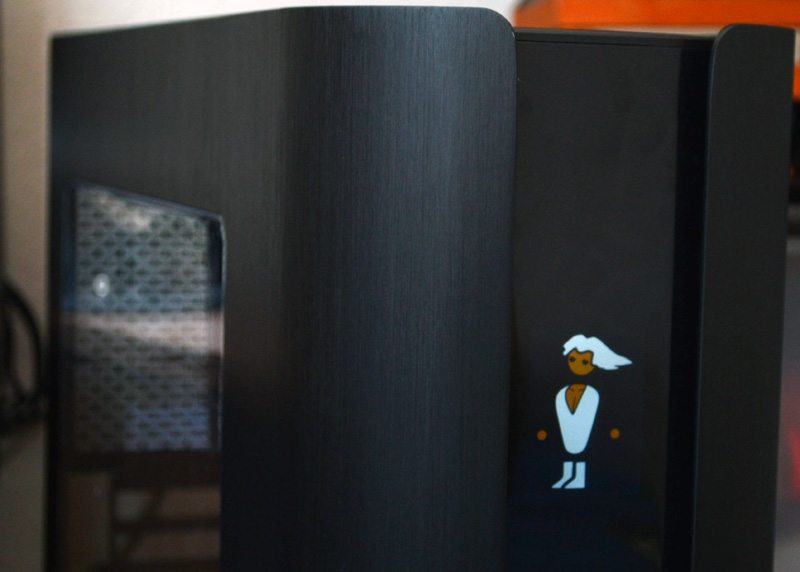
Now to the one cool feature I’ve been eager to test; the LCD display! As you can see, the display defaults to the BitFenix logo, but you can download a small app from the BitFenix website to change it with ease; all you need is a 240 x 320px image which you can easily make yourself using mspaint, photoshop etc.
Up front, the images look nice and clear with a good level of contrast, although there is some backlight bleed on the blacks.

Wouldn’t be doing my job right if I didn’t try this one; looking good!

Glorious PC Master Race indeed! This turned out far better than I had expected.

From a side angle, you can see the contrast fades a little, but it still looks awesome.
Zoom in, you can see the pixel density is decent and from a range of a couple of feet things look nice and sharp.

Final Thoughts
Pricing
There are a few variants of the BitFenix Pandora available, but they’re all rather well priced overall. You can expect to pay from £69.95 for the basic model, right up to £94.95 for the windowed and LCD equipped model.
Overview
I’ve been looking forward to reviewing this chassis ever since I saw it at Computex 2014. Fortunately for myself and no doubt BitFenix, the Pandora has exceeded my expectations in (almost) every respect. It’s unique in terms of design, it has some cool features and it’s overall rather cool.
The only issues I’ve had with this chassis are with cable management. In the end, I was able to get pretty reasonable results without too many headaches, but it really is tricky to keep the rear side panel in place. I’d ask that BitFenix throw that push-pin design in the bin and opt for some good old fashion screws. If I could change at least one thing, it would be making the chassis 10mm wider to allow even more cable routing space. However, it is what it is and with a little extra care, as well as carefully picking your PSU and cables to limit the excess, you’ll certainly net a great build without too many troubles along the way.
Build quality is very good overall, certainly helped along by those massive aluminium side panels which are both durable and great to look at. There’s filtered air intakes throughout and you get two good quality 120mm fans pre-installed. The side panel window is a nice feature, if you can afford to pay a little extra to get it. It offers a great view of the chassis interior and I really like the extra bit of window to show off your 2.5″ drive, which also does a great job of masking the cable shroud that it mounts upon.
The star of the show is the LCD display, it’s certainly unique and I’ve never seen another consumer ready chassis with one. Although I have seen some modders do something similar. It’s pretty simple to use and it’s a great way of customising your system, much like I did today with the #PCMR logo, although you can use any image you want; so long as it’s 240 x 320px.
Pros
- Unique design
- Built-in LCD logo display
- Long GPU support
- Cable shroud
- 240mm radiator support
- 2 x 120mm fans pre-installed
Cons
- Screw on side panels would have been better
- Cable routing can be tricky
“BitFenix have once again created a unique and innovative chassis that certainly stands out from the crowd. In terms of design it is fantastic to look at and while it’s not as practical as some other chassis solutions, it’s nice to see some new ideas on the market.”

BitFenix Pandora Micro-ATX Chassis Review
Thank you Overclockers UK for providing us with this sample.


