Interior
To remove the side panels, it’s quite an extensive job so I hope you have plenty of time. It involves unscrewing the top and bottom corner panels and removing them. Once done, you will then need to remove the thumbscrews situated with two on each side.
Once done, you get a view of the inside which shows that the black colour scheme follows throughout. The case supports ATX, Micro ATX and Mini ITX motherboards and also has support for graphics cards up to 29.3cm long.
Opening the other side of the case up will reveal all of the wires that are connected for the front panel and BitFenix emblem. It also gives you scope as to how effective the cable management features of this case are.
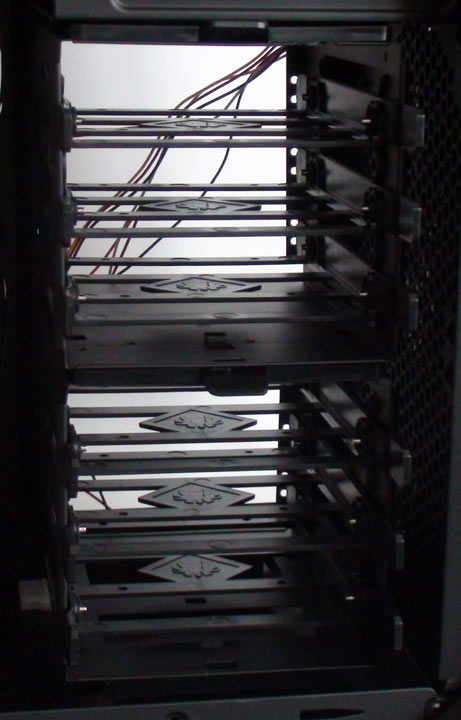
A clear view of the optical drive bays shows that it can accept 3 x external 5.25 drive bays and 1 internal but a set of 2.5 adapters are included for various configurations.
There are seven x 3.5 drive bays in total.
Each of which all feature a BitFenix branded drive bay for easily installing your drives.
If not in use or if wanting to use a slightly longer graphics card, BitFenix have made a section (4 of the 7) of drive bays which can be removed. Think of it as a modular design if you will.
As said previously, there are 7 tool-less PCI expansion slots and each one features a fully ventilation expansion slot panel giving maximum airflow when the slots aren’t used up.
The power supply location is a standard fitting with a slightly raised platform giving the fan of your PSU sufficient room to breathe. A dust filter is also situated just underneath and can be removed from the rear of the case (once the corners have been removed).
Cooling wise sees space at the rear for an optional fan but we are unsure as to why one wasn’t included as they are relatively cheap to produce.
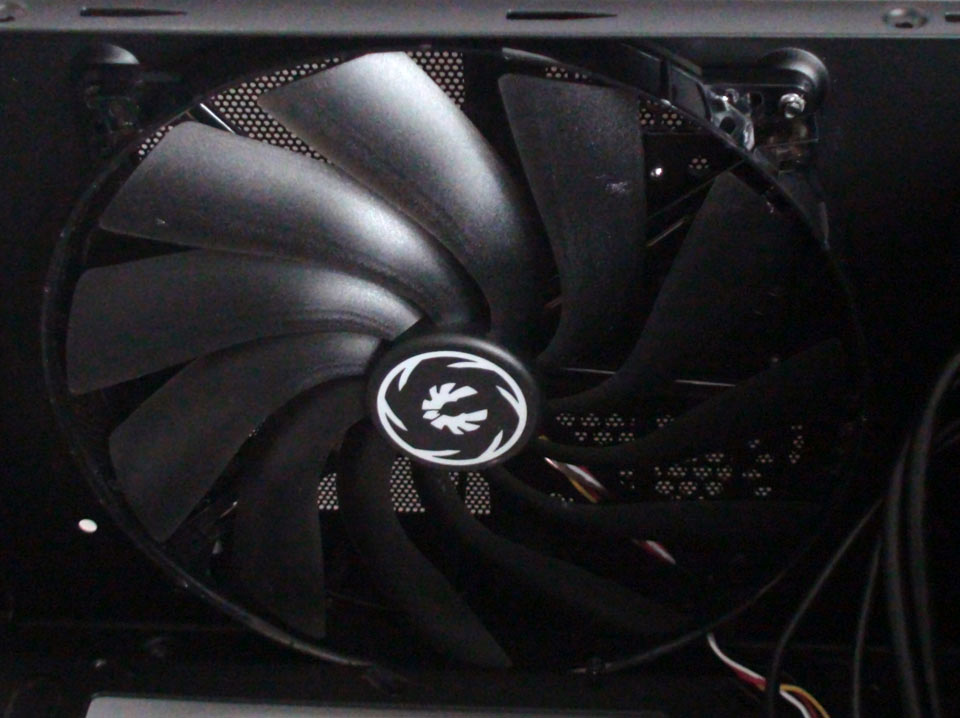
A huge 200mm fan is situated at the top of the case and features red LEDs for something a little bit extra special.
The front of the case also features the same 200mm red LED fan which gets shown off through them rubber slats and will make your friends say ooh la la.
A mass array of cables are also fitted for the various features and functions of this case and include Molex connectors, front panel and eSata.
There are also two USB 3.0 cables which will loop through the oval shaped hole at the rear of the case and connect into your rear I/O panel.
80 PLUS Bronze Certified: Provides up to 88% operational efficiency, generating less heat and lowering…
Featuring deluxe custom artwork of iconic figures from the beloved Fallout franchise, this deck is…
Presented for the first time ever, the 3 volume set of The Elder Scrolls V;…
Valve's latest upcoming game which has been in development since 2018 and was originally codenamed…
Ghost of Tsushima Director’s Cut made a strong debut on PC, hitting over 57,000 concurrent…
Microsoft is set to bring the next installment of Call of Duty to Xbox Game…