Cooler Master Cosmos II Super Tower Chassis Review
Peter Donnell / 10 years ago
Exterior
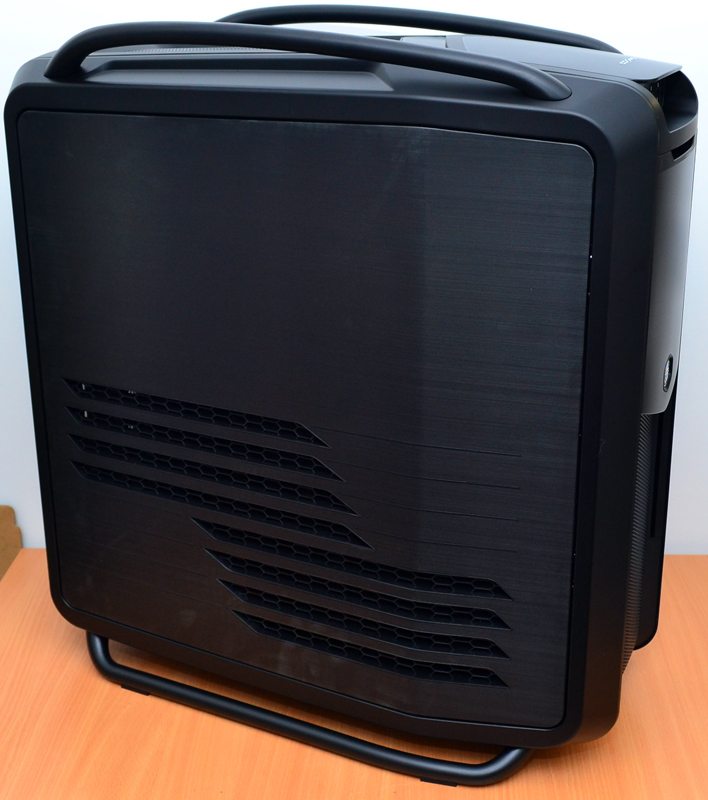
After much struggling and sweating, we finally managed to lift this juggernaut of a chassis out of its box and get it on top of our desk. The left side panel looks super slick, it has a brushed metal finish over its somewhat angular design, with a large section of ventilation slots in a “Z” shape, the part of the vents nearer the back of the chassis will be used to provide extra airflow to and GPU’s you have installed, while the lower half of the vents near the front are to provide air to dual 120mm fans for HDD cooling and extra airflow in general.
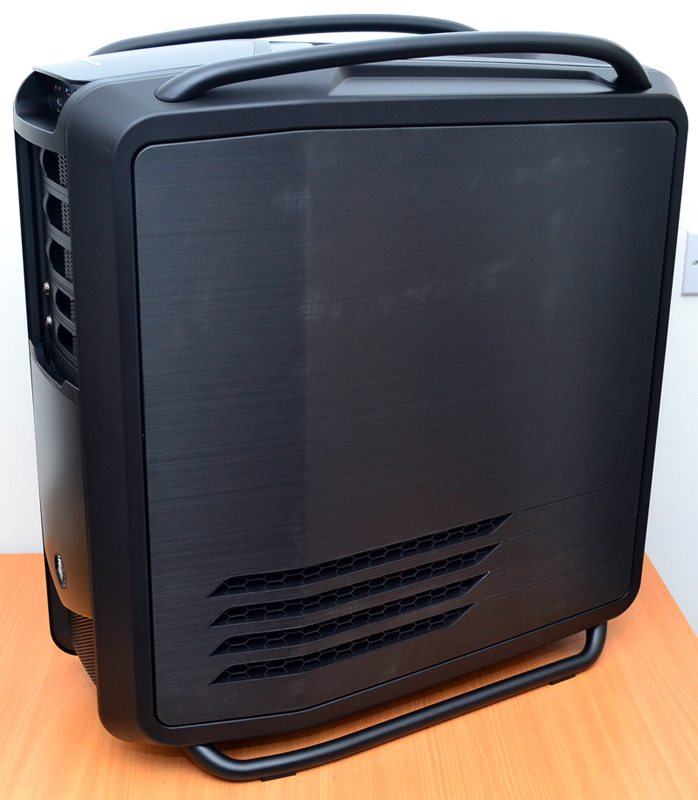
The right side panel features a very similar design, but this time only a few vents that will allow air to pass through the chassis. Air from the left side HDD fans will allow air to pass over your hard drives, then out the right side of the chassis, rather than allowing that warm air to build up.
The front panel has a huge amount of features going on, Starting at the top we have the main I/O panel, a pull down cover for the 5.25″ drive bays, and a large ventilation section that will provide airflow to the front fans.
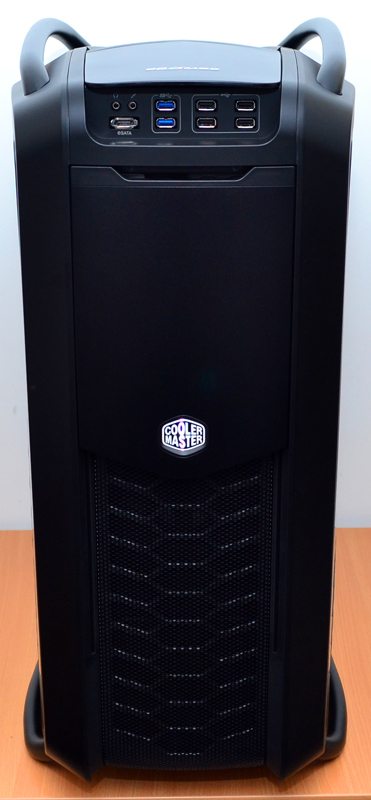
The cover is held in place with magnets at the top, but glides up and down with a smooth action when you need access to the bays behind it. This gives you a super clean look on the front, but easy access to the drive bays when you need them. You’ll find three 5.25″ drive bays, all of which features easy to remove / reinstall covers. Below them you’ll also find two lockable hot-swap hard drive bays, each of which support 3.5″ or 2.5″ SATA drives.
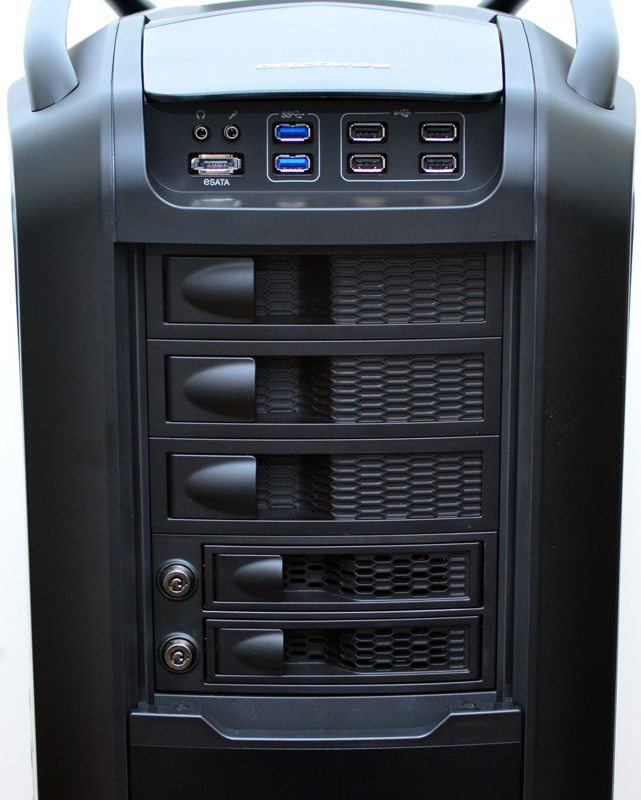
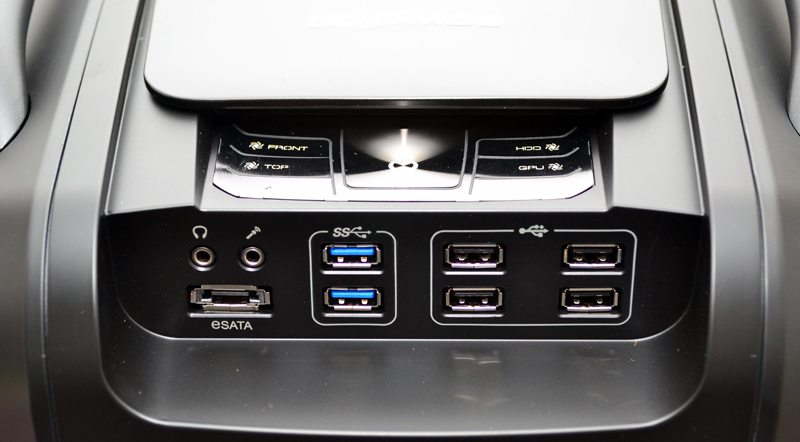
The main I/O panel offers up HD audio connections, eSATA, 2 x USB 3.0 and 4 x USB 2.0. Not content with already having a comprehensive front panel, you’ll also find a slide back panel just above the inputs / outputs. The top sliding panel hides some gorgeously designed buttons, these cater to the power and reset functions, but it’s also a very competent fan controller. The fan controller is split into sections, allowing you to adjust the fan speeds of front top and rear fans, as well has HDD, GPU and CPU, or of course just what ever fans you’ve connected to each section.
The 5.25″ bay covers unlock with a pull mechanism, meaning you can install your drives tool-free. The lockable HDD bays of course need the key, but allow you to add an extra level of protection to your drives.

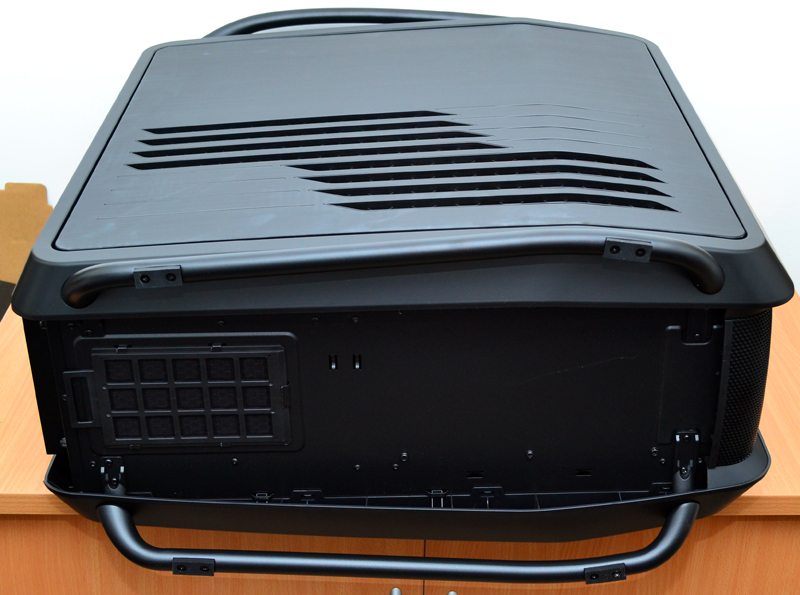
Around the back you’ll notice that the side panels and the frame of the chassis overhang a little, this gives a clean look to the edges of the chassis from the side view. There’s thee water / cable routing holes at the top, a pre-installed 140mm exhaust fan with the option of mounting a 120mm instead. 10+1 expansion bays means you’ll have no worries when installing a quad-GPU setup and finally at the bottom you’ll see a GPU bracket extends out of the chassis to allow extra room for extra-large PSU’s.
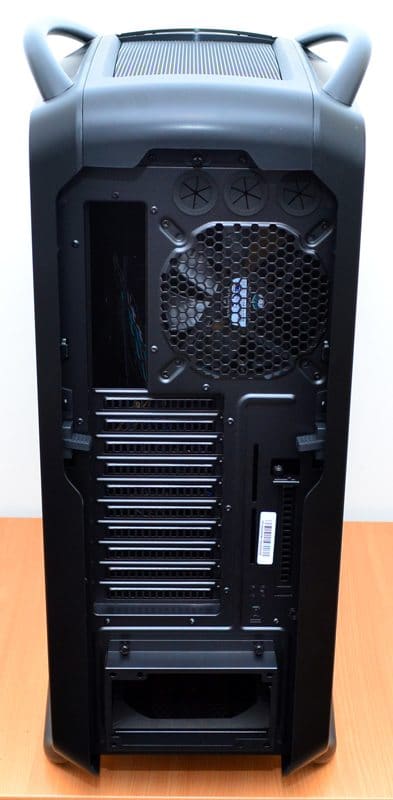
The underside of the chassis is given great clearance thanks to two large rails that act as the main stand, this provides great airflow to the PSU ventilation, there is a slide-out washable air filter covering the PSU.