Cooler Master Master Liquid ML240R RGB Cooler Review
Mike Sanders / 6 years ago
A Closer Look
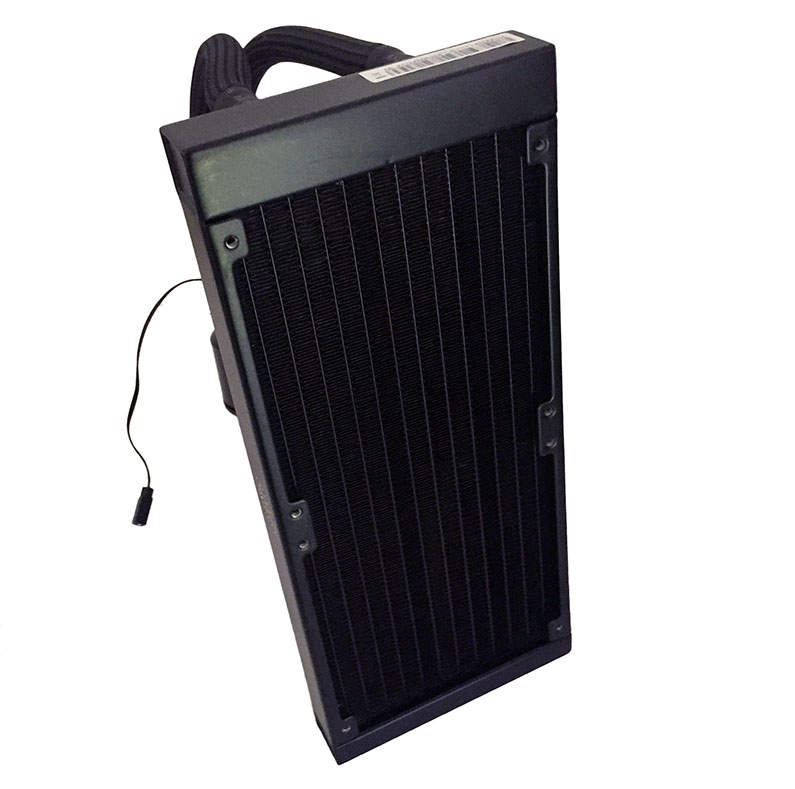
The radiator and pump head are very well presented and the hose length is about perfect for any system setup. The hose, which is reinforced is a little stiff to maneuver and as such, as often is the case, you’ll probably want to attach your fans and have this mounted before you attempt to put on the cooler. It doesn’t always make things easier, but in this instance, I think it would be helpful.

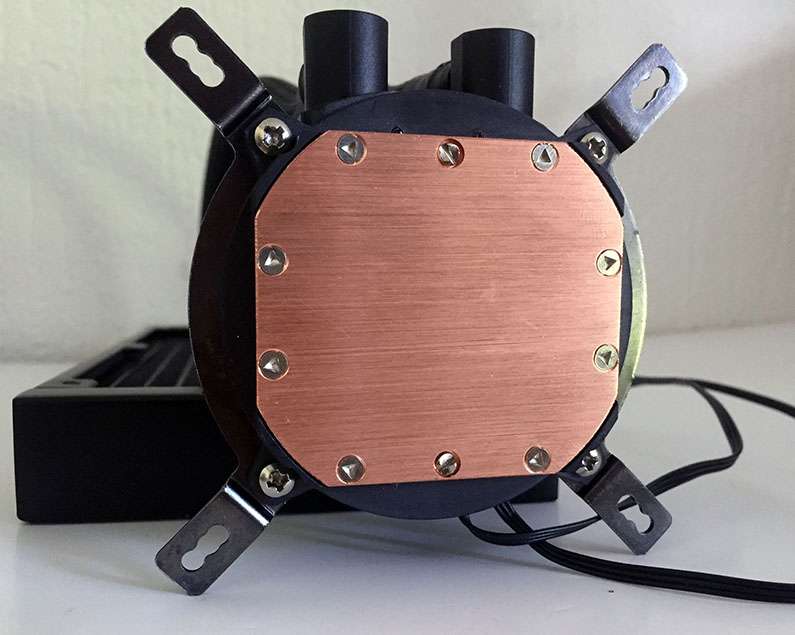
The pump block initially comes with the Cooler Master cover removed. Do not worry though, it is designed to be removable. Exactly what it achieved is unclear. Except of course if you prefer to have a brighter light show rather than the circular ring effect you get with it on. As we have seen before with Cooler Master products, the base of the pump block has a slight recess. This allows you to insert your chipset bracket allowing for a little stability while screwing it in place.

The contact plate for this cooler is massive as you can see in the image below. This should allow for optimum coverage of your processor to give the most efficient heat dissipation possible. In addition, you can also see that the brackets are screwed in from the underside. This is a little unusual. This does, however, stop the rather large screw heads being visible from the top. In addition, given the fashion in which coolers are mounted, it does actually make a lot more sense.
Fan and Radiator
The radiator itself is exactly what you would expect from a 240mm AIO cooler. It’s big and it’s in a matt black finish. The item of note is the Cooler Master logo which is on the side. This, while large, is neither intrusive nor unusual.
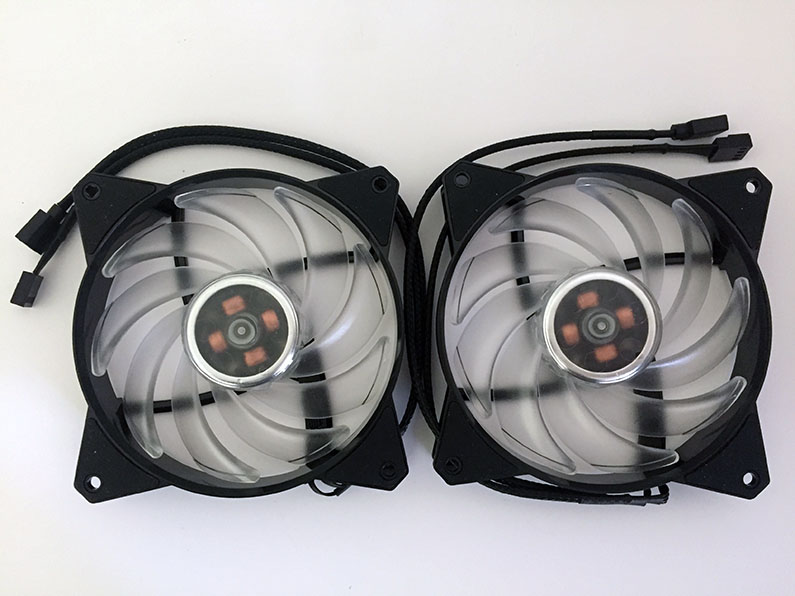
Coming with 2 Cooler Master fans the design is nice and the LED lighting is clearly evident before you even turn it on. I must say that I did like the design with the fixing points not taking away from the fan size. In addition, the cushioning to the fixing points should help minimize any vibration. A minor point, but the screws supplied to fit the fans are actually more akin to thumb screws. While this does make them larger than you would expect, I actually don’t care.
Screwing in 8 fan fixtures can be time-consuming and fiddly work. With this system I was able to do them all by hand and for the sake of a polished job, just nipped the last part with the screwdriver. I really can’t stress how much I liked this system and it removed nothing from the overall look as far as I was concerned.
Pump Block
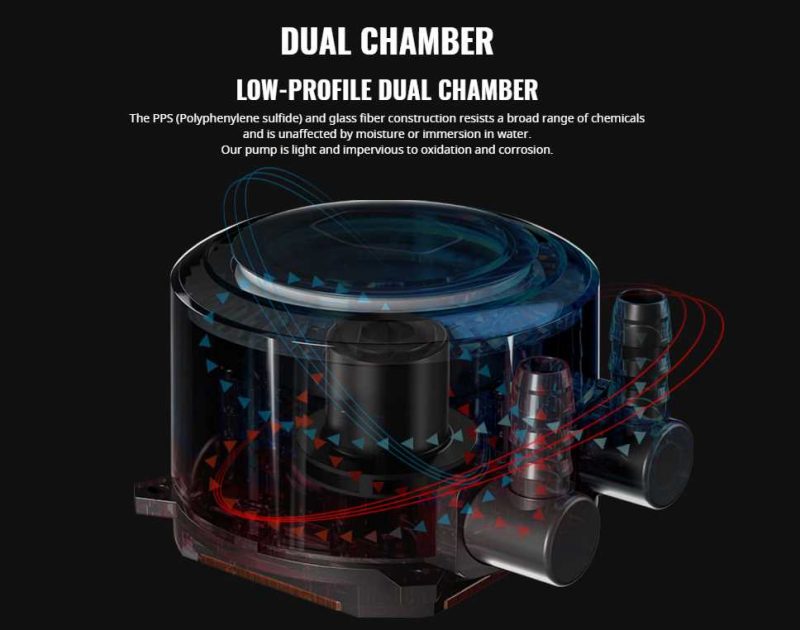
Although we have given our thoughts on the pump block, it is again worth noting that this carries Cooler Masters’ duel dissipation technology. While the jury is somewhat out on how effective this really is, the methodology testing will clearly be of interest to see what effect this has on the overall performance.
RGB lighting and controller
The Cooler Master Master Liquid ML240R RGB comes complete with a manual RGB controller hub. It’s at this point that things get both good and bad and for complicated reasons. Firstly, though, let’s concentrate on the controller itself. The good points are that is has a plethora of connections, so if you have other RGB lighting in your system, you should be able to control it with this.

In addition, the 4 control buttons are nice and clear. 2 of them allocate the output sockets which are indicated by LED lights so you know which are turned on. The other 2 buttons physically scroll through the range and patterns available. As for the controller itself, in a clever design choice, it can be powered by either a USB adaptor which can fit directly to a spare outlet on your motherboard or alternatively by a SATA attachment. Cables are supplied for both, but I must say, I liked the USB option particularly as it’s a smaller attachment and opens up more options for placement of the controller.

Lights, Camera, Action!
So what are the bad points? Well, firstly, if you recall them 4 adaptors in the image above, you will need those and they feel easily breakable. In addition, the controller itself feels very flimsy and cheap. Don’t get me wrong, it operated perfectly fine, but I could easily see this breaking if you were a little hamfisted with your work. In addition, the amount of cabling required to set this up is excessive. Some extreme cable management and placement will be necessary to make sure this looks good when you have it fitted.

We have taken a brief video below displaying the lighting effects. Due to limitations in recording and the manual control, it is clearly difficult to both record and operate at the same time. We do hope though that this gives you an idea of some of the functions available in a working environment.


