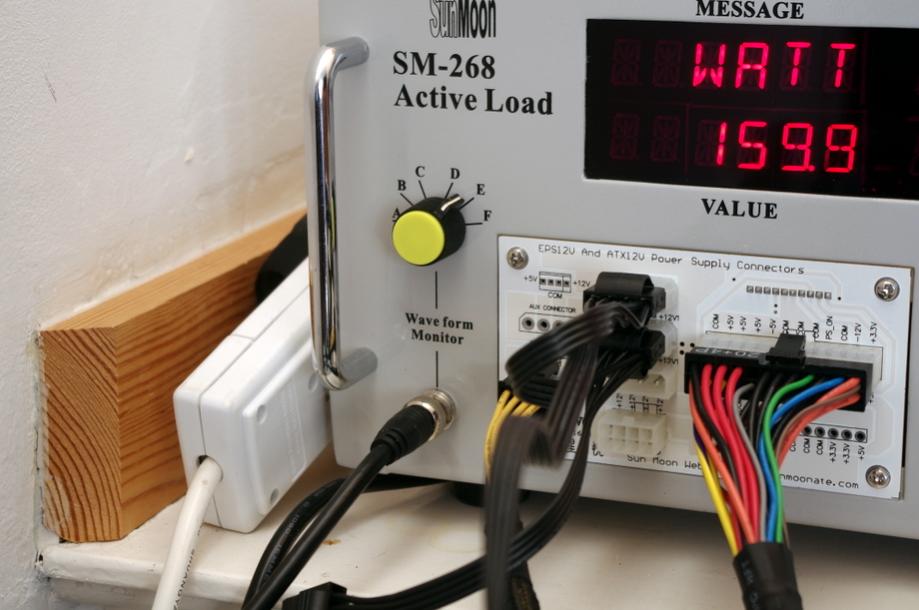
This is my favourite part of the testing, mainly because it involves dealing with lots of wavy lines on green backgrounds that make me feel very scientific! In theory, computer power supplies should supply a completely flat waveform with no peak-to-peak voltage. However, in the real world that is impossible. What the waveform you see represents is the peak-to-peak voltage which are tiny fluctuations in voltage. If, like me, you have swotted up on the ATX specs, you will know that the ripple must be monitored through a 0.1 µF ceramic disk capacitor and a 10 µF electrolytic capacitor, fortunately, the load tester has these fitted behind the BNC connector we attach the oscilloscope to. I can adjust which rail I am measuring by turning the dial to select which waveform I wish to monitor.
The oscilloscope we use is a Stingray DS1M12 USB model which is connected to the same laptop the COM cable from the load tester is attached to. As you saw, the other end attaches directly to the load tester via a BNC cable. The fact we can just connect it to a socket on the load tester with a BNC cable makes life a lot easier as we don’t have to be sticking probes into wires.
The software displays a screen which is reminiscent of a traditional oscilloscope to make it easier to use, having a USB scope also has a few inherent advantages such as the lower price and being able to take screenshots rather than taking a picture of the screen of a traditional scope. The settings took some tweaking to get the desired outcome. Firstly, the V/DIV is set to 0.01 which is at it’s lowest. V/DIV means the number of volts between each division, so in simple terms, the lower the number, the more zoomed in’ it is. We then set the T/DIV to 20ms which is the amount of time it takes for the waveform to travel across each vertical division and the sampling was set to 8K samples for maximum detail. This is what the screen looks like and is being modelled by an NZXT HALE90 at 20% load on it’s 12V rail:
Very sciencey, isn’t it! For scale, here is an example of an X-branded’ PSU bought from everyone’s favourite *cough* PC hardware and electronics retailer under identical test conditions to the NZXT unit:
That’s off the scale, not quite over 9000mV but the unit is still incredibly dangerous! More testing found that the unit was out of ATX specs for ripple, voltage stability and failed 80+ testing by a long way despite being certified’ as one. The 650W unit also cut out at 536W, not explosively mind, but with a horrible electrical noise. Funnily enough, they don’t sell these anymore!
All from your smartphone, all with AI: Effortlessly edit your photos, Get quick language translation…
【High-Definition Projector Screen】: This projection screen features a 1:1 high gain ratio, also supports 3D,…
Faster screen action with a response time of 1 ms and a refresh rate of…
Surface Pro 9 combines laptop-level performance with the flexibility of a tablet for people who…
The AOC 25G3ZM/BK meets the needs of both e-sports games and competitive players and casual…
16:10 QHD+ panel Latest Intel Core Ultra 7 155H RTX 4050, GDDR6 6GB Intel Killer…