✨ We've just launched our NEW website design!

Learn More Here
GuidesStorage

Everybody Can NAS, a Beginners Guide to OpenMediaVault

Interior


It is time to crack open the device and see what’s inside. The top cover comes off by loosening the thumbscrew on the back. If you can’t easily slide it off, you forgot to open the door first.
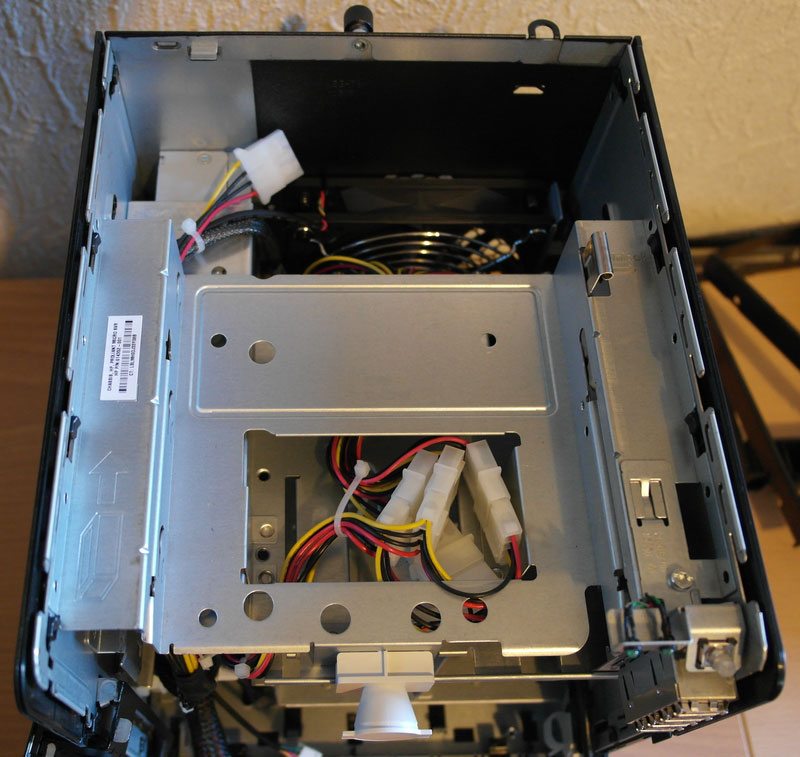
The Insides

Inside we see the 5¼ inch bay and all the power couplings. We can also spot the fan that is relatively easy to remove and clean due to it’s cleared position.

The system only comes with MOLEX power connectors, so an adapter might be needed depending on what boot drive is to be used. We will need one in this case as the included HDD is default SATA drive.
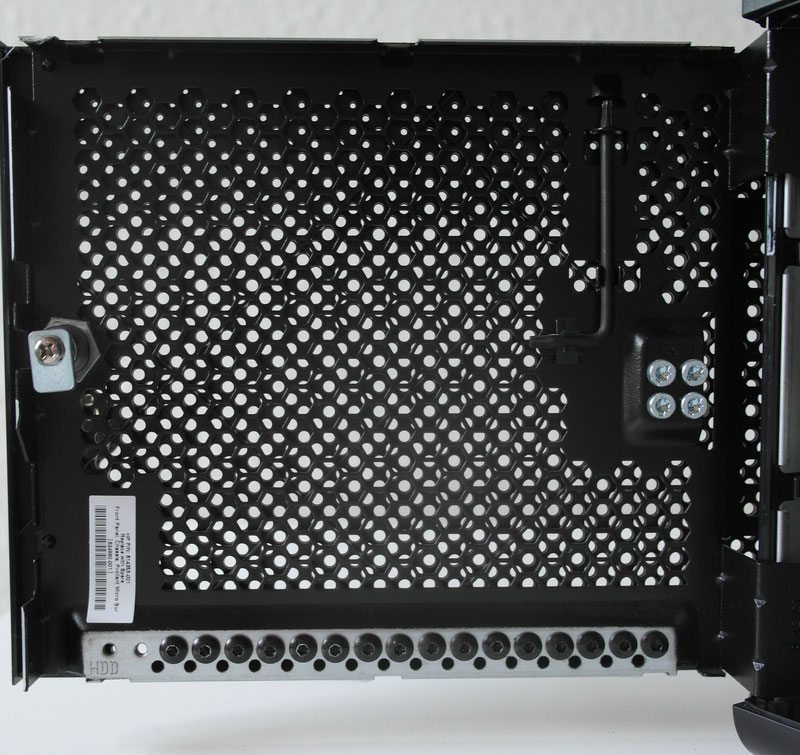
1fig007

The Front Door

Opening up the door, we find all the screws we need to mount our hard drives (black) as well as a set working for the slide-in function of the 5¼” bay (silver). A Torx tool for the screws is also included, so you won’t need any extra screwdrivers to get started.
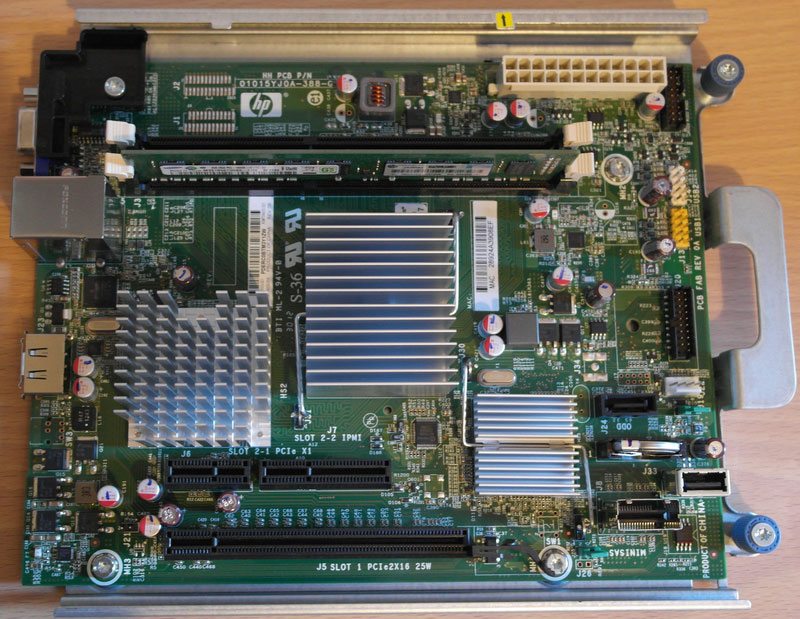
1SAM_0866

The Motherboard

Pulling out and looking at the motherboard, we can see that both the chipset and AMD Neo II CPU that powers the board are passive cooled. Removing the mainboard is really easy, all you have to do is loosen the 2 blue screws and unplug the cables. It slides right out. You only need to remove the board if you wish to upgrade the memory or plug in a PCI-Express card. All connectors are otherwise conveniently placed at the front of the board.

If all these features weren’t cool enough, it also has an onboard USB port. Some NAS operating systems such as FreeNAS run great off a USB stick, eliminating the need for the HDD as boot medium.

1fig008

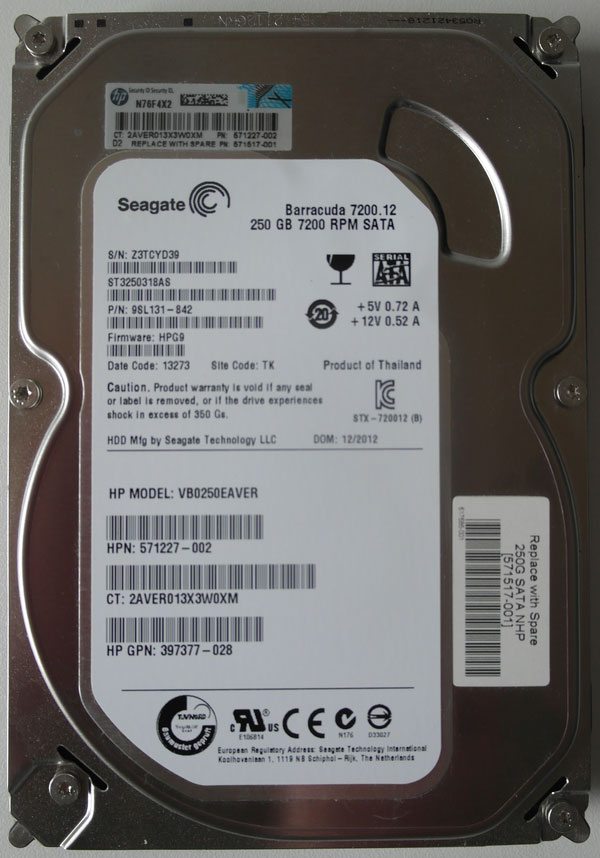
The Included Hard Disk Drive

The included hard disk was a Seagate Barracuda 7200.12 (VB0250EAVER). The drive is listed online as SATAII interface and as Hot-Plug-Able. It is nothing fancy, but with its size of 250GB and spinning at 7200 RPM, it should do a great job for the Operating system on our new NAS.

1SAM_0861

Previous page 1 2 3 4 5 6Next page

Related Articles

12 Comments

  1. This is really something I never heard about and way more better than external HDD, which you need to take with you everywhere.
    But… I instantly have a question for this. You mentioned NAS works as a pc, so it should have Mobo, right? And furthermore, is there any possibility to RAID all hard drives? 🙂

    1. While I can’t speak to a hardware raid on this device (I’m not that familiar with it).. I built my own NAS around OMV, and OMV supports various software raid levels on the storage drives no problem.

    2. u can build pc and run omv on it. but i hate this idea, fans are noisy. if you dont mind about case, use arm board (i used banana pi) and get sata multiplier and u have board with 4 sata ports, hdmi/rca video, gbit lan, 2 usb, IR – you can also add GUI, mouse and keyboard and use it as backup comp 🙂

      1. That’s what water cooling is for. Kits these days even come pre-shipped with coolant in them with no assembly required. There’s really not any excuse anymore.

        1. water cooling kits have also fan included, but not this fans are noisest, i mean psu fan, in cheap units you have noisy fan, and if you can afford for better psu, you can afford for really good 4disk qnap/synology/bufallo

          1. Believe me, fans are cheaper than a soho NAS. A good PS will set you back about $70 and a good fan maybe $15. A watercooler cost me less than $50. You are still not in the kind of money you would be in for a QNAP NAS when empty they run around $250 and then you need to populate it with NAS class drives.

  2. I attached, after instalation, two SATA HDD, but i cannot setup Mirroring with these two. The main OS is on a IDE HDD and I want to setup those two HDD as RAID. Why I cannot do this?

  3. I’ve been trying to find any information on how to access the shared folder from outside your home network. That to me is the whole point of a NAS, yet I’ve not even found a mention of it besides using a VPN. I see no explanation of how to find the NAS remotely. Anyone know a tutorial that covers this?

    1. You can actually do that quite easy, for any system, not just NAS. It requires 2/3 steps:
      – Get a dynamic DNS account (no-ip.org, dyndns, etc) or check if your router already has one of its own
      – Set up the DDNS in your router, making it sync.
      – Forward the ports for the function you want to share in the router. That could be 80 for HTTP or 21 for FTP. (With UPnP enabled, this will be done automatically for the services you tell to use it on your NAS)

      If you want access to it from the file explorer, you can add an FTP connection there too in Windows – that way it’s like a local shared folder, even though it’s remotely.

Leave a Reply

Your email address will not be published. Required fields are marked *

Back to top button
Close

Adblock Detected

Please consider supporting us by disabling your ad blocker!   eTeknix prides itself on supplying the most accurate and informative PC and tech related news and reviews and this is made possible by advertisements but be rest assured that we will never serve pop ups, self playing audio ads or any form of ad that tracks your information as your data security is as important to us as it is to you.   If you want to help support us further you can over on our Patreon!   Thank you for visiting eTeknix