Overclocking
When overclocking, some users may find it a daunting task, whereas some may find it as a bit of fun to do in their spare time. No matter who you are, you will be faced with mass amounts of settings and the process will always be the same.
Overclocking has always been a trial and error exercise that involves changing multiple settings to get the results you are hoping for. Of course, there are software applications to aid you in finding the highest, stable overclock, but the best results are generally seen from using the motherboard’s BIOS.
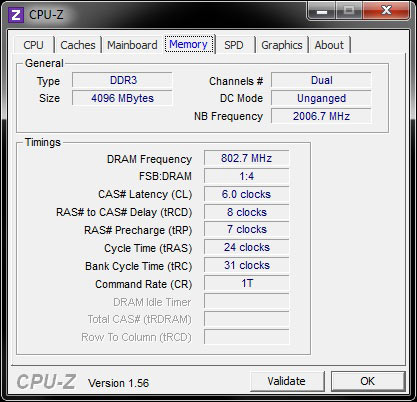
When taking a look at the stock memory settings for this particular kit, we can clearly see the timings that are used at default. Our test motherboard did need the timings manually entered as it defaulted at much looser timings. The voltage for DRAM was also manually entered as per Exceleram’s guidelines due to the wrong default value. The other option if your board supports it, is to choose the XMP profile, which for this memory was XMP-1600 which tells the board exactly which settings to choose from the memory. With us using an AM3 based test system, XMP wasn’t available to us, as it’s an Intel feature.
Once the memory was set up, we could continue to run our benchmark tests, comparing it to the various other memory that we had available. For the sake of continuity, here is a CPU-Z screenshot showing the correct memory values for speed and timings.
Once we had finished our testing at default speeds, we moved on to overclocking of which there is various different manners of doing it. It could involve loosening the timings and upping the voltage to the safest level whilst aiming for the highest DRAM frequency, but we are well aware here at eTeknix that a lot of consumer’s don’t like to alter voltage settings, and the memory has a higher fail rate if such settings are changed.
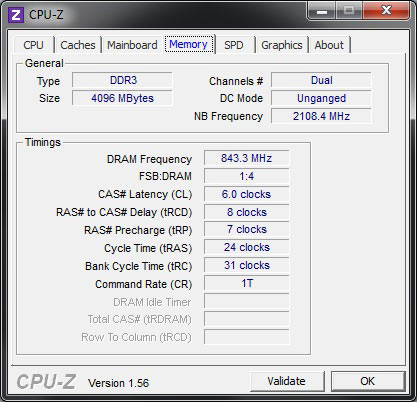
Due to this, we decided that the best way to overclock would be with stock timings and voltage to see how far the memory could be pushed on default settings. In our eyes, this gives the memory a much more intensive test as it pushes the memory modules to the limit of its default settings.
From overclocking the memory in this manner, we were able to keep the low latency timings that the memory comes with and with a voltage of 1.65 we were able to get a 86MHz overclock, which may not sound like a mass amount, but we did also have a tinker with the voltages and timings and found that anywhere from 1800MHz upwards was achievable giving a hefty 200MHz+ overclock, but upon testing, it showed that the looser timings and higher voltage didn’t give a significant difference in benchmark testing.
MIC FOR GAMING - Designed for gaming, broadcasting, and podcasting, level up your stream with…
NeocoreGames has just announced that King: Arthur: Legion IX is now out on Steam. In King Arthur: Legion IX, you…
Drop has already seen a few exciting collaborations over the years, such as their work…
Corsair has just revealed that they'll be launching a new SSD with the MP700 PRO…
The developers at Colossal Order have just released a new update for its polarizing city…
In a significant shift in gaming trends, Sea of Thieves has clinched the top spot…