Gamemax Aurora Mid-Tower Chassis Review
Peter Donnell / 6 years ago
A Closer Look – Exterior
The chassis has quite a nice stance to it and finished in all black with a huge tempered glass window; it’s going to be easy to match up with any other colour scheme.

The side window mounts on four pegs with aluminium thumbscrews holding the glass in place. It’s pretty standard to see glass these days, but I’m happy to see more chassis under £100 featuring it.

Dust Filter
On the top, you’ll find a magnetic dust filter, making it super easy to clean and maintain.
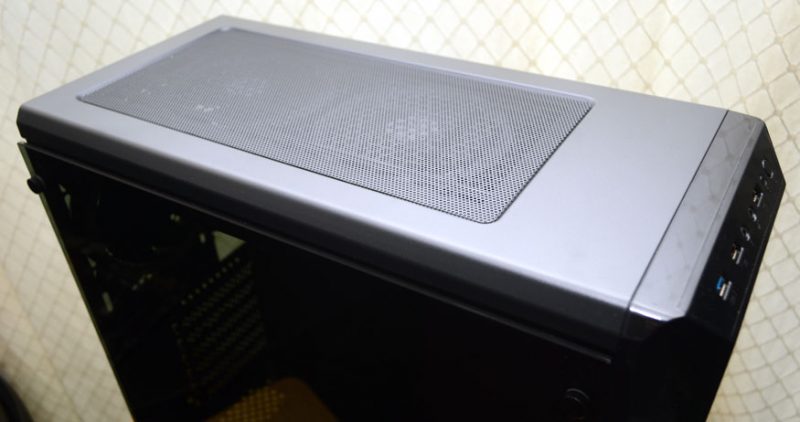
If you lift it out of the way, you’ll find two pre-installed 120mm RGB fans. There are mounts here for 140mm fan spacings also. However, it’s weird to me that they mounted the fans here as exhaust, as there are no pre-installed fans in the front panel. Personally, I would remove these two, and put them in the front.

The front I/O is pretty straightforward but has everything you’ll need. There’s a single USB 3.0, dual 2.0, and a reset button.

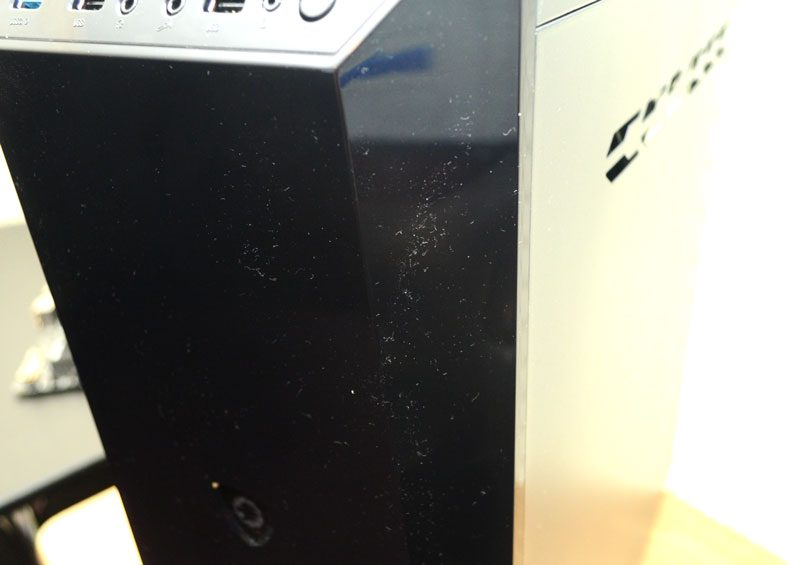
The power button is located in the middle of the front panel, which is pretty cool. It’s a bit different and breaks up the design a little. The front panel design is a bit glossy for my liking though, as it cheapens the look. Of course, that’s subjective, but I do at least like the angular design of it.

Dusty
The gloss plastic does attract quite a bit of dust though. Thankfully, there’s a cleaning close included in the bag. However, if you have a dusty room, this isn’t going to be fun.
The right side panel is mounted with dual thumbscrews and features a weird cut out design towards the top. I’m not sure what they did this for, as not only does it allow dust to get in, it also exposes the cables through the panel, and compromises its durability.
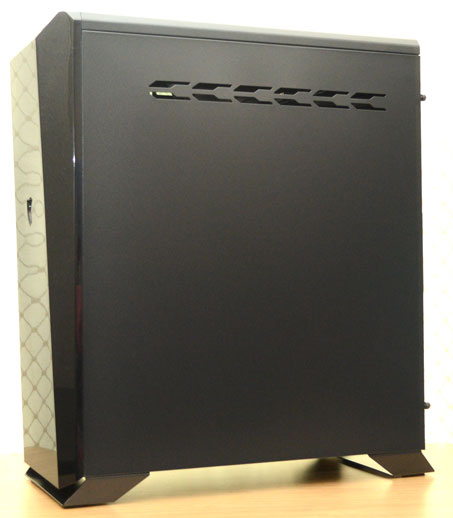
The panel is a bit thin, and I can push it in with my finger, then if you wait, it will pop back out again on its own. Look at the light pattern from the bottom; this is it straight.

Now with it pushed in. Maybe swap this out for a solid black panel Game Max!

Around the back, we’ve got all the usual stuff, with a fan mount, expansion slots, and a bottom PSU mount.

I especially like the fan mount, as it uses elongated screw cut-outs, allowing you to height adjust your fan or AIO to improve compatibility. There’s a pre-installed fan too, which matches the design of the two in the top. However, this fan is mounted as an exhaust also. All three stock fans are blowing out, with none bringing airflow in. That’s easily fixed but should have been right from the factory.

Snap-Off
There are seven expansion slots here, with the top using a replaceable cover. However, the bottom six use snap-off covers, which I would expect on a cheaper chassis, but don’t think they should have cut the build costs in this area.

On the base of the chassis, there are two full-width metal feet providing plenty of stability, with some rubber grips to stop it scuffing the floor/desk. There are four holes cut where I suspect feet can be mounted for a different model, suggesting this is a retooling of an older or existing product. There’s a full dust filter for the PSU too, which is always a nice bonus.


