How to Install an AM4 AMD Processor
Ron Perillo / 6 years ago

For first time PC builders, putting together a system can be anxiety inducing. Which is why it is important to be familiar with the components first before proceeding. This guide serves as a basic starter help for those who have not put together their own PC before. Specifically, it covers the topic of processors and how to install it on a motherboard.
AMD currently uses two different sockets: AM4 and TR4. AM4 is for their mainstream platform while the TR4 socket installation is for their high-end desktop platform. Only the AM4 socket will be covered here since the TR4 is for advanced users and would know what to do. The same principle still applies, so once you get the hang of installing a mainstream desktop processor on a motherboard, you should be more than able to install one on a high-end system.
If you are looking for a guide for installing Intel desktop processors, you can follow this link.
AMD AM4 Socket Type
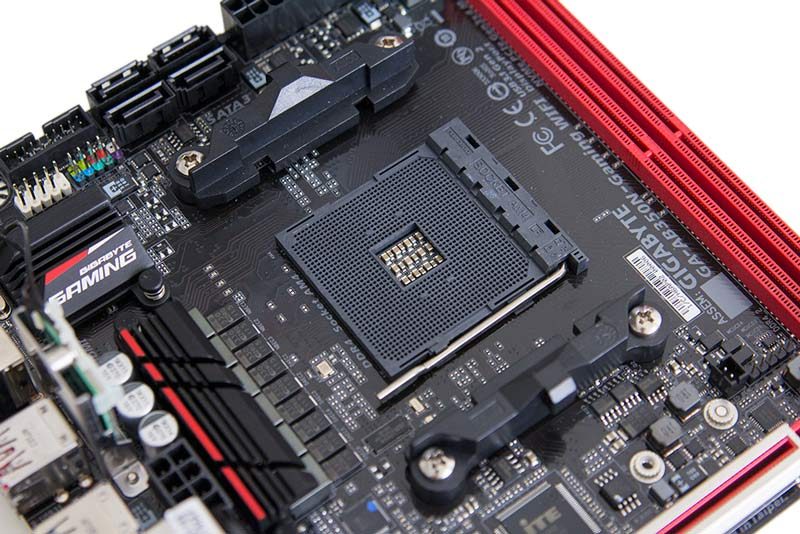
AMD Processors use what is called a PGA-ZIF type socket. PGA stands for Pin Grid Array, with the pins on the processor itself with matching pin layout on the socket. ZIF stands for Zero Insertion Force, which means it requires very little effort to plug in the socket.
AMD has been using a PGA-ZIF type socket for several generations now. Each differ with pin-count and layout, but for the most part, the installation methodology is the same. The photos show the latest AMD socket AM4 motherboard with the Ryzen AM4 CPUs that are compatible with it. However, the same steps can be used to install an older AMD AM2+, AM3+, and FM2+ socket CPU on a matching motherboard.
AMD Processor Installation

1.) There is a lever on the motherboard socket which you raise first. This releases the lock so that you can install the processor into the socket.
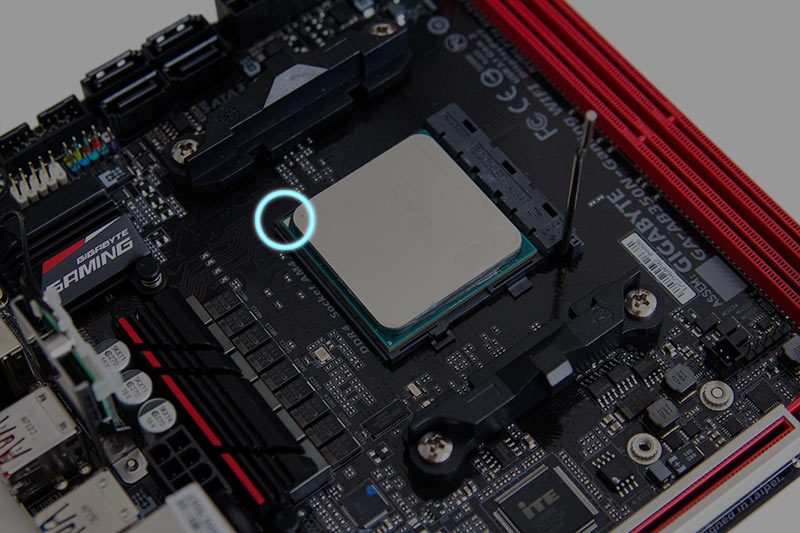

2.) Line up the processor to the socket, and it should just plop down without effort as long as the lever is up. There is a triangle in the lower corner (highlighted in the image above), and it should match with the triangle on the corner of the socket as well. This serves as a guide for the orientation.

3.) Drop down the lever to lock the processor into place.
4.) See how easy that was? Your processor is now in place and it is time to install your CPU cooler. Now let us move on to the AMD CPU heatsink installation guide.


