Lian Li Lancool II Review – The Ultimate Mid-Tower?
Peter Donnell / 4 years ago
Exterior
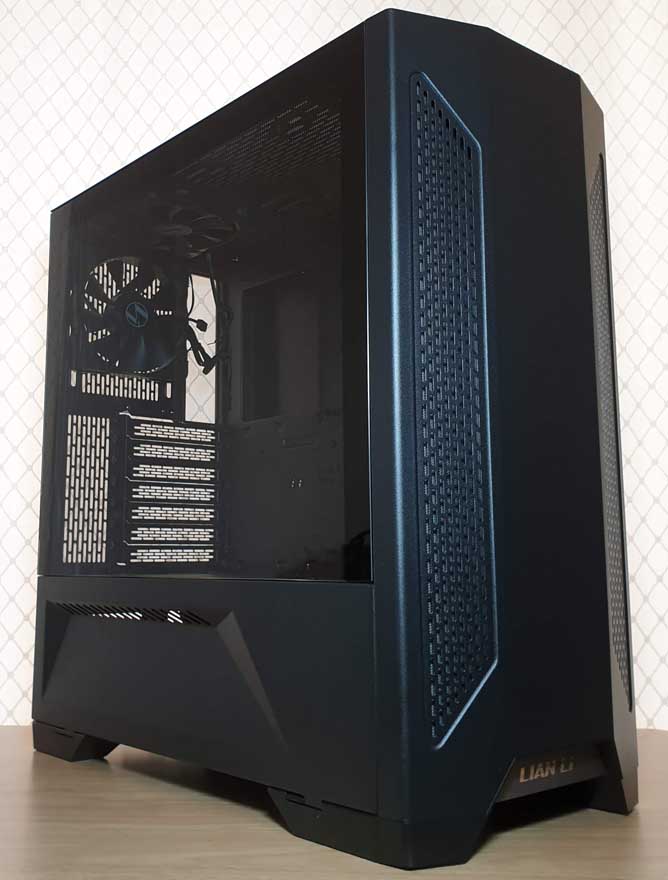
The Lian Li Lancool II looks fantastic from the moment you take it out of the box. What really stands out, or more so, doesn’t stand out is the finish. It has a lightly textured matte black paint job that’s not particularly reflective. It’s actually quite stealthy, at least until you see the reflections on the glass. Because it’s all blacked out on the interior, it does make it a mirror when you have no interior lighting. However, that’ll all change once the system is built.

The front panel looks fantastic, but it’s the little details that add up here though. The front panel has an angular design but mixes rounded edges on the sides and more bold angles further in. The same with the ventilation, which uses lots of straight lines, but also some soft curves. The end result looks both aggressive and sleek at the same time, and I love it.

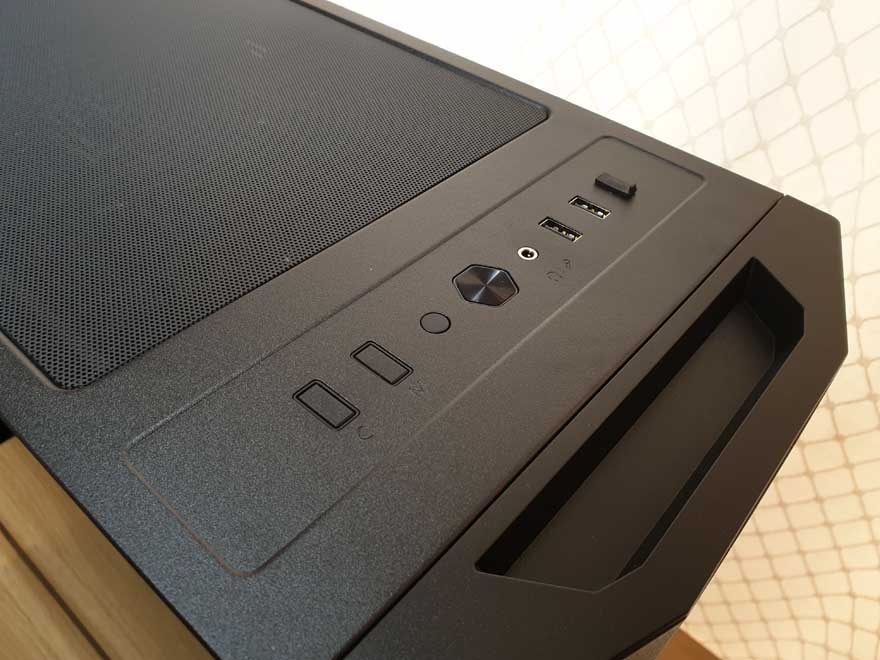
Tucked into the lower section, you’ll find a small Lian Li logo. I love that they’ve done this, it’s a lot less in your face and keeps the front panel looking clean. Plus, you can see those large feet are giving the case amazing ground clearance too.

The front panel has a few more tricks that aren’t immediately apparent. There’s a set of high-quality dust filters behind it, as well as some cool RGB lighting effects, but we’ll get to that shortly.
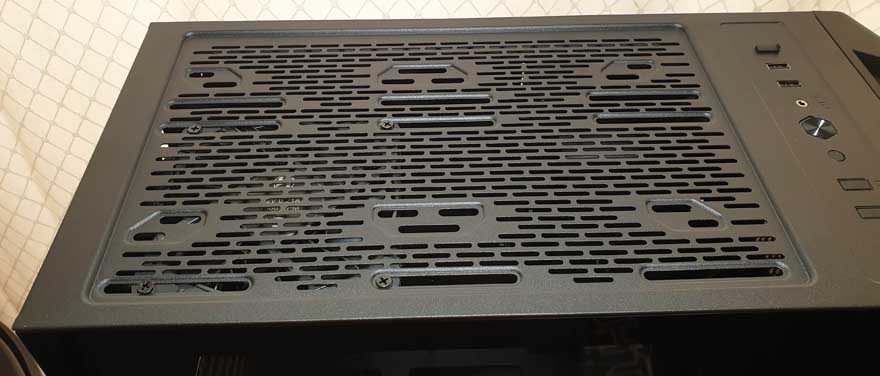
On the top, you’ll find a huge magnetic dust filter, as well as the front I/O panel.

The I/O is pretty much all blacked out too, with black power controls, and even the USB ports are black rather than blue on the interior.
Under the dust filter, you’ll find plentiful options for mounting a wide range of fans and radiators. Plus, there are options to move them closer or further from the motherboard, improving compatibility with boards that have large VRM cooling.
Down the right side of the case, you’ll find it looks pretty much identical to the left. Another hinged tempered glass window so it looks just as cool from either side!

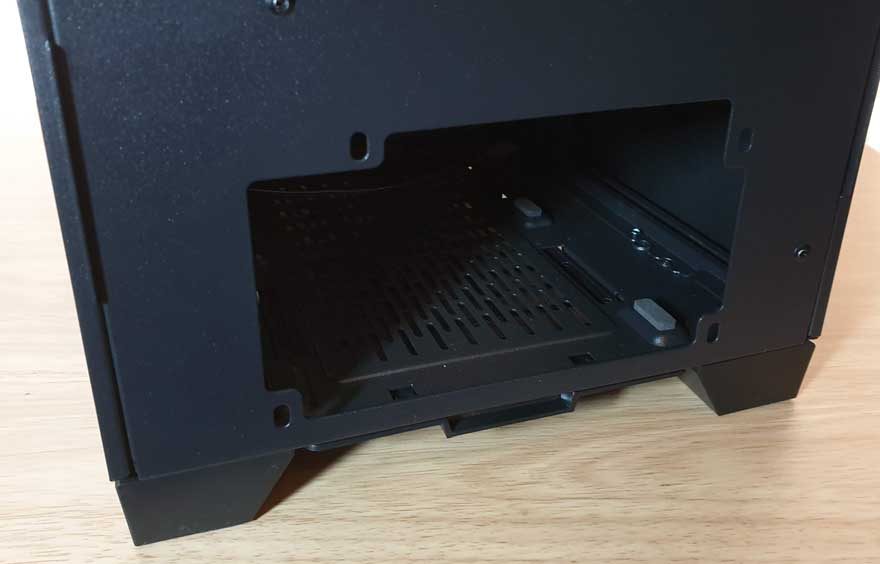
Plus, there’s another exposed section of the PSU shroud, which opens out; you’ll see that in a moment.

Around the back, it’s business as usual. This is an ATX mid-tower after all, so it has to meet those requirements.

There is a height-adjustable fan/radiator mount, which features a pre-installed exhaust fan.

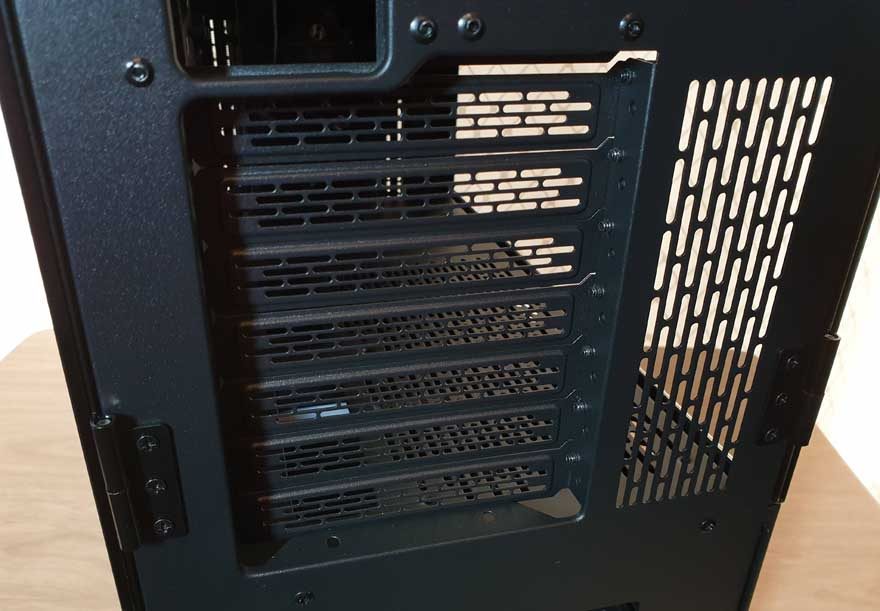
Below that, there are seven expansion slots, each fitted with reusable metal covers. What I love is that they feature the same perforated design as the front panel vents; it’s the little details that count.
The PSU mount is located at the bottom, under the built-in PSU shroud.