Netgear R6250 Dual Band Gigabit Smart WiFi Router Review
Chris Hadley / 10 years ago
A Closer Look
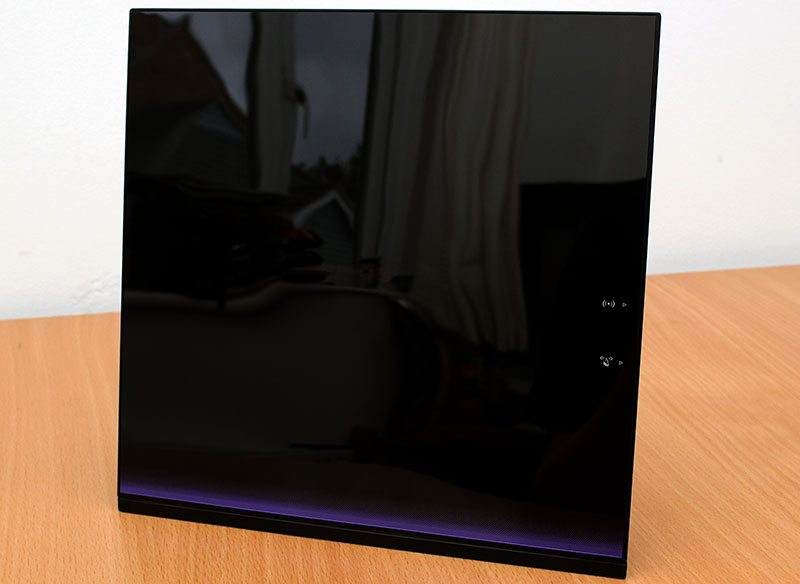
With all the accessories set aside, it’s time to have a closer look at what is packed inside the R6250’s black plastic casing. Those who read my review on the R6300 earlier in the year will note a striking resemblance in its design and style. If the two were to be stood side-by-side, the only differences that would be immediately noticeable are the purple colour along the lower edge of the R6250 along with a slightly narrower build.
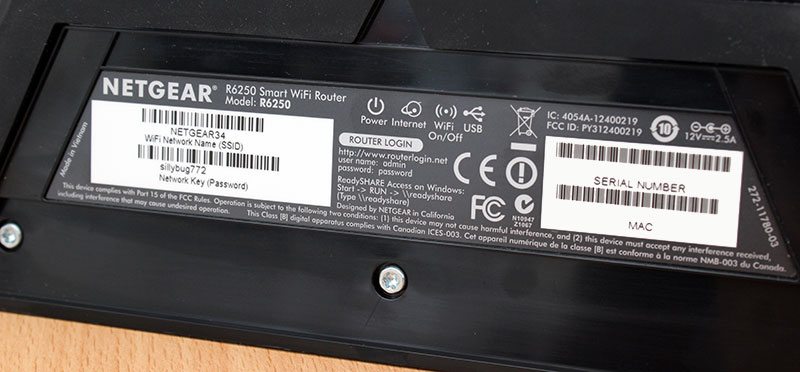
Whilst I’ve shown the R6250 above in its full glory, I’ll just take a step back in the unpacking process to before the protective film has been taken off. On top of this film is a sticker that is placed on top right hand corner. This sticker gives us the routers default SSID and wireless key. Instead of having a fully open network by default, Netgear have made their routers far more user-friendly by giving a more secure platform to build upon out of the box. Don’t worry if you lose this sticker though, as the default settings are also printed on the underside of the router.

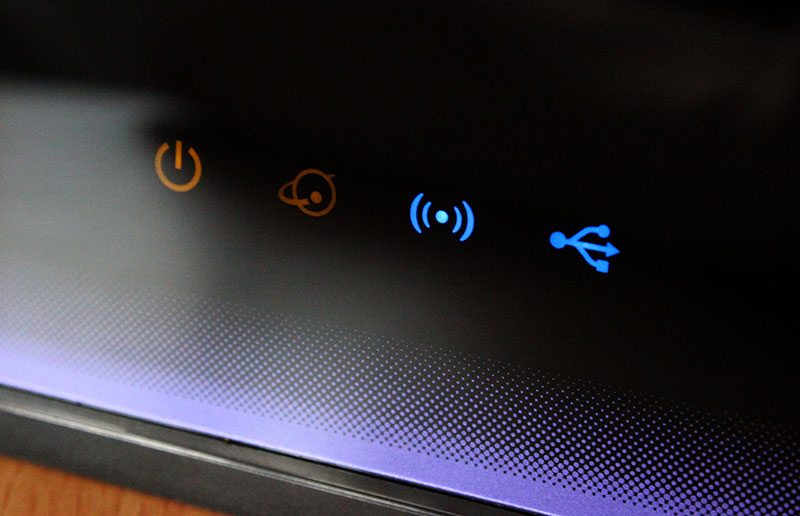
Heading back to the overview, Netgear have kept the status LEDs on the front simple and to the point. Alongside the power LED is an orange / green LED for internet status, WiFi status and USB status. There’s not activity indication for the LAN ports as we do see on some models – the reason being that the clean look on the front would be disrupted and a bit more crowded to look at.
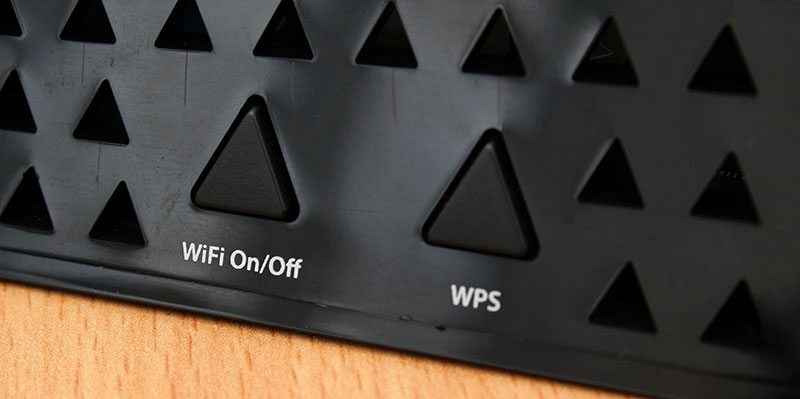
Tucked just around the right hand side of the router is a pair of buttons. The first of these is for WPS one touch connections and the second for switching the wireless on and off.
Turning the router right around and having a looking at what’s on show behind the scenes, there is by no means any shortfall on ventilation. Whilst entry-level routers generally don’t tend to give off that much heat, high-powered routers such as this do get a little warm under the collar – hence the mass of triangular shaped holes all over the back of the unit.
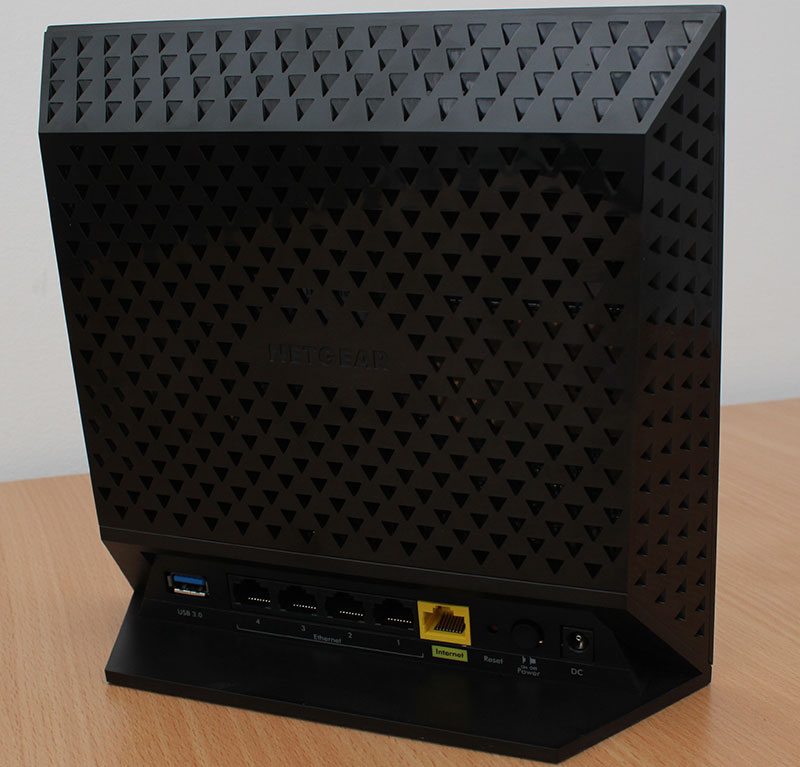
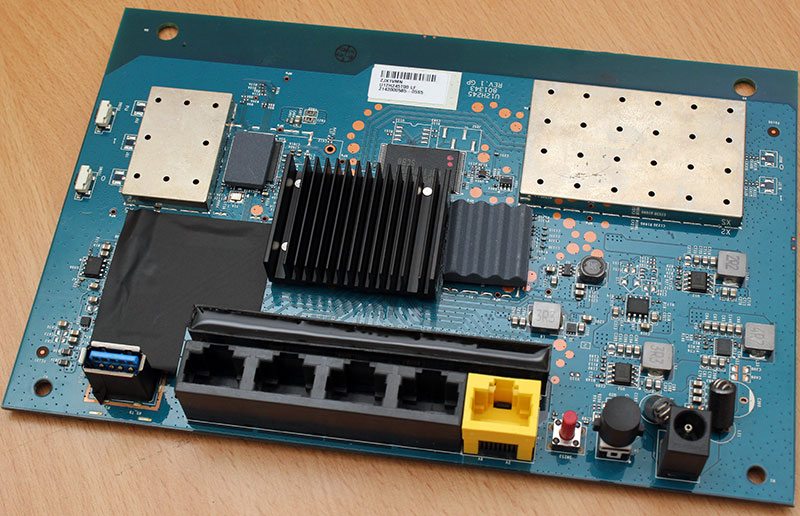
At the foot of the router, we find a fairly standard array of connectivity options. Alongside four Gigabit Ethernet ports, we find a Gigabit WAN port, DC power button and jack, a factory reset button and finally a single USB3.0 port for connecting a printer or external storage device.

On the underside of the router we find the previously mentioned default wireless settings along with the default login credentials and the systems serial number and MAC address.
Whilst we’ve seen what the router has to offer on the outside, it’s time to go that little bit deeper with our router reviews. After all I’m sure you’d like to see exactly what makes these routers tick. Before I do though, I’m going to make the point now that taking the router apart WILL VOID YOUR WARRANTY. Myself and eTeknix as a whole will not be responsible for any damage that may be inflicted to your unit if you decide to take it apart – we do the breakdown so that you don’t have to.
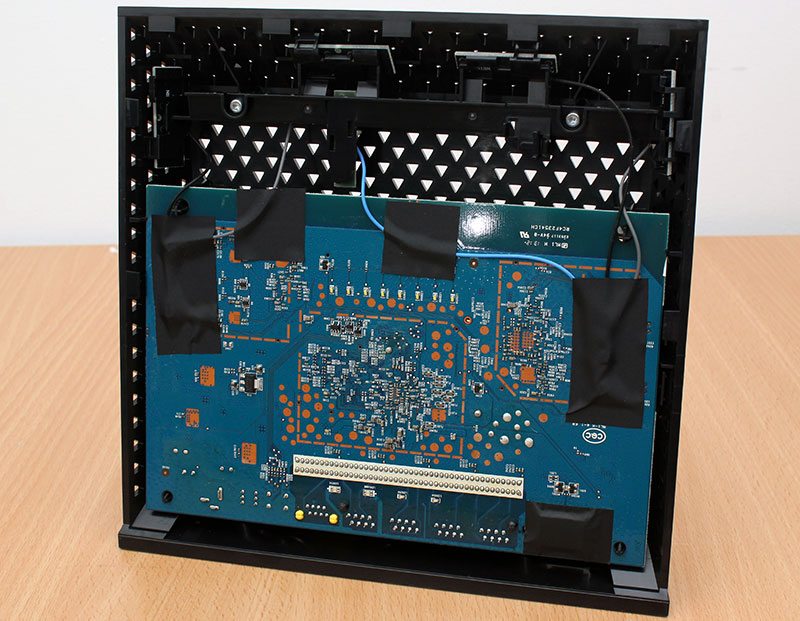
Prising the lid off the front of the R6250, we can initially see that the router has a relatively small PCB given the size of the case. The reason for this is that it allows for the antennae to be placed in an optimum position, saving the need to have external fittings.
Plugging in the router and powering it on we can see where the illumination on the front comes from. The front face of the PCB has two distinct lines of SMB LEDs – the upper eight lighting up the Netgear logo and the lower four for the power and status indication.

In the top of the plastic housing, there are a total of five individual antennae for the 2.4GHz and 5GHz radio transmissions. The position of the antennae within the unit is also very important. Netgear’s Beamforming technology relies on the routers ability to pin point where a particular wireless device is so that it can automatically channel the wireless signal to that unit individual client. By using this technology, Netgear are able to offer a more stable, reliable and faster connection to any devices that are connected – especially those that have a Netgear wireless adaptor with Beamforming technology.
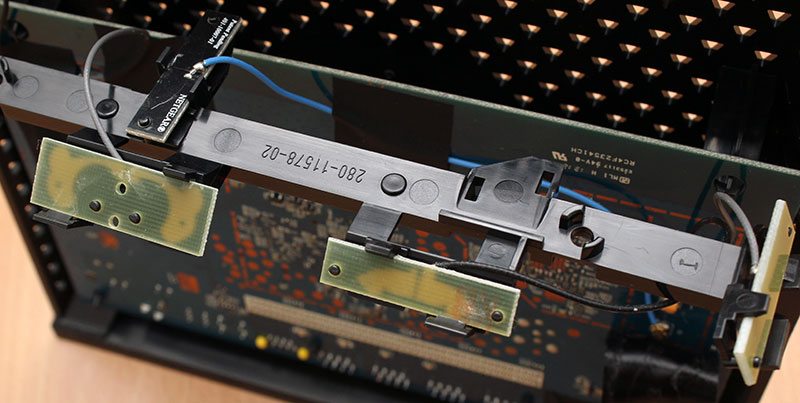
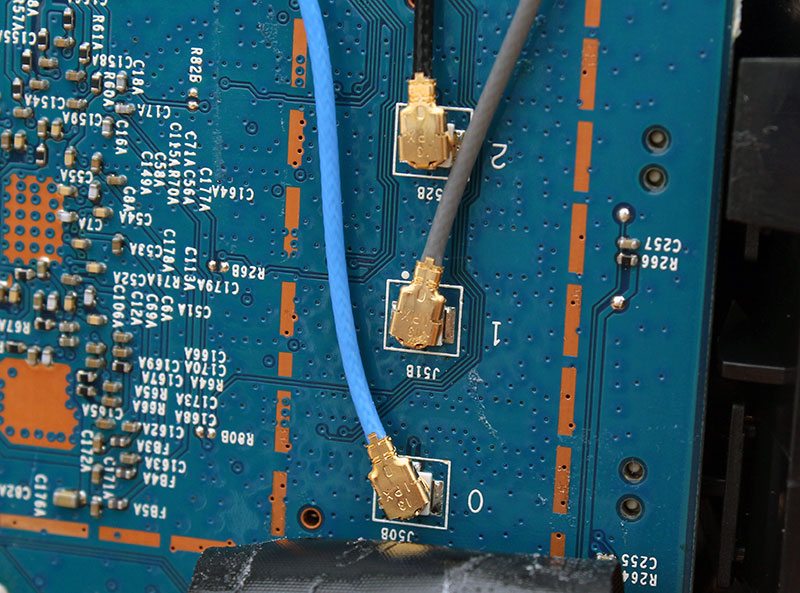
Peeling back the protective tape that covers the antennae wires on either side of the PCB, we can see the remarkably small terminals that connect the antennae to the PCB.
Taking the PCB right out of the casing allows us to get a look at what lurks on the other side of the board. Instantly we can see there are a number of components of key interest. Lying at the heart of the board, under the largest of the heatsinks is a Broadcom BCM4708 dual-core 800MHz processor, giving the router the power it needs to handle the huge range of network features that it has to offer.
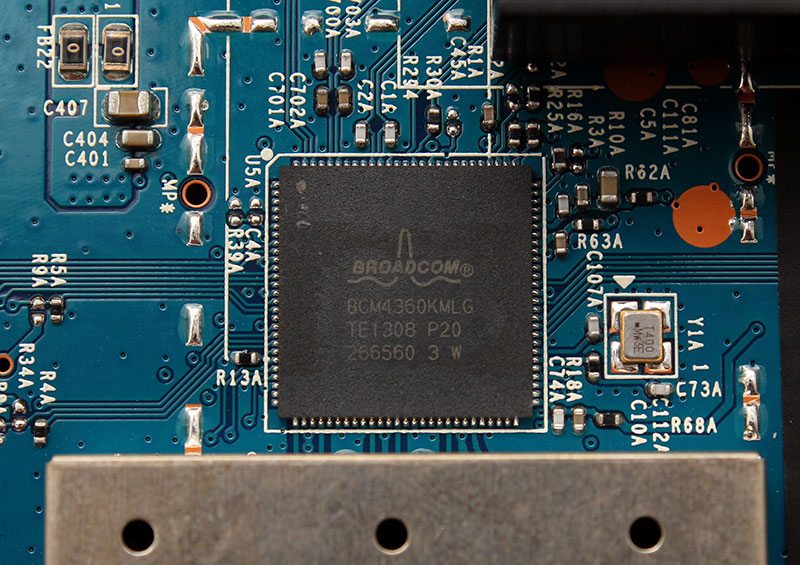
Just to the right of the CPU, underneath the smaller of two ceramic heatsinks, is a Broadcom BCM4360KMLG 5GHz 802.11AC Gigabit Transceiver. As its name suggests, this little chip is responsible for all 5GHz transmissions, be it AC or wireless N.
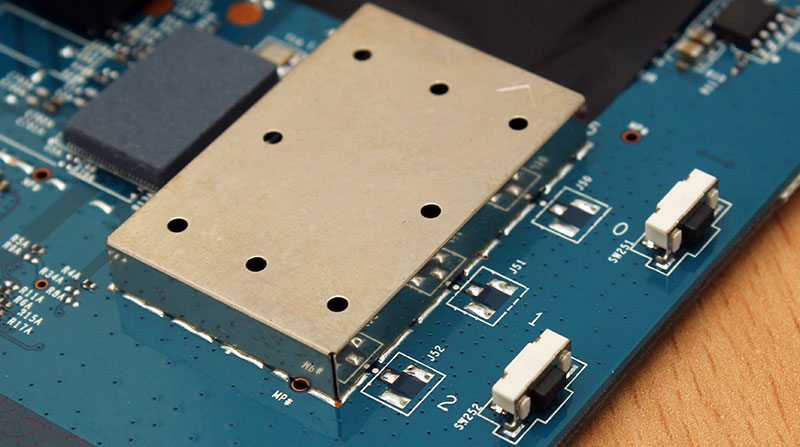
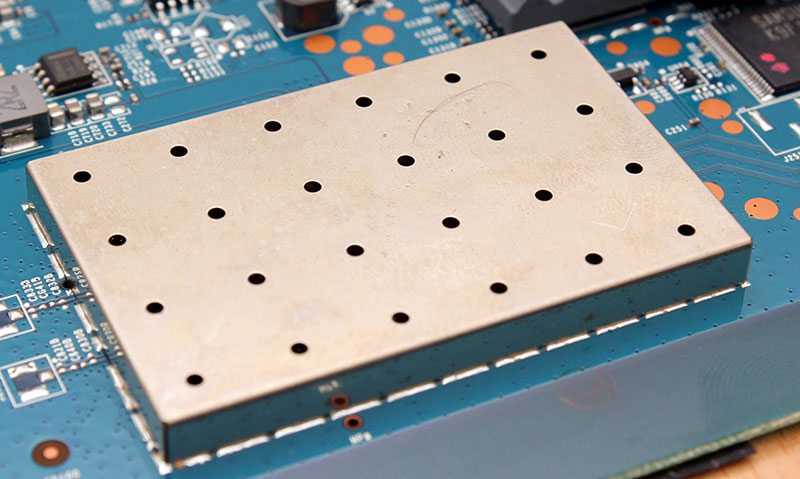
Next door to the 802.11AC transceiver is an RF shield covering the 5GHz power amplifiers, protecting nearby circuitry from any undue interference. On the edge of the PCB we can also see the two buttons for WPS connectivity and for turning the wireless on/off.
On the opposite end of the board is the second, but much larger, RF shield. Below this is a Broadcom BCM43217 transceiver for the 2.4GHz 802.11bgn radio and the accompanying power amplifiers.
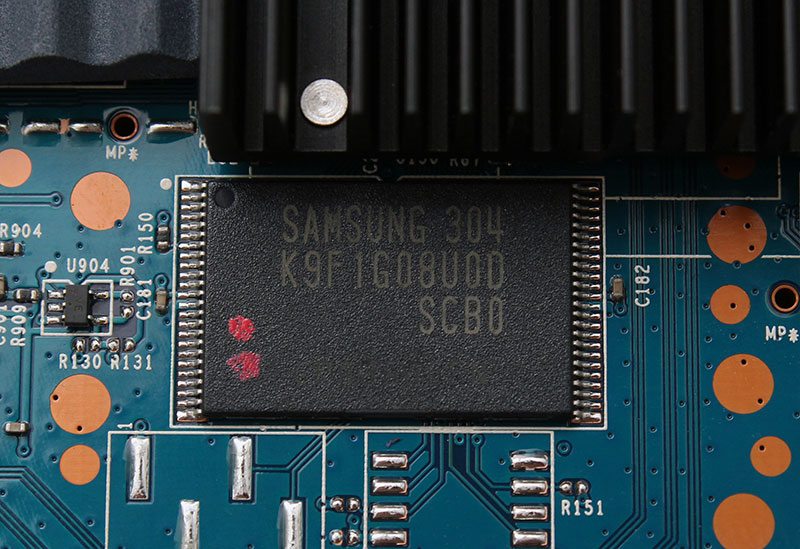
Nestled beside the CPU we find a Samsung branded K9F1G08U0D SLC NAND IC that has been cut down to a modest 128MB capacity.
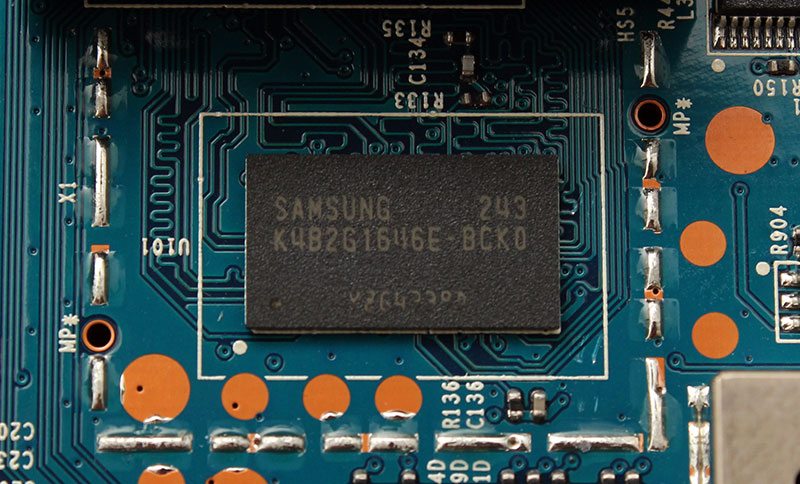
The last chip of interest that we can see on the R6250’s PCB is 256MB of Samsung K4B2G1646E-BCKO DDR3 SDRAM.