Nitro Concepts S300 EX Gaming Chair Review
Mike Sanders / 5 years ago
A Closer Look
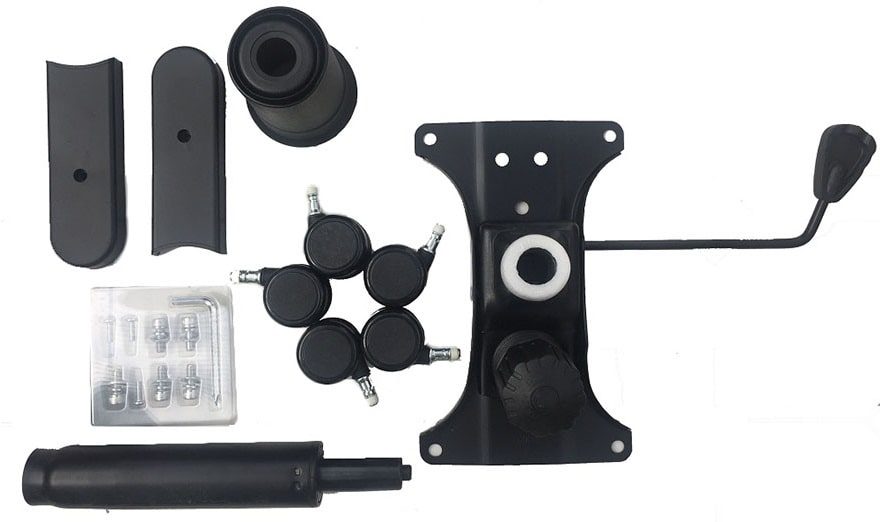
As you can imagine, being a gaming chair there is rather of lot of individual parts that go to make the whole. Fortunately there everything you need to get this assembled can be found right out of the box. Let’s, therefore, take a closer look at the individual components!
Accessories
As this is a gaming chair, there are clearly more than a few parts you need to put this together. Thankfully, the vast majority of the small parts (and your tools) are all kept within a cardboard box.
Laying all the key components out, you will, however, be surprised to find that in terms of overall assembly, this isn’t quite as intimidating as you may have feared.
Don’t get us wrong, this is a big chair. As such, having a partner or, at the very least, a decent amount of workspace will be helpful. I did, however, manage to do this all by myself without too many problems!
As for assembling it, you only need one tool and you are fortunately provided with it. Take note later in the review, however, as it may cause you more problems than was really necessary.
The instruction manual you are provided with is nice, bright and clear which makes the assemble a lot less daunting. You are provided with only 6 basic steps which should give you an idea on this being not too tricky a task!

The rear of the A4 instruction sheet also provides you with the key operational functions of the chair. While these are mostly intuitive, it’s nice to see them there.

Wheels And Base
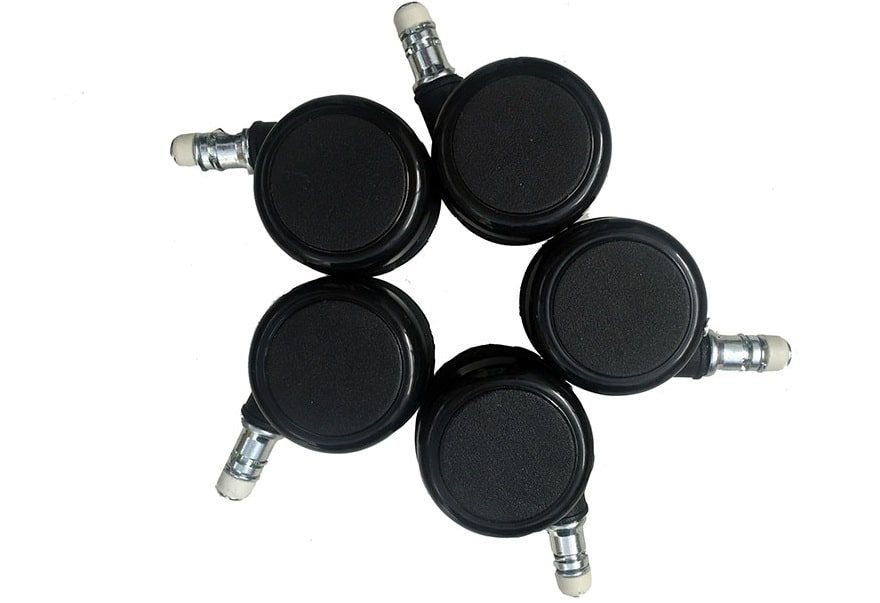
The wheels to the chair are fairly basic plastic castanets. Provided with 5 of them, while they are largely nice quality, beyond that there is very little to comment about them.
The base itself is 5 spoke (as you might have guessed) with a white trim that matches the overall design of the chair. It is a little disappointing that the base is entirely plastic and a metal design is, usually, a bit more reassuring. It does, however, feel durable and in terms of aesthetics it’s a good start!

The wheels attach to the base by simply pushing in. Surprisingly little resistance is required, but once in place, they feel more than secure.

Finally, you will insert your height adjustable piston to the base itself. This generally falls into place and generally only ‘locks’ in when you first sit on the chair. The plastic covering provided also ensures that you can’t potentially catch your fingers in it while operating.

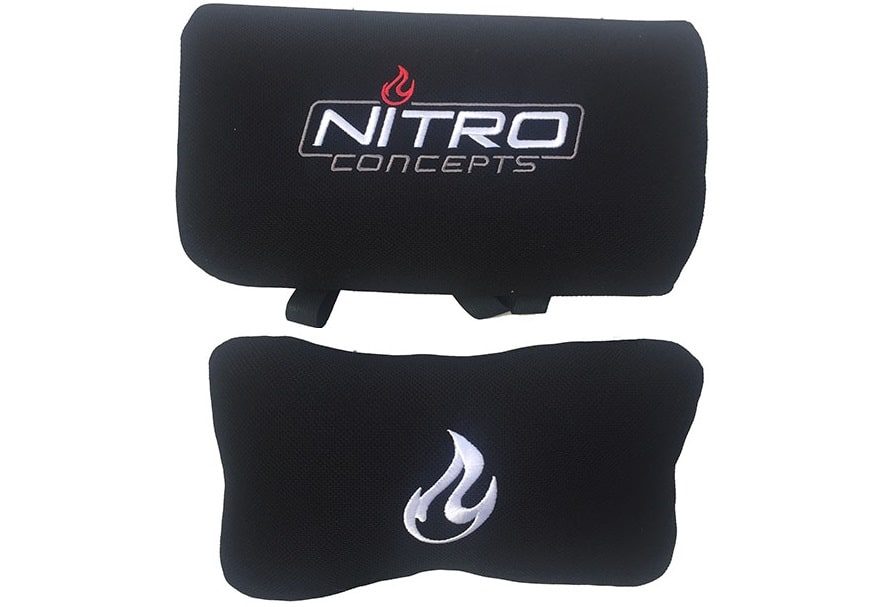
Cushions
You are provided with two cushions for the chair. Both of which can be attached to provide lower back and upper neck support. The cushion to the top is nice and firm and fits via straps to the (near) full length of the chair.

The other cushion has a more ‘memory foam’ feel about it which was unexpected, but certainly not a concern.
Base/Seat
The base comprises of your seat with the armrests and rear backrest attachments already in place. It does, of course, carry all the colour and styling that will form a key emphasis on the completed design.

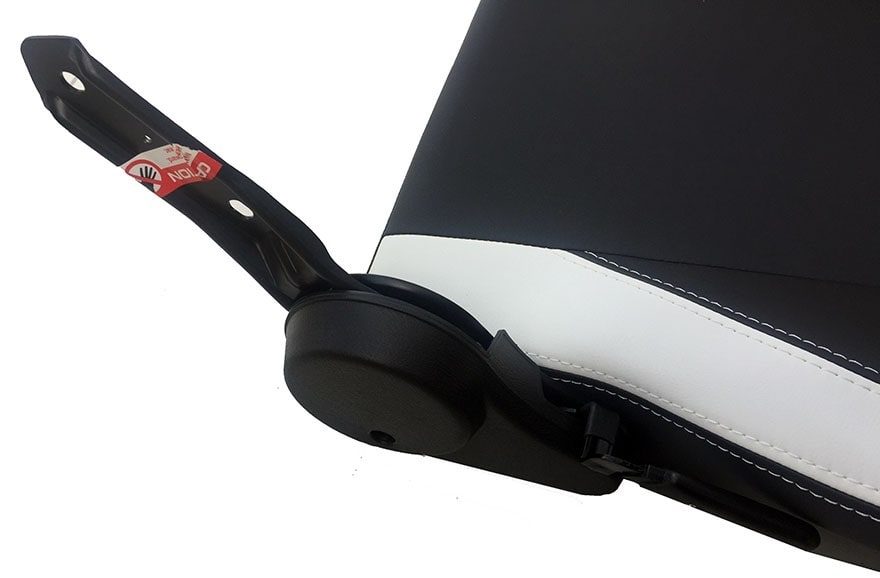
The right side of the seat has the main adjuster for the tilt function. That has a pretty stern warning notice on it not to engage this until the backrest is fitted. This is excellent advice and not to be ignored. If you attempt to pop the handle while the back rest is not attached, that metal arm is coming at you with alarmingly rapid pace.
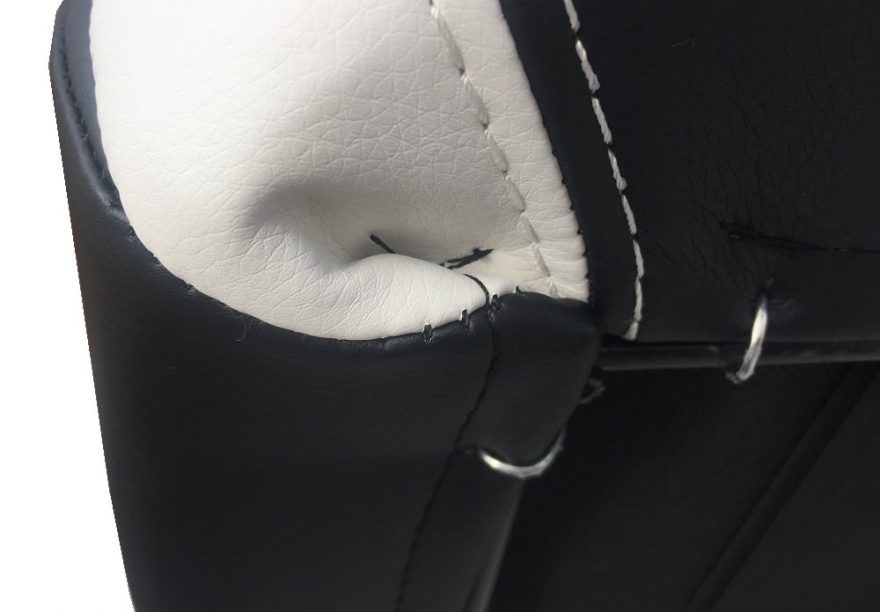
While the seat itself is cushioned (and cushioned nicely) there are also 5 elasticated straps to the underside which provide excellent comfort and support.

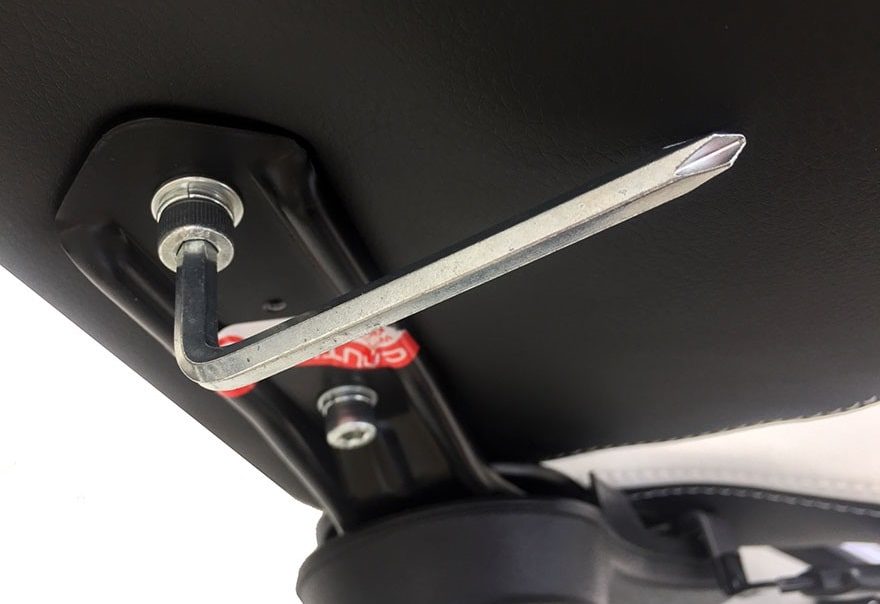
The seat fits to the wheel base via 4 screws to each corner. While this is relatively easy to attach (albeit rather cumbersome work) it does highlight the first issue with the tool provided. Namely that if you were to attempt spin this naturally, you would catch the plastic covering to the ‘soft-tilt’ adjust.
This could easily allow you to both scratch and/or damage it which means that some care is required.

In terms of stitching and quality, while the stitches in the fabric are clearly visible, there were no aspects of major concern. Even the underside of the chair (usually a rather messy area) is excellent presented meaning that in terms of production, a strong level of ‘finishing touch’ has been made here.
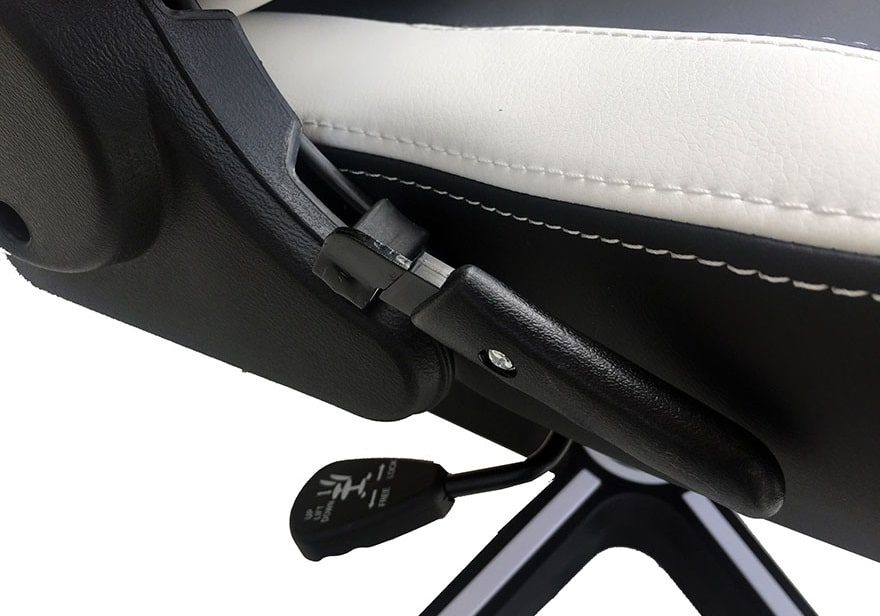
Once everything is attached, the height operation (as well as the ‘soft-tilt’ lock) level becomes more apparent. As can be seen below, the labelling on it is both nice and clear.

Arm Rests
The armrests to the Nitro Concepts S300 EX allows for 3 general configurations. Height, angle and length. These can all be adjusted by the simple control tag or, in the case of angle, by a little brute force.
It is a little disappointing that the arm rests are (basically) lightly cushioned plastic, but, on the whole, the range of movement does allow for good comfort adjustment.

Backrest
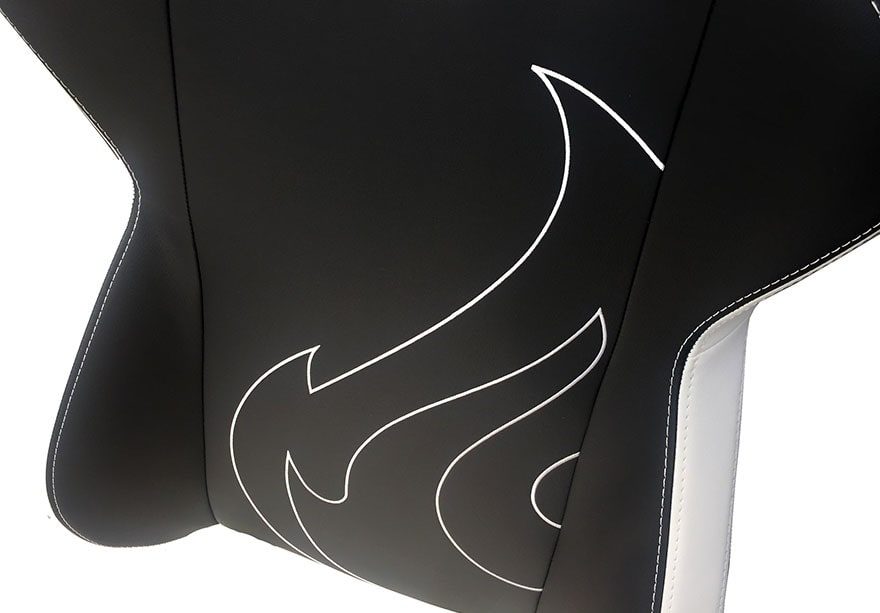
In terms of most of the design aesthetics, they are mostly to be found on the backrest and they are certainly impressive!

The main eye-catching part of the design is the white flame. While this is only an outline, it simply looks fantastic. Particularly with the white on black design.
The Nitro Concepts logo is also nicely embroidered to the top in which the quality again is faultless. No loose threads, no messy corners, it looks crisp and solid!
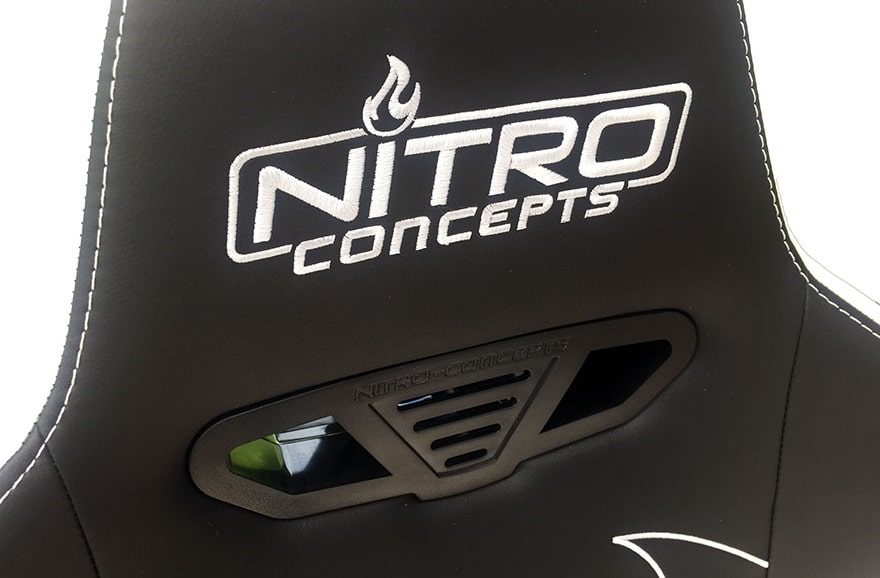
The rear of the chair also carries this design over with the ‘flame’ logo again being embroidered to a very high quality.

Putting the Pieces Together!
Mounting the backrest to the ‘base’ of your chair is easily done via 4 screws which are already in place to each side. All you need to do is remove them, line up each side and re-attach them.

In another issue with the tool provided, the phillips screwdriver on the opposite end (while needed shortly) is rather concerningly just a the right length to potentially stick into your fleather covering.
At this point, I would honestly recommend using another tool if you have one or, at the very least, taking this slowly and with care.
One this is done, simply attach your two plastic covers (provided with the accessories as well as the 2 screws necessary) and you have, by all intents and purposes, your chair assembled.
We should highlight again that the stitching quality to the backrest is very good again.

As you can see in the images, it is clean, uniform and without any rough edges or areas of concern.

In terms of assembling the Nitro Concepts S300 EX, you’re looking at about an hours worth of work. Possibly less if you’re rather experienced at putting these type of gaming chairs together.
So, now it’s assembled, what’s it like? Well, there’s only one way to find out!


