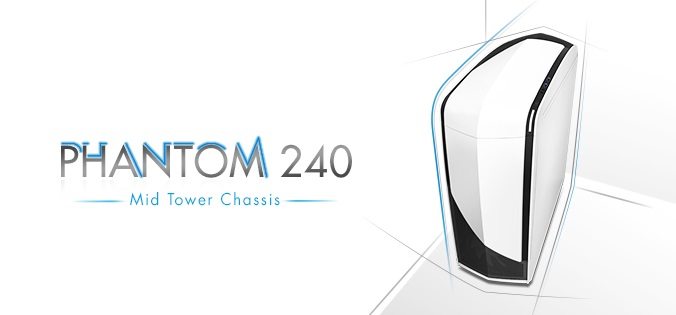
NZXT Phantom 240 Mid-Tower Chassis Review
Peter Donnell / 10 years ago
Introduction
NZXT have become legends in the eyes of many PC gamers, their chassis designs are highly focused on gaming builds and often offer loads of innovative features, cool designs, great build quality and more, the only downside being that all this glorious quality comes at a price. With many of the best NZXT chassis costing in excess of £100, it can leave many of us feeling left out as not everyone is comfortable with spending that kind of cash on a PC case, which is why NZXT has created the Phantom 240.
Based around the design of the rest of the Phantom range, the P240 has been cut down a little to offer the consumer a little extra value for money. Priced at just $69.99 / £55 it is taking on the very competitive mid-budget market, typically the price bracket most people aim for before you start getting into high-end and enthusiast level products. There are virtually countless great chassis in this price range and you often find each manufacturer offers something unique, most often in terms of design, to try to tempt you into a purchase, so it will be interesting to see what NZXT have to offer for this kind of money. Even more interesting is to find out if saving some money means loosing out on some of that legendary NZXT quality.
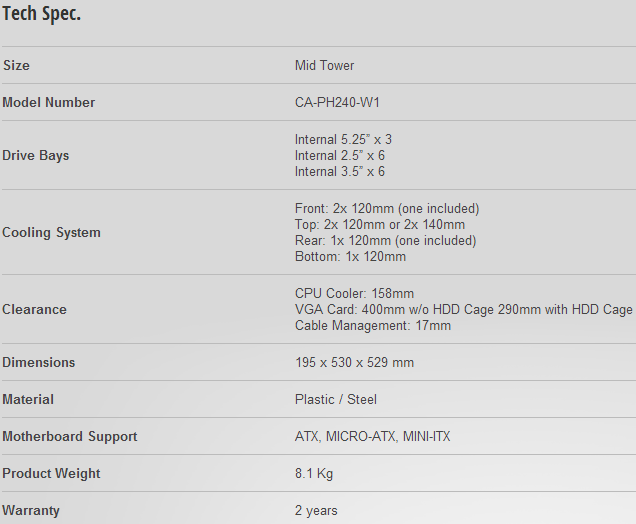
As you can see from the specifications below, the P240 is rather well equipped; it has room for three 5.25″ drives, plenty of hard drives, lots of fan mounting positions, with room for large graphics cards and CPU coolers.
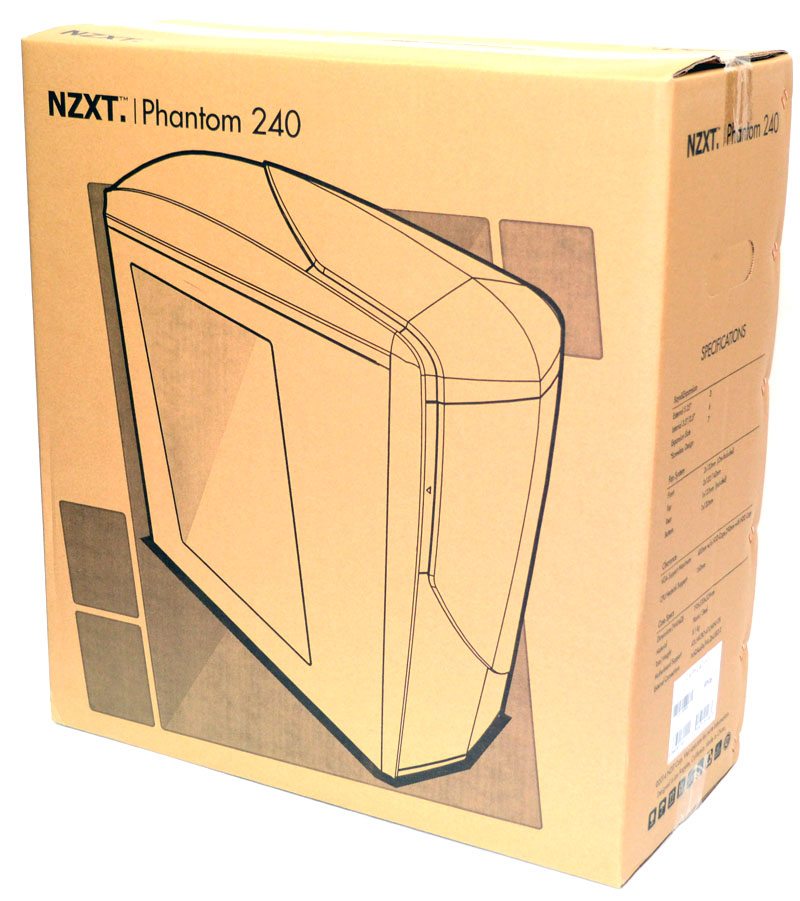
The packaging has been kept nice and simple, likely in a bid to save costs, which means you’re spending more of the money on the product rather than on fancy packaging, which is never a bad thing.
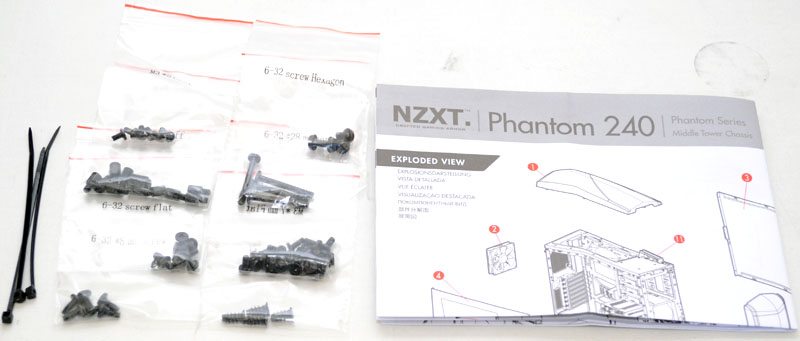
In the box you’ll find lots of labeled bags of screws and fittings, all of which are high a quality and finished in black, perfect for getting all your major components installed. you’ll also find a fold-out user guide which talks you through all the major features and the installation process.
Exterior
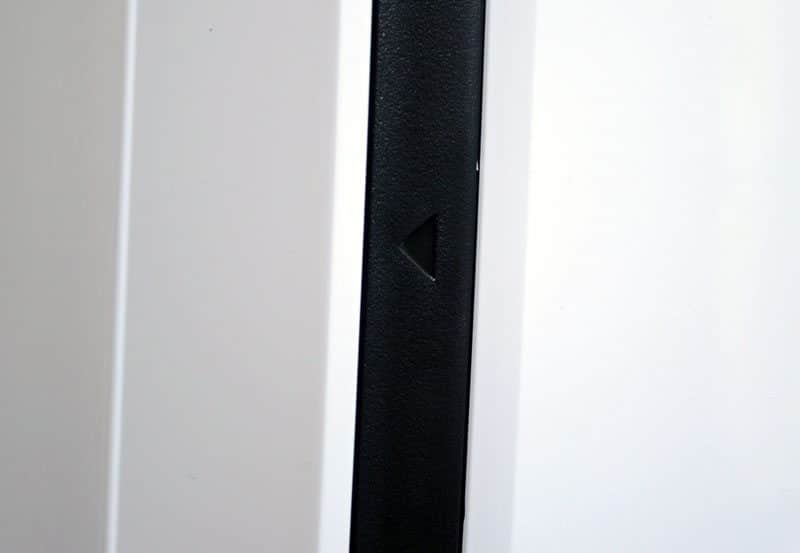
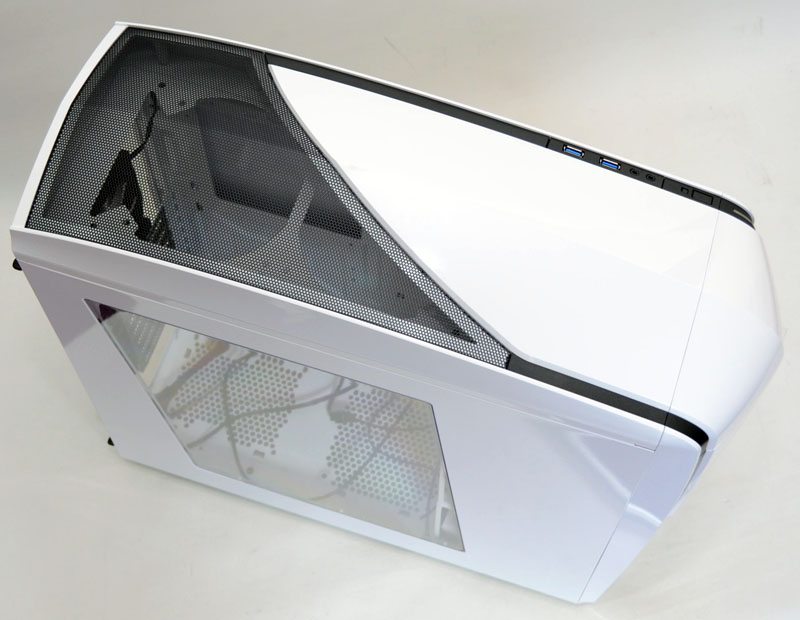
The Phantom 240 is a very elegant looking beast, it’s lavished with strong lines and huge sweeping curves. The left side panel features a sloped window which is fitted with crystal clear perspex, giving a very uncompromising view of the chassis interior.
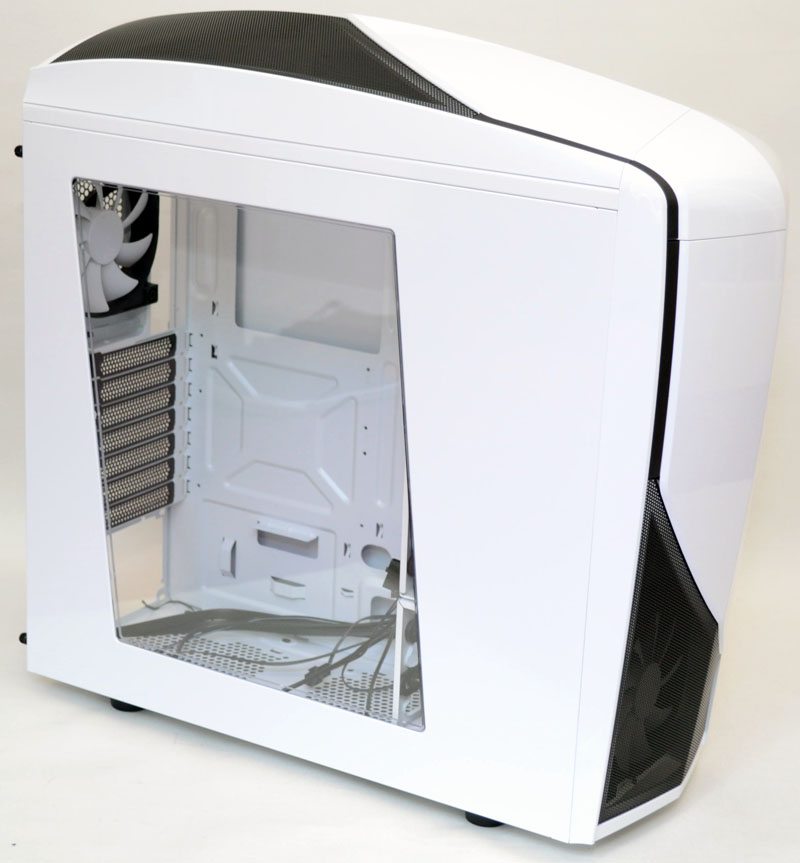
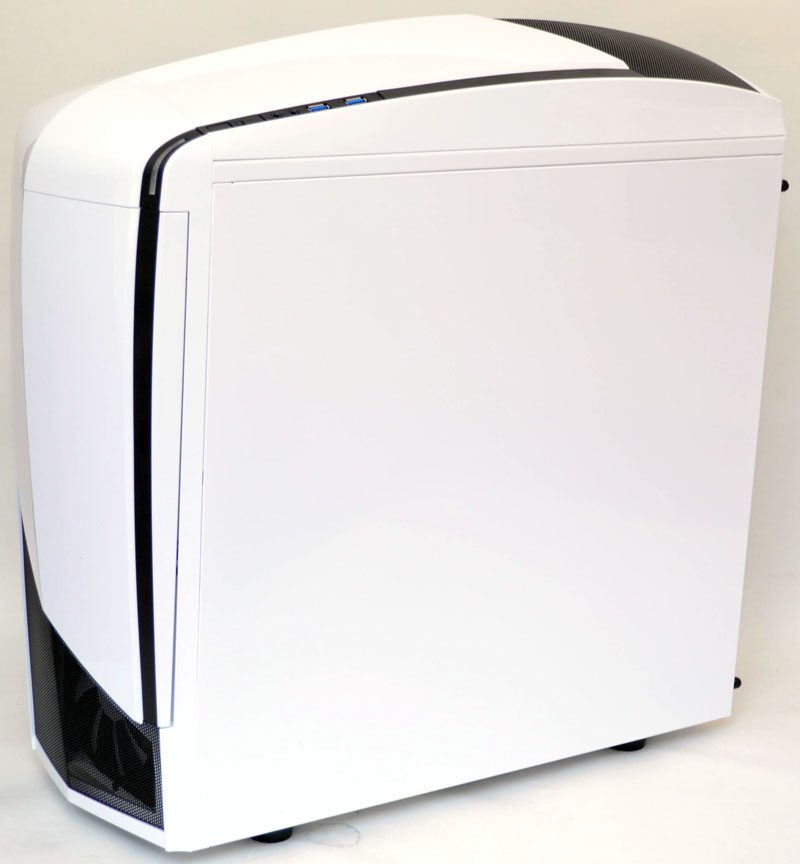
The right side panel is just a blank white panel. While it is hard to see in these pictures, the white of the left and right side panels is a little less bright than the top and front panels, they appear to mis-match a little with the rest of the case, which is a bit of a shame, but not something you would really notice without looking for it.
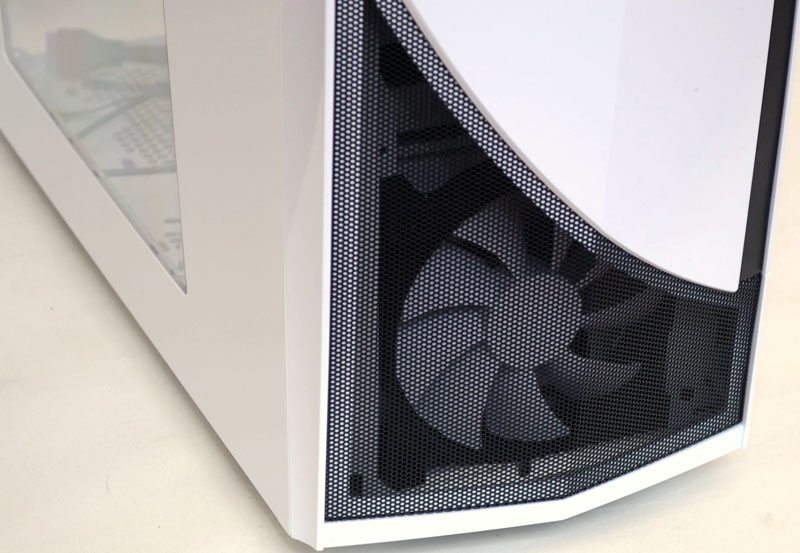
The front panel features a funky door panel that hides all the front drive bays, below which you’ll find a large mesh section and room for two 120mm / 140mm fans, with a single 120mm pre-installed.
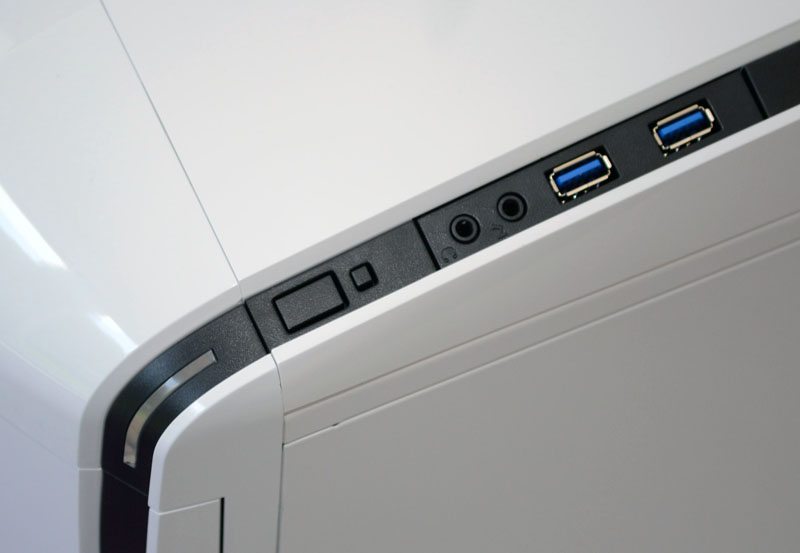
At the top right is a LED power indicator, power and reset buttons, HD audio jacks and a pair of USB 3.0 ports.
The front door panel features a push-click release system, press on the left side and the door will pop open.
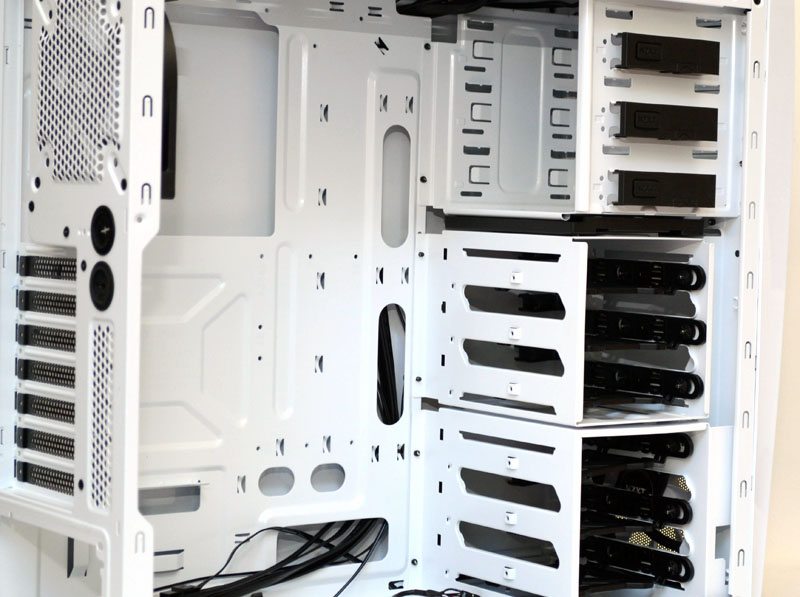
Behind the thick front panel you’ll see three 5.25″ drive bays, each with a cover which can be removed from the front thanks to the little black clip on the left of each panel.
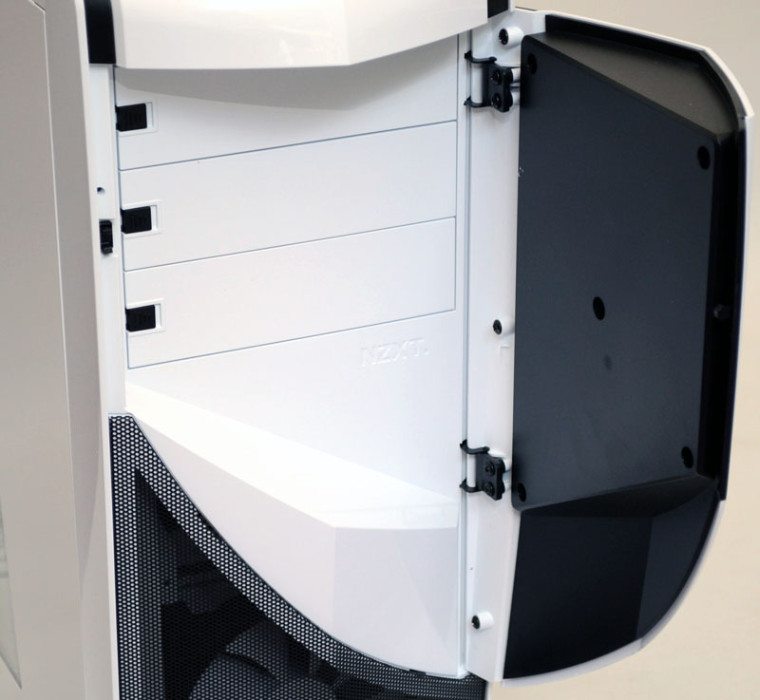
The fan mesh is unfiltered, so may clog up with dust from time to time, but the front panel is removed with a quick pull at its base, so maintainance shouldn’t be too difficult.
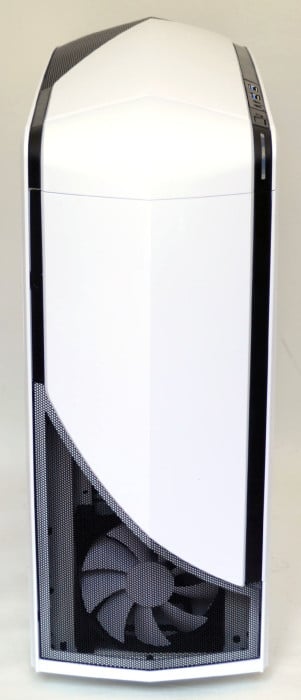
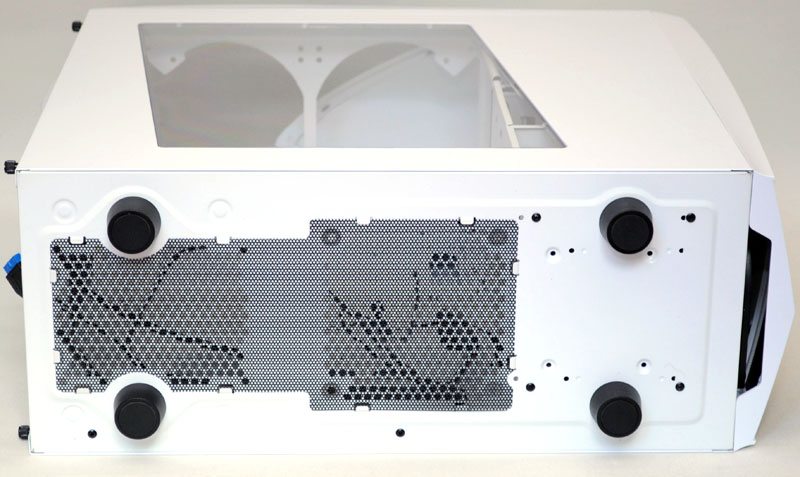
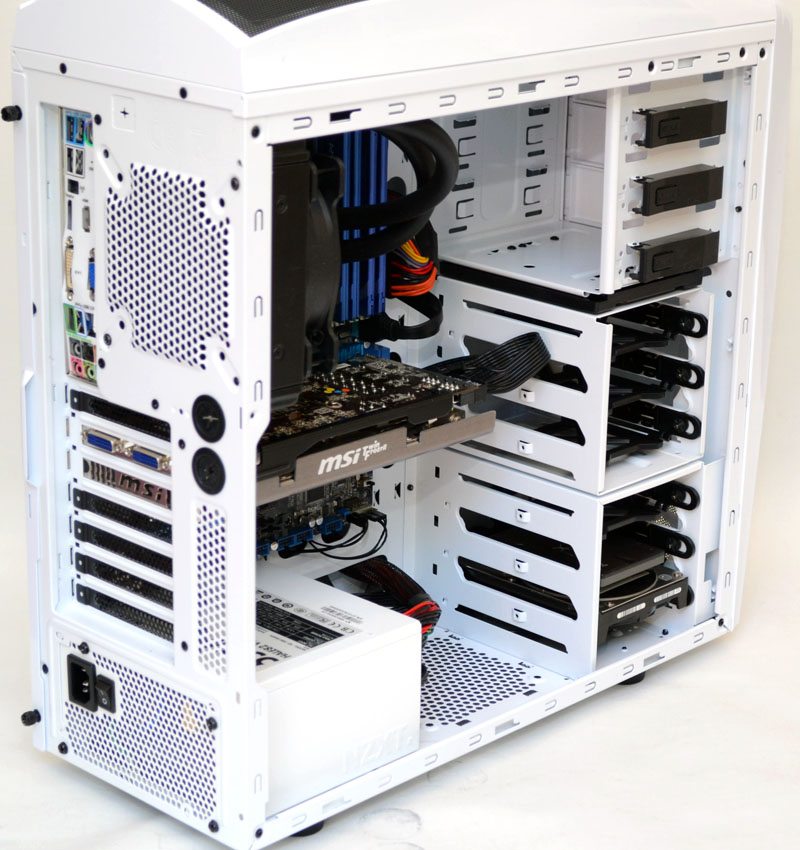
Around the back you can see just how tall the top panel is, giving clearance for fans above the motherboard and perhaps even a slim water cooling radiator. Below that you’ll find a 120mm / 90mm fan mount with a 120mm pre-installed fan, two cable / water pipe routing grommets, 7 ventilated expansion bays and a bottom mounted PSU cut-out.
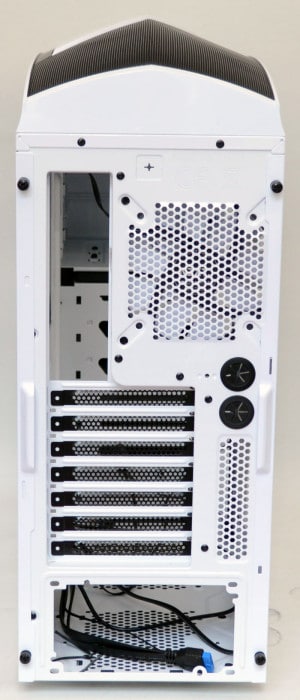
The top panel features plenty of ventilation and below that you’ll find room for 2 x 120mm / 140mm fans.
A clip-in thin mesh on the base will help provide clean airflow to your PSU and the optional 120mm fan mount. Four large rubber feet provide good ground clearance and should also help reduce vibrations from your system.
Interior
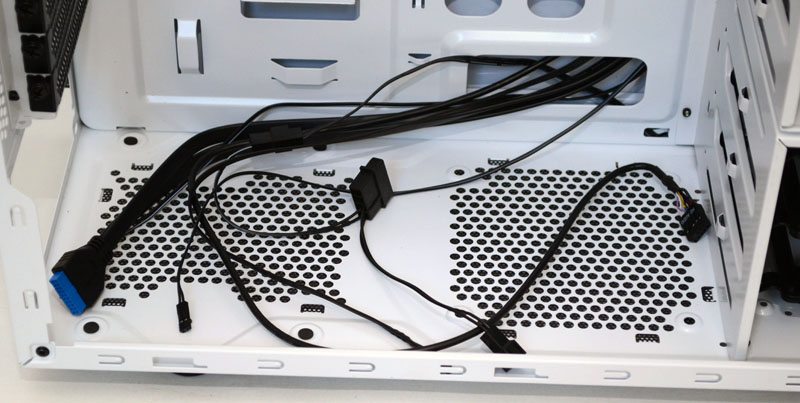
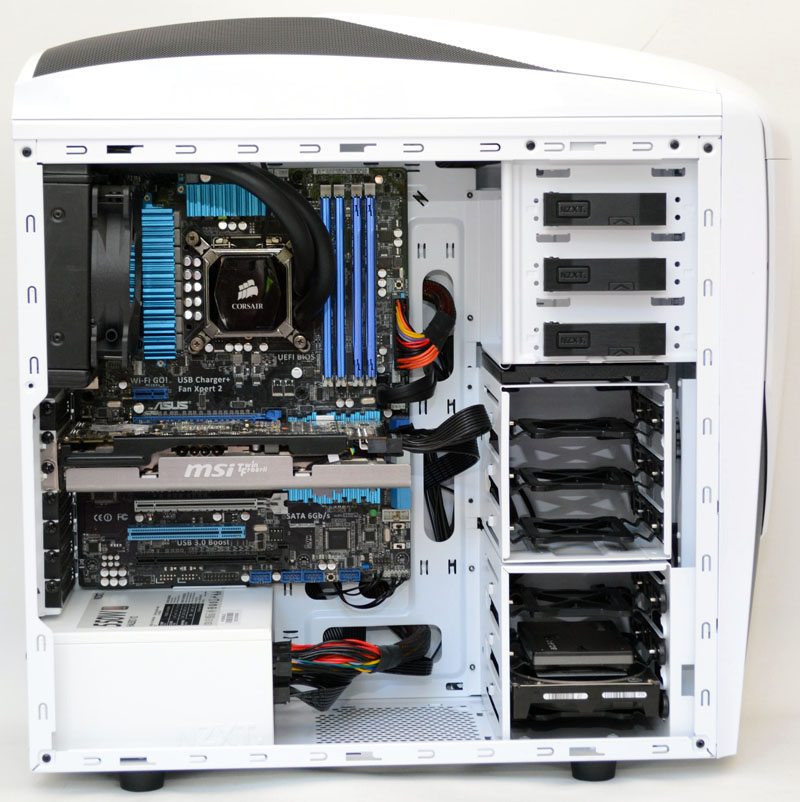
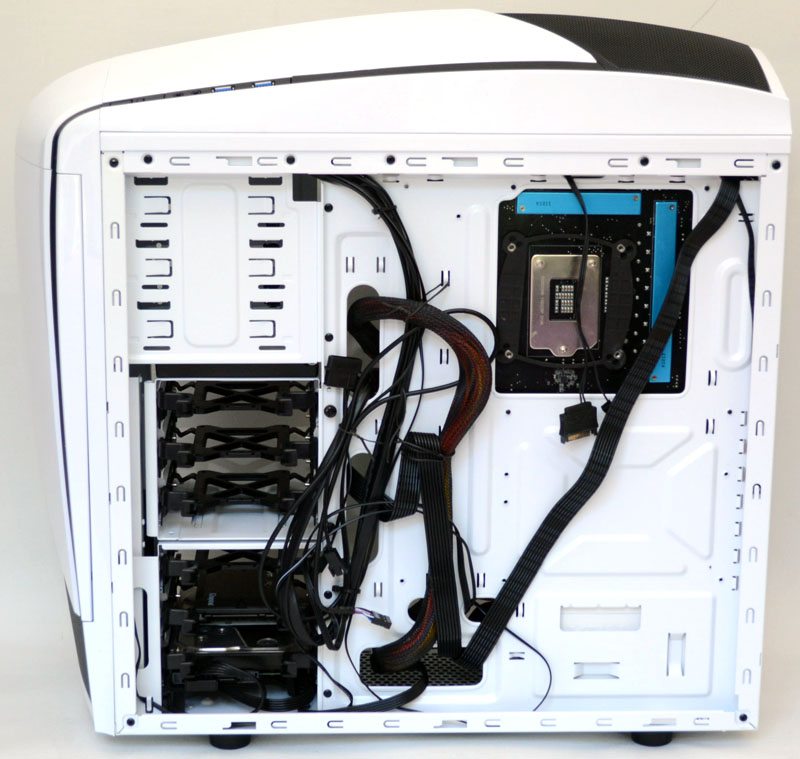
The motherboard back plate features a large cut-out, as well as a multitude of cable routing holes. There are no rubber grommets, which is a shame, but adding them would no doubt have meant a higher price point for the P240.

The PSU can mounted fan up or fan down and will rest on four small rubber pads to help reduce vibration. All interior cables have been finished in black, which should help keep the build looking neat and tidy.
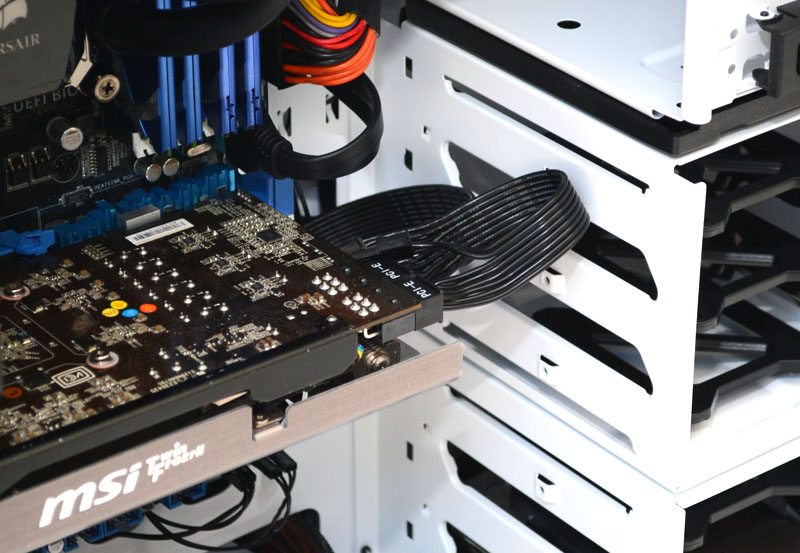
The 120mm fan in the back is pretty basic, but it still looks better than most of the stock fans you see in this price range. The PCI slot covers are all made of metal and held in place with quick release thumb screws for easy installation / removal of your components.
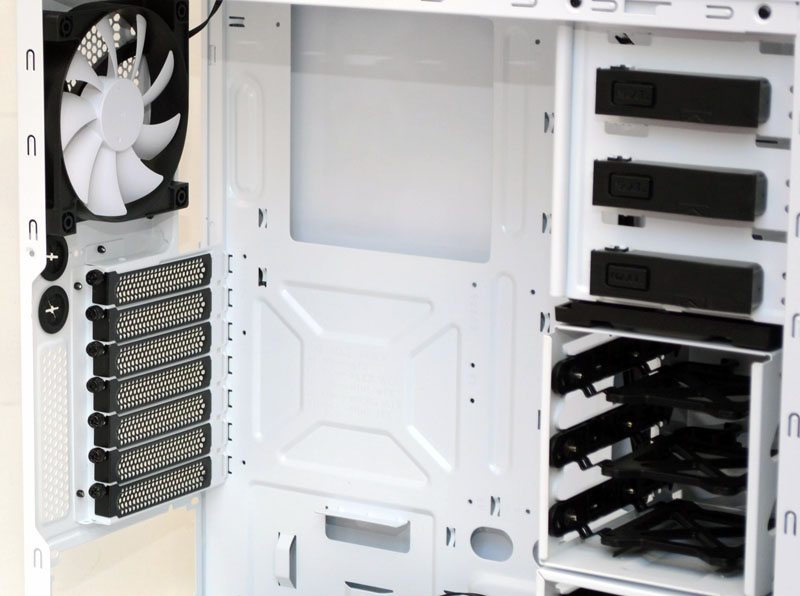
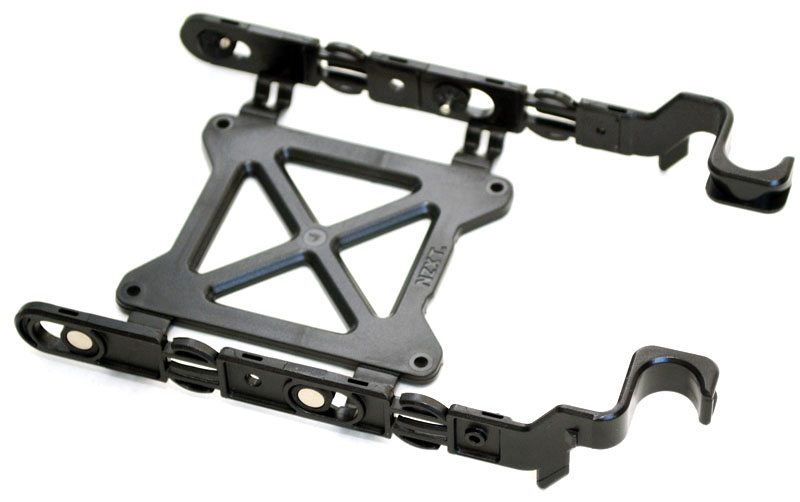
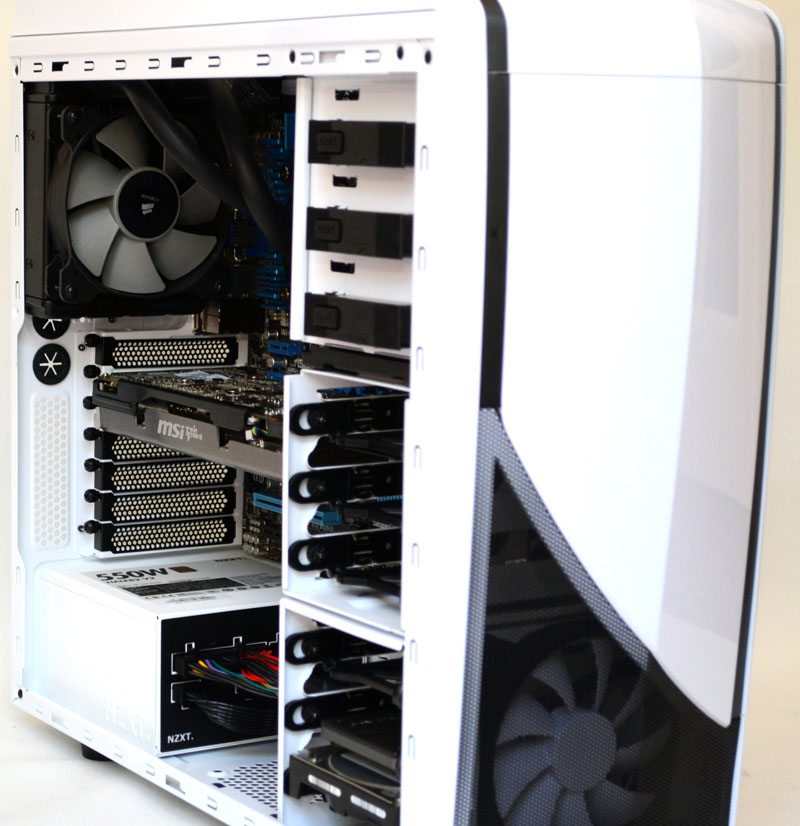
There are two hard drive bays, each offering three removable trays which support both 2.5″ and 3.5″ drives. The middle bay can be removed completely, allow room for extra long graphics cards, although you’ll be hard pushed to find a card so long that you would need to do this.
The top fan mounts are quite close to the motherboard, so you likely would need to put them on the upper section, which limits your watercooling clearance, so those wanting water cooling may want to stick with a rear 120mm AIO unit.

Around the back you’ll find loads of cable tie loops that will help you keep all of your excess cables in check and with 17mm of clearance behind the motherboard, cable management should be pretty easy, even for a beginner.
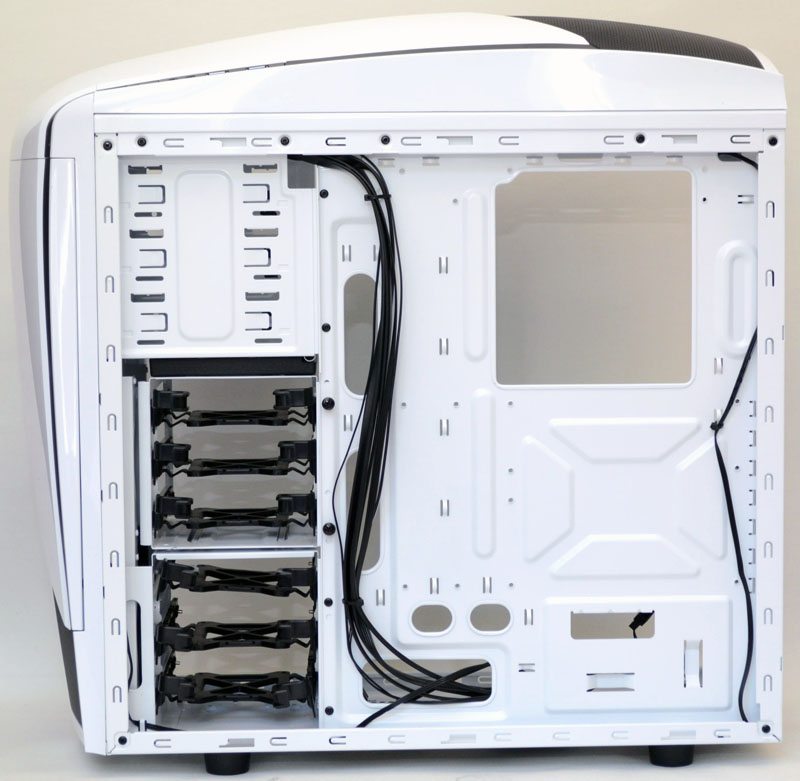
The hard drive bays slide out from the right side of the chassis, this gives a nice clean look to the left side of the chassis, not that it matters too much anyway, since the HDD bays are not on show through the side panel window.
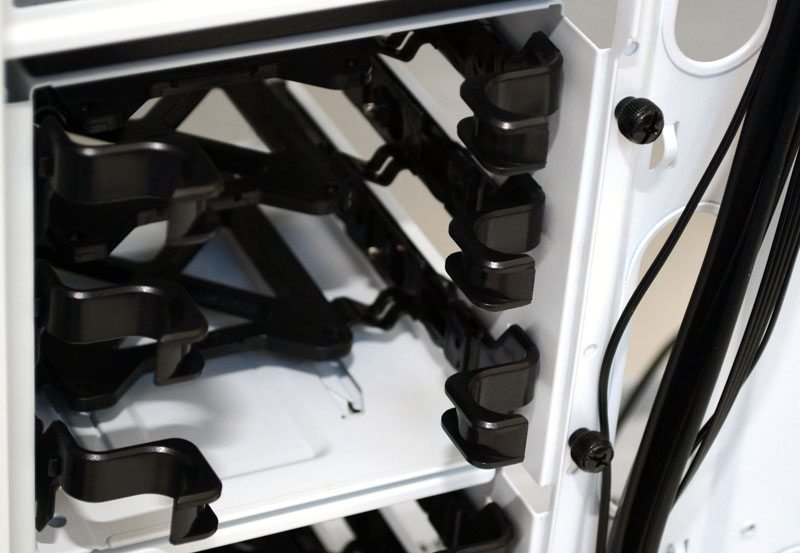
The HDD trays are made of flexible plastic and can mount your 3.5″ drives without the use of tools, but 2.5″ drives will need to be attached using the included screws.
Complete System
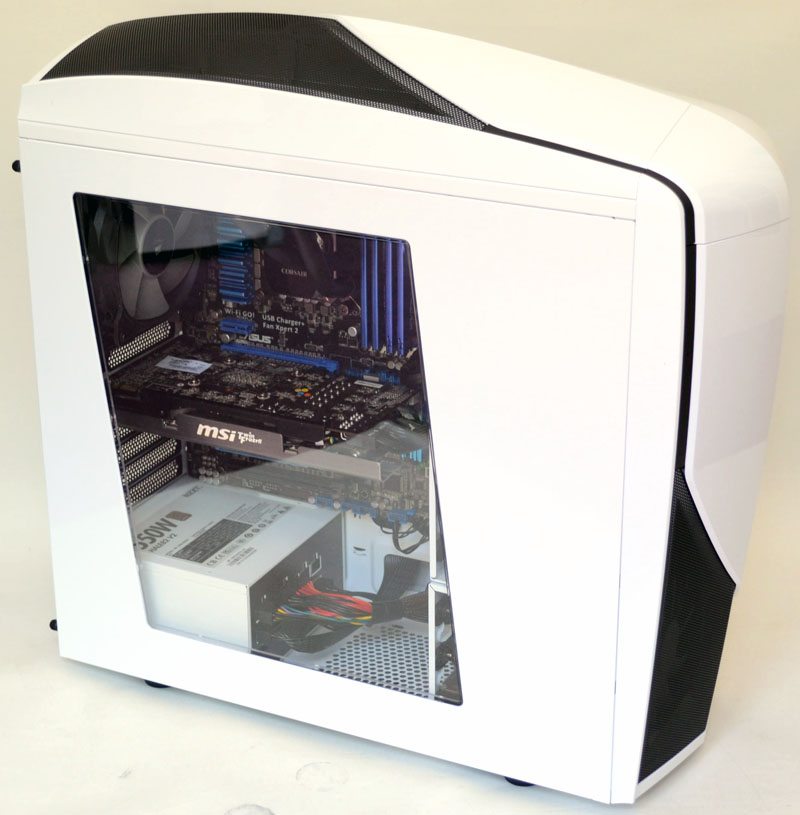
Total build time on the NZXT Phantom 240 was just 35 minutes, I could have done it much quicker, but I took time to test if the NZXT X60 would fit the top 140mm fan mounts, it unfortunately did not, nor did the Corsair H100i. In the end I opted for the H80i, a 120mm all-in-one water cooling unit, it was a tight fit, but it fit none the less.
The chassis is quite wide, so there is loads of room for airflow to our GPU and a multi-GPU configuration should prove no issue for the Phantom 240.
The hard drive bays were easy to work with and you can see I have 3.5″ and 2.5″ drive sitting snug in the bottom two bays.
As I said before, the middle bay is removable should you have a long GPU, but even with cables sticking out the back of our GTX 560 Ti, there was no need to create any extra space.
The cable management space is doing a great job, although it would start filling up pretty quick if you were to saturate all hard drive bays and install a second GPU.
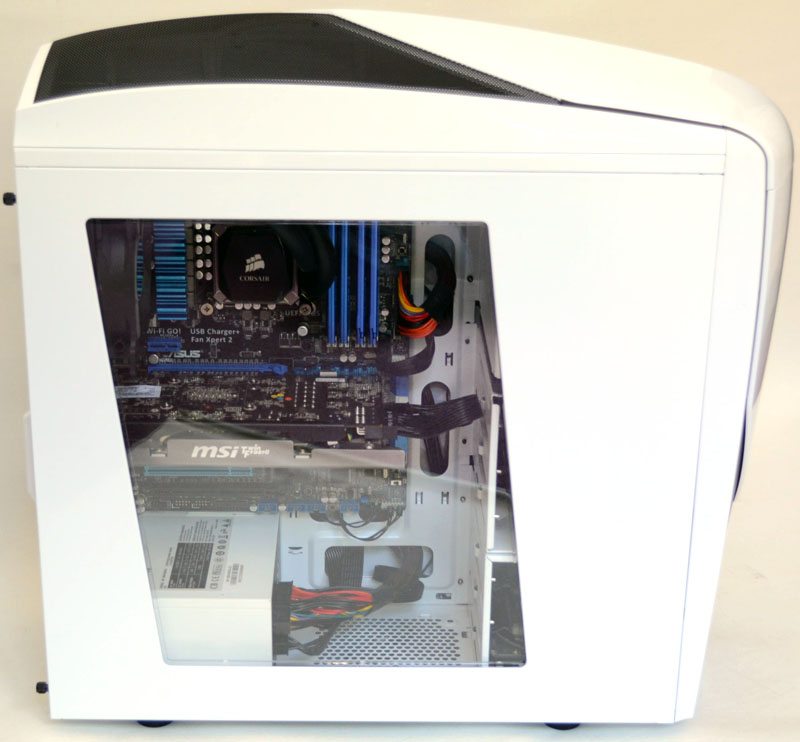
With the side panel back in place we still get a great view of the system build. The cable routing options are doing a good job of keeping the build looking neat and tidy, which can have benefits to airflow, but with such a big window it also helps to improve the aesthetics of the systems interior.
Rubber grommets really would have been nice, but you could easily clean up the look with some aftermarket braided cable extensions.
Final Thoughts
Price
At just $69.99 from the NZXT web store, the Phantom 240 is great value for money, it’s one of the cheaper NZXT gaming chassis on the market and I expect it will become a little cheaper once it is available at the multitude of online PC retailers, who love to compete to offer the best value. The case isn’t without its flaws, but at this price range it’s very competitive on features and certainly gets extra points for its aesthetically pleasing design. Easily a good investment for anyone looking to build or upgrade their gaming system.
Overview
I have mixed feelings about the Phantom 240, it’s a great case, albeit one I don’t think I would ever buy. I find the front and top panels to be a little too curved, but at the same time I don’t think it looks bad at all, I just prefer a more angled design such as their H440 (which is why I own a H440). I’m not blind, this is a stunning case, especially for this kind of money and I bet the design is going to prove very popular with gamers who want to build a premium looking system, without spending premium levels of money.
Component compatibility is high, there’s loads of room inside this case for larger power supplies, long graphics cards, SLI/Crossfire setups, huge CPU air coolers, smaller water cooler units, lots of storage and optical drives and there is still plenty more room for cable management and other accessories.
The chassis has certainly been designed with air cooling in mind, it’s certainly not as water cooling capable as its bigger brothers, but you can expect to pay almost twice as much for the higher end NZXT chassis that have broader water cooling support. I was able to get a 120mm radiator in the back and for most users that will be more than enough for overclocking their gaming rig. It’s nice that NZXT has included two fans into the chassis, for a low-to-mid performance system they’ll provide more than enough airflow, more serious gaming rigs can take advantage of the additional fan mounts for improved airflow. I would have liked better air filtering on the front panel fan mounts, as its relatively open design will no doubt clog up with dust quite quickly and will allow dust to travel into the system.
The side panel window looks stunning, something that will prove very popular with those who like to install case lights. In fact, the NZXT Hue lighting kit would be an ideal addition to the Phantom 240. The only problem you may run into is that if your PSU has garish cables, you’ll have a hard time hiding them against that glossy white interior, especially since there are no rubber grommets to help tidy up the interior aesthetics of the chassis.
“The NZXT Phantom is a very competitive product, it’s got plenty of features, loads of style and a very attractive price tag. There are a few things I would have liked to see added, such as better filters and rubber grommets, but the increase in price extra features like this would bring would defeat the purpose of this being a more budget friendly model.”
Pros
- Great build quality
- Clean and stylish design
- Huge side panel window
- Good component compatibility
- Competitive price
Cons
- Metal and plastics have a slightly mismatched shade of white
- No rubber grommets on cable routing holes (understandable given the price)
- No proper dust filtering system on front intake
- Water cooling support is limited

NZXT Phantom 240 Mid-Tower Chassis Review
Thank you NZXT for providing us with this sample.


