Philips 242G5 144Hz LCD Gaming Monitor Review
Chris Hadley / 10 years ago
A Closer Look
Putting the two parts of the monitor together couldn’t be much easier for the 242G5 thanks to a quick lock system and a pair of locking pins on the back of the monitor. On the top of the stands head is a pair of flat pins that the LCD sits onto and as the head is located into the VESA mount recess on the back of the panel, the lower two pins lock in place.
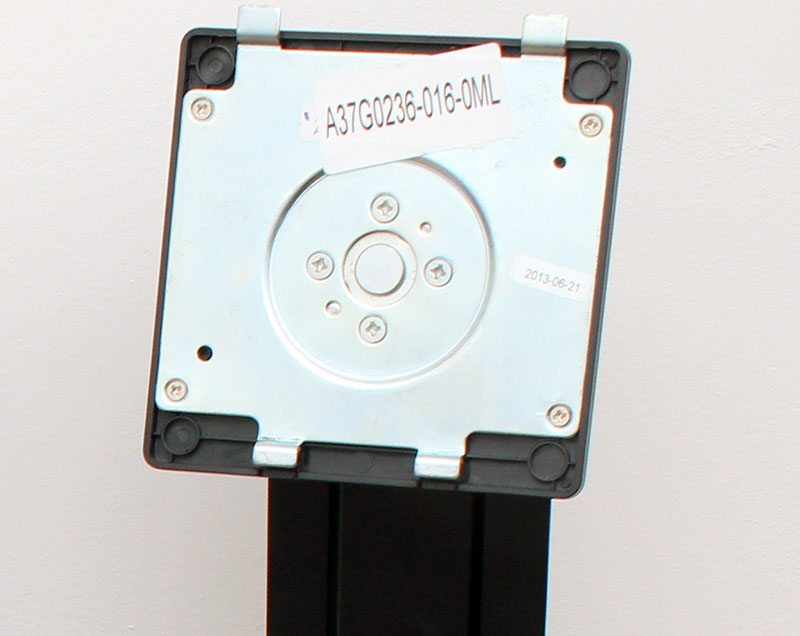
Looking at where the head of the stand mounts on to the screen, we can see where the upper and lower pins locate themselves and at the bottom, the two pins that lock the stand in place with a release button just below. The 242G5 is also VESA100 compatible and the panel comes with the four screws needed for VESA mounting already in place for safe keeping.

With the two parts of the screen locked together we can get a look at how things look as a whole. The 242G5 has a rather plain design to the bezel with a textured matte black finish and along the bottom of the panel a single red stripe that widens in the middle to surround the Philips branding. With the stand fitted, the screen is 22cm from front to back so for users with rather shallow desks, a monitor arm may be required to keep the panel back towards a wall for example.

Looking at the back of the screen, it becomes clear why the screen has such a deep footprint. Like a number of other panels on the market, the 242G5 is fully height adjustable and the mechanism required for this operation is not slim by far. When attached to the stand, the screen can be raised by up to 13cm and the head also allows the screen to be rotated through 90° for portrait viewing.

Moving round to the underside of the panel, on the left hand side is a 110-240V IEC power input with a typical power consumption of 18.5w during use. Our power meter registered no higher than 19.2w during the time that I used this panel (~3 days).

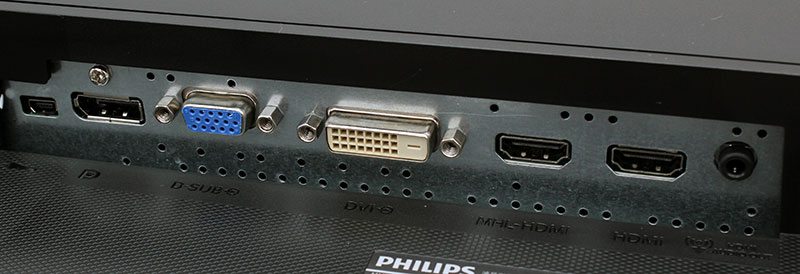
On the other side of the screen is a fairly standard array of display inputs with DVI, VGA and HDMI on offer, but on top of this we also have DisplayPort 1.2 and a secondary MHL-HDMI (V3.0) port that supports mobile device connections such as smart phones and tablets to bring their contents to the big screen in a full HD resolution. To round off the connectivity options there is a 3.5mm audio output for MHL-HDMI connections and to the far left is a Mini-USB 2.0 connection for the included Smart remote.
Whilst the panel has rather plain bezel, on closer inspection there are a couple of subtle markings to be found. The first of these is on the top left of the panel where the model number is printed. The model number is printed in dark grey so in most light conditions is not clear to see (which is a good thing) but it is visible none-the-less, especially when a flash is used on the camera.

The second marking is to the bottom left of the panel and is printed in red to make it more visible, showing off the screens 144Hz capability (when connected through a DL-DVI cable).

On the underside of the panel along the right hand side is a row of five buttons for navigating through the 242G5’s OSD and for also changing the input source as well as power. The power light itself is rather subtle with a small white LED found just to the left of the power icon. There is a secondary power switch found just behind the panel on the right hand edge to turn the screen right off.

Around the side of the screen to the left is a USB3.0 hub with four ports available and the USB-B 3.0 jack for connection to a PC. Of the four ports, the top right port also supports Fast Charge, delivering a higher current to connected devices reducing the time needed to charge them.

As mentioned before, the monitor does have a large footprint due to its adjustable height capability, however it is not too big to become intrusive on a desk. The front part of the base is flat to reduce the footprint a little at the front and the upright portion of the stand has a stylish curved design as it rises up towards the mechanism for height adjustment. In the middle of the upright is a hole for passing cables through to keep them tidy and out-of-the-way.

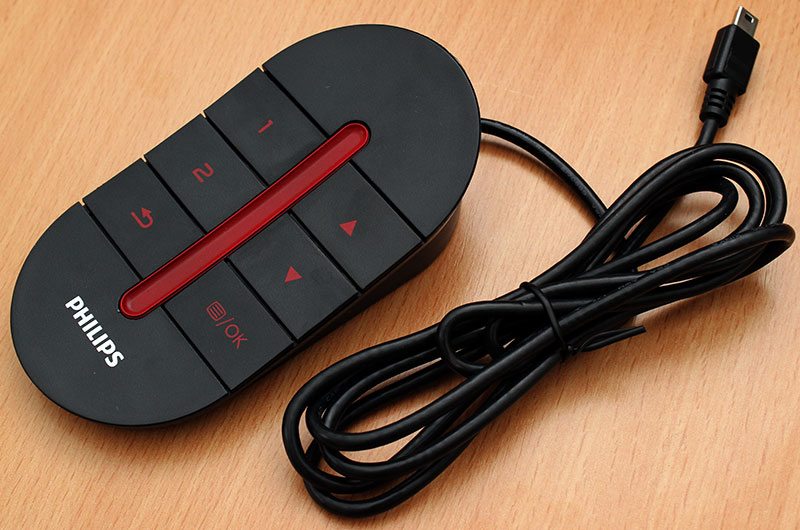
The last part of the monitor is something a little different. Typically, all the OSD control is made from the on-screen buttons, but these are not exactly what we would call convenient when you want to make a quick adjustment to the screens colour and brightness settings when starting a game for example.