QNAP SilentNAS HS-251 2-Bay NAS Review
Bohs Hansen / 10 years ago
A Closer Look
As mentioned on the previous page, QNAP didn’t use the default vertical drive-mount system that we see in most NAS. Instead they’ve opted for a horizontal layout to make it fit into the home-theatre environment. This layout will of course result in a bigger footprint, but also a better match for your living room.
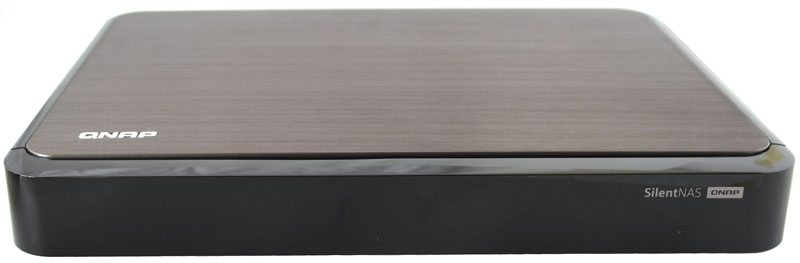
The front cover is held in place by magnets and gives the devices a sleek and clean look with its dark, but slightly transparent, cover. While this dark design will hide the drive bays, after all nobody likes to look at those, it is still transparent enough to let the status LED shine through.
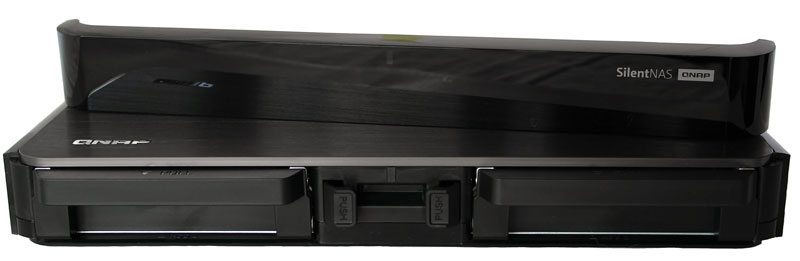
Taking a closer look between the drives, we see the two push latches to unlock our drive bays. There is a little recess between the two latches for the front panel’s magnet. This ensures a secure fit without any rattling or screws to fumble with. The single system LED is located above the recess and shines brightly green while everything is okay. If an error should occur, it will turn red to inform you that your attention and actions are needed. As mentioned above, the LED is bright enough to shine through the front cover.
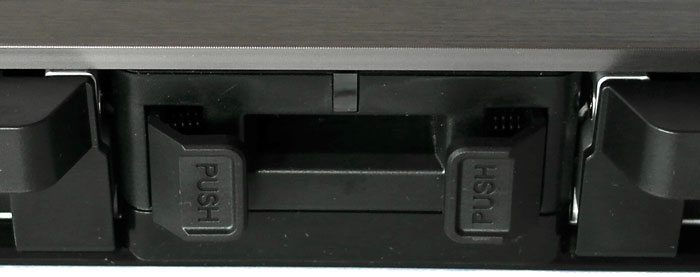
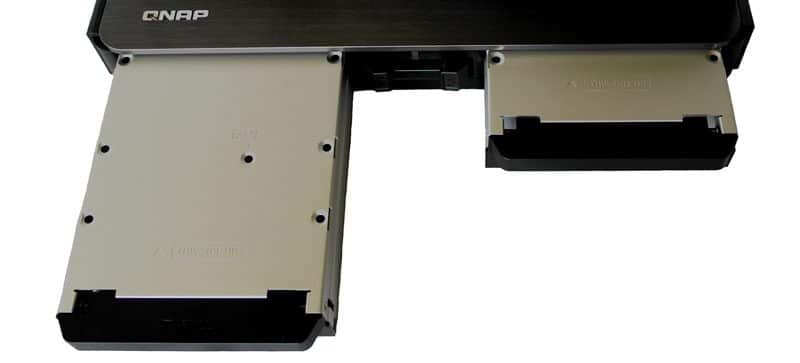
The metal drive-caddies are easy to slide out, it just requires a press of the respective button. The metal trays appear to be mounted upside down, but this is in fact cleverly thought out to aid the drives in staying cool in this passive system. It’s also nice to see metal over plastic caddies; only the handles are made of plastic here.
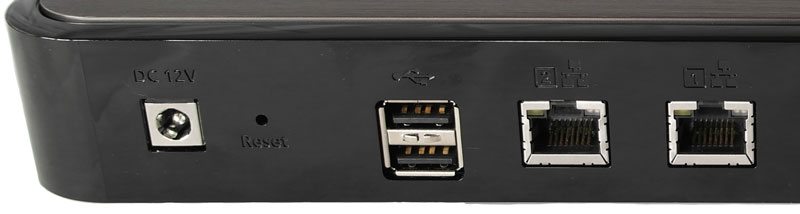
Turning the device around and having a look at the rear, we see the 12 volt DC power connection and needle-reset all the way to the left. Next we have a set of two USB 2.0 ports followed by the two Gigabit Ethernet ports.
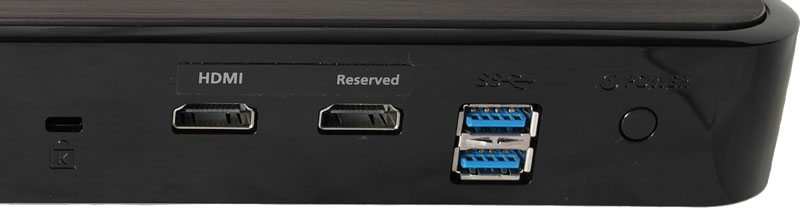
Continuing on to the other side, we find the obligatory Kensington Lock to secure your NAS against theft. You’ll also find a HDMI and reserved port and removing the cover from the reserved port we see another HDMI port hidden away; it wouldn’t however surprise me if the modding community found other good uses for the reserved port besides maintenance. The soft-touch power-button is all the way to the right. Between the power button and HDMI ports there’s a set of two USB 3.0 ports to attach high-speed external storage.
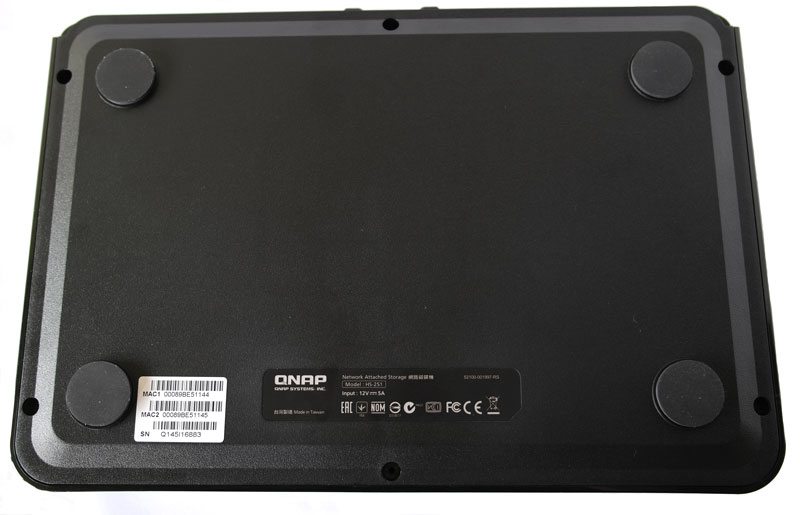
On the bottom of the device there are four large rubber feet that should help absorb any vibrations from your hard drives; there is also a sticker that tells us the serial number of the device along with the mac address of both LAN ports.
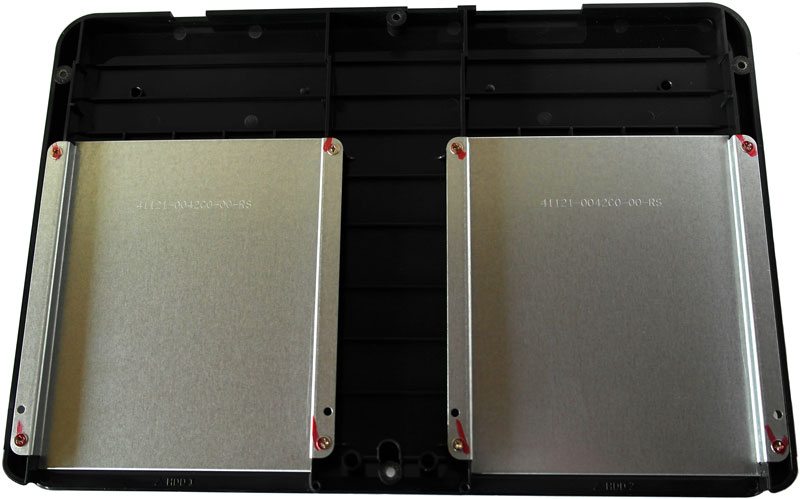
Taking off the cover, that is actually the bottom of the unit, we see a metal brace one each side. These help and aid the hard drive caddies when sliding them into the NAS. There isn’t anything else on the cover as the rest is mounted in actual case.
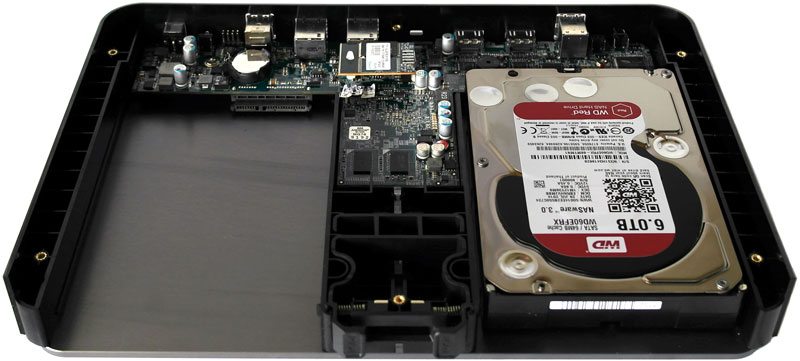
Having a look inside the device we see the motherboard located at the rear with a T going in between the drive bays. This T was necessary to have enough room for all the components cramped in this tiny device. In front of the motherboard and between the drive bays we see how the locking mechanism works. In it runs an LED extension to lead the light from the motherboard mounted LED to the front. We can get a good look at how the hard drives cooling is aided by the direct contact to the thick metal cover. The very narrow mounted drives should further aid in keeping the vibrations and noise, down.
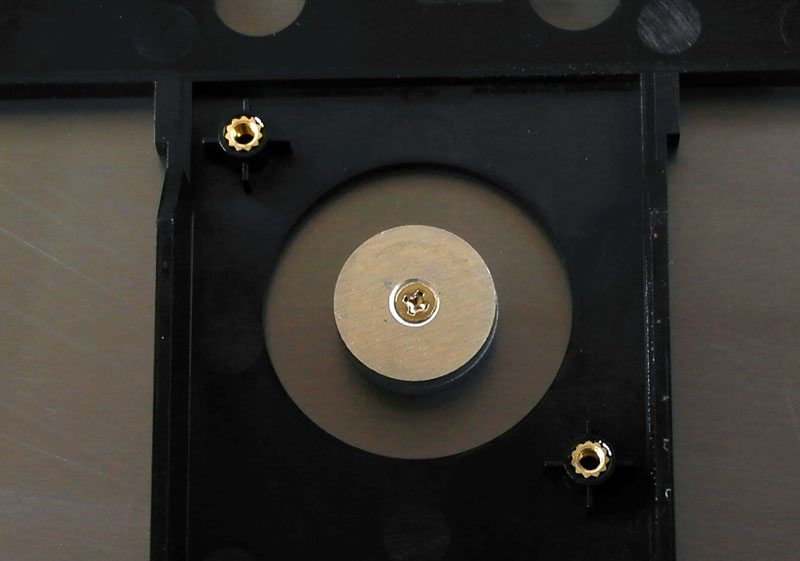
Removing the motherboard from the casing reveals the heat-sink used on the Celeron CPU in this device, and it is the same method we saw used in the HS-210. The heat-sink is screwed directly into the chassis, effectively turning the entire device into a cooler. An adhesive heat-transfer pad is placed between the heat-sink and CPU to ensure optimal transfer.
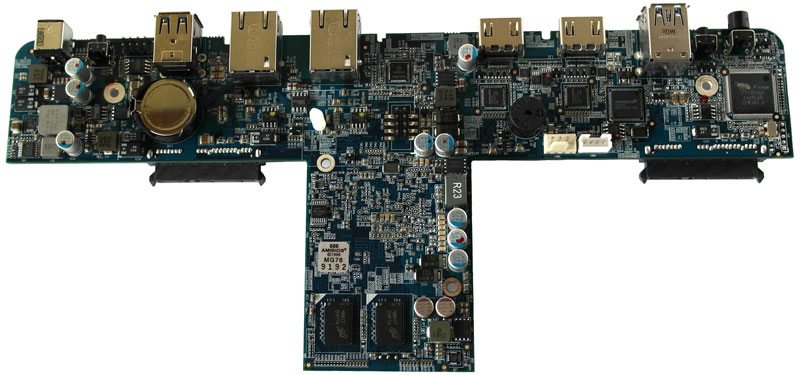
Taking a closer look at the motherboard, we can see the resemblance to the HS-210 again, but this time with a lot more cramped onto the PCB. It’s quite the accomplishment in itself to have that much on so little PCB space, considering all the features this QNAP NAS has to offer.
At the top we can see all the rear connections, plugs and buttons. The BIOS battery is placed to the left in the image and we can see that it’s a normal sized and easy to replace battery. At the bottom of the T we see two of the four Micron DDR3 RAM chips. The ASmedia chips are placed to the right and so is the on-board speaker. Next to the speaker we can spot a 4pin fan connector and a COM port. The last two aren’t natively used, but great for modders and maintenance. The SATA connectors are located on each side of the PCB and it is powered by an AMI BIOS. All in all, these are a lot of default components arranged to fit into the tightest space and customized for plug’n’play.
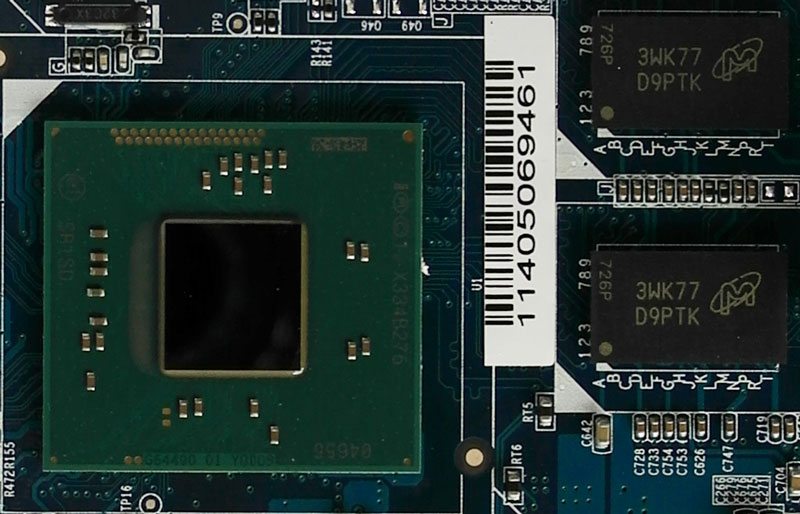
Not seen on the photo above, as it is on the other side, is the CPU that powers this entire unit. The Intel Celeron dual-core CPU runs with 2.41 GHz and has a burst up to 2.58 GHz. Next to it, we see the last two of the four Micron RAM chips in this system, each of them with 256 MB.
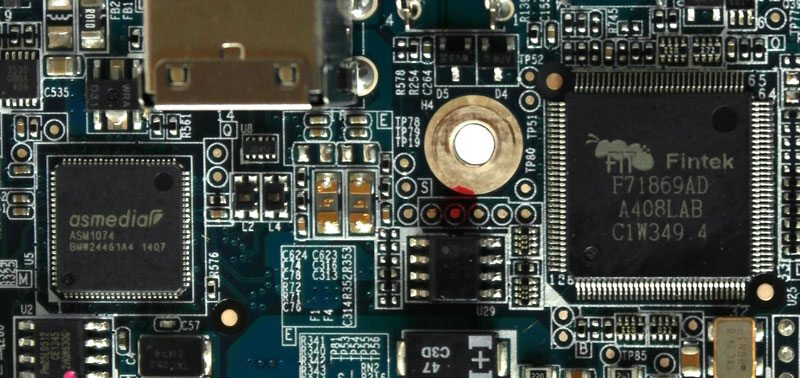
The QNAP HS-251 uses the ASmedia ASM1074 USB3 controller for the two ports and has a Fintek F71868AD sensor chip to keep track of the systems health.
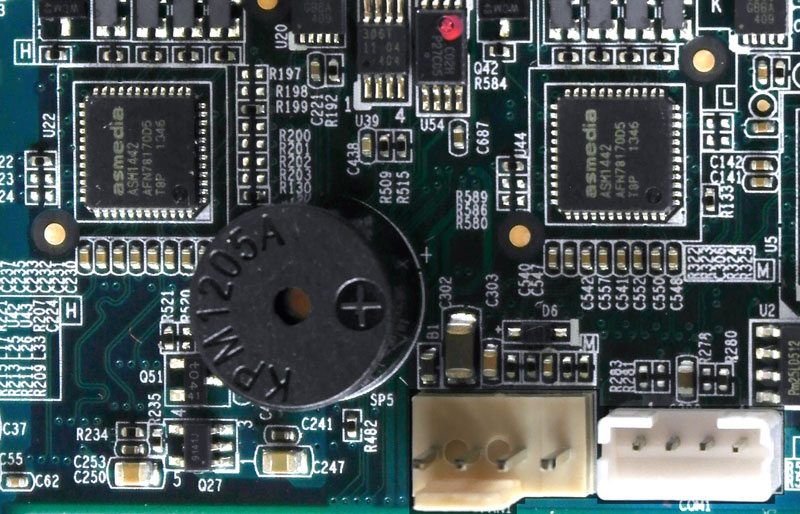
The NAS has not one, but two ASmedia ASM1442 HDMI chips, a thing that makes one wonder when looking at the reserved HDMI port, one chip should theoretical be enough. We also see the standard 4 pin FAN connector as well as the 4 pin COM connector. The COM port is used in case you need to access the systems console directly. In the middle of this photo we see the on-board speaker placed.
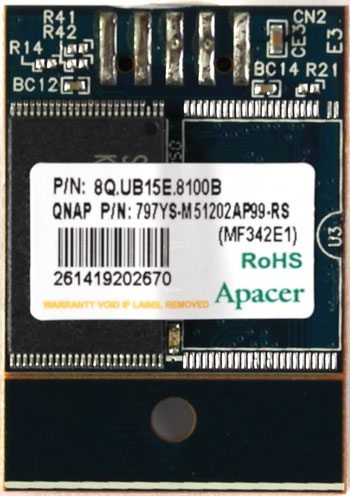
The HS-251 has 512MB internal flash memory for the system, and it uses an Apacer USB flash module for this. The modular design of the module would allow for a (theoretical) easy upgrade by modders.