A Simple Guide On Flash Drive Partition Removal in Windows
Bohs Hansen / 7 years ago
Step by Step Guide
Okay, it is time to get started. We have ejected any drive we can beside the one that we want to delete the volume from and naturally our internal system drives which we can’t and shouldn’t eject. So we are all set.
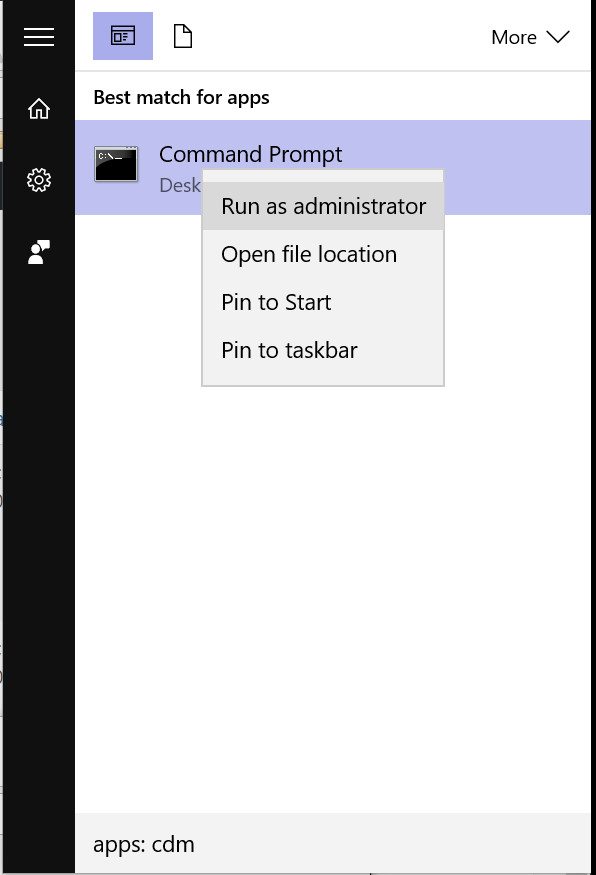
Start by launching the command prompt interface. The easiest way to do this is to hold CTRL down and press ESC to get up the start menu, or you could press the Windows Start button with your mouse. Now type in CMD without selecting anything and it should show you the Command Prompt application within a few seconds. Right click it and run it as administrator to make sure that you have full system access.
Depending on your Windows version, it might look a little different that shown below, but effectively it will work the same.
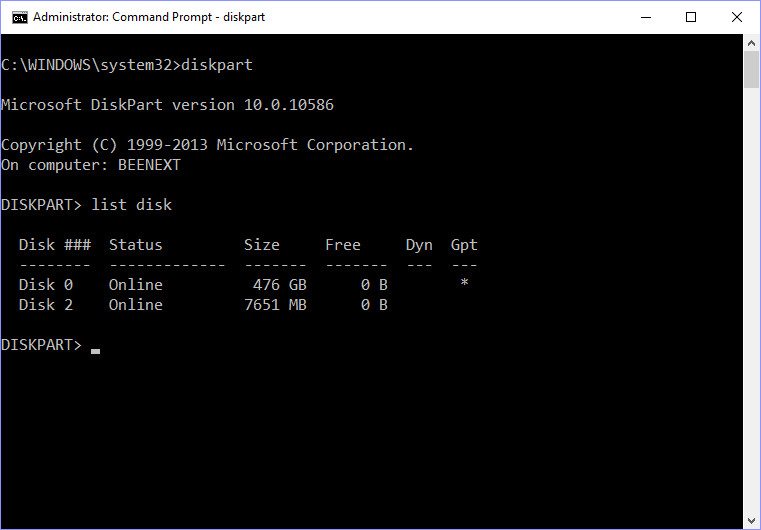
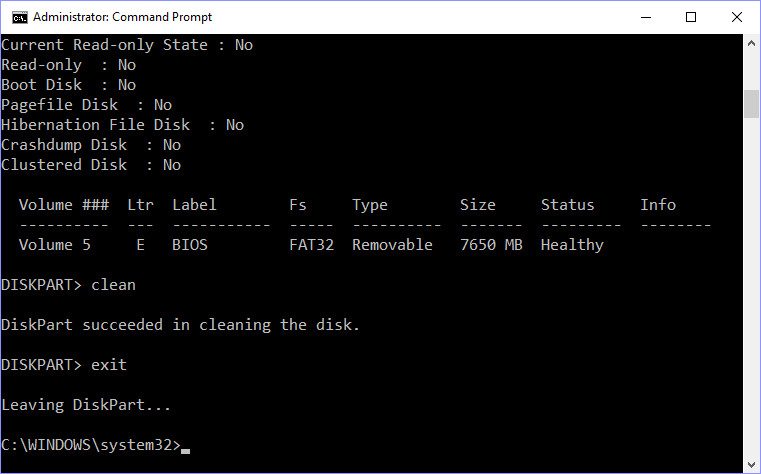
We now have our Command Prompt open and the next you’ll need to do is to launch the DiskPart app by typing diskpart and pressing enter/return. Now type list disk to get a full list of the installed disks and remember the disk number for the drive you want to delete. In this example, it is Disk 2 that we want to delete.
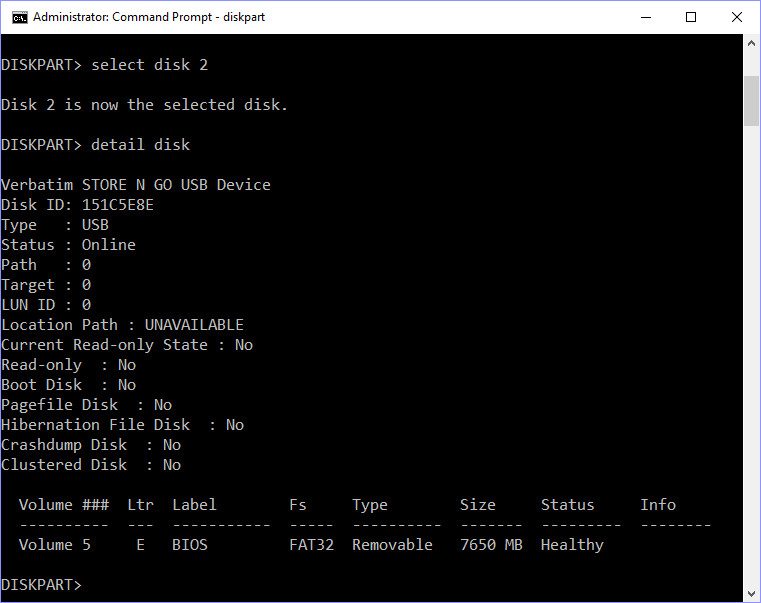
Now select that disk by typing select disk 2 (or whatever drive number your drive is). To double check that we have selected the proper drive, type detail disk. This will show us all the details on the selected drive including type, volume, and disk label. Double check this, especially the label, to make absolutely sure that it is the correct drive that you have selected.
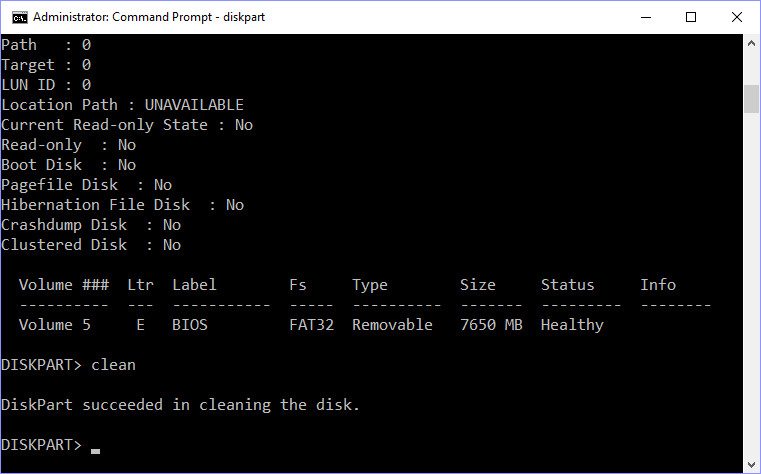
Now that we have selected the right drive and double checked that it actually is the one we want to delete, we can go ahead and actually delete it. There are two different methods to do this, but the end result is the same. We can type clean all which can take quite some time depending on the size of the drive or we can just type clean which is a lot faster. The first and longer method will write zeroes to all bytes of the selected disk where it also will mark and avoid any possible bad sectors. The second and faster method will only write zeroes to the first and last sector and thereby make it available as a clean drive again. I know that my drive is in full working order, so I’ll just pick the quick method and type clean.
This method only takes a few seconds after which we’re done. Now we could continue to create a new partition through this command prompt tool, but chances are that you’ll prefer to do it through a graphical user interface rather than the prompt. So we’ll just exit the Diskpart tool again by typing exit.
Now you can close the command prompt again, just click the X in the corner of the window, press ALT+F4, or type exit.
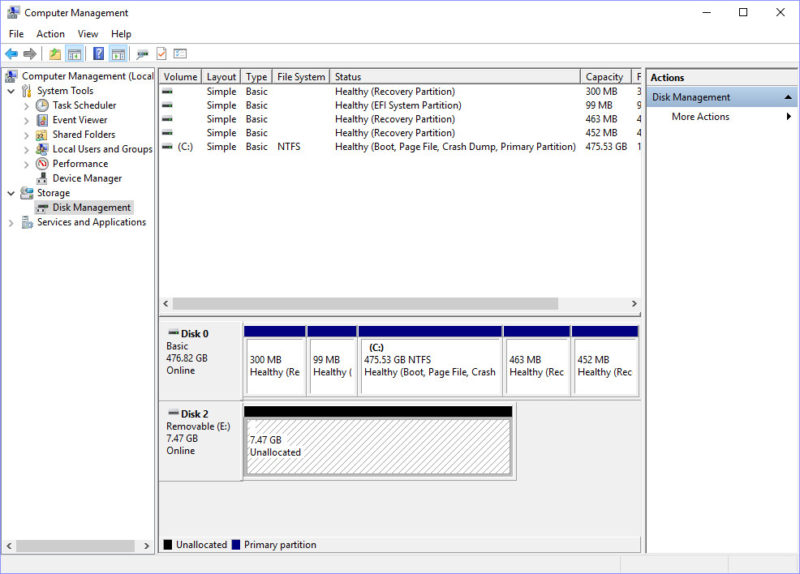
And that is it and all there is to it. I don’t know why Microsoft didn’t add the function into the Disk Management, but they didn’t. Once you launch the Disk Management again, for example by right clicking your My Computer/This PC icon on the desktop and choosing Manage, we see that the drive is unallocated and it will let us create a new simple volume on the drive to our liking.
Command Summary
- Diskpart – This launches the tool
- list disk – This provides the list of available drives
- select disk # – This selects the disk with number #
- detail disk – This shows details on the selected drive
- clean / clean all – This clears the selected drive’s volume
- exit – This exits the tool again


