Swann OutbackCam 12MP Outdoor Photo & Video Camera
Bohs Hansen / 7 years ago
Introduction
Today I’m taking a break from my usual storage, network, and enterprise reviews to take a closer look at something completely different, the Swann OutbackCam. The OutbackCam is a rugged and portable HD video and 12 MP photo camera and recorder.
We’ve tested different surveillance cameras before, but the OutbackCam is quite different than the usual surveillance systems. As the name suggests, it is a camera designed for outdoor use. For this, it needs to be more durable and have its own built-in power source. And it is. The OutbackCam has a durable and water resistant casing as well as dual battery compartments. It is also able to work in extreme temperatures down to -20°C.
Swann equipped the OutbackCam with both day and night vision, and the later might be its biggest selling point. It can record in complete darkness with night vision up to 15 meters/ 50 feet. This ability is thanks to the 40 built-in infra-red LEDs in two groups. One of the groups can be disabled, allowing you to run it with just 19 IR LEDs when 40 provide too much illumination.
By default, the camera stamps the photos and video recordings with information such as the exact recording time with day, time, and moon phase. However, this can be turned off in the settings if you just want the images and video as they’re recorded.
The image sensor is a CMOS with an effective pixel count of 2560 by 1920 (5 Megapixels). It records colour pictures in day mode and black and white images at night, which kind of is logic. It has a 3.6mm lens that works with 0 lux lighting if the IR LEDs are turned on, and it features a viewing angle of 62 degrees.
The video features are quite nice too. It records in the AVI format for broad compatibility on playback devices, and it does so with up to 1920 x 1080 pixels. The video frame rate is specified at 15 fps, but 30 fps are possible too with 720p videos. Still pictures can be saved in 5, 8, or 12MP, it features multi-shot feature, record delay and time-limited video recording length.

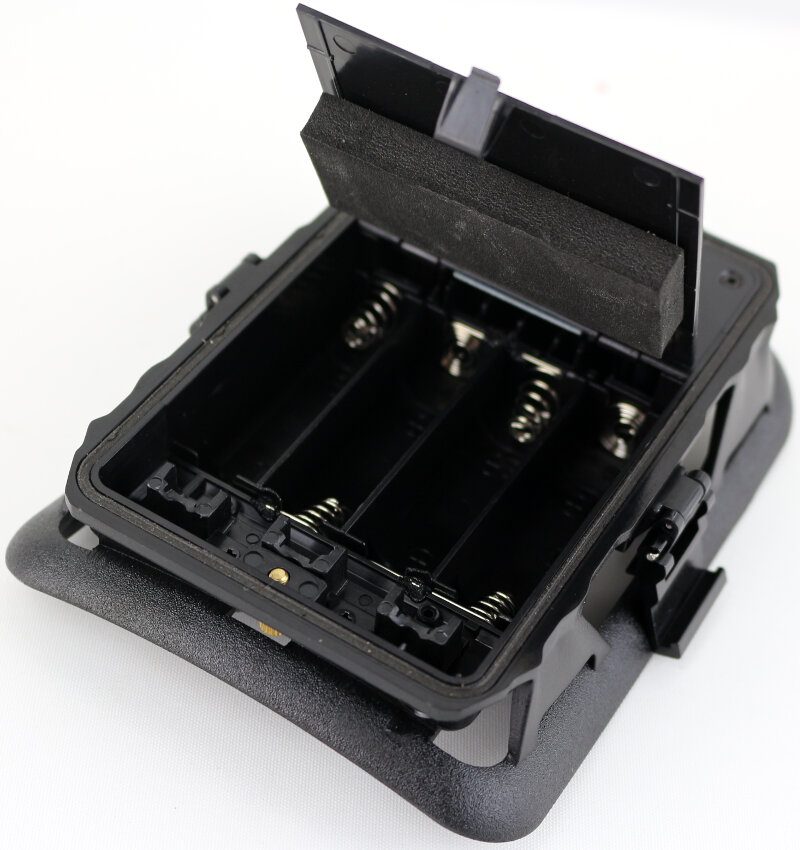
You can equip the Swann OutbackCam with a 32GB SD card, and that should be plenty for thousands of photos and hundreds of videos. The recordings are also easily transferred to your system and uploaded to sites such as YouTube and Facebook this way. While some might want larger cards supported, it really isn’t needed. The OutbackCam runs on batteries and they will have to be replaced or recharged around the same time as the card would be full. The camera itself runs on 4x AA batteries and the included mounting bracket allows for another 4x AA batteries to be installed. That’s plenty, even for extended monitoring over several months with motion triggered recording.
The extra mounting bracket and battery compartment make the camera easy to set up. It can easily be mounted on trees, posts or flat surfaces in order to monitor farm or wild animals – or even capture unwanted behaviour such as trespassing, vandalism, and dumping trash.
Feature Highlights
- High definition 1080p
- Amazing high resolution 12 Megapixel camera
- Durable water resistant casing
- Powerful day & night vision up to 50ft/15m
- Wide angle view
- Convenient motion activated recording to SD Card
- Portable with battery power
Packaging and Accessories
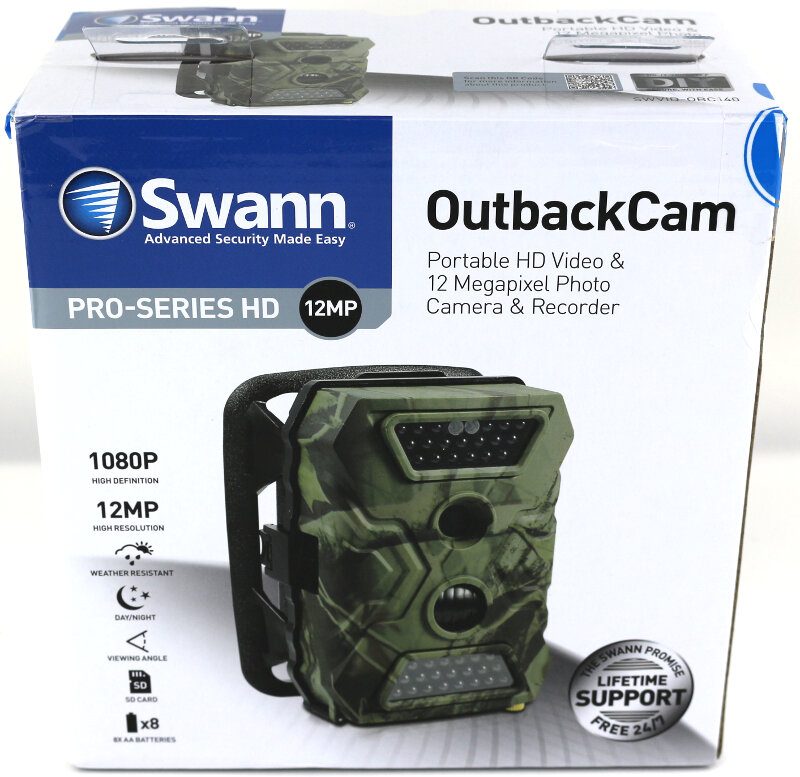
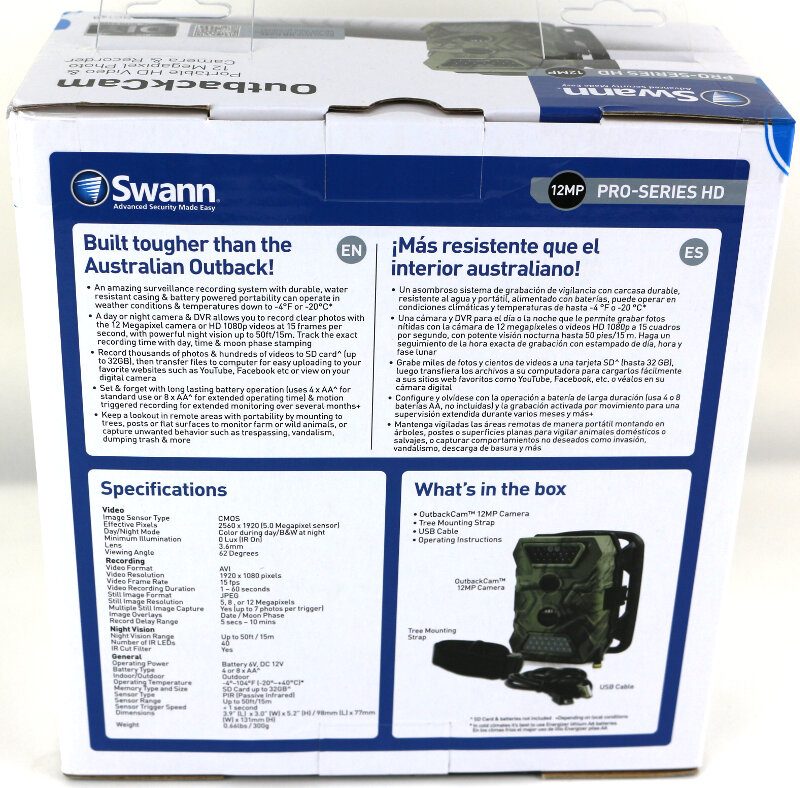
The packaging will tell you everything you need to know before purchase. The front has all the specification highlights as well as a photo of the actual camera.
The sides and rear side have more information and the exact details of the hardware, from the sensor over IR LEDs to the package content.
Inside, besides the outdoor camera, are a bunch of notes. These include an instruction manual, conformity declarations and warranty information.
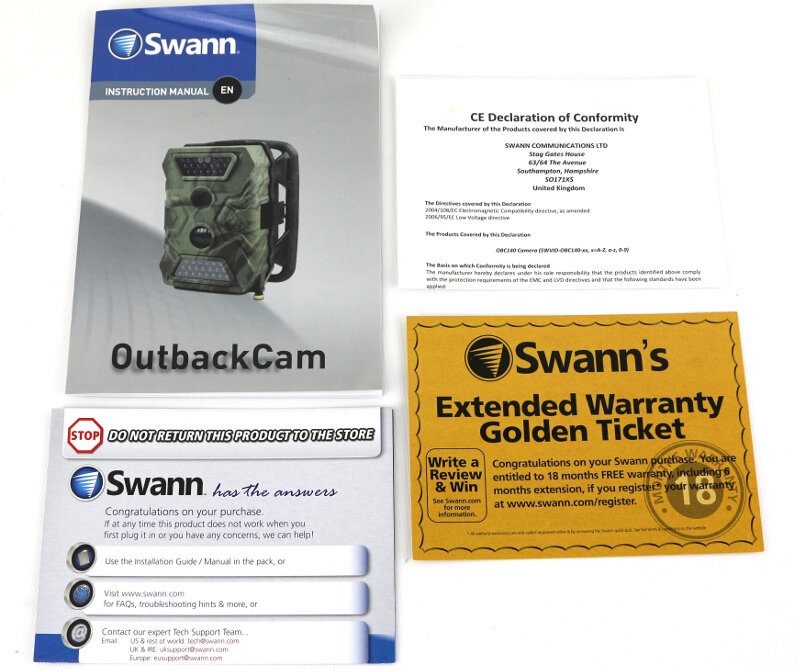
There’s also a USB connector cable and a tree mounting strap. The latter allows you to mount the camera on any tree or pole-like object for easy monitoring of the area.

A Closer Look
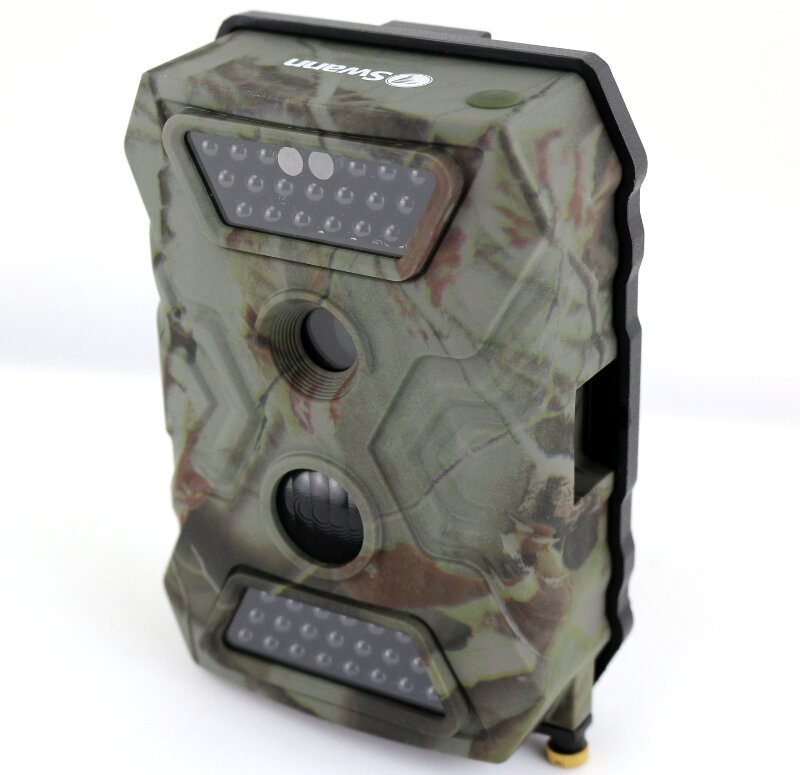
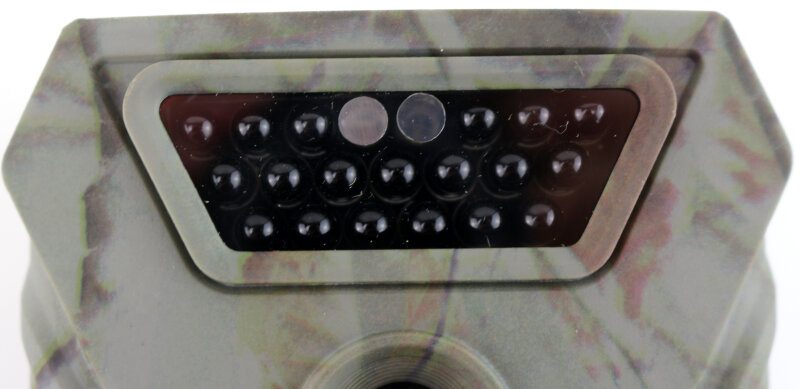
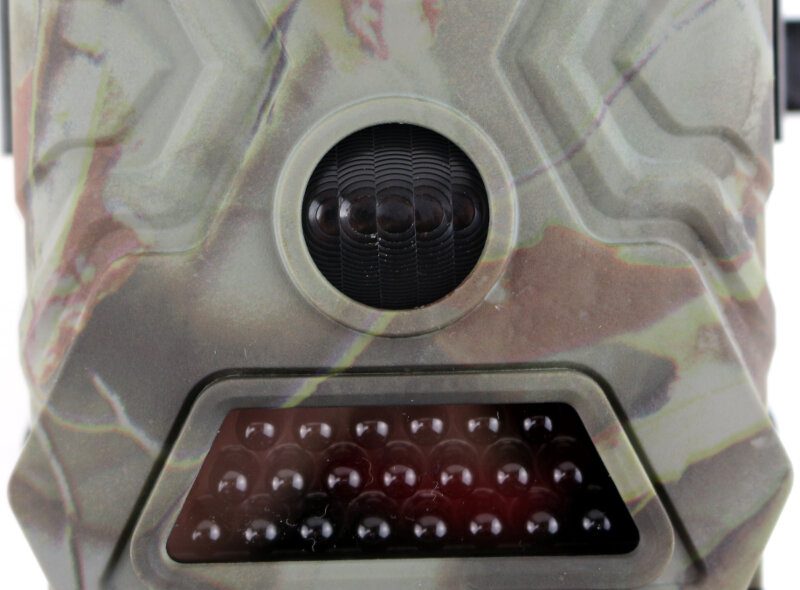
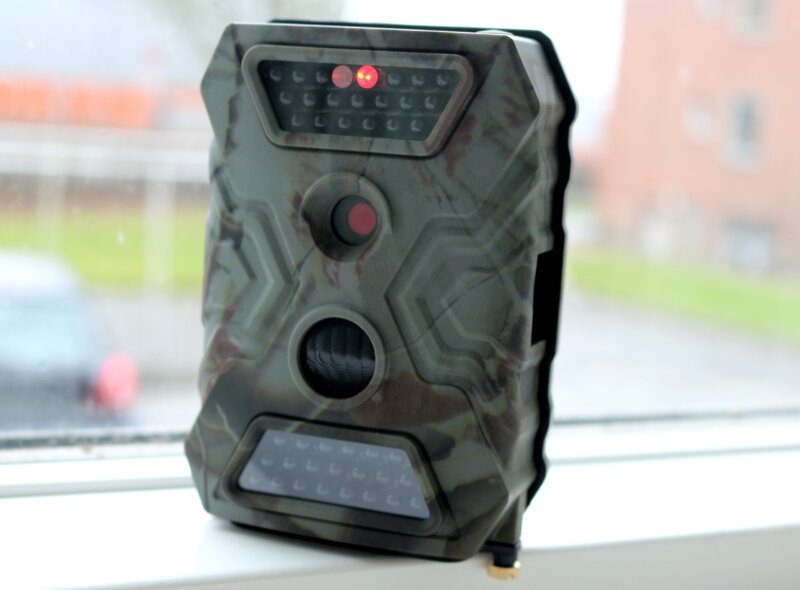
When moving in for a closer look, the first thing we notice are all the IR LEDs. There is one section at the top of the camera, as seen here, and the second is further down.
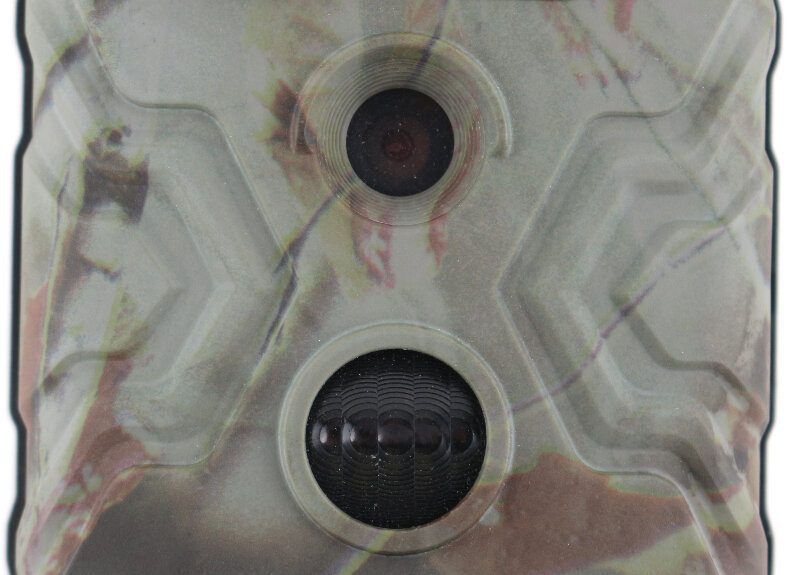
The image sensor is located in the middle of the camera which allows for easy aiming when you mount it. The built-in display is located on the inside when the extra battery compartment is mounted. So there is no real way to aim the camera visually. With a centred sensor location, that gets a lot easier. Below it is the passive Passive IR.
Below the sensor are the remaining IR LEDs. The two section combined make up the 40 featured LEDs.
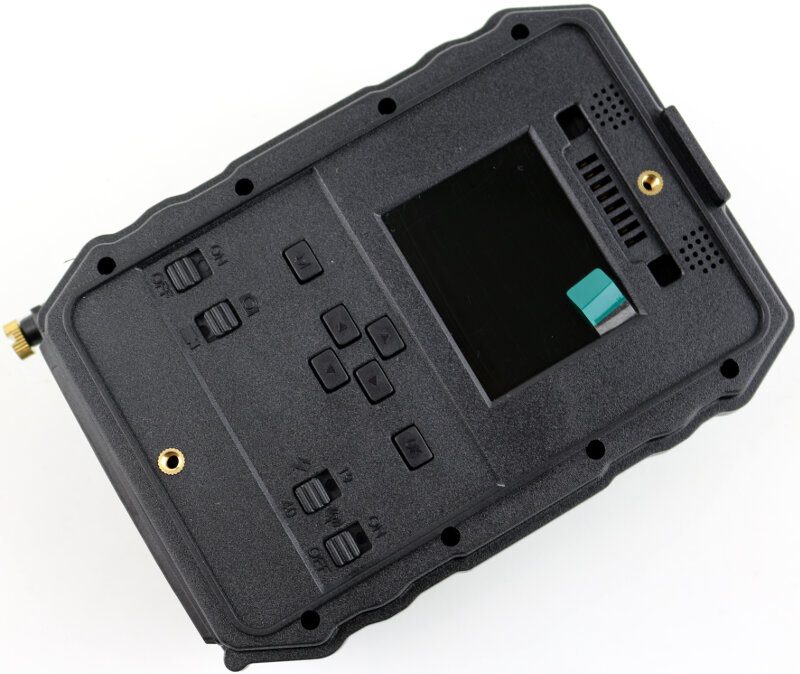
The display isn’t large, but it’s sufficient as it mostly will be used to configure it. However, it allows you to watch recordings as they happen too.

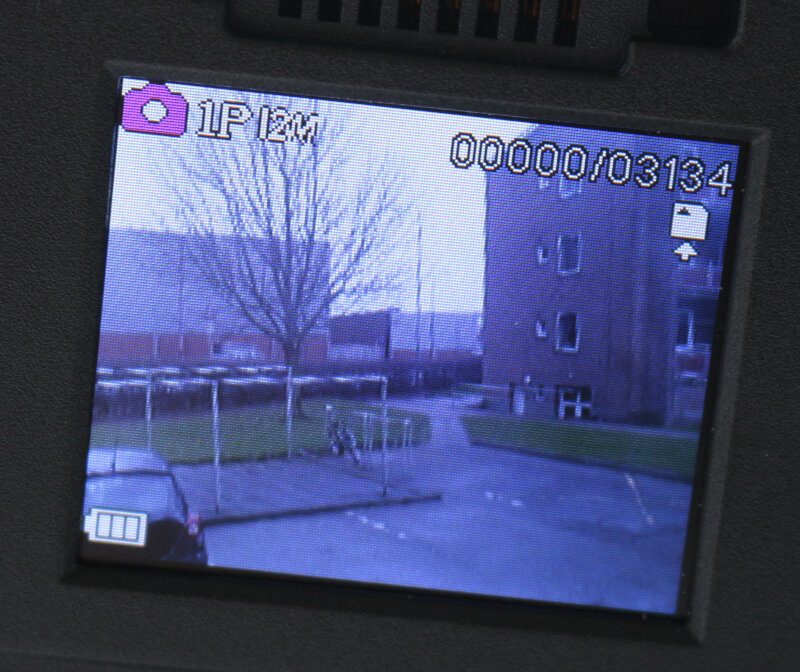
Control of the camera is easy. There are switches to turn the camera on and off, switch between camera and video mode, limit the amount of IR LEDs enabled, and for the motion detection. Above the switches are menu controls needed to set up the configuration.

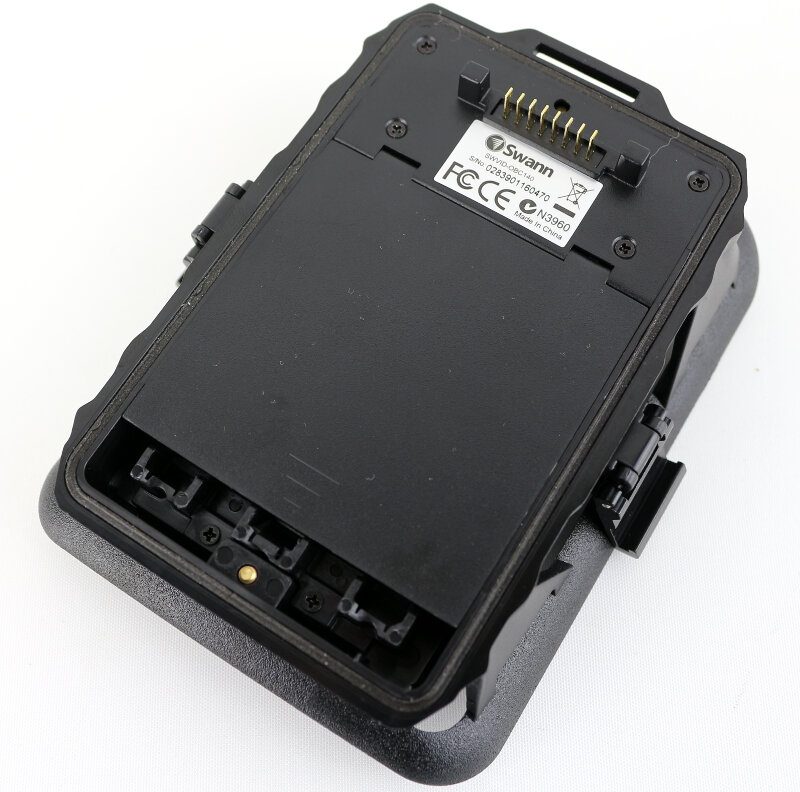
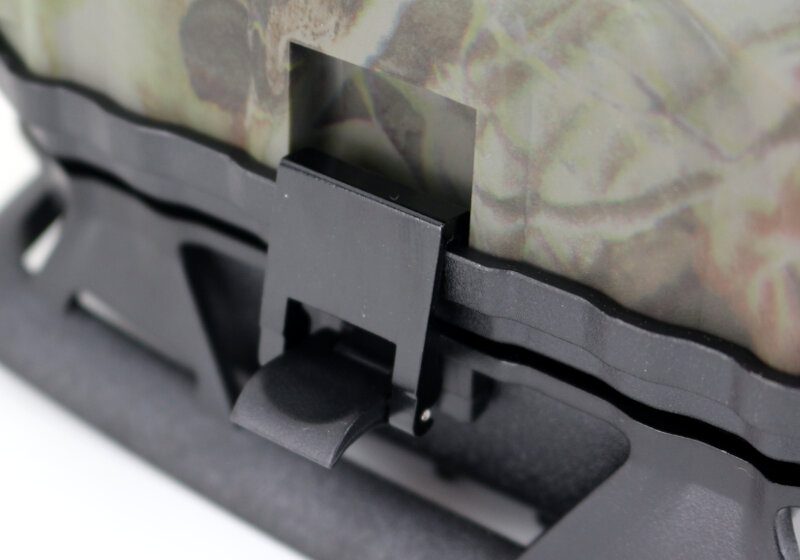
The two pieces, the camera and the extra battery compartment, are coupled together with easy-to-open mechanisms. That makes it easy to first mount the rear part to the tree or pole and then add the camera on top. It also allows easy battery and memory card replacement without the need to remove the mounting strap.
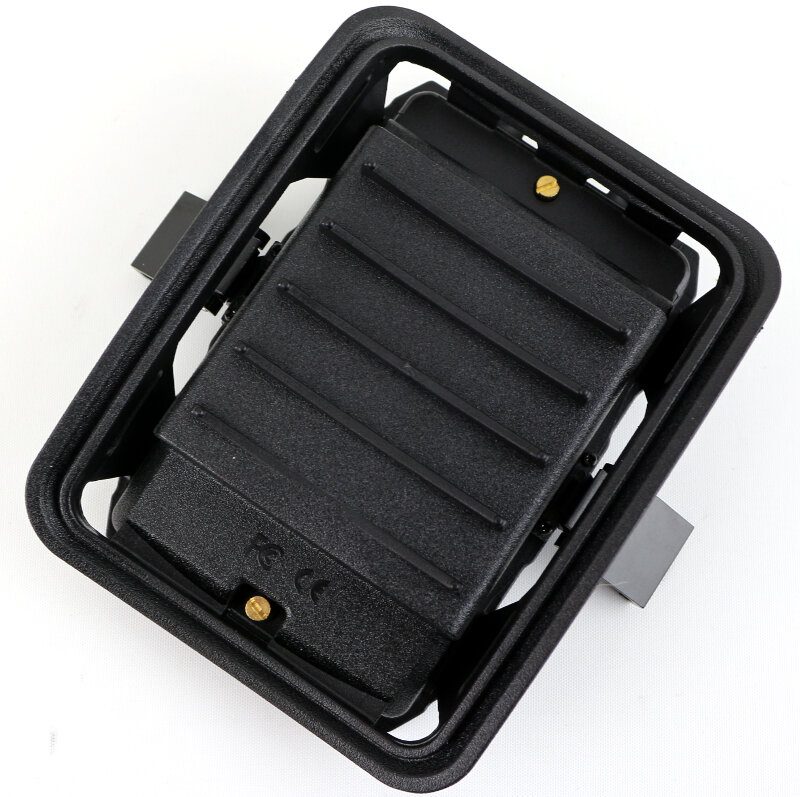
The battery compartment is curved on the rear to accommodate round surface mounting, as trees and poles usually are. Other than that, the rear of it doesn’t come with more features.
Turning it over, we see the connector pins at the top and the battery compartment below.
The installed batteries will stay in place at all time thanks to the added foam pad.
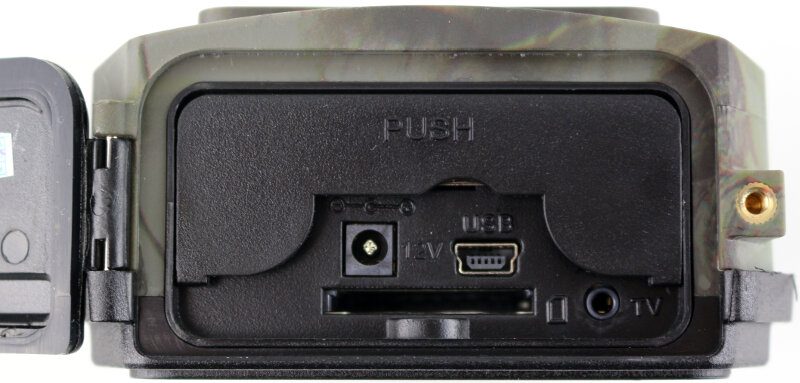
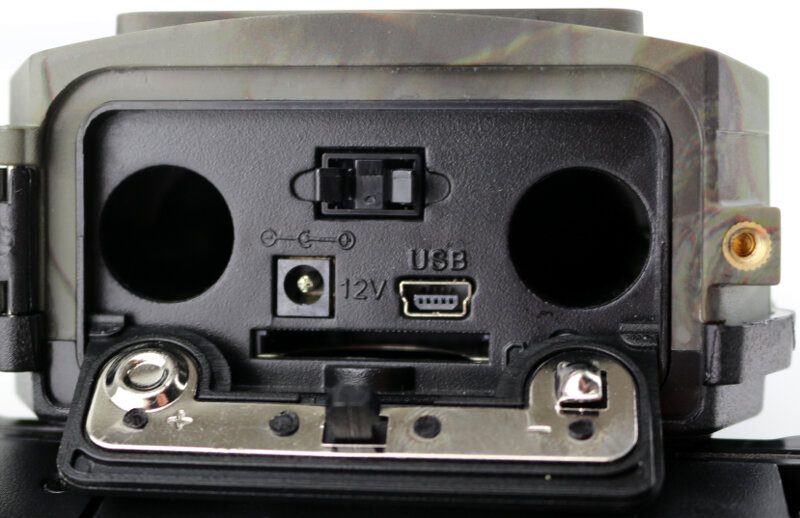
The bottom plate on the actual camera is secured with a single thumbscrew to keep dirt and water out of the connectors. Once opened, you gain access to the memory card slot, the USB connector, and a DV 12V power connector. There’s also a TV connector at the bottom corner.
The battery compartment is opened with a simple push on the cover. Slide in two batteries on each side and close it up again.
Menu Selection
The menu is easy to read and use, and the menu points are clear on what they contain. Most also show the current setting to the right of the name.


Test Methology
Testing a camera like this is quite easy, as you would expect. I simply insert a memory card and start to take photos and videos with it. Since this camera features nighttime vision thanks to infra-red LEDs, I’ll test it during nighttime as well as daytime.
On the following pages, you will find a list of videos and photos that all have been recorded with the Swann OutbackCam. No editing has been performed on either. The videos have been uploaded to YouTube and embedded into the article. The photos have been resized and changed in compression to meet the sites limitation, but the full sized and unedited photos will be linked at the bottom of each page. This allows you to take a closer look at some of them, in case that is relevant to you.
I originally had taken a lot of video and photos before the shown recordings, but the memory card died while I attempted to transfer the files onto my workstation. These things happen, and it was one of my oldest and most used memory cards, so it was bound to happen. That means that the shown recordings are more spring-time oriented than beautiful show covered winter scenarios.
The content of the recordings isn’t special in this review, some might even say boring, but I attempted to catch a variety of different lighting scenarios as well as various depths. I recorded video while walking and with the camera on a fixed location. Some videos are with closeup motion and others with remote motion. All this, in combination, should give a great view of the camera’s capabilities.
Daytime Video Tests
This first video is a small walk down a trail. While I did try to keep the camera as steady as possible, anyone who ever tried to walk with a camera knows that this isn’t an easy task. The pictures are still clear despite the shaking, there is no motion blur.
The second video is with the camera mounted stationary. The wind is creating remote movement in the lake’s water, and the tree branch in the front of the shot is also in movement.
The third video is an attempt at close-up motion. I kneeled down in some high grass and watched it move in the wind. Again, we get clear images without motion blur or similar FPS delays.
This fourth video is an attempt to see how close I can go to an object and still keep it in focus.
The fifth video is another video with the camera mounted stationary. It shows silent motion in the stream running below the bridge that I’m standing on. Sometimes working can be a soothing experience.
The sixth and last daytime video was taken from another bridge, showing more rapid water movement. We got light reflections and rapid movement in the water, and once again, the camera does a great job at recording this.
Nighttime Video Tests
I had the camera set up with motion detection enabled for quite some time, but I sadly wasn’t lucky to capture anything with it. There isn’t much wildlife around here and it seems like what is, was walking other ways. That doesn’t prevent me from testing it tho and I simply took some normal night time recordings.
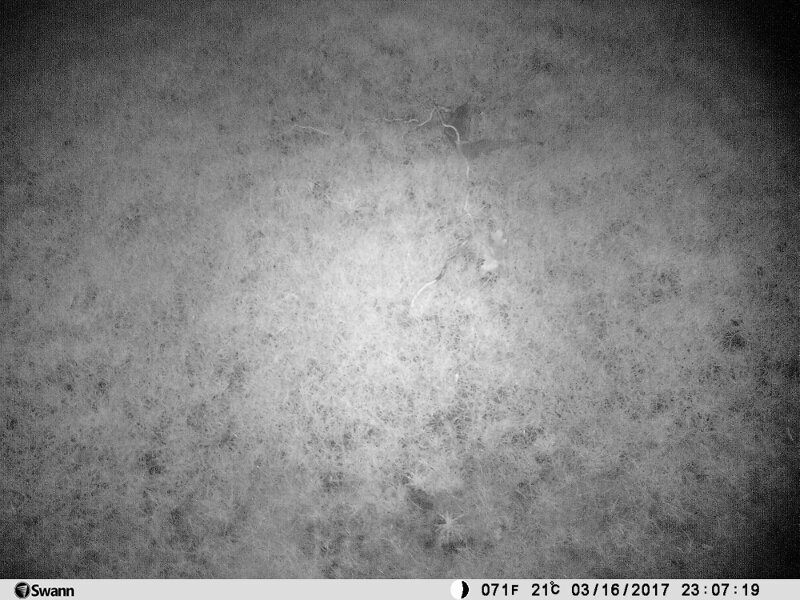
Since the area behind my apartment complex is wide open, I had all 40 IR LEDs enabled on the camera.
In both these videos, we clearly see how great the IR LEDs can light up the area. I couldn’t see anything but darkness with my own eyes, but the LEDs light up the grass and swing set nicely. I would estimate the distance between my balcony and the swingset seen in the videos to be around 15 meters.
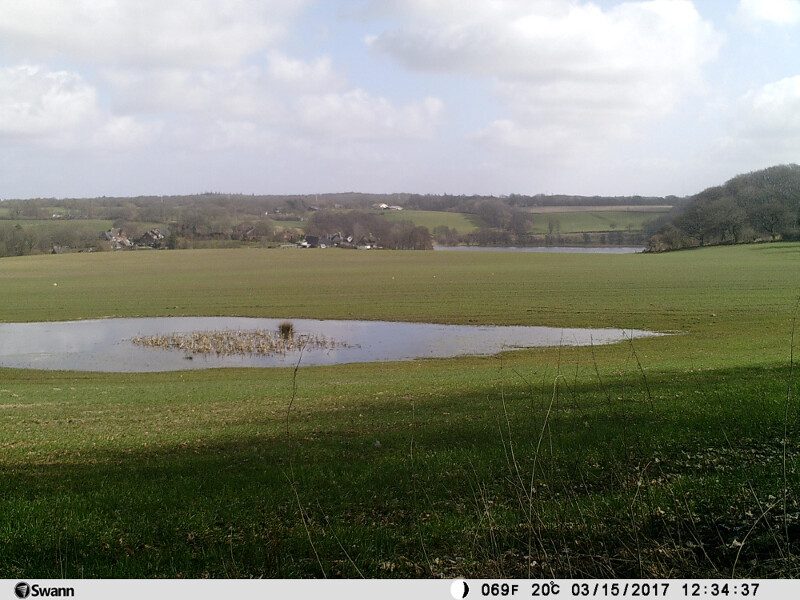
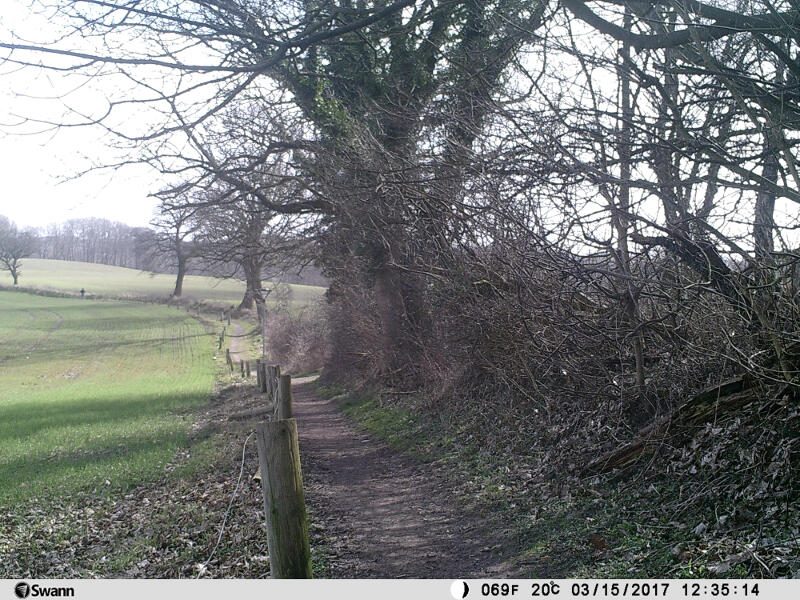
Daytime Photo Tests
The daytime photos were taken on one of my walks. I tried to capture a variety of angles in comparison to the light source (sun), with close-up and far away details, and with a variating depth.

A slight change of angle can have a lot of impact on the colours of the taken photos.
But either way, the taken pictures have a great quality.

The Swann OutbackCam is great at various depths in the same photo. Everything looks great and sharp.

In some instances, the brightness gets a little too much for my taste, as seen here. But that’s normal and the same for any camera. With a DSLR you’d adjust your settings, but that isn’t an option here. Everything is done automatically, and that’s a great convenience. It isn’t a big problem in any way, especially not since the OutbackCam features a built-in display. It allows you to see the photos you have taken and you can adjust the next photo accordingly.

We also see all the previously mentioned details at the bottom of the photos, such as moon phase, temperature, date, and time.


These next two pictures show how well the camera can capture the details. It requires a fast shutter speed to capture moving water and not having it just be white mass, and the OutbackCam also does this well.


These last two pictures were an attempt to capture far away details. Both cows and the houses are clear.

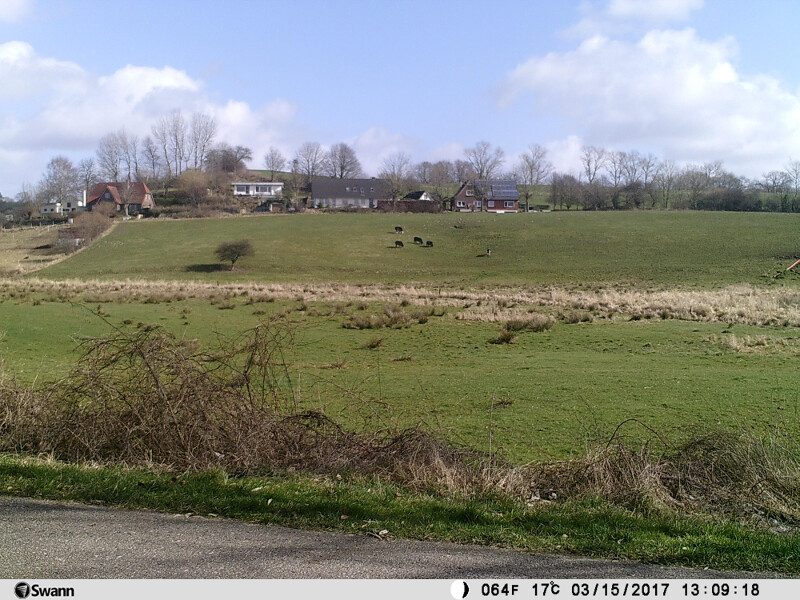
Full resolution and unedited photos can be found in a shared Google Drive folder.
Nighttime Photo Tests
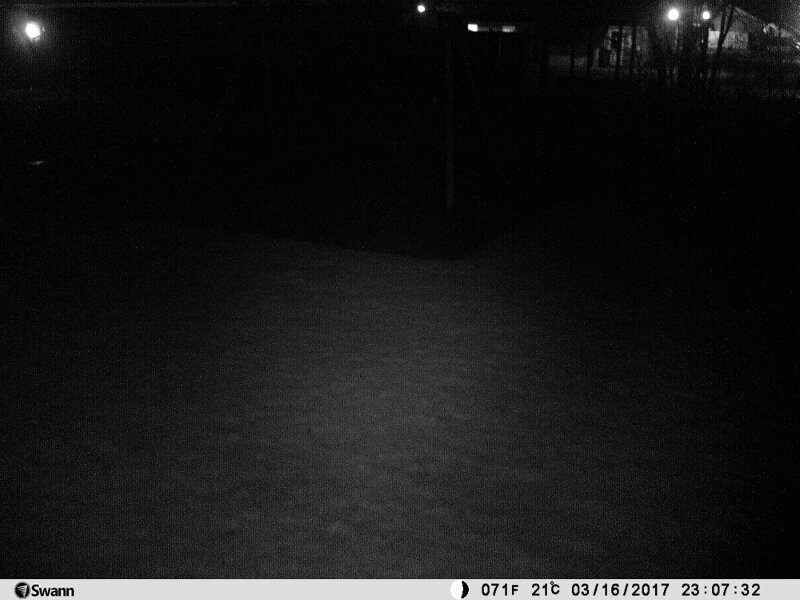
The nighttime photos are taken at the same time as the previously shown videos. I tried to take different angled shots, both left and right as well as downwards from my balcony.

The IR LEDs do a great job, and they would easily light up any animal passing through the sensor.


Angling the camera down and we almost get too much illumination from the IR. 40 LEDs are a lot and that’s why you can run it with just 19 of them enabled.

Sill, the quality is great and we can easily spot the nut branch located on the grass.


Like the last test, I limited the distance possible for the camera. The first shot here is with 19 IR LEDs running and the last turned off. We get a great and clear picture.

That changes when we turn on all 40 LEDs. It provides far too much illumination in the area. The distance from the camera and to the red brick wall is about 2 meters here.

Full resolution and unedited photos can be found in a shared Google Drive folder.
Pricing and Conclusion
Pricing
At the time of writing, the Swann OutbackCam Portable HD Video & 12 Megapixel Photo Camera & Recorder can be yours for £99.99 from Amazon UK. I couldn’t find an American listing at the time of writing.
Conclusion
Swann’s OutbackCam is so easy to use, you won’t need any manual. Everything is logical from the time you unpack it to loading it with batteries and turning it on. The buttons are labelled with easy to understand icons and the menu is easy to navigate. As you browse through the menu, you’ll quickly find the settings you’re looking for as well as find out what the camera can do.
The OutbackCam takes some great photos and videos, photos with 12 Megapixel and videos in full-HD 1920x1080p resolution. Not only during the day but also at night. The camera is equipped with two sets of IR LEDs which make up 40 LEDs in total. That gives a great nighttime illumination that sometimes is too much. For this, you can just turn off one of the sections and only use half. During the day time photos, I did notice that it was sensitive to the light source, but nothing that interferes with the quality of the images. The colours only fade a little and the image gets brighter.
The built-in SD card slot accepts cards up to 32GB and that should be sufficient in most cases. You’ll most likely need to replace the batteries long time before the memory card is full. Speaking of batteries, the double compartment for up to 8 AA batteries in total gives the camera a great endurance. You can offload images from the SD card directly or connect a USB cable to your PC. You can also power it through a DC connector, but that takes away some of the ruggedness.
When everything is closed, the camera can withstand quite a bit of weather and you don’t need to worry about having it mounted outside. Neither temperatures nor rain should affect the functionality. The shape of the extra battery compartment and the included strap makes it easy to mount the camera on trees and poles, so it’s only your imagination of placement that sets your limits.
Pros
- 12 Megapixel photos
- Full HD 15FPS/HD 30FPS video
- 40 IR LEDs for 15-metre nighttime vision
- Motion detection
- Multishot, delayed shot, and time-lapse function
- Dual-battery compartment
- Easy mountable
- Lightweight
- Fair price
Cons
- Too much light can be an issue at times
“Swann’s OutbackCam is a great tool to monitor outdoor areas, whether it’s for animal or human movement; whether it’s night or day.”

Swann OutbackCam 12MP Outdoor Photo & Video Camera Review
Thank you Swann for providing us with this sample.


