TerraMaster F2-221 2-Bay SMB NAS Review
Bohs Hansen / 5 years ago
A Closer Look at the Device
It is time for us to take a closer look at the device itself, after all, it’s a beauty.

Front-Facing Features
The only front-facing features, besides the drive trays, of course, are the LEDs and the power button. There’s an LED for each of the hard drives, one for the network, and one for general power.

The green pinhole LEDs give the unit a great premium look which matches the aluminium cover.

Rear-Facing Features
The rear side is where all the connectors are. At the top, you get a HDMI port followed by two USB 3.0 ports. Below them are the two Gigabit Ethernet ports which can be linked or used seperately.
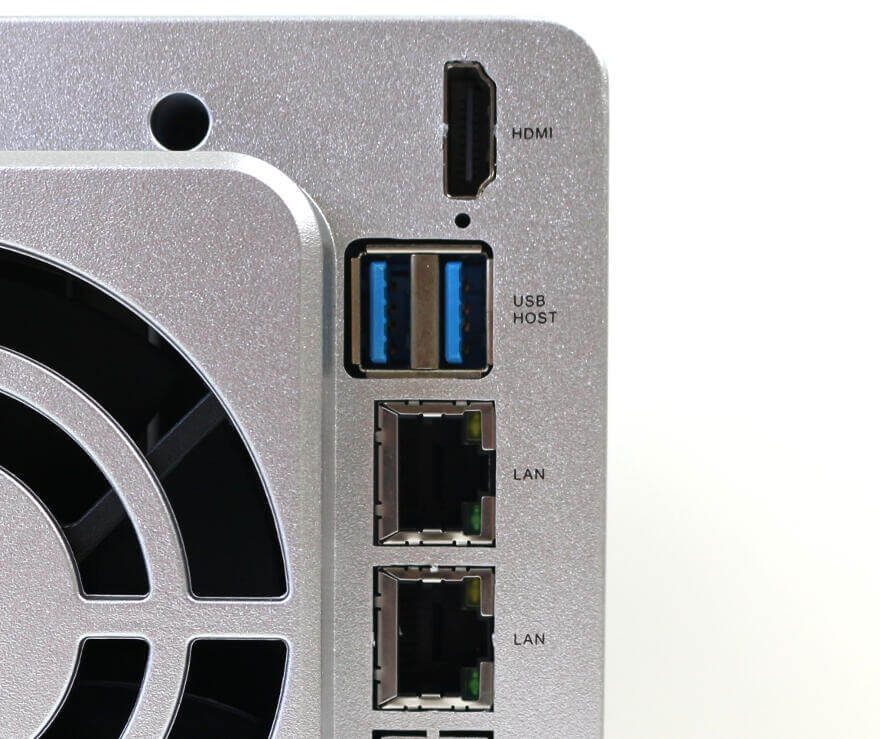
The exhaust fan is extruded from the general enclosure which makes it very prominent. But then again, as this side is turned away from you, you won’t notice it.

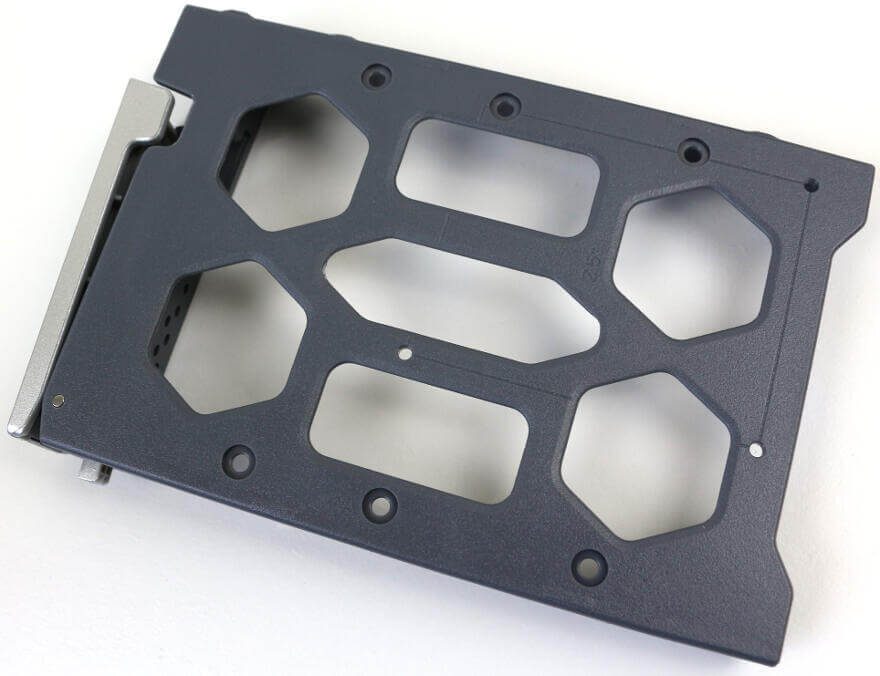
Drive Trays
The drive trays are made of plastic all the way. The front latch doesn’t feature a spring sytems or the likes which is a shame. But it isn’t a bad thing as such.

You can mount both 2.5-inch and 3.5-inch drives of all sorts in these caddies. They feature screw holes for them all, including all types of HDD.
HDMI Output
Sadly, the HDMI port only offers the prompt view at this point, but hopefully, that will change with future software updates. Only can only imagine that this is the reason behind the addition of an HDMI port to the NAS.

How To Upgrade The Memory?
Upgrading the memory in a TerraMaster NAS is quite easy and nothing to worry about. Of course, you should be careful. But it isn’t hard.
You start with the removal of the four screws in the back. Once they’re out, you can gently pull the rear cover off. Now you have to options: Either you can remove the fan connector from the motherboard, but it’s hot-glued for a secure connection. The second option is to just turn the whole rear contraption 90 degrees and it will fit through the enclosure.

You can then pull gently at the front and the whole thing will come out. You should, of course, remove the drive trays first.
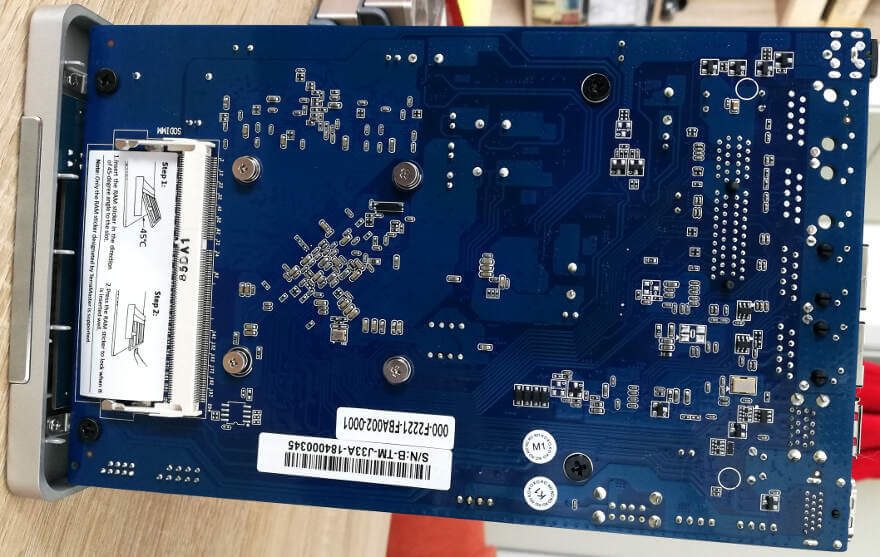
Once you got it all seperated, we can see the SO-DIMM slot on the rear of the inner workings. No further dissasembly is required here. Plug in the memory module, reverse the above-steps, and it’s done.
A Few Inside Shots
While we have the unit open, there are two things worth highlighting. The OS is run of an internal USB stick which is removeable. A great backup option in the event that it ever wears out. A soldered NAND chip can’t be replaced as easy.

The second thing worth nothing is the relative large heatsink on the CPU where we’re also able to spot the onboard RAM next to it.


