The ULTIMATE Quarantine Gaming PC
Peter Donnell / 4 years ago
From Nothing to Something
Cost quickly became an issue, as it worked out that buying the wood, borrowing tools and only purchasing the ones we couldn’t borrow would be MORE expensive than buying a pre-cut kit from Amazon/eBay/etc. This was especially true with the tools and skills needed to install T-molding slots on the edges. Plus, my skills couldn’t get the wood to the same standard of cuts as some of the CNC kits out there. So, pre-cut kit it was. We’re talking £50-60 vs £120+ for tools and materials, it was a no-brainer. Albeit, my original plans were shaping up nicely, but alas, they’re pointless now.

The choice was amazing, but typically I ran into two issues. Widescreen pre-cut arcades were massive, typically for 27″ panels, whereas the bartop designs were about 500mm wide (internally). My monitor was 507mm wide. That’s what sandpaper is for, right? I hadn’t decided which to sand yet, the monitor or the wood, but we’ll make it fit. Regardless, we stuck with the 500mm wide kit and would figure out the monitor issue, as this was closest in design to my original plans above.
COVID-19 Problems
This project was not meant to be a rush job. I was planning on doing the work over the coming weekends, take our time, with an aim to finish by the school summer holidays. What we didn’t see coming was COVID-19, which pushed the holidays forward. It also choked the supply line of hardware we needed. The build had to move faster, so we called in the big guns, the big favours, everything, and then really put the hours in. I wanted this thing working ASAP, even if it meant some compromises were made. So, we could have the basics installed, but run it from an external gaming PC if we couldn’t source the internal components in time.
The First Components Arrive
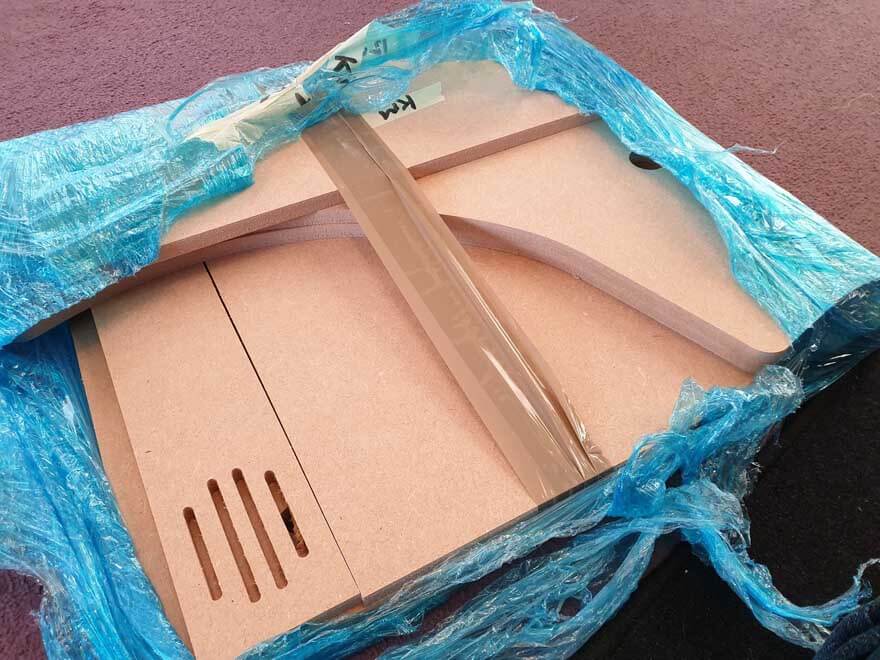
Thanks to Rich’s Bartop Arcade for shipping it promptly and it looking amazing. This isn’t a promo for a free kit either, but the guy was super helpful and I don’t think this project would have survived without his help. The image below is from his eBay store, I didn’t build it quite like this.
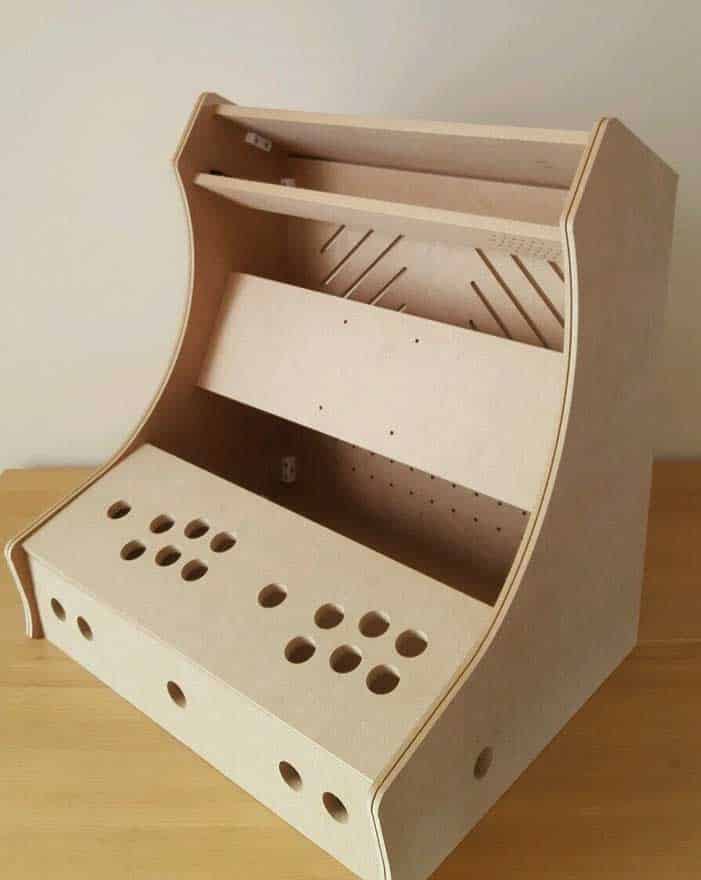
As you can see, it comes flat packed. There’s no screws or fixings here. It’s built to be flexible to your needs as you monitor, speakers, a marquee will all vary in size. Notice his CNC machine has put in everything; speaker holes, ventilation, and t-mold grooves on the edges.

This week also saw the arrival of the buttons. I was shocked at how many kits are available at a reasonable price. Most of them don’t require ANY soldering either. It’s basically just plug and play, which is brilliant.

It was time for a test-fit of the hardware. Lucky we did this, as none of it fits, and we spend two hours sanding the holes out to fit the buttons, which were all slightly larger than specified on the box. Ah well, these things happen.

Lovely mechanical switches on the sticks, oh-la-la. We sat here and clicked these things all afternoon… no joke.

A quick test-fire of the USB driver board, offering up plenty of LED goodness from the buttons.

Love a pinball sim? Me too, so we’ve got pinball flippers on the side too!


