Thermaltake Urban T81 Extreme Full Tower Chassis Review
Peter Donnell / 10 years ago
Introduction
Thermaltake have already got some very cool and very popular enthusiast grade chassis on the market, the Level 10 GT and the Chaser A71 are both great examples of this. Their Urban series was launched last year and has gone from strength to strength as Thermaltake expand the series, and now we see the new top king of the range with the release of the Urban T81.
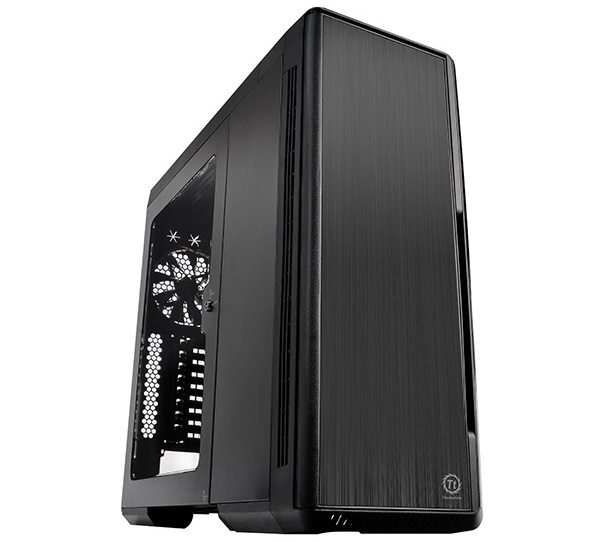
The Thermaltake Urban T81 is an absolutely beast, we first saw this chassis out at CES 2014 and we were blown away by what it was capable of, so I’m very happy to see it here at eTeknix HQ. It’s been packed with features that make it a formidable weapon for ultra-high end system builds, tailored to not only meet the demands of modern water cooling solutions, but also provide some industry leading air cooling options too.
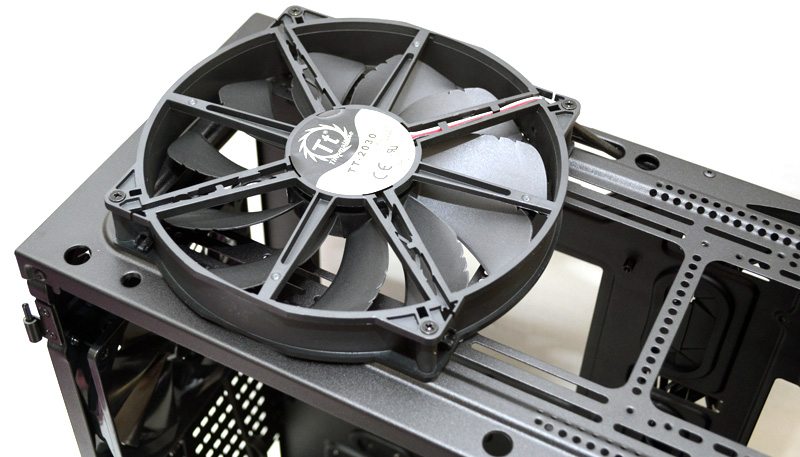
As you can see from the rather extensive specifications below the chassis is capable of holding plenty of storage in both 2.5″ and 3.5″ formats. It also features a built-in fan controller and most impressively it comes with not one, not two, but three high quality 200mm fans pre-installed! As well as an extra 140mm fan in the back; as far as pre-installed fans are concerned, the T81 is way ahead of the rest of the market.
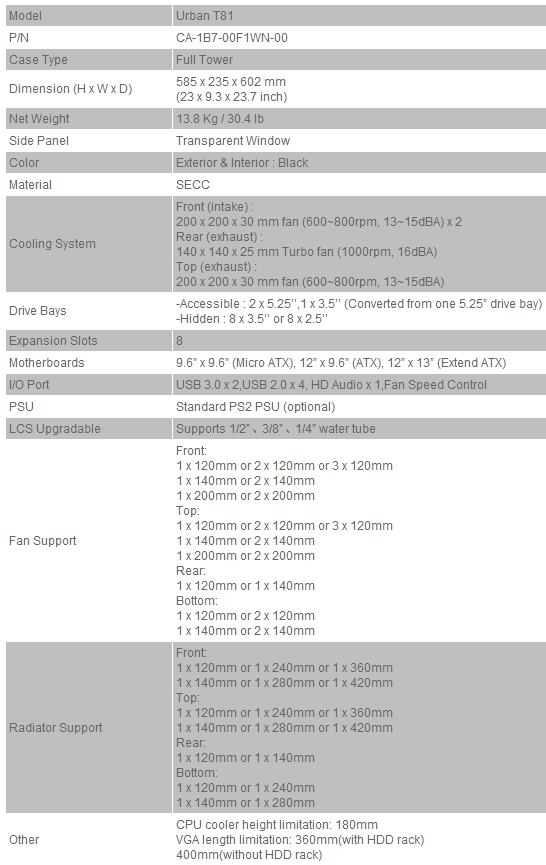
Since the specifications chart is just a sea of numbers, lets take a quick look at the radiator support diagram below. As you can see, there is room for epic custom loop water cooling, huge radiators, small radiators, they’ll fit. Radiators can be mounted in the front, back, top and bottom simultaneously.
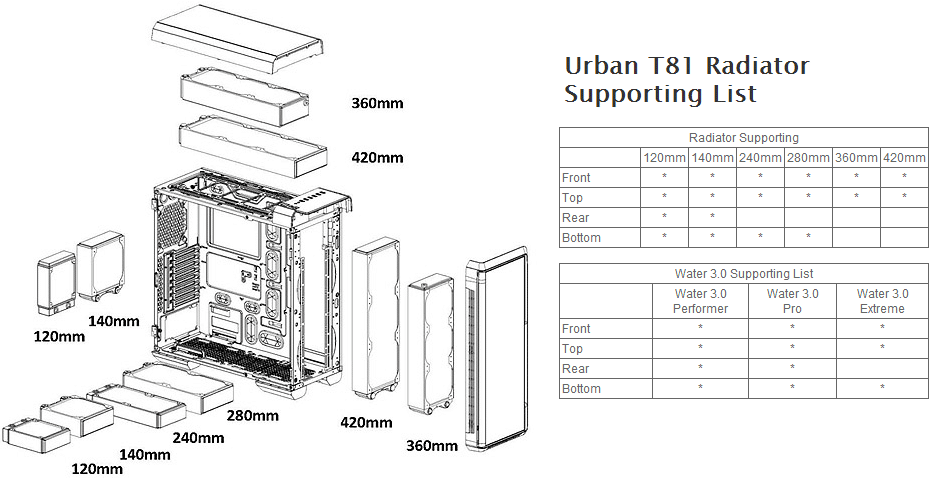
The fan support list is just as impressive, with the ability to mount four 200mm fans on this chassis, keeping in mind that three 200mm fans come pre-installed.
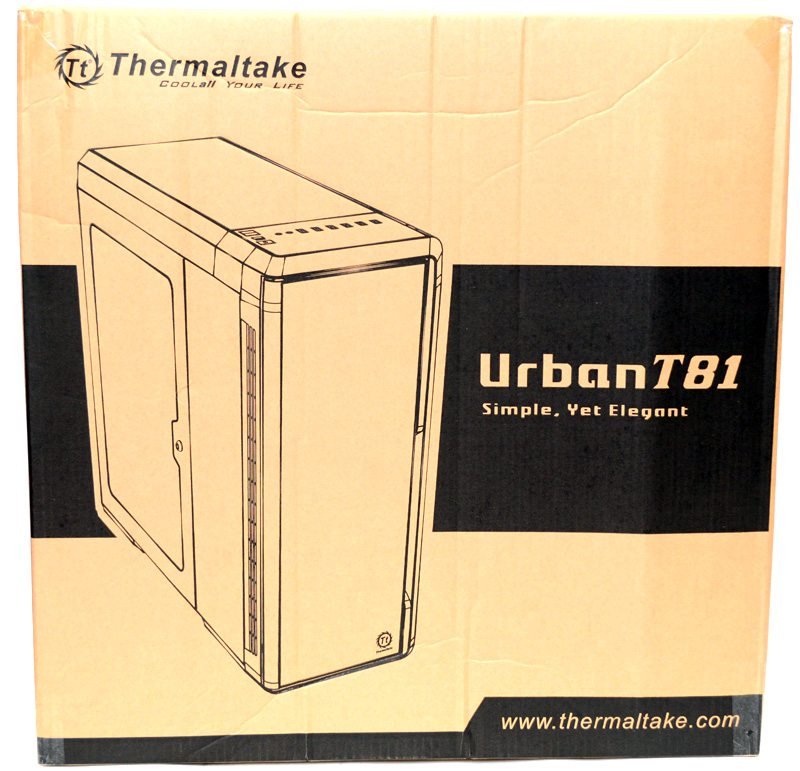
The T81 comes packaged in a fairly standard looking box, with a high contrast representation of the chassis overall design on the front.
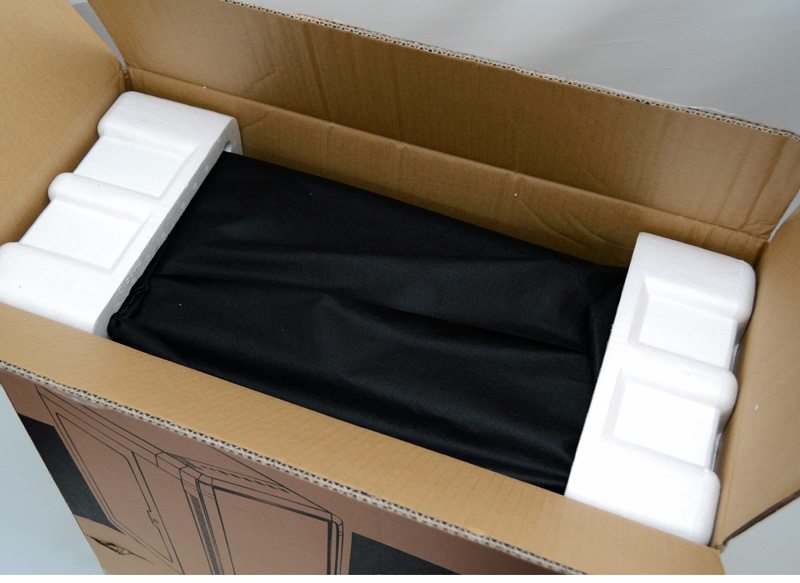
On the interior of the box you’ll find some Styrofoam packaging on each side as well as a black cloth cover to keep the case protected.
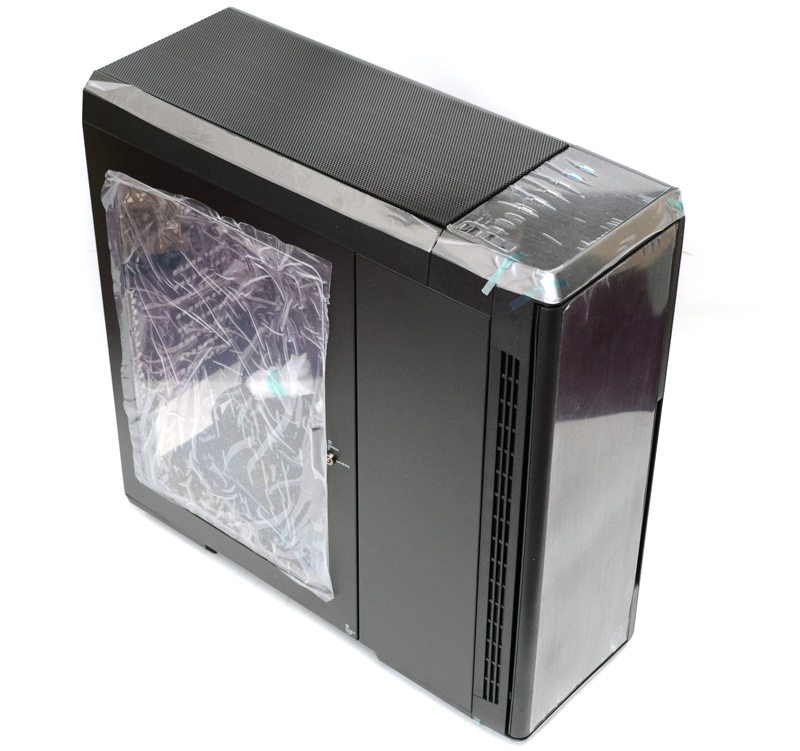
The case comes really well covered with plastic film on the interior and exterior of the side panel, as well as protective film and tape on all glossy panels and moving parts.
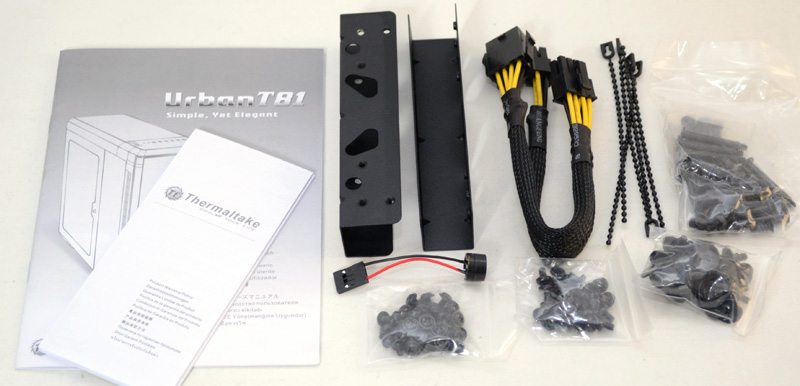
Inside the chassis you’ll find a small brown box which contains a pair of brackets, a CPU 8 pin (4+4) extension cable, some cable ties, an internal speakers and all the nuts and bolts you’ll need to install your components.
Exterior
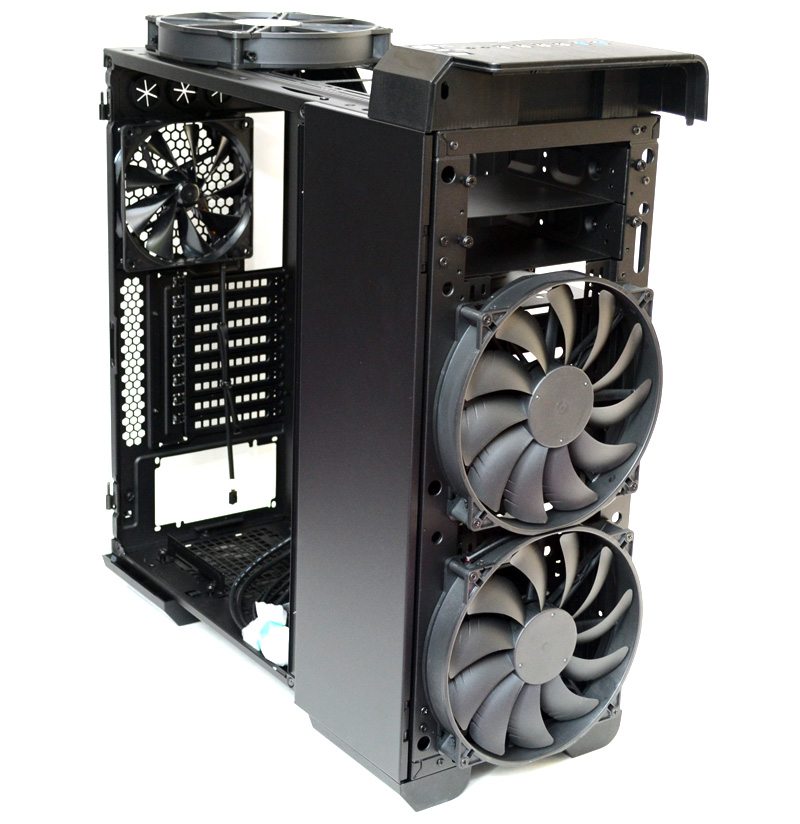
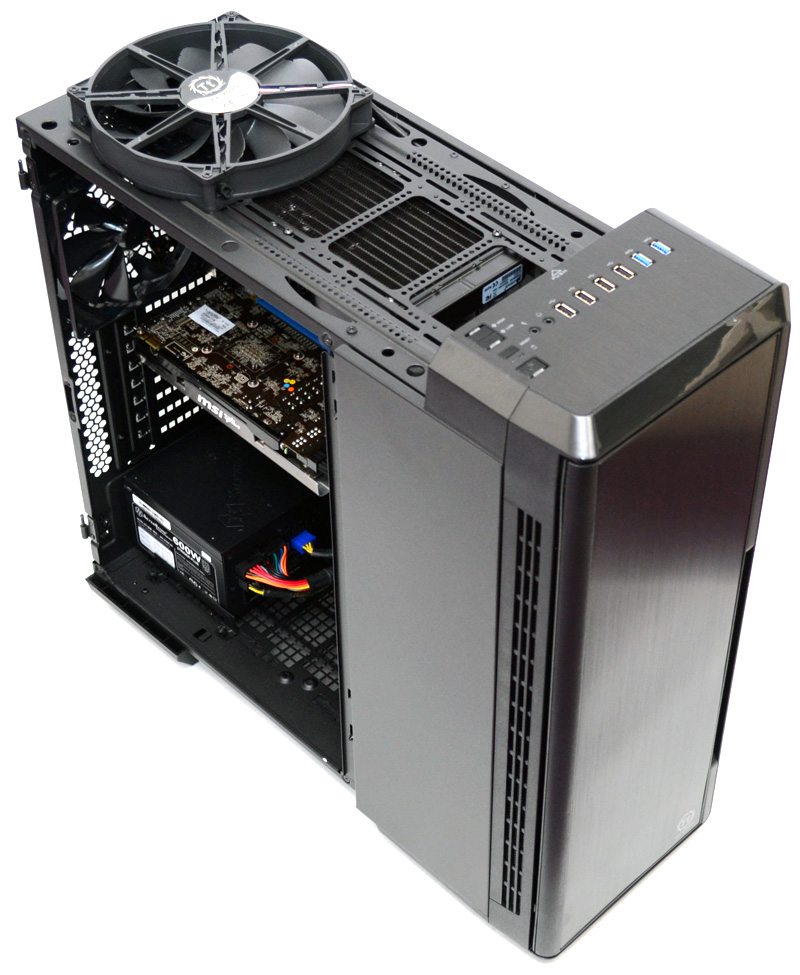
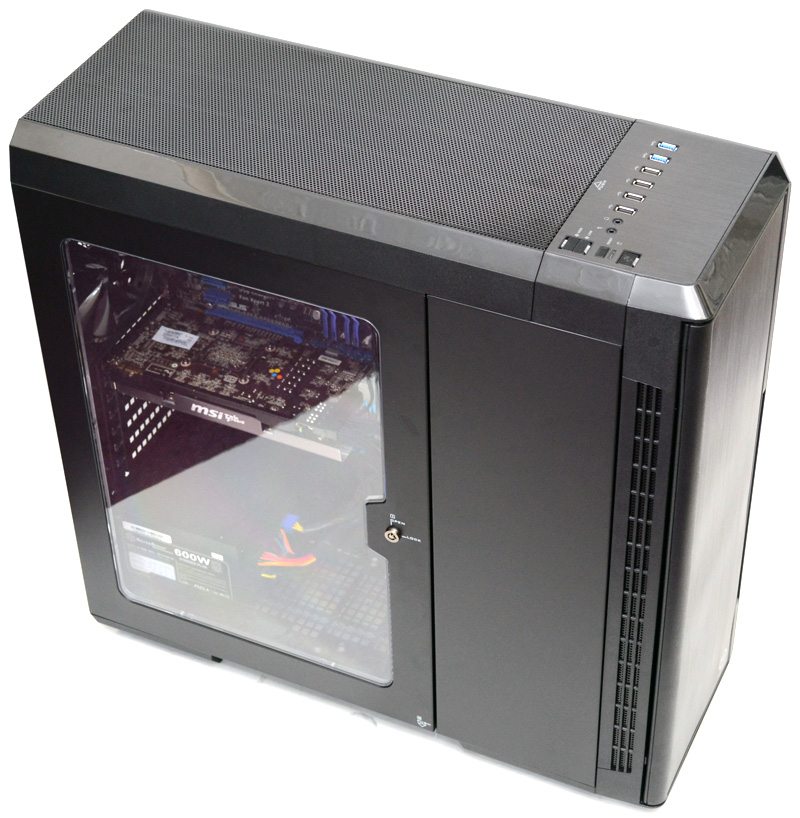
The Urban T81 features two side panel doors that open out on hinges, much in the same way as “suicide doors” do on modified cars. The largest door panel features a huge and clear window panel to give us a great view of the chassis interior, while the smaller door is solid metal, covering up all of the front hard drive / cooling mounts. Both doors fasten in the middle and are lockable.
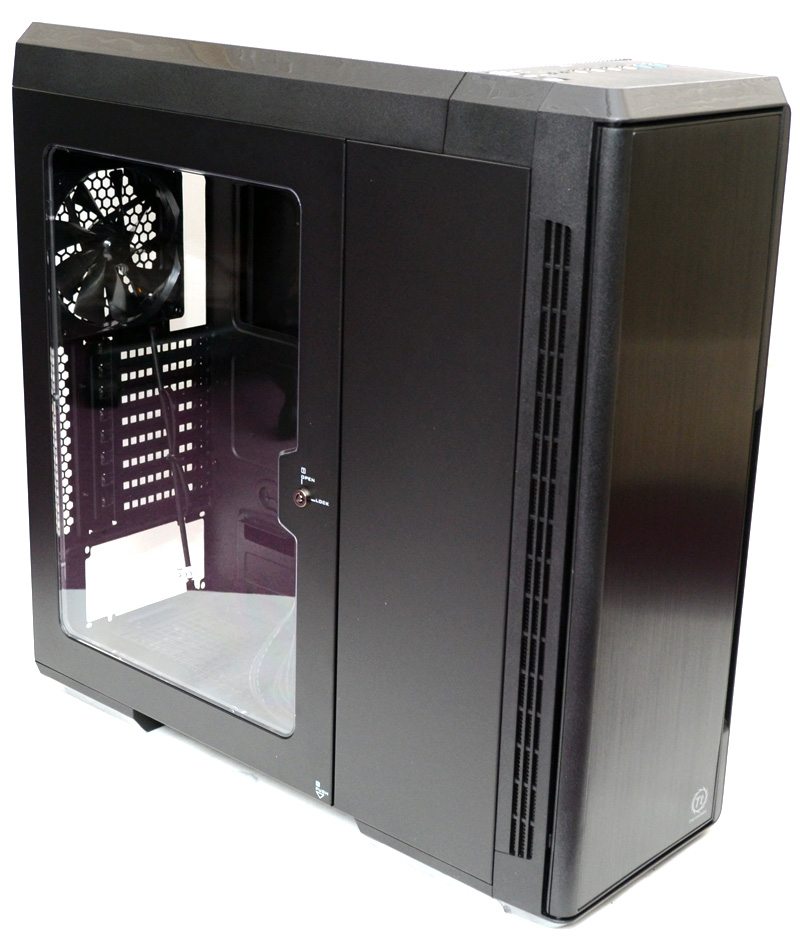
The chassis comes with a set of keys that allow you to secure the internal components, very handy for those who take their systems to LAN events.
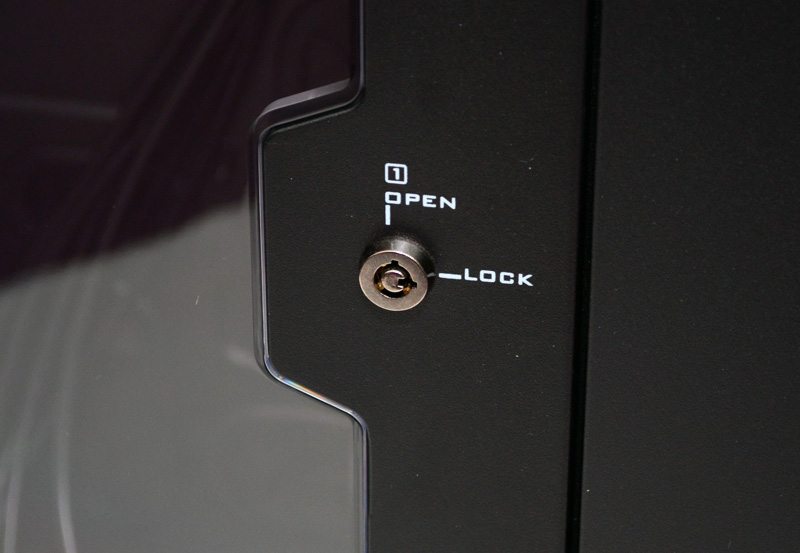
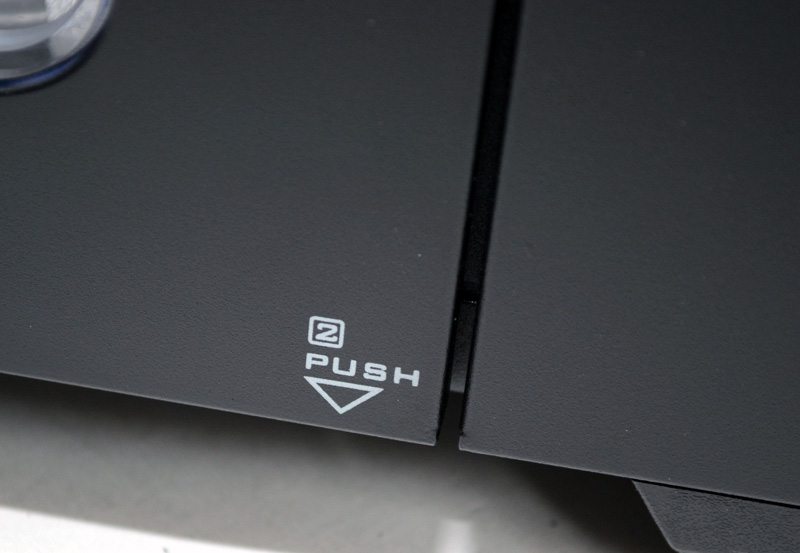
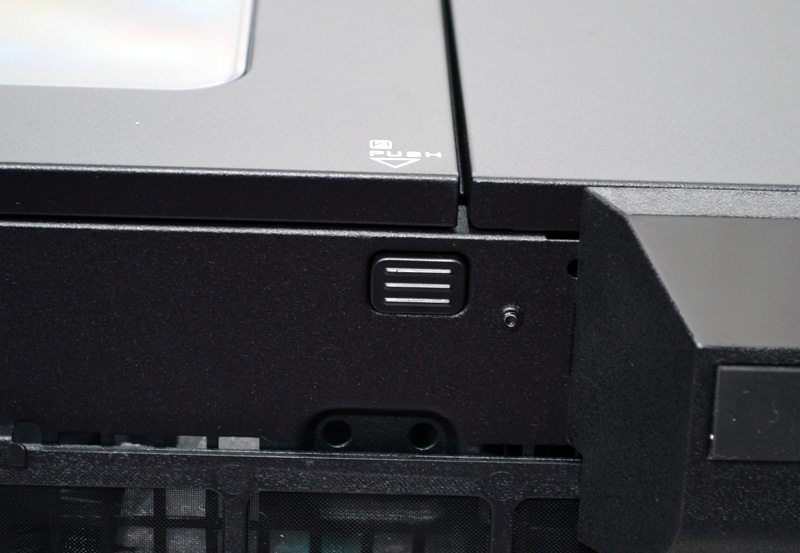
Once unlocked you can pop open the side panel by pushing in a button that is hidden on the under the chassis.
At the front edge of the chassis you’ll find plenty of ventilation, this is used to feed the front fans.
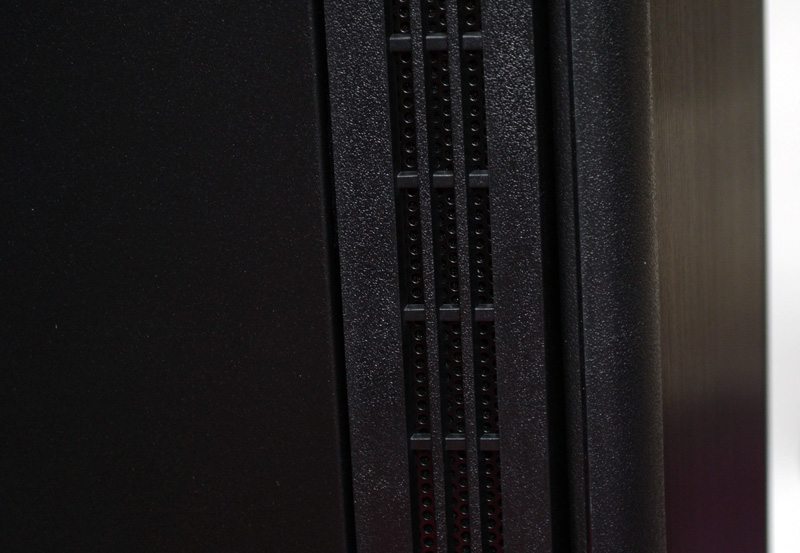
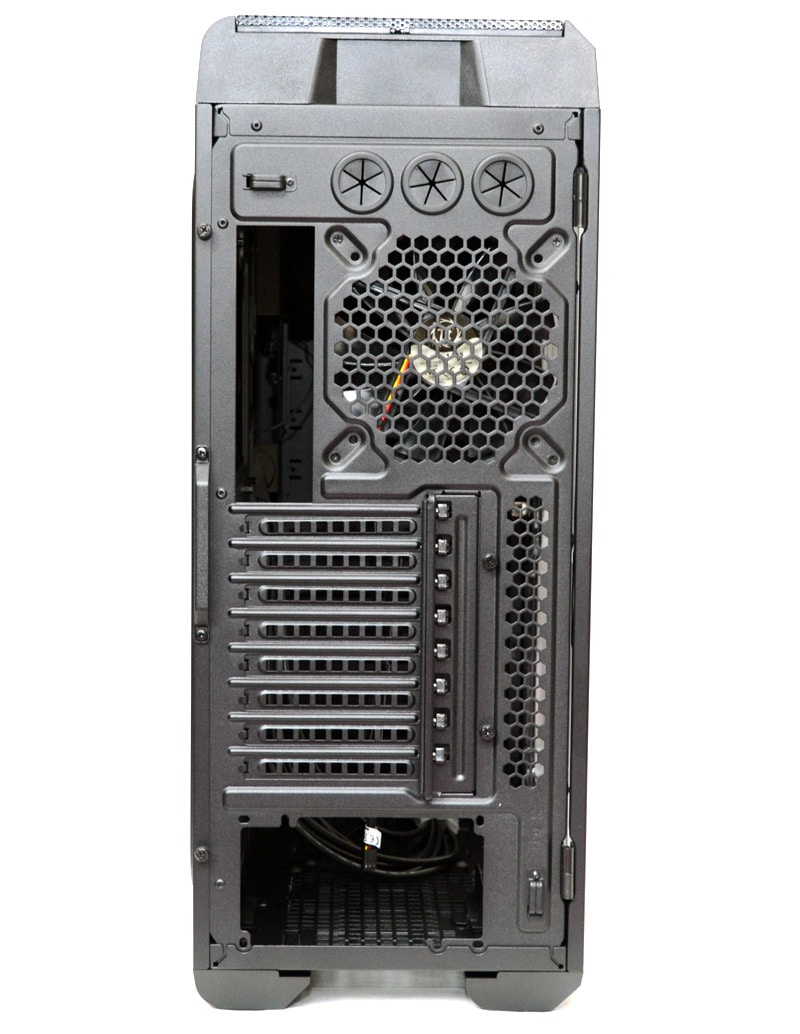
The right side panel is a solid metal panel with a deep recess to allow for extra cable routing space, the right side of the chassis also features a lot of ventilation for any front mounted cooling.
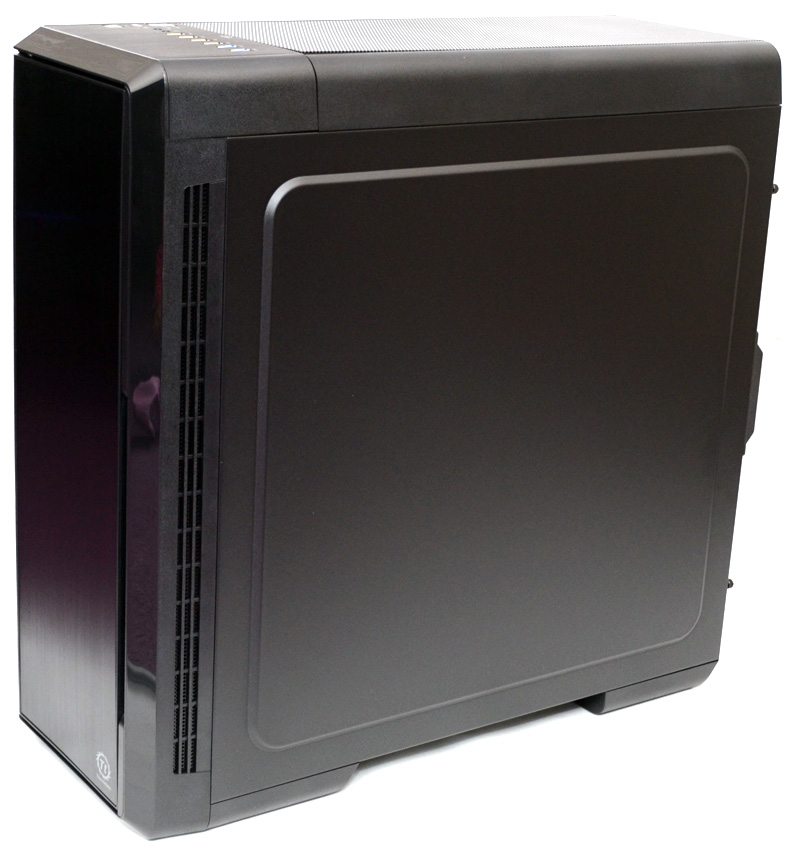
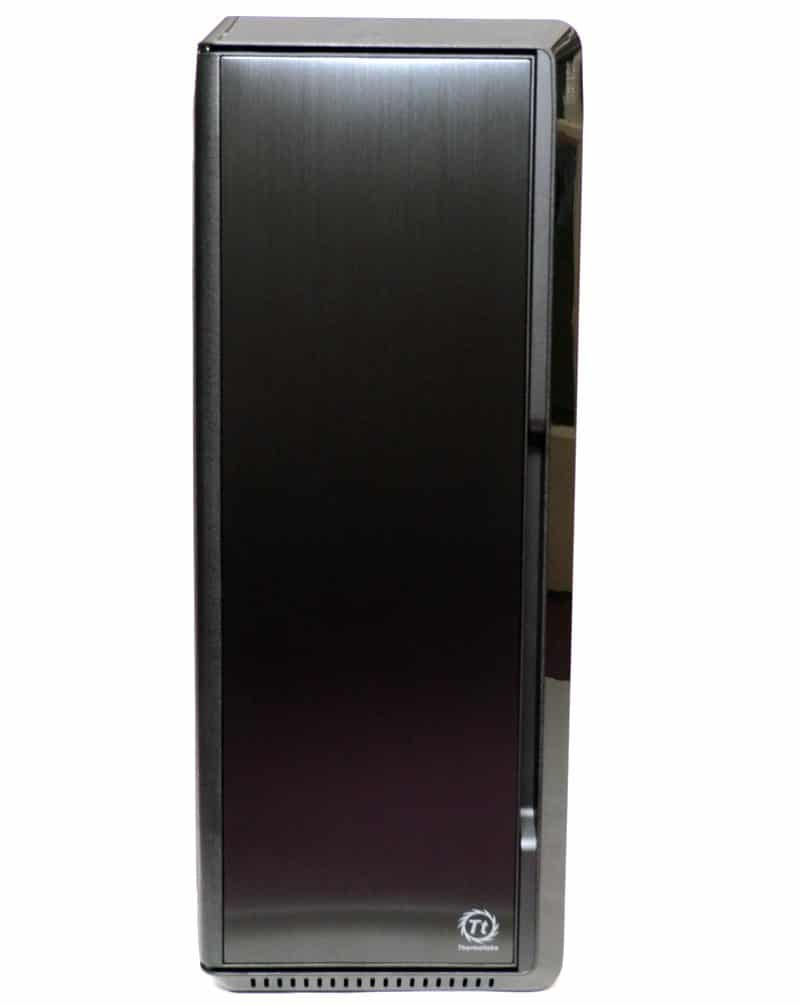
The front panel is covered with a sleek-looking door panel, finished in gorgeous black aluminium and it does a great job of giving the chassis a bold and clean look as it covers the front fans and 5.25″ drive bays.
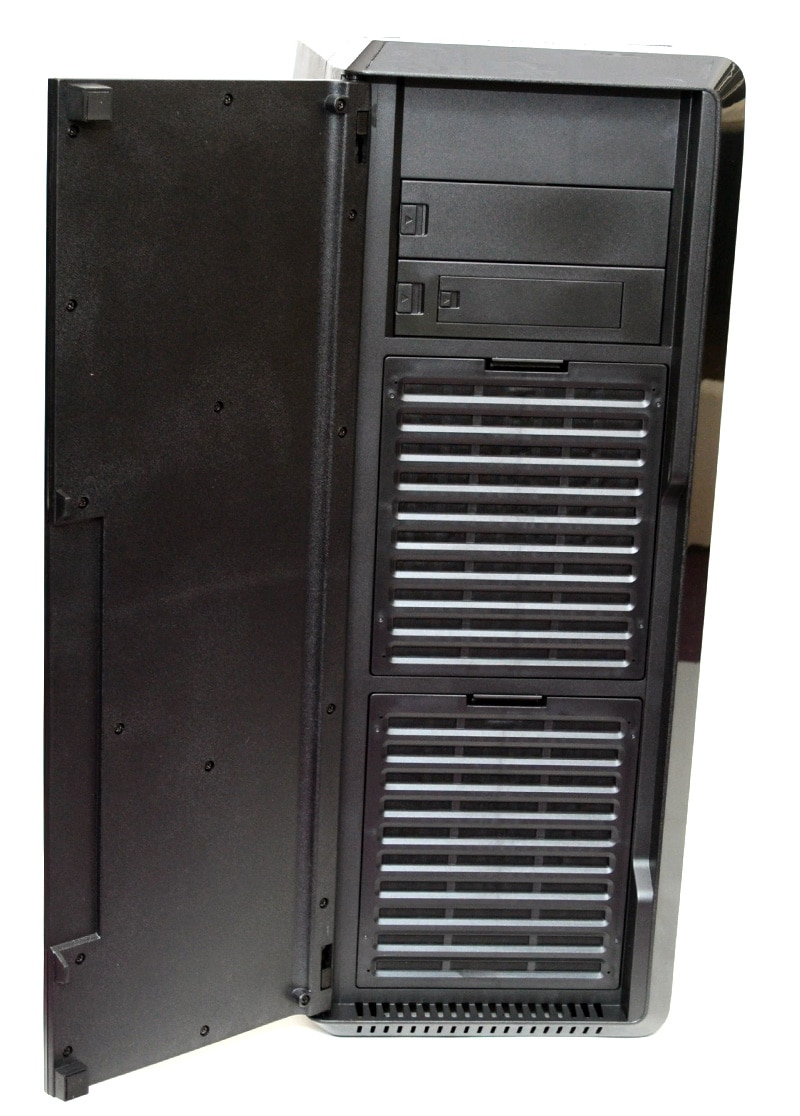
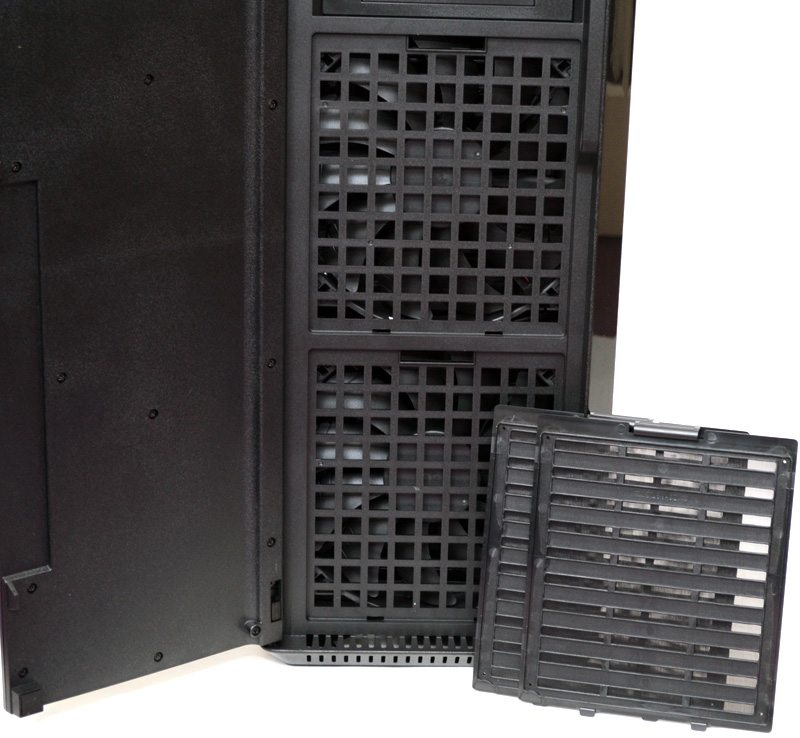
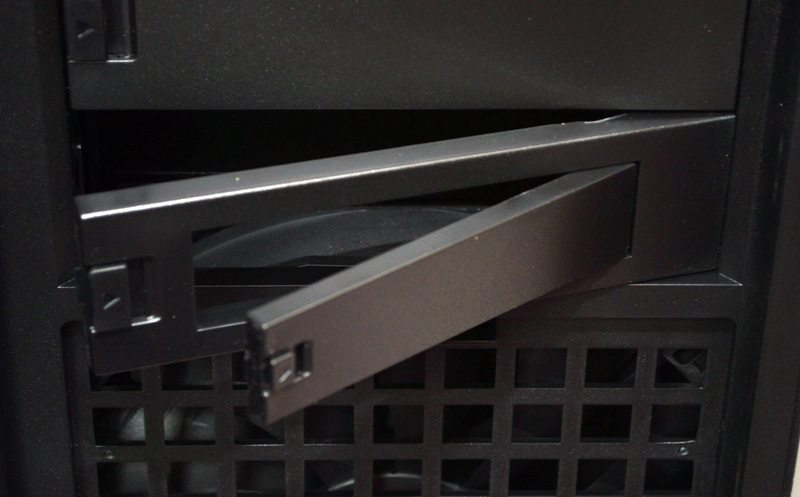
Behind the thick front panel you’ll find two 5.25″ drive bays with flip-out covers are well as two huge clip-in dust filters.
The filters are easy to remove and can be washed, making them very easy to maintain.
The 5.25″ drive bay covers can be removed and re-installed from the front of the chassis and the lower cover comes with another flip out cover inside it, allowing further compatibility for other devices such as card readers.
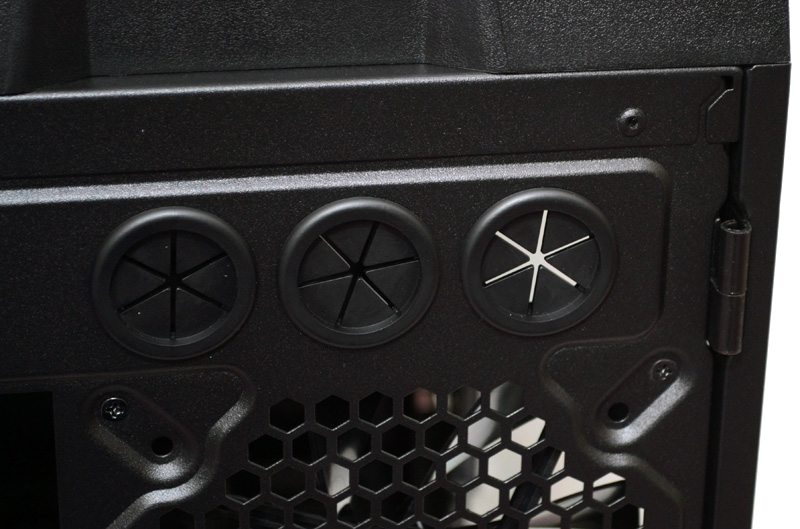
The top panel is raised up high to allow space for thick radiators above the motherboard.
This is complimented by three grommeted water cooling / cable routing holes. Below that you’ll find a 120/140mm fan or radiator mount.
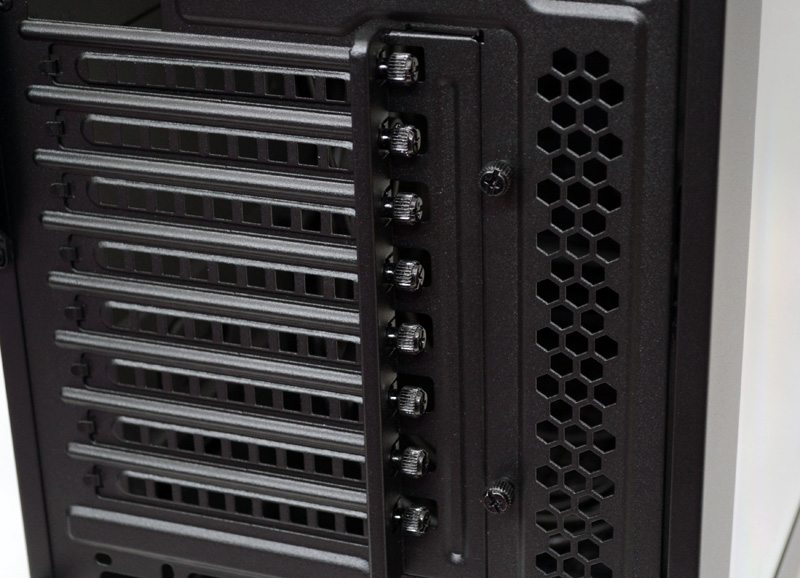
There are eight expansion slots, each fitted with a good quality ventilated and reusable cover. The mounting screws are on the exterior of the chassis and this allows a little more clearance on the interior, all of the expansion bays are secured with a metal plate over the screws which is held in place by a pair of thumb screws to the right of the mounting screws.
There are two security lock mounts on the back of the chassis, one at the top and another here at the bottom.
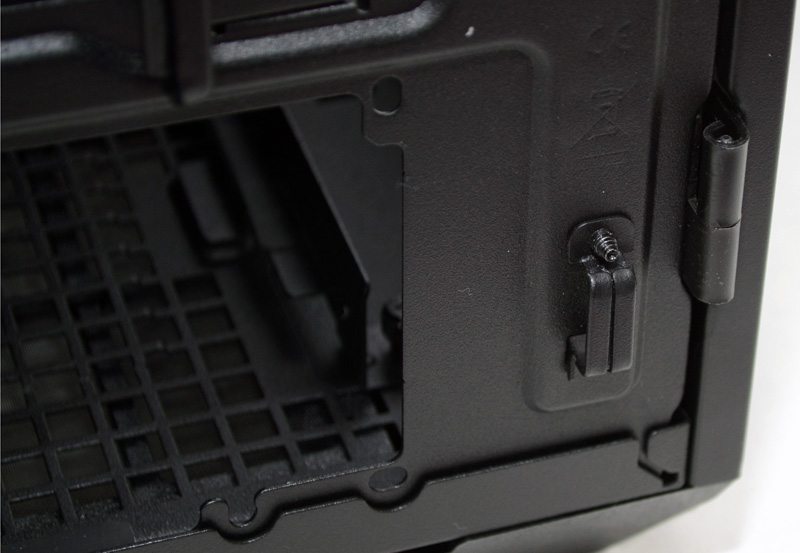
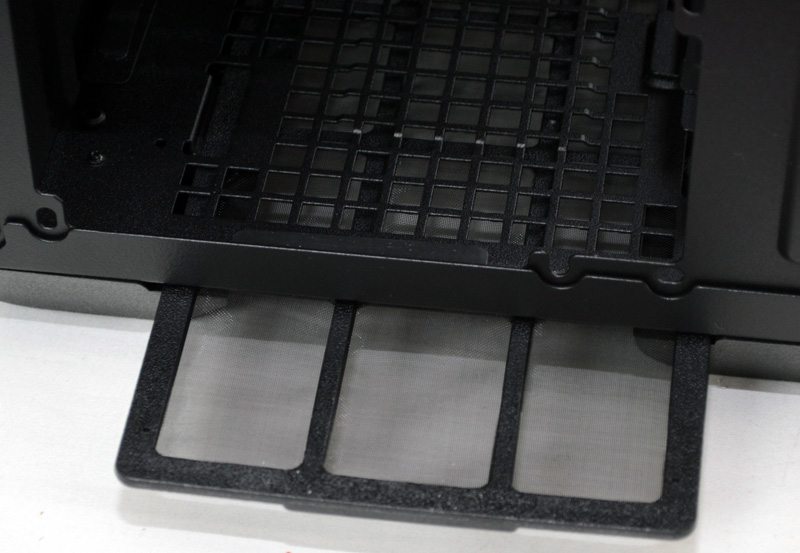
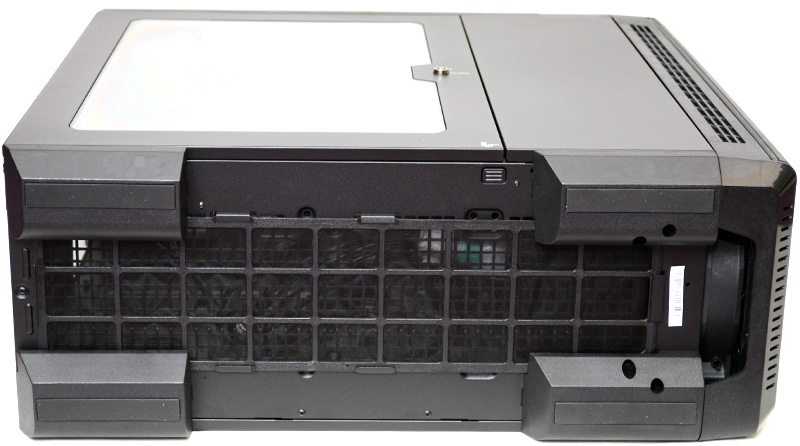
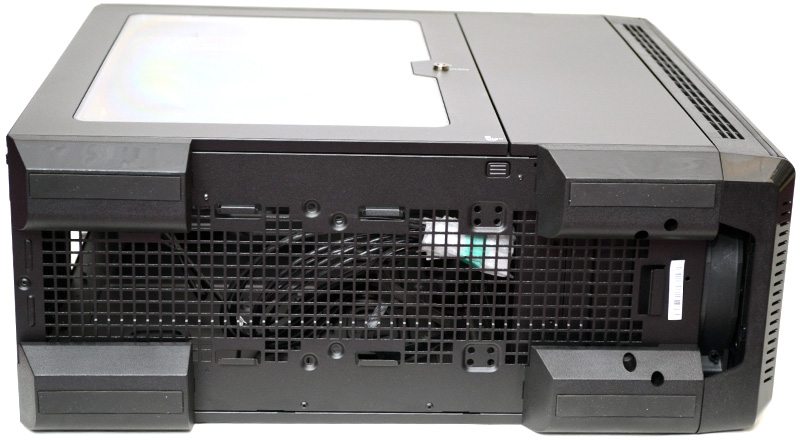
The PSU mount is at the bottom with screw holes cut to allow normal or inverted PSU mounting. The bottom dust filter (which we’ll take a closer look at in a moment) can be slid out at the back of the chassis for easy maintenance.
The top panel features a huge air filtered cover which is mounted using two push-click clips.
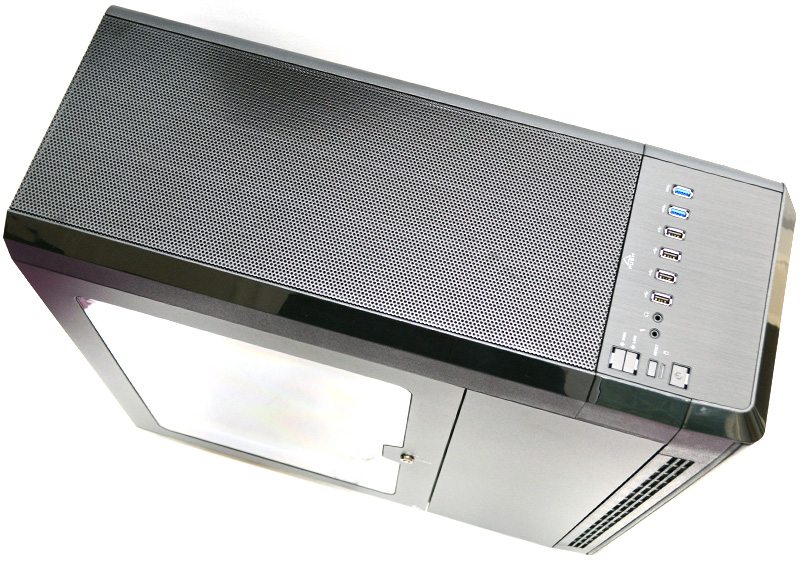
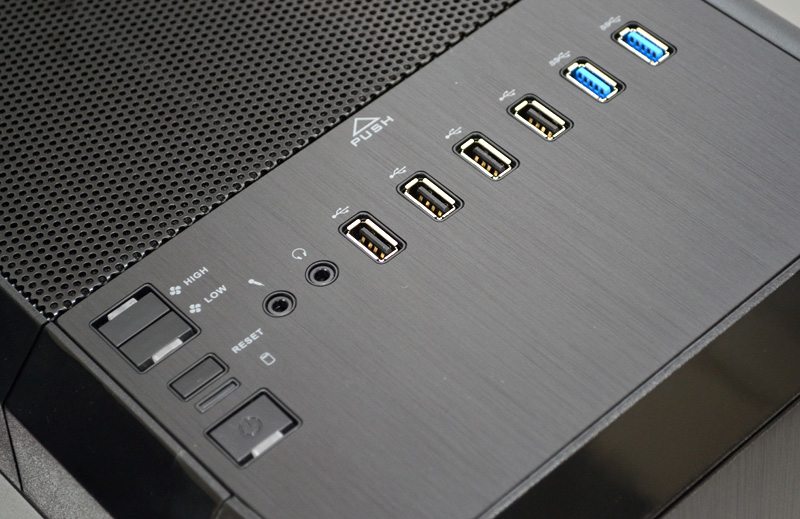
The main I/O panel is covered with more aluminium to match the front panel and comes packed with features. On the left are the fan speed controls, reset and master power buttons, to the right of that you’ll find HD Audio connections, four USB 2.0 and two USB 3.0 ports.
The underside of the chassis features loads of ventilation and four large feet that give that chassis great ground clearance. The dust filter which can be slid out from the rear of the chassis is full length and covers all the fan / radiator mounts, as well as the PSU air intake.
In the middle you’ll find a small push button, this is used for popping open the side panel doors.
With the filter removed you’ll notice two 120 / 140mm fan / radiator mounts.
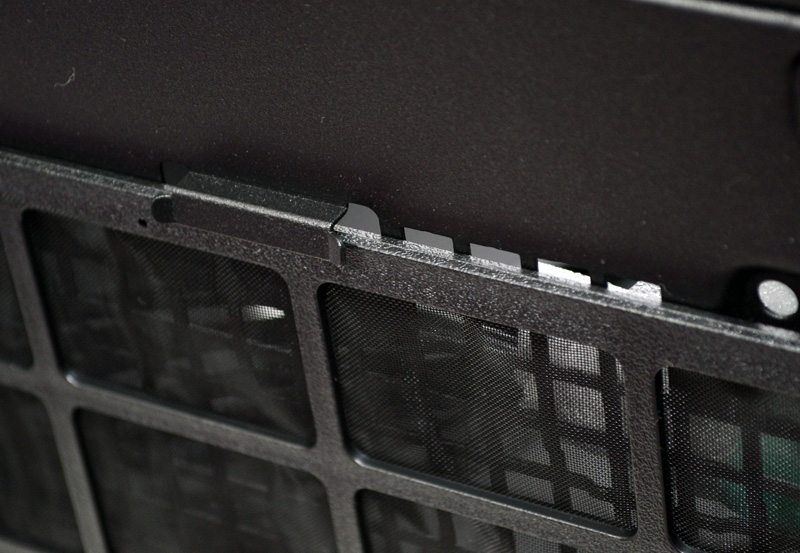
One minor issue I have noticed is that the filter is a few millimetres too narrow to cover the air intakes, this could allow dust to enter the chassis as the filter should fully cover the vents.
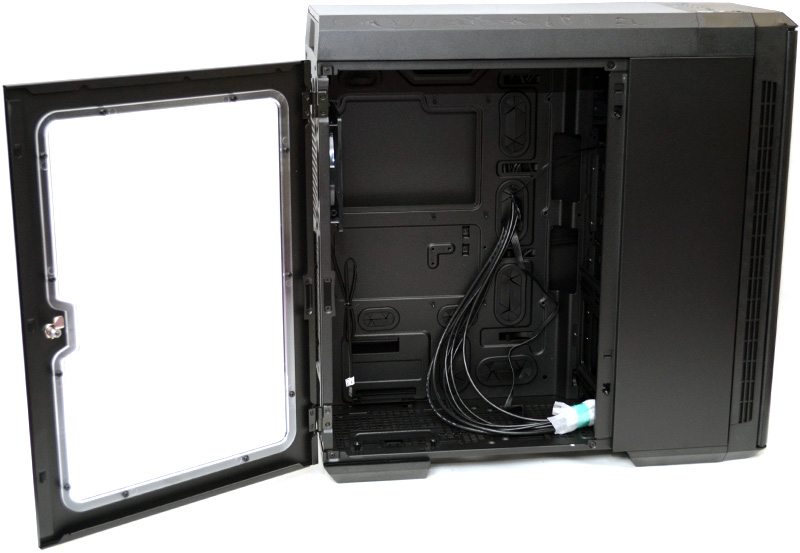
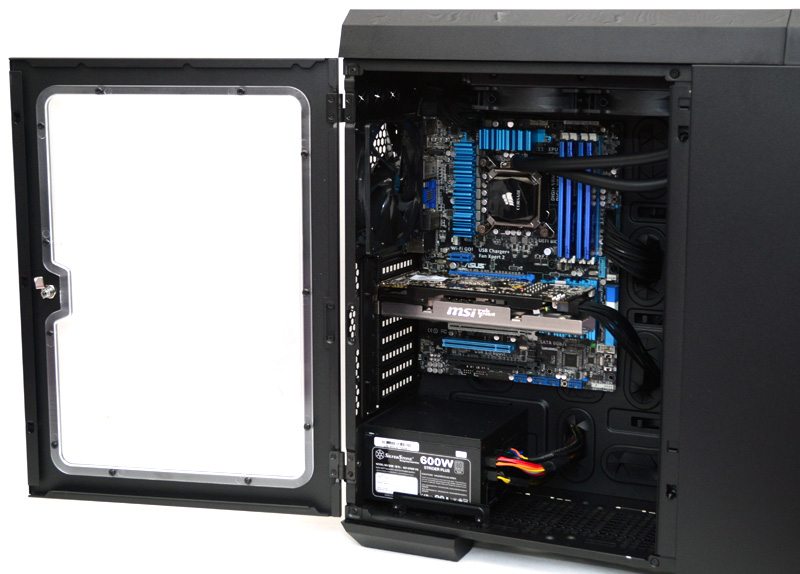
Interior
Once unlocked you can pop open the side panel doors. Here you can see the left side door is open, giving easy access to the chassis main compartment.
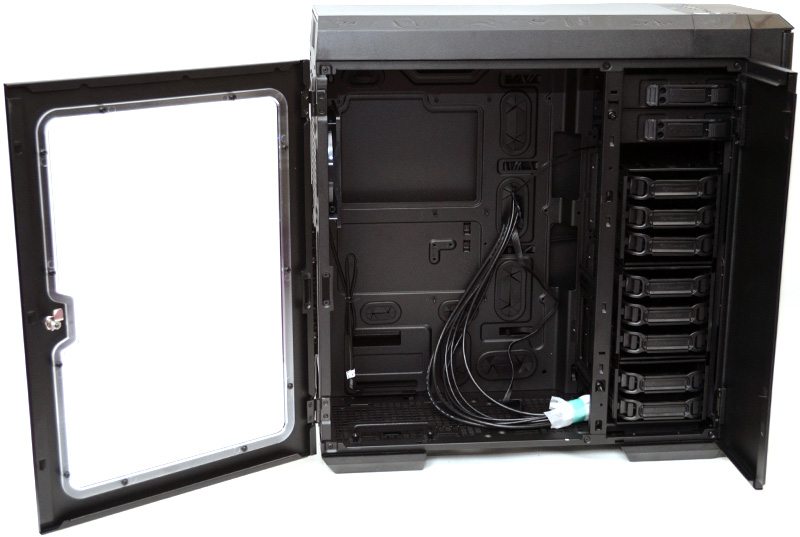
The right door opens out giving access to the front storage bays.
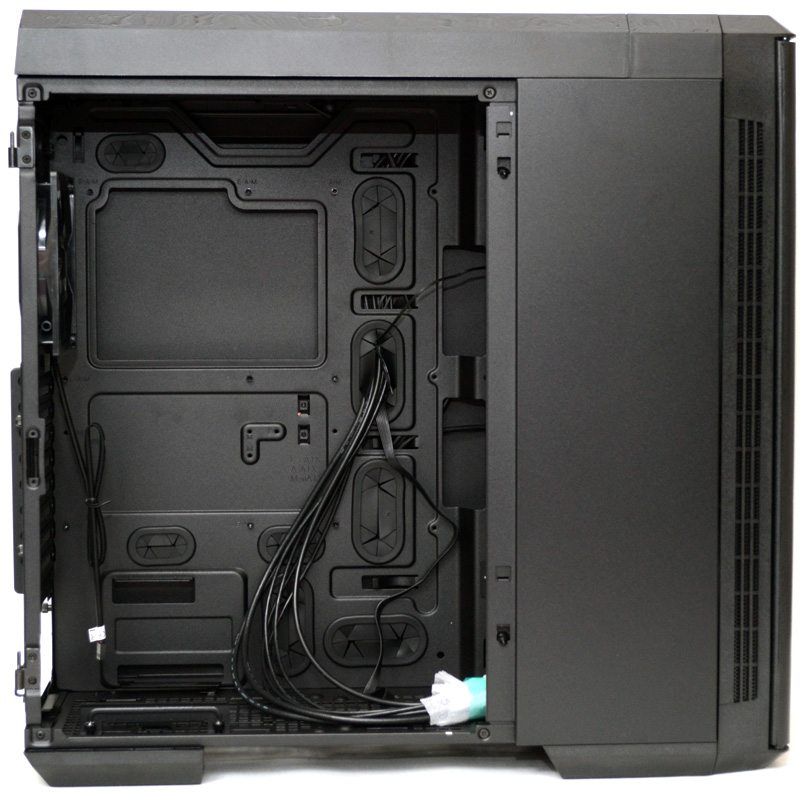
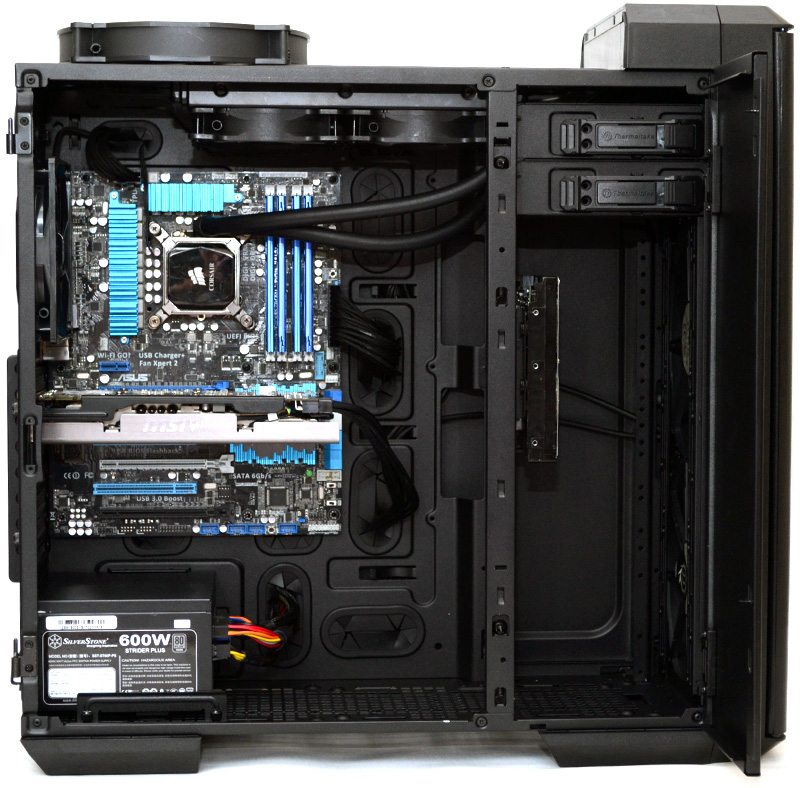
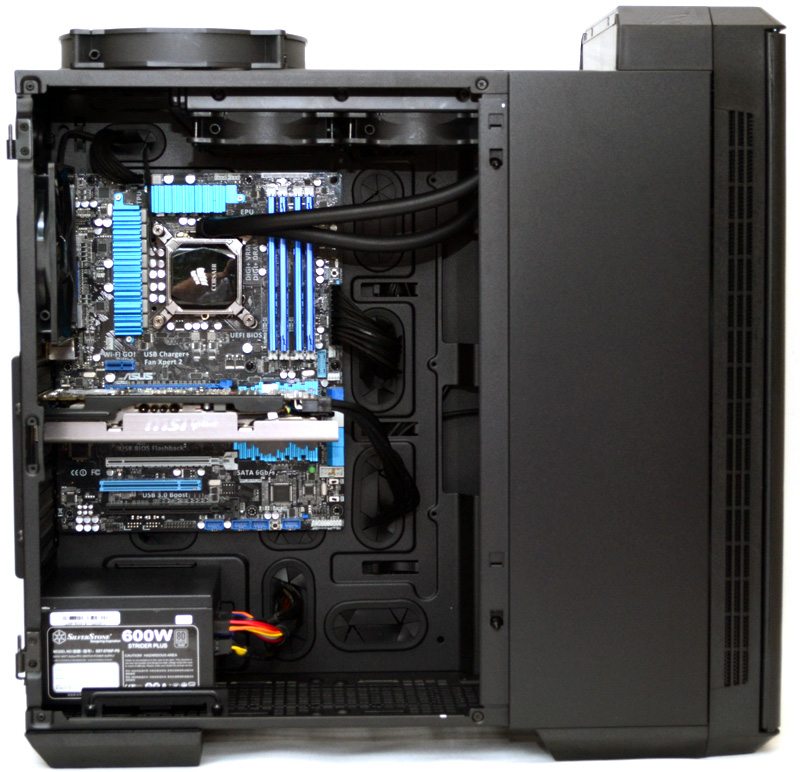
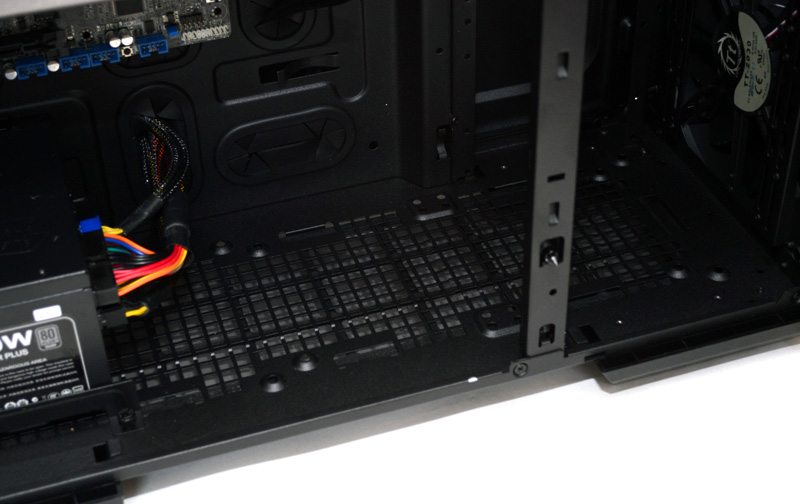
The left side door can be lifted off its hinges once open, so that you can work on the interior without it getting in your way. On the interior you’ll find a huge CPU-cooler mounting cut-out and a wide array of grommeted cable routing holes spaced around the powder black interior.
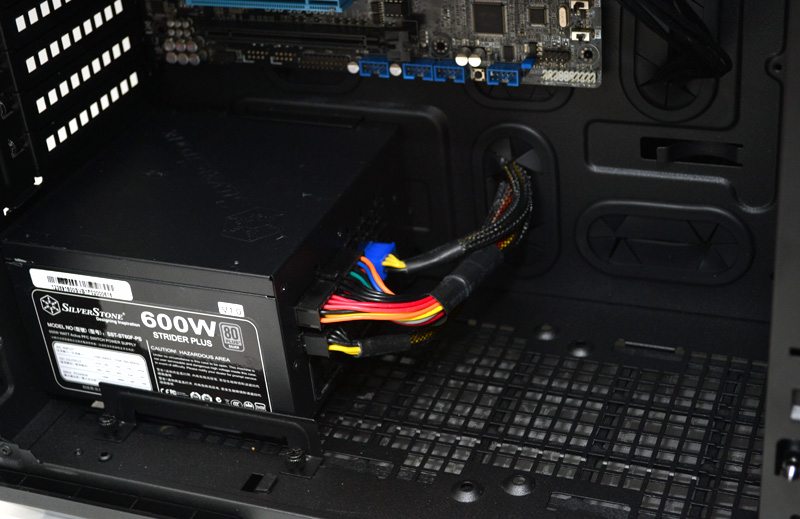
The PSU mount allows room for extra long PSU’s, perfect for those planning on installing some of the 1000w+ behemoths that are now available.
In the back there is a 140mm fan pre-installed and it comes with a good quality black sleeve on the cable to help keep the build looking neat and tidy.
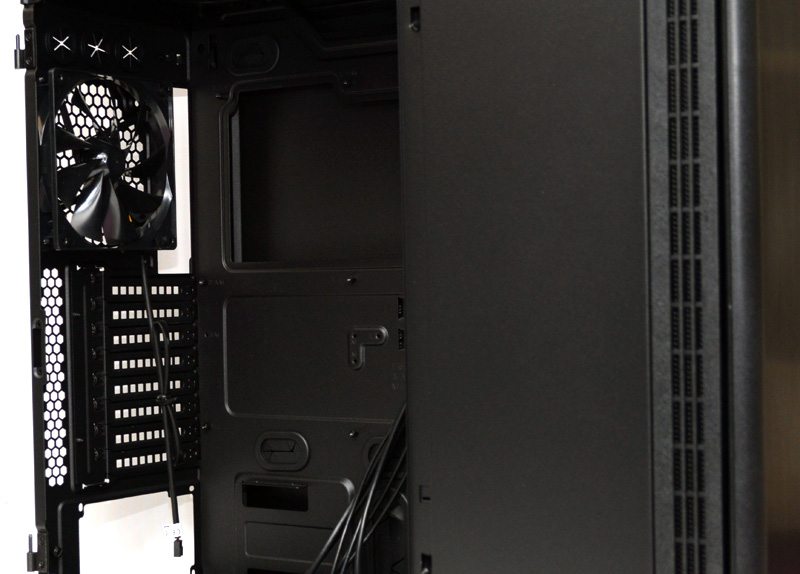
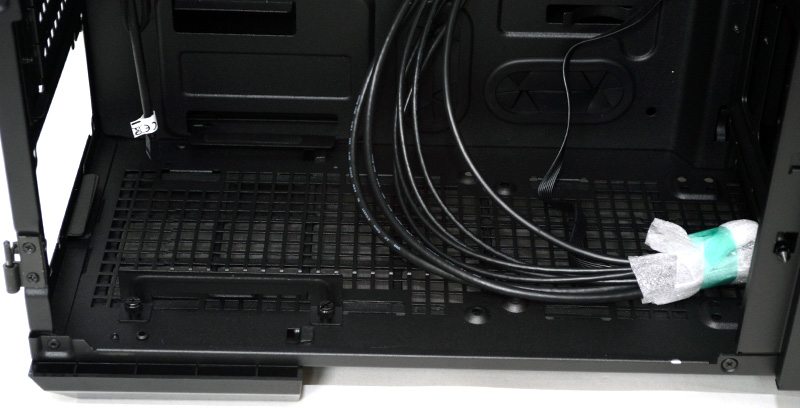
All internal cables are high quality black cables.
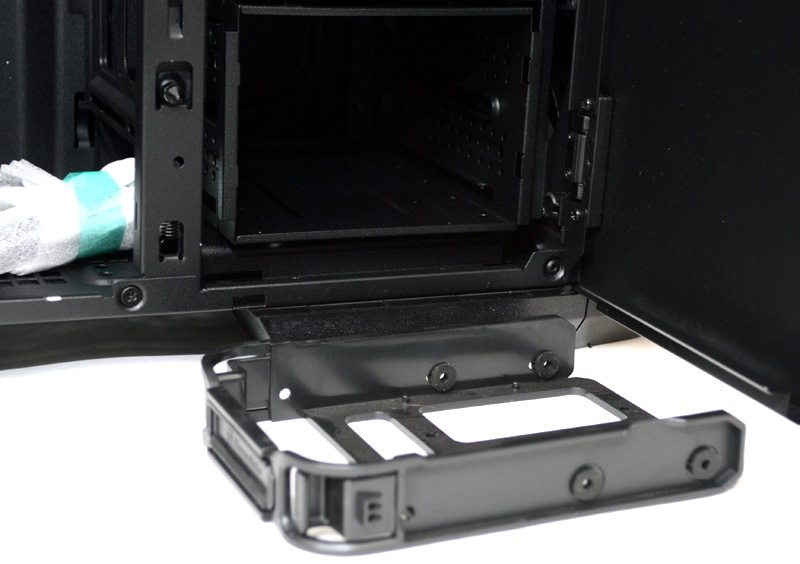
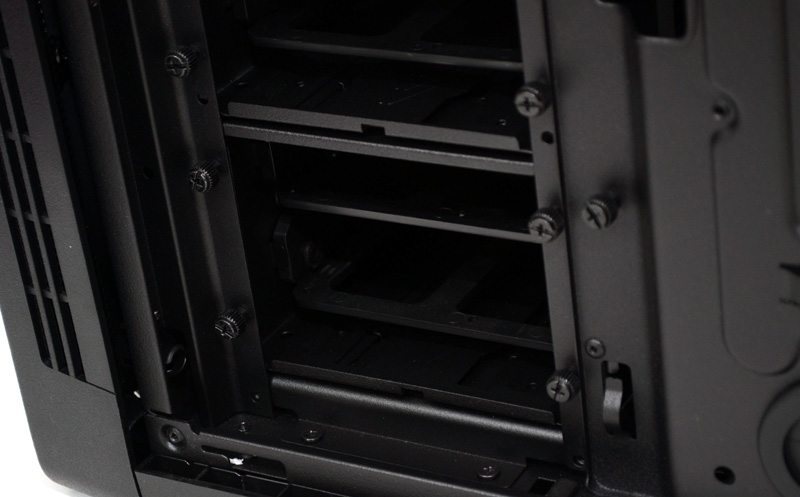
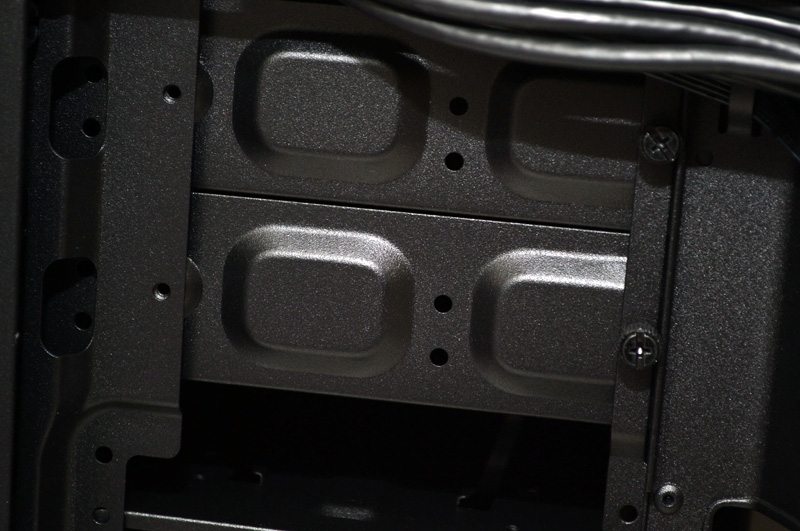
The front storage bays offer loads of space from 3.5″ and 2.5″ drives, each bay is fully removable and you can even move their order around. From top to bottom we have 3+3+2 bay layout, each bay held in place by thumb screws.
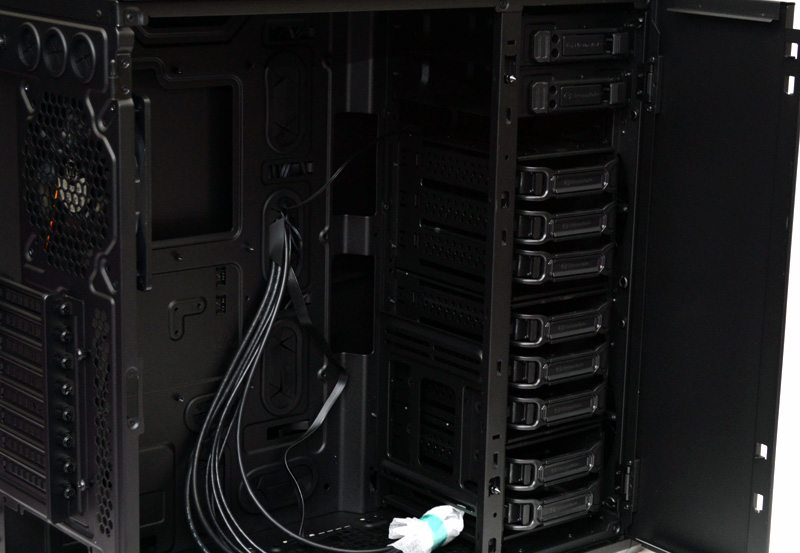
The removable drive trays are all very high quality, they’re not tool free but Thermaltake have included a big bag of high quality screws to help you mount all of your drives. All trays support either a 2.5″ or 3.5″ drive.
In the top you’ll find another huge cut-out above the centre of the motherboard for cable routing, as well as a few small cable cut-outs on the top fan / radiator mounts which will be needed if you’re installing a push-pull fan configuration on a large radiator.
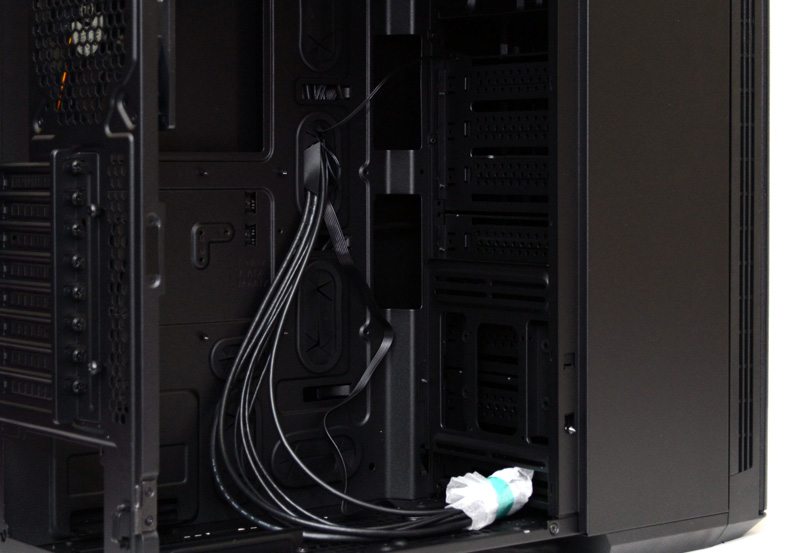
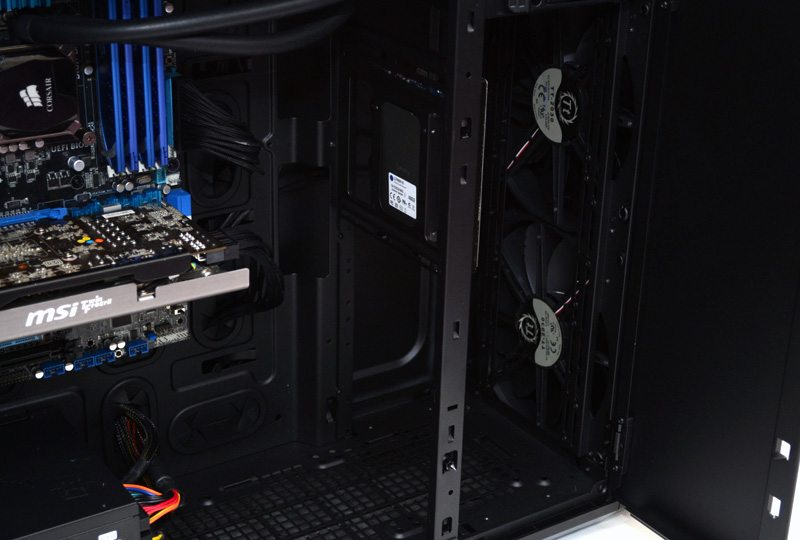
Around the back there doesn’t look to be much cable routing space, but it’s more than doubled thanks to the way the side panel mounts, as well as the recess in the side panel its self.
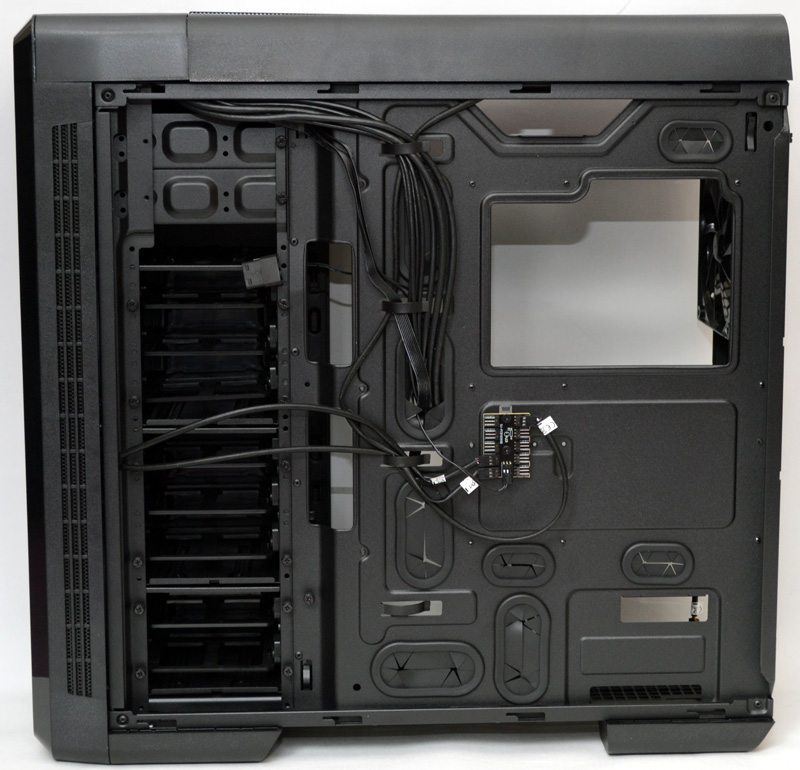
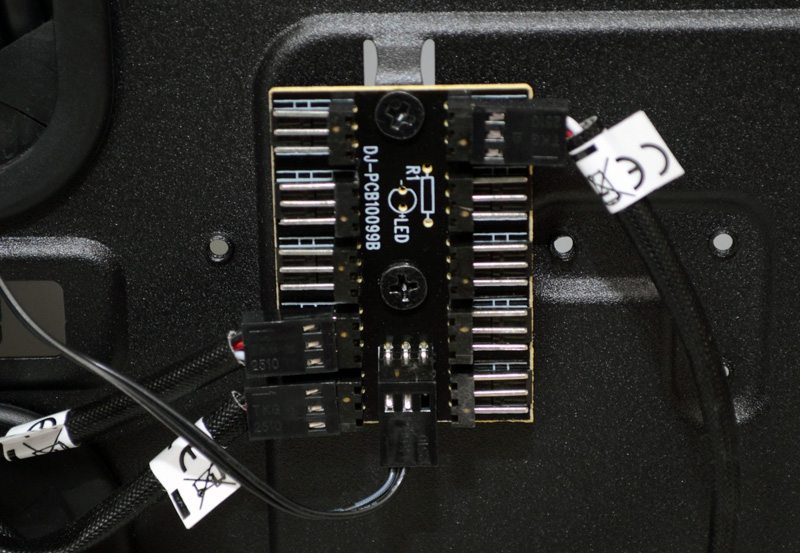
Behind the motherboard is a ten port fan hub, combine this with the built-in fan controller on the front panel and you can easily manage loads of storage within this huge chassis.
Here you can see the thumb screws which hold the hard drive bays in place.
Further up you’ll find that the 5.25″ drive bays are also modular and fully removable, something you’ll need to do to use the maximum radiator size in the top of the chassis.
The top panel comes in three parts, first we have the dust filter which can be removed on its own for easy maintenance.
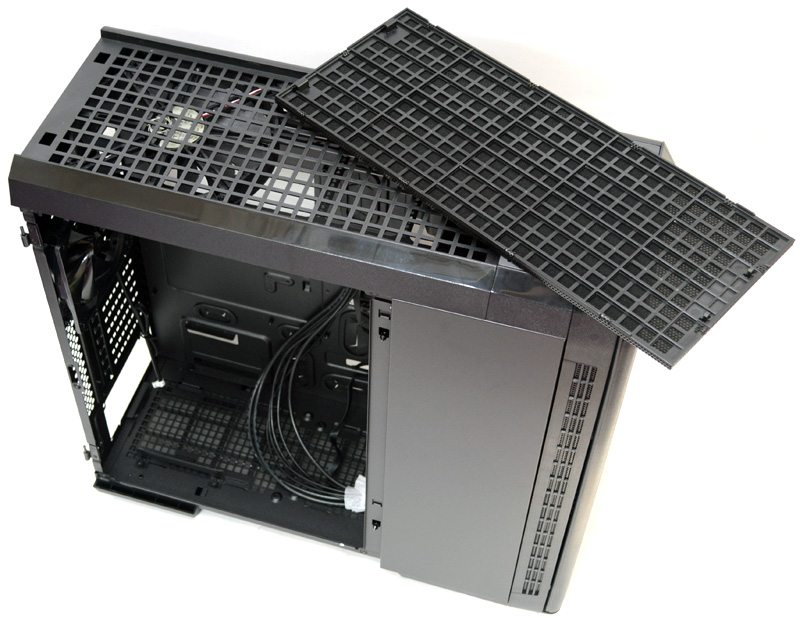
Below that you have a larger top cover which is deep enough to allow for a layer of fans or a slim radiator to sit on top of the chassis. Then you have the actual top metal part of the chassis, which comes with more fan screw mounts for more fan sizes and configurations than any other chassis I’ve ever seen! All major mounts are elongated lines, to allow you to mount fans or radiators in their optimal position for your build.
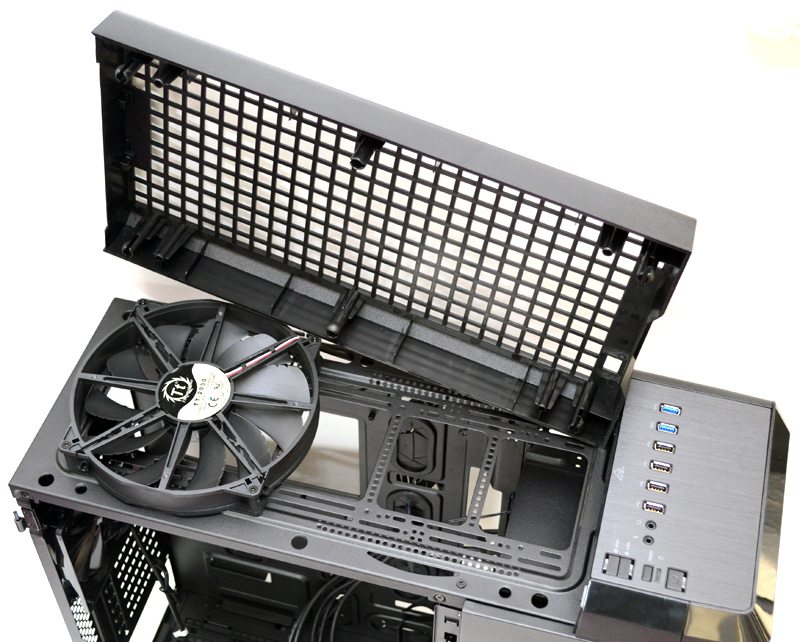
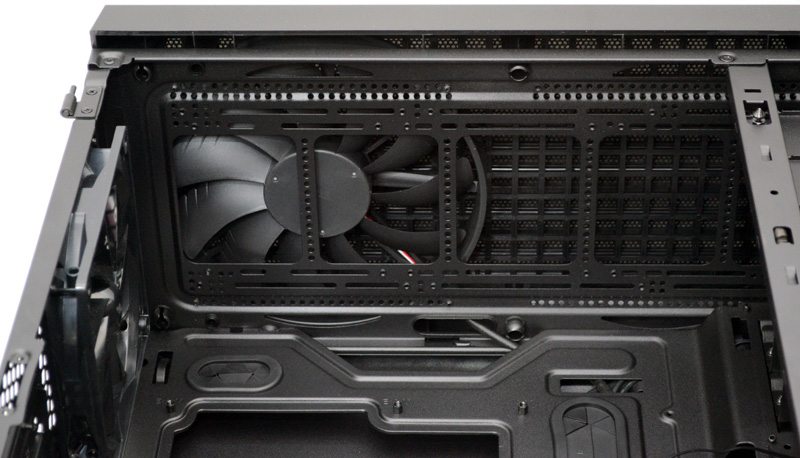
Here you can see the top rear 200mm fan, although you can hardly miss it.
Pop off the front panel and you’ll find another two 200mm fans.
Complete System
Total build time for the T81 was 45 minutes, this is a little longer than it usually takes me to put a rig together, but there is good reason for this. As you can see, I’ve stripped out all of the front hard drive bays and while I haven’t got a 360mm radiator in the front, this serves as a nice demonstration of how much room you can free up in the front of this chassis.
There is an extra panel here that allows for mounting of a 2.5″ and a 3.5″ hard drive, handy if you’ve stripped all the other hard drive bays out of the front, you do need some hard drives in your rig after all.
The build looks really nice, and you can see that I’ve mounted a 240mm radiator in the top and still been able to leave the 200mm fan in the top left.
I’m not sure this is what I would do for my own build, but again it serves as a nice demonstration of the fan and radiator capabilities available here.
With the hard drive bays removed, most importantly the bottom hard drive bay, you’ll gain access to the full length of the bottom of the chassis, giving you even more room for cooling components, pumps, mounting a reservoir, etc.
Cable routing throughout the case is superb, giving a nice clean build and while I thought space would be limited, I had no issues getting the right side panel back in place after routing all the cables.
With the side panels back in place and the doors closed, the T81 looks simply stunning and while it can hold a huge amount of cooling the design of the case does well to hide it out of sight while giving you a great view of the motherboard and expansion cards.
Of course should you need easy access to your internal components, just pop open the door with the release button and you’re in. Also, this build really does look stunning!
Final Thoughts
Price
There is no doubt about it, the Urban T81 is an expensive chassis and that is hardly surprising given the specifications and capabilities we’ve seen today. The chassis can be picked up in the US from Newegg for $189.99 + shipping and while it isn’t available in Europe just yet, expect availability very soon at around £120+. This puts it along side products from NZXT, Corsair and Cooler Master, who all offer some very cool mid and full towers at this price range, but not one of them comes close in terms of water cooling and air cooling capabilities, so this case is still great value for money regardless, especially when you consider that there are four high quality fans, a ten port fan hub and a fan controller included in the deal.
Overview
This is one of the best cases on the market right now, there is no doubt about it. If you’re on the market for a chassis that can handle an incredibly powerful rig then the Urban T81 is capable of holding it and keeping it cool. The triple 200mm fans and the 140mm rear fan are more than enough to keep your system cool and will offer up some seriously impressive airflow for your system, but should you wish to strip it down and fit thick radiators, push-pull configuration fans, lots of water pipes and more into your system then the Urban T81 should really be at the top of your shopping list.
Build quality is faultless throughout and a lot of care has gone into making something that is unique, innovative and easy to work with. The dual side panel suicide doors are not only cool in terms of design, but they offer a practical solution to gaining access to your components, while also providing an extra level of component security thanks to the key lock. The split design works well to hide the front storage and cooling components while giving a clear view of your graphics cards and other components, which is great as you’ll no doubt want to show off your rigs interior if you’re building an epic water-cooled system.
Component compatibility is very high, multiple long graphics cards are no issue, a large power supply, lots of storage, virtually unmatched cooling support and extensive cable routing options allows for a no fuss installation process, the only limit in terms of what you can install in the T81 is your imagination.
The only issue I had throughout the whole build was that the bottom dust filter could do with being a little wider, to have such an extensive set of dust filters on this case only to be let down by a small gap on the bottom seems a shame, but overall it is hardly a deal breaker.
The price is high but the return on investment is huge, Thermaltake have really outdone themselves with the Urban T81 and I have no doubt that this is going to be a very successful and popular product for them for foreseeable future.
Pros
- Four high quality pre-installed fans
- Dust filters on all air intakes
- Highly modular storage bays
- Extensive water cooling capabilities
- Great cable management
- 10 port fan hub
- Build in fan controller
- Sleek aluminium front panel
- Very competitive price given specifications
Cons
- Bottom dust filter could do with being a little wider
“The Thermaltake Urban T81 is easily one of the greatest chassis that Thermaltake have ever made, the inclusion of four high quality fans, as well as its dust filters, fan hub, fan controller, radiator support and modular storage, make this one of the most versatile chassis available on the market today and a perfect solution for any high end system build.”

Thermaltake Urban T81 Extreme Full Tower Chassis Review
Thank you Thermaltake for providing us with this information.


