Thermaltake UX200 Air CPU Cooler Review
Mike Sanders / 5 years ago

Installation
As this is a push pin designed cooler, the mounting system (in theory) is very straight forward. Given that this design is primarily used for ‘stock/low-profile’ coolers, however, we did have some concerns as to whether this would be substantial enough for a cooler as large as this.
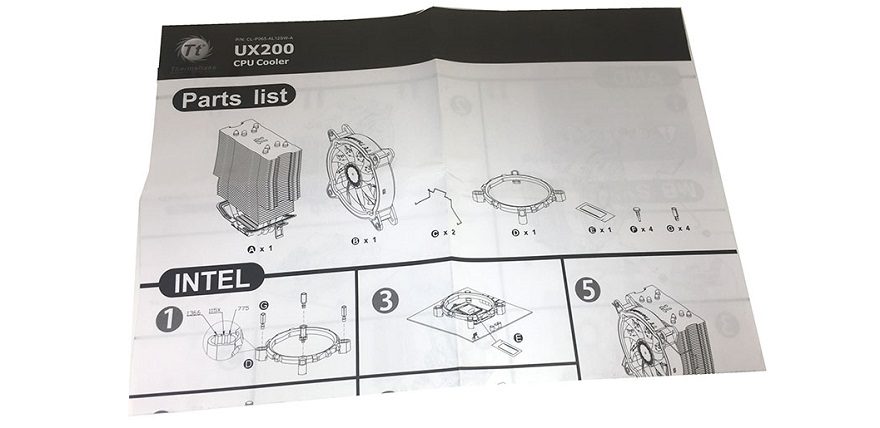
The push-pin design allows for a minimal number of parts which is always a nice thing. Particularly if you’re new or inexperienced in cooler installations. In addition, the manual (while light on written instructions) is both clear and concise to help you know exactly what you’ve got to do here!
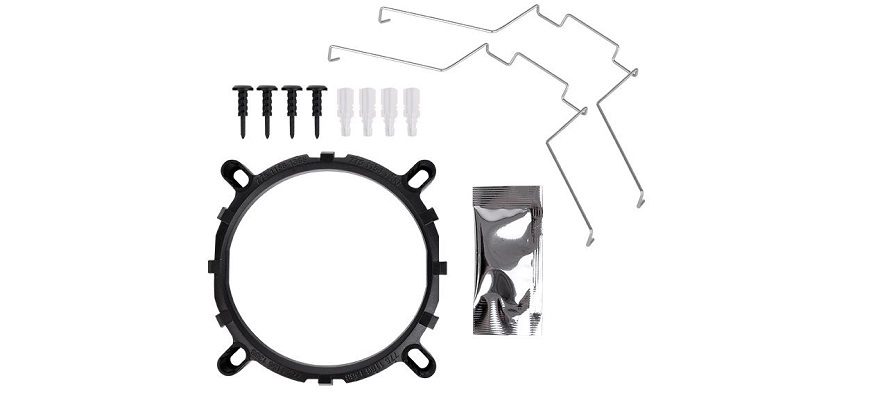
Installing the mounting bracket is (in theory – more on this later) a very simple process. You simply lay the ring over your respective motherboard ‘holes’ and then insert the main clip. Through the insertion of a pin (acting as a ‘locking mechanism) you can have this done and ready for your cooler within literally minutes. Once installed, it feels very well secured to the motherboard. That doesn’t, however, mean to say that this design is flawless.

Easy for Some – Harder For Others
Having good clearance around the processor makes this installation a lot easier when it comes to mounting (or more accurately, clipping) the cooler itself into place. Our motherboard has a number of VRM banks surrounding the processor and (as you can see in the picture below) this made things incredibly cramped! It’s equally made for an awkward job in removing the cooler after it was installed (we do have to box things back up again you know!). As such, it’s a lot faster to simply just ‘un-pop’ the push pins.
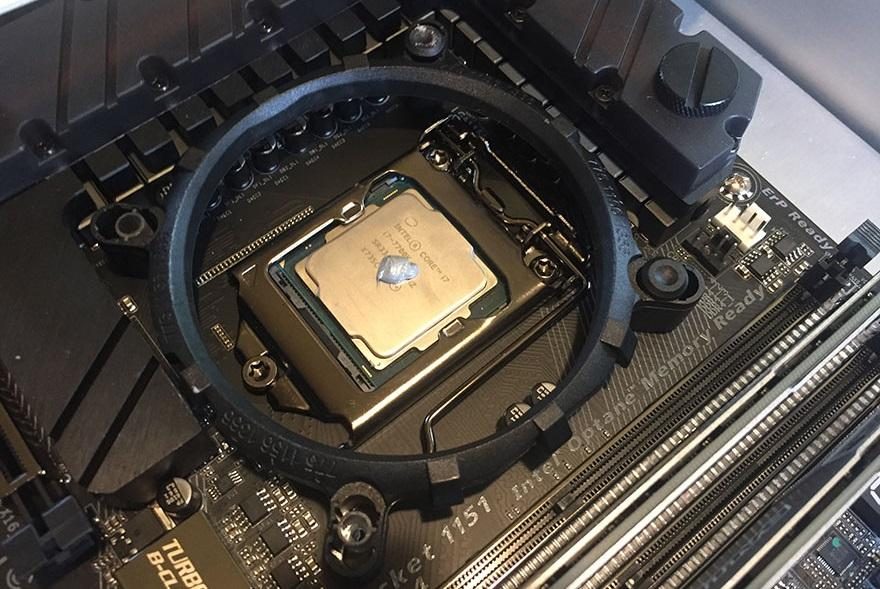
Going into more detail on the installation, the cooler itself mounts via a clip which is loosely hooked over on one end of the mounting ring then is ‘clipped’ into place on the other. As above, if you have the room, this is a great and simple design. If you don’t, however, expect some colourful language to start flowing from your mouth.

Overall Thoughts
So, from out of the box and onto our system, this cooler took us around 10 minutes to install. In comparative terms, this is pretty fast. In addition, and unlike many other ‘push-pin’ designs we have seen, the installation method is genuinely straight forward. As we noted above, however, the difficulty (and by proxy, time) will ultimately be determined by how much room you have to manoeuvre. Specifically, around your processor and particularly the VRM.
Thermaltake claims that this cooler is “easy to install”. That may well be the case. We, personally, however, would add a pretty big asterisk saying that this is entirely dependant on how much space surrounds your processor. It’ll never be impossible to install, but we suspect that for some motherboards this could be fitted within 5 minutes and on others, you’ll be looking at closer to 10-15.

RGB in Action
We honestly can’t stress enough just how excellent the ARGB features are on this cooler. With 15 led-lights, they provide excellent, bright and vivid effects which can only be improved further by the use of a compatible motherboard with sync capability. We should note, however, that this cooler does not have a manual controller. As such, if you don’t have a sync compatible motherboard, you will be stuck with the single rainbow ring.

Referring to an earlier point with the Thermaltake logo being ‘set’ into the side of the fan, this really comes to life when the system is switched on and, again, adds another small (but highly impressive) level of aesthetics.
It’s honestly a really small touch, but speaks volumes of how much effort Thermaltake put into making this cooler look amazing!


