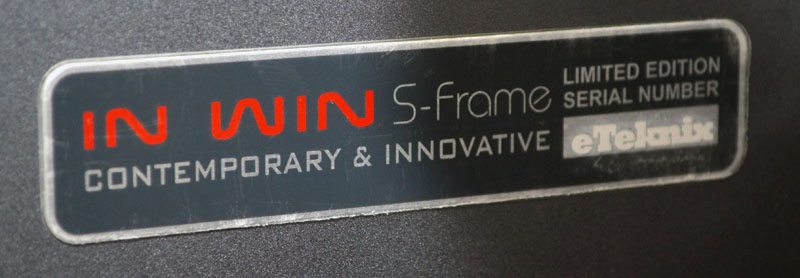
In Win S-Frame Open Air Limited Edition Chassis Review
Peter Donnell / 10 years ago
Introduction
It was only a few weeks ago that I was in Taipei to attend one of the technology industries largest trade shows Computex. While eTeknix were attending the show we were lucky enough to be invited to the In Win factory, where we got to see the many stages of product development and manufacturing, as well as being part of a small group who were the first to see their new D-Frame Mini and S-Frame chassis. While attending the tour we were also awarded the awesome gift of a one of a kind S-Frame of our own, of which only fifteen will ever be produced. The retail edition of the chassis comes in a stunning black and red colour scheme and only 500 of these will be made, each one branded with a special serial number, as too are the 15 models sent to the technology industries review media, such as our selves. The model we were given comes in a blue-tinted colour scheme and I’m sorry to inform you that this colour isn’t available to the public, but the core design and feature set of our model is identical to the retail release, so it shouldn’t have any effect on our review.
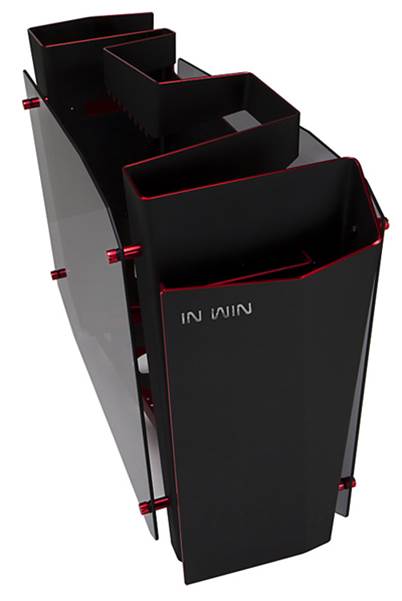
In Win have come from being just any other manufacturer, to somewhat legendary status in the last few years. Their passion for creating some truly unique and awe-inspiring products has given them a reputation for creating chassis that are borderline works of art. With products such as the H-Frame, D-Frame, Tòu and the 904 being prime examples of how In Win are literally thinking outside of the box these days and it looks like the S-Frame is one of their boldest designs yet.
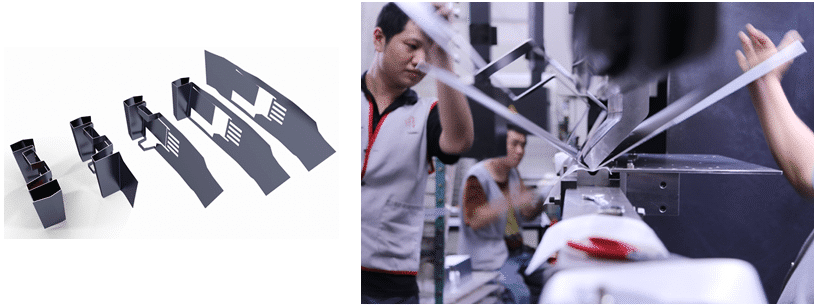
Manufactured from a single piece of 4mm thick aluminium, the metal work of the S-Frame is folded 15 times by two people who feed the metal into a special machine, giving the chassis manufacturing process a real hands on approach that is very different from the often automated production lines we’re used to seeing create PC cases. It is then finished off with two 5mm thick panels of tempered glass, which means no expense has been spared in the construction.
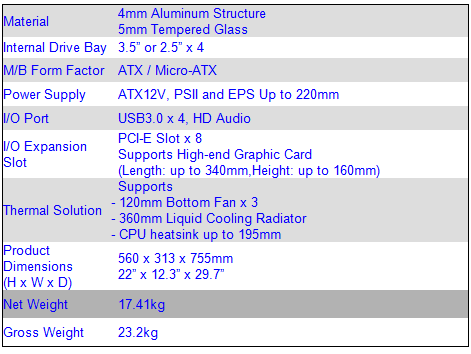
As you can see from the specification below, the chassis will handle ATX and MicroATX motherboards, large PSUs, comes with four USB 3.0 ports on the front and room for up to 3 340mm expansion cards. Cooling is an interesting mix as the chassis features a semi open-air design, but you’ll still find room for 3 120mm fans in the bottom, or up to a 360mm radiator, and the chassis can also handle a CPU tower cooler of up to 160mm in height. You’ll also notice the dimensions, this chassis is super wide and long compared to your average ATX chassis.
The box for the chassis is nothing short of massive, one would think their is an American style double fridge in here, but its size is actually a side effect of several inches of soft foam padding protection, designed to keep the tempered glass away from harm in transit.
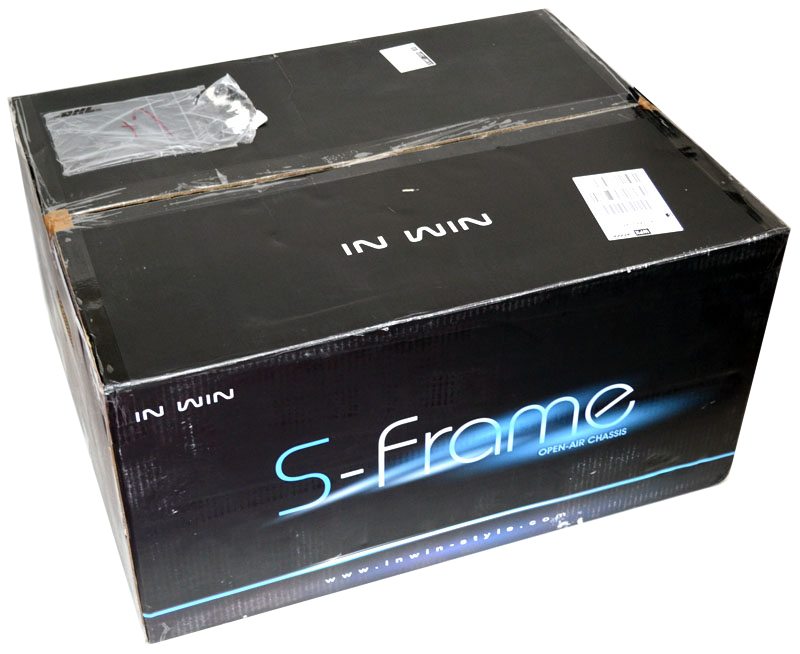
A few bullet points down the side of the box detail the major selling points of the chassis.

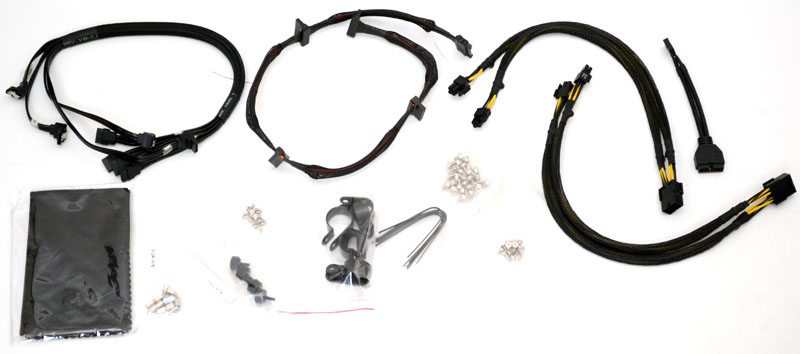
In the box I found a few extra components, including a multi connect SATA cable, 4-from-1 hard drive power cable, motherboard 4+4 pin extensions and a USB 3.0 to USB 3.0 adaptor.
Exterior
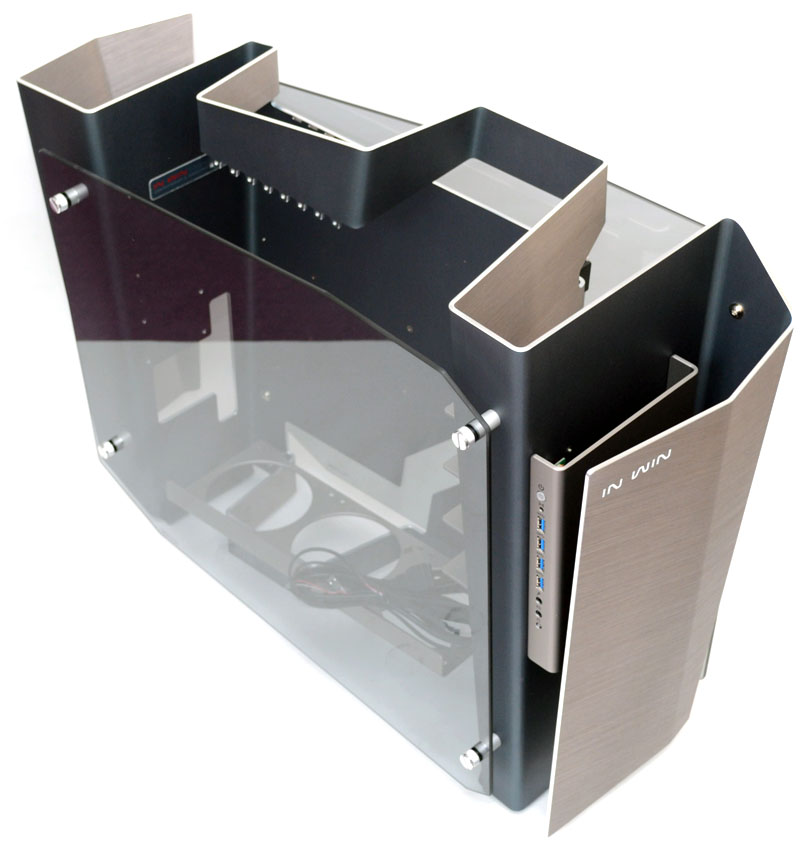
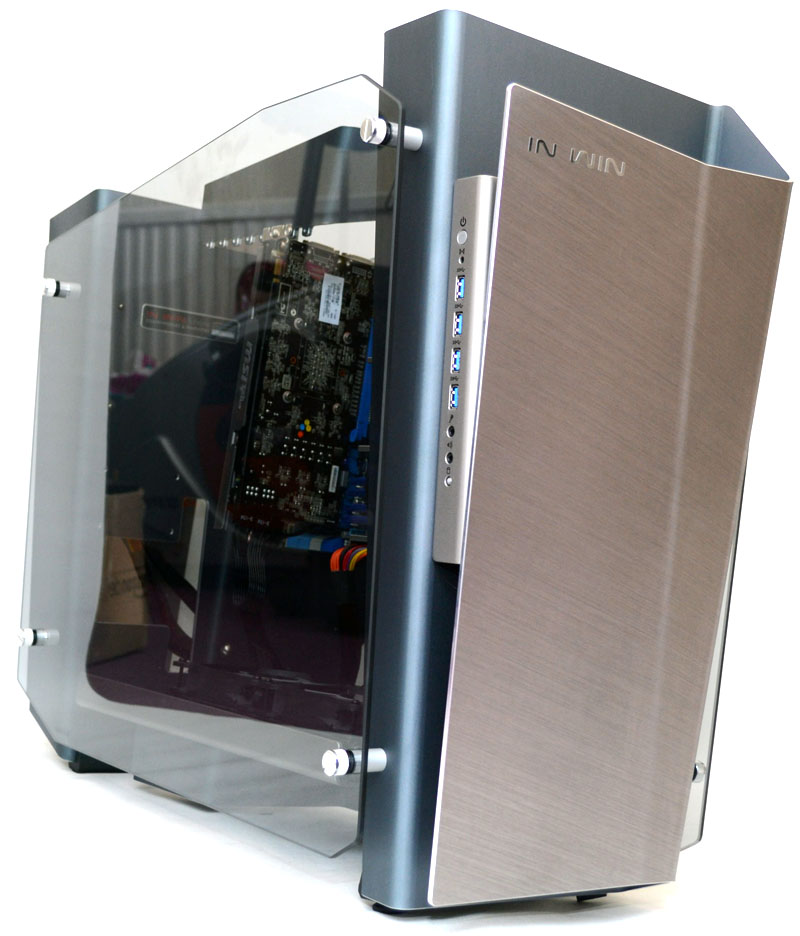
Now that I have the S-frame out of the box, we can finally bask in the awesomeness of this sleek exclusive colour scheme, which features a slight blue tint and grey dual colour finish. I love it so much that’s it’s already a shame consumers won’t ever get their hands on it, that being said the black and red edition is just as awesome.
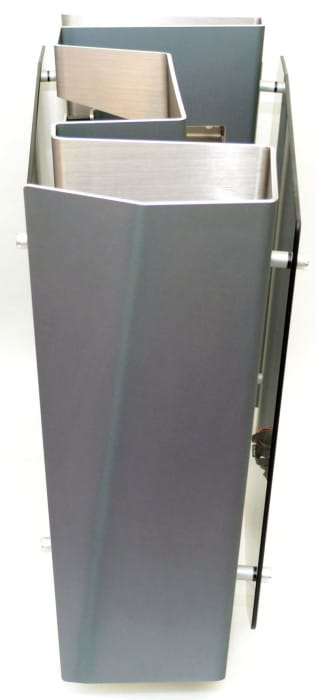
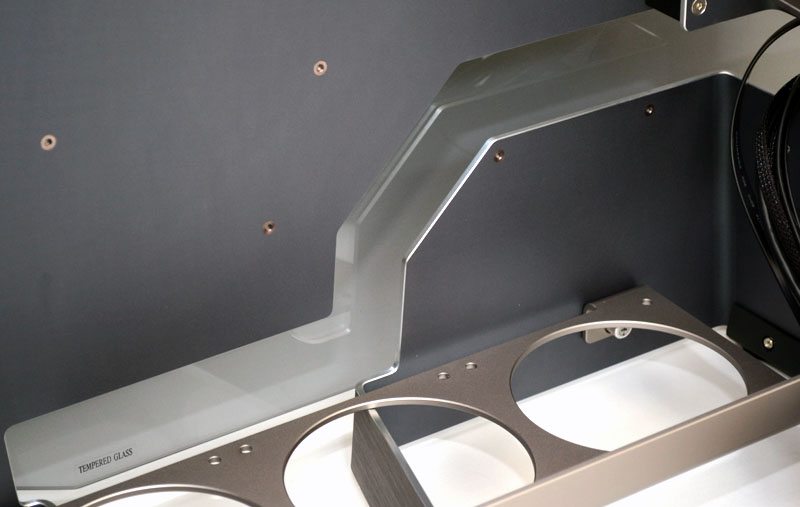
As you can see the chassis is made up from a huge piece of thick aluminium, this panel started its life as an almost 6ft long sheet and you can see how complex the shape is given that this is a single piece of metal. Mounted on the side is a custom shaped piece of tempered glass with a mild darkening tint to it.
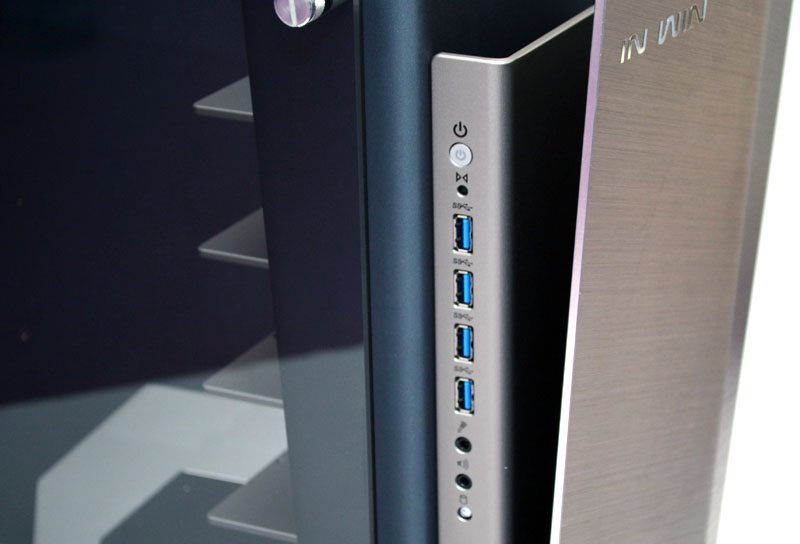
Along the front edge of the left side you’ll find even more aluminium forming the front I/O panel, from top to bottom we have the backlit power and a reset button, four high-speed USB 3.0 ports, HD audio jacks and a HDD LED indicator.
The glass can be seen through pretty easily from straight on, dependant on lighting conditions.
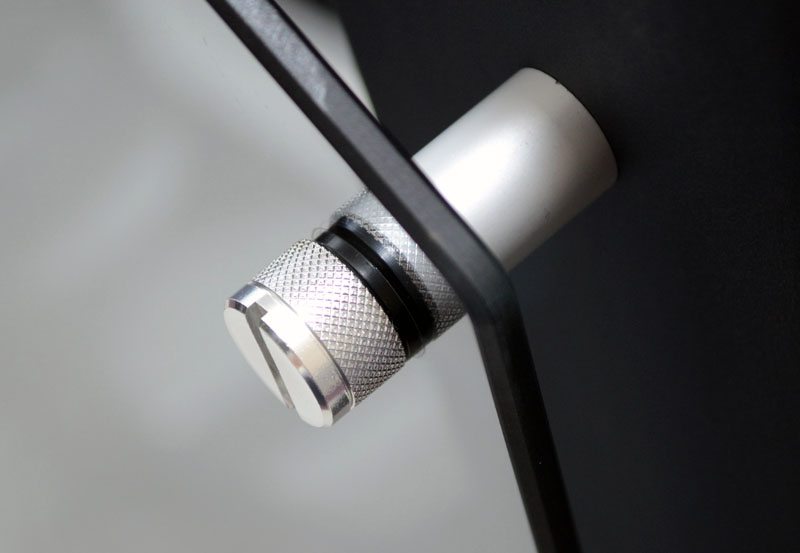
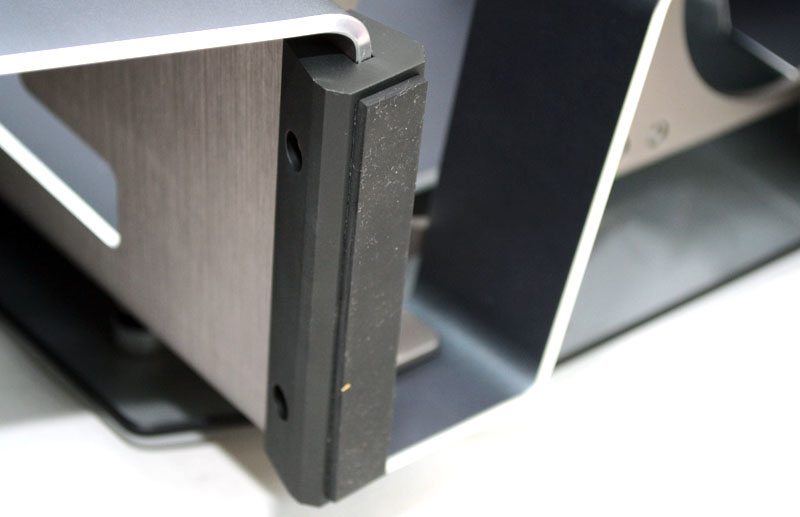
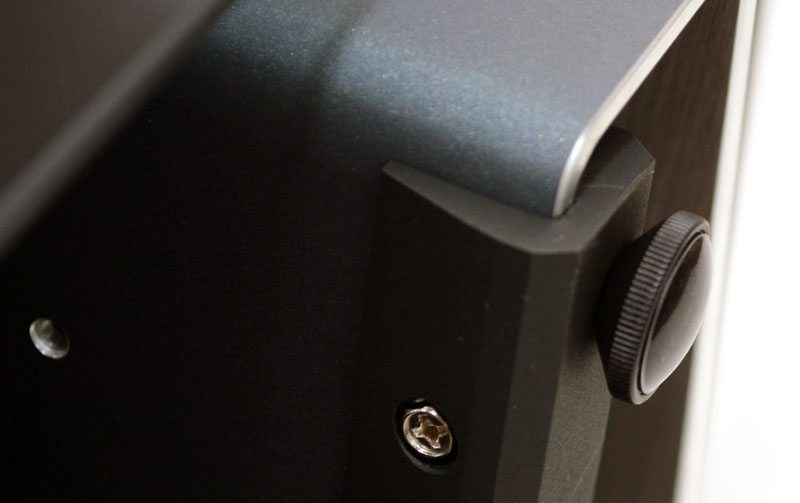
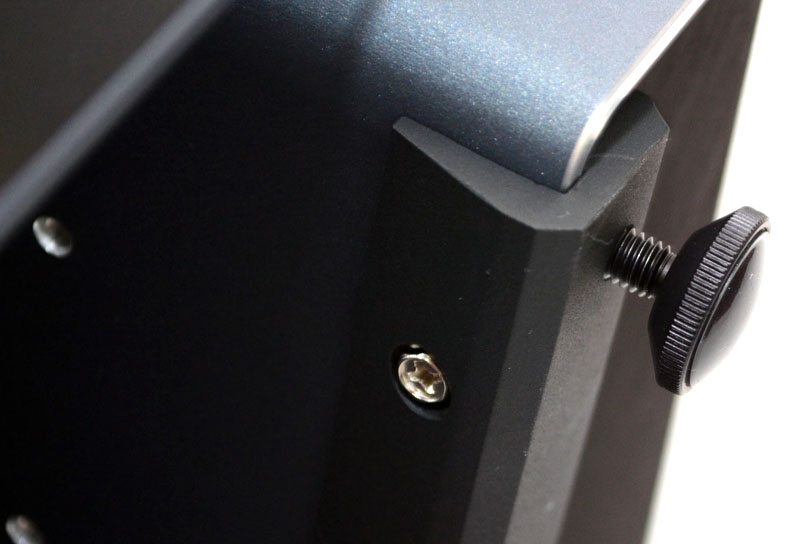
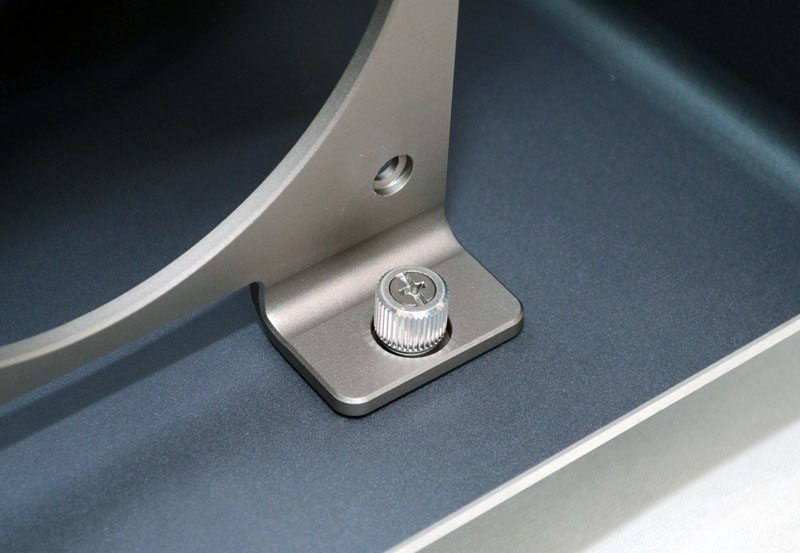
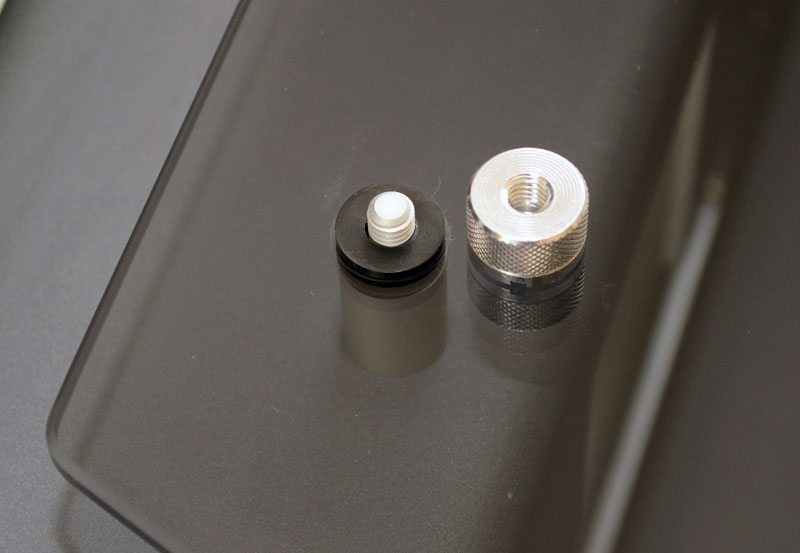
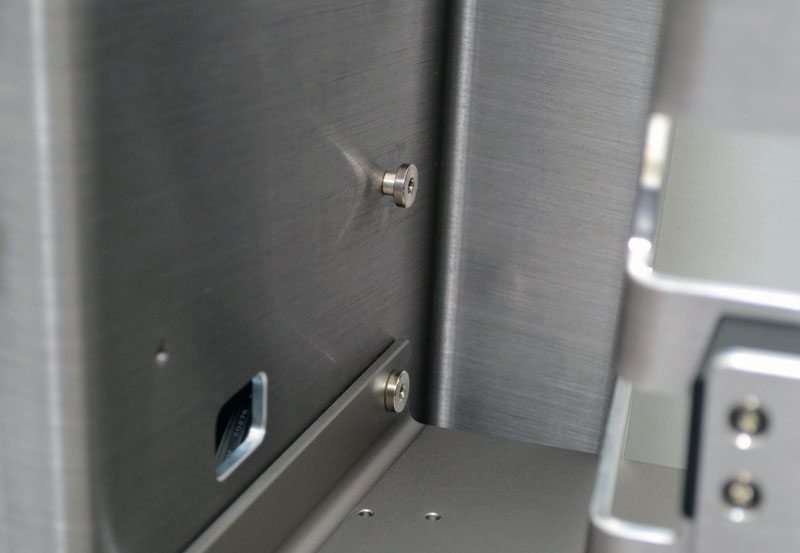
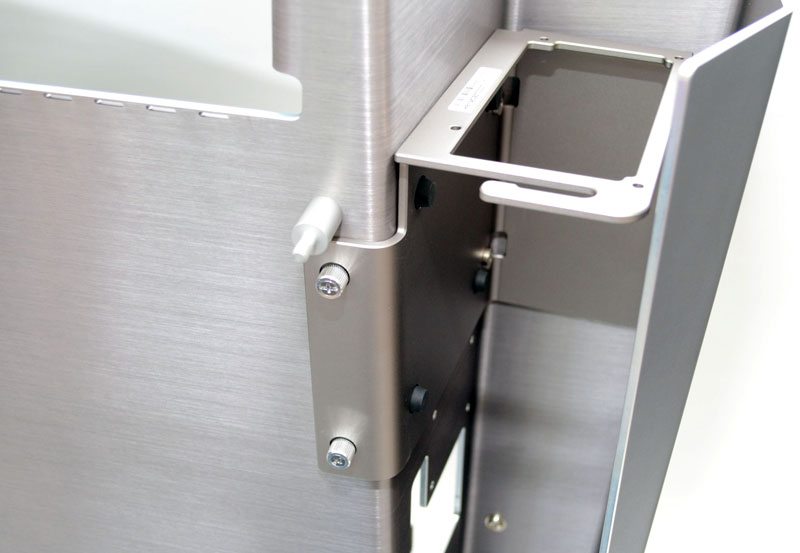
There are four brushed aluminium pegs on the left side of the chassis, each with a rubber cap to provide a soft resting position for the glass panel. The panel is held onto the peg with some beautifully finished aluminium thumb screws.
The right side panel is also made of the same tempered glass and held in place by four more of those stylish thumb screws. Obviously there isn’t much to look at back here, but it’s certainly motivation to keep cable routing as neat and tidy as possible, because it’ll all be on show when your system is complete.
The front panel gives us a huge slab of the aluminium sheet to look at, a heavily brushed effect gives it a super premium look and the slight fold on the right side breaks up the way light hits the panel, rather than it just being bland and flat.
The nice glossy In Win logo in the top left adds a nice subtle branding to the case.
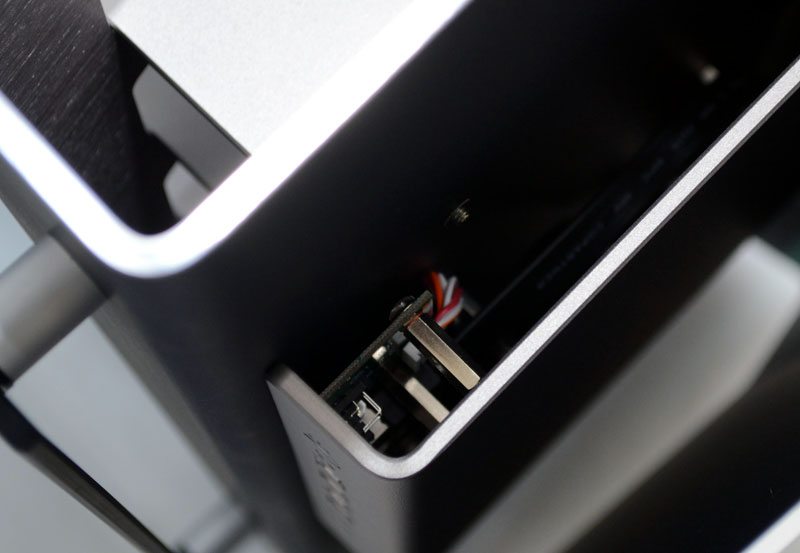
Being an open air case you can see all the inner workings, including the front I/O panel PCB, but In Win have even used nicely finished screws down here.
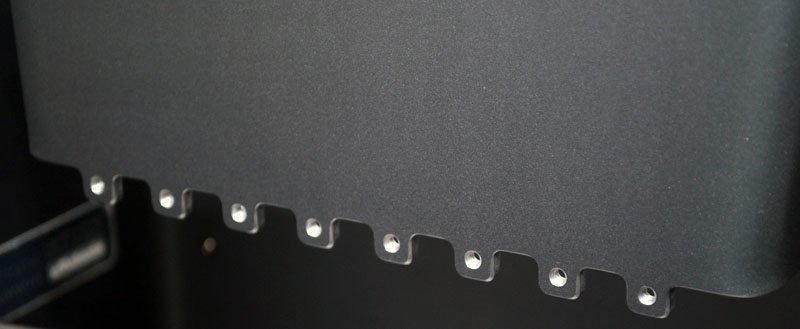
The back panel features a similar design to the front, albeit a little slimmer from left to right.
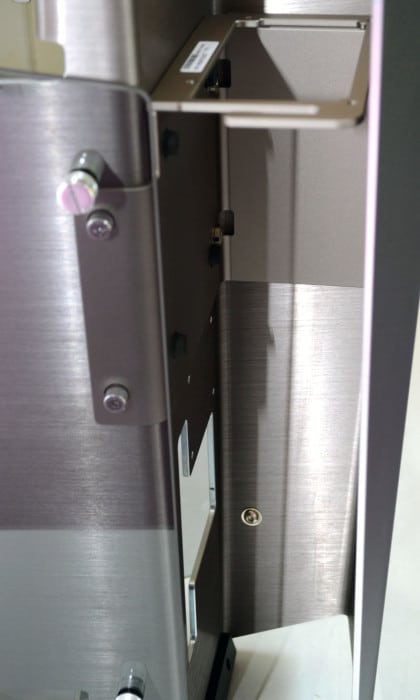
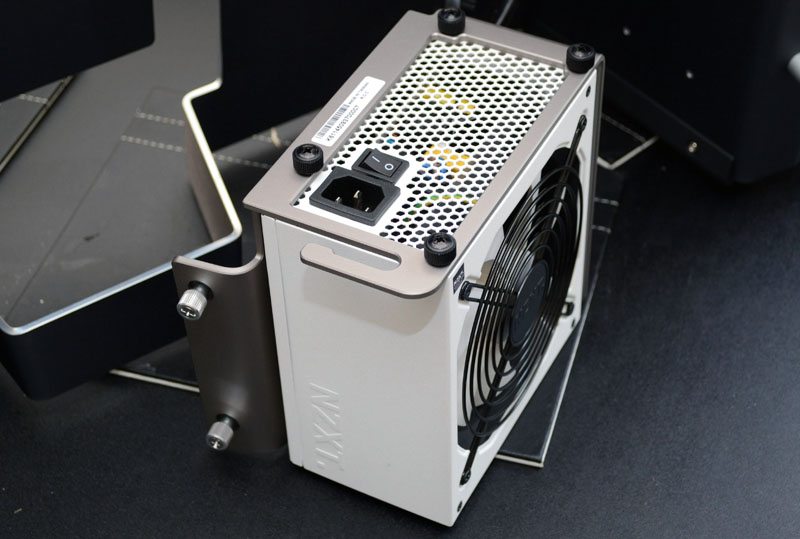
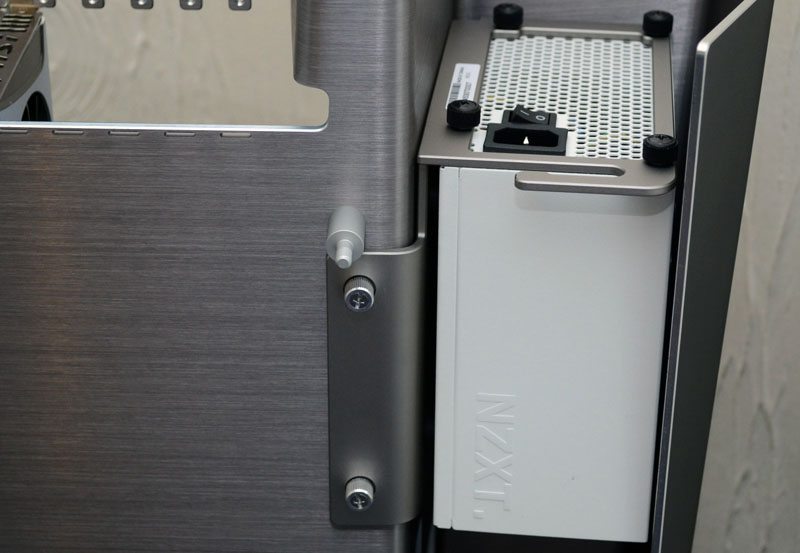
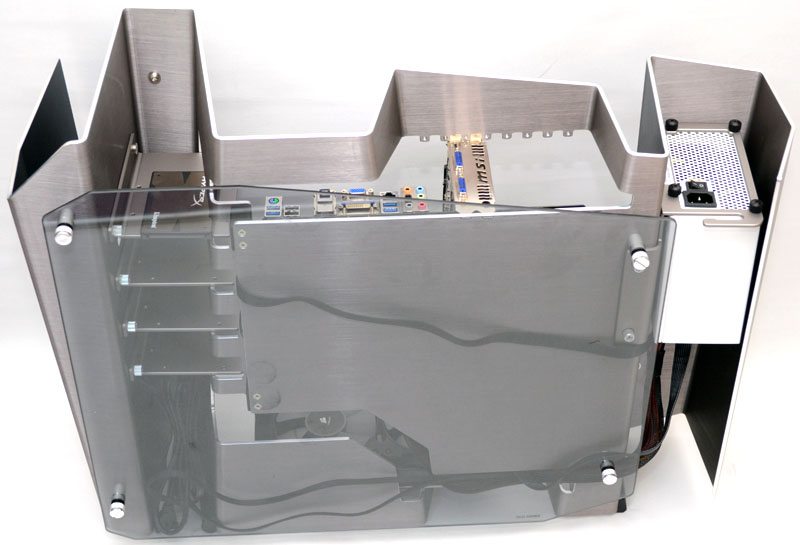
Just behind the front panel you’ll find the PSU mount, which is technically mounted on the exterior of the chassis, as the back panel wraps around it on three sides.

On the right side of the chassis you’ll see the PSU mount at the back, and a large open section below it which will allow lots of spare space for cable routing.
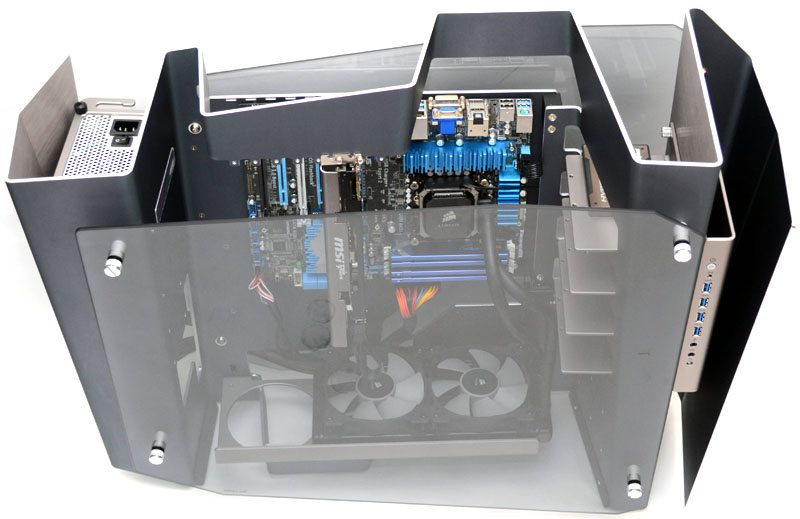
The top panel is pretty straight forward, as there is no “back panel” as such. This is because the motherboard is rotated 90 degrees, so your GPUs back plate will be at the top of the chassis.

Any expansion cards slot into the little holes at the back of the panel.

Any cards can then be screwed into the front pop out section of the top panel.
The underside of the chassis features a very similar design to the top panel, the only major difference being that there is a 360mm fan / radiator mount near the base of the chassis.

Towards the back of the chassis you’ll find a black aluminium block with a thick rubber strip applied to it, this should prevent the chassis from sliding around your desk and also help reduce any vibrations from your system.
At the front are two hard plastic feet which screw into the base of the chassis.
These screws can be turned to adjust their length, perfect for removing a wobble on any uneven surfaces.
The radiator mount we saw a moment ago is held on by two spring mounted screws which can be seen from the underside of the chassis.
Time to get that side panel off and take a look inside the chassis! Here you can see the rubber washer mounting system I mentioned earlier, with all four of these removed you can simply lift the glass panel away from the chassis.
Interior
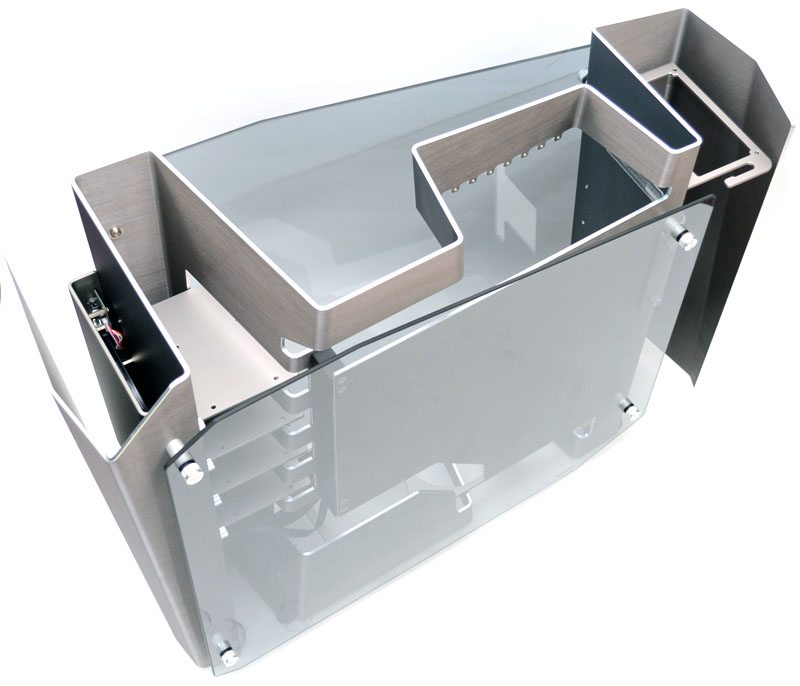
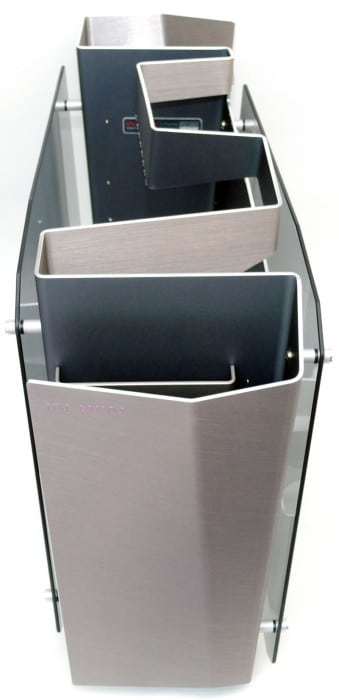
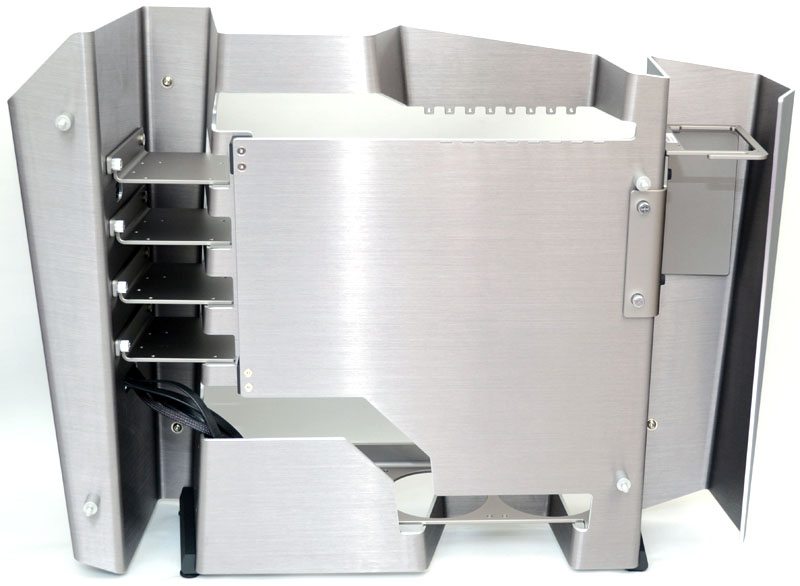
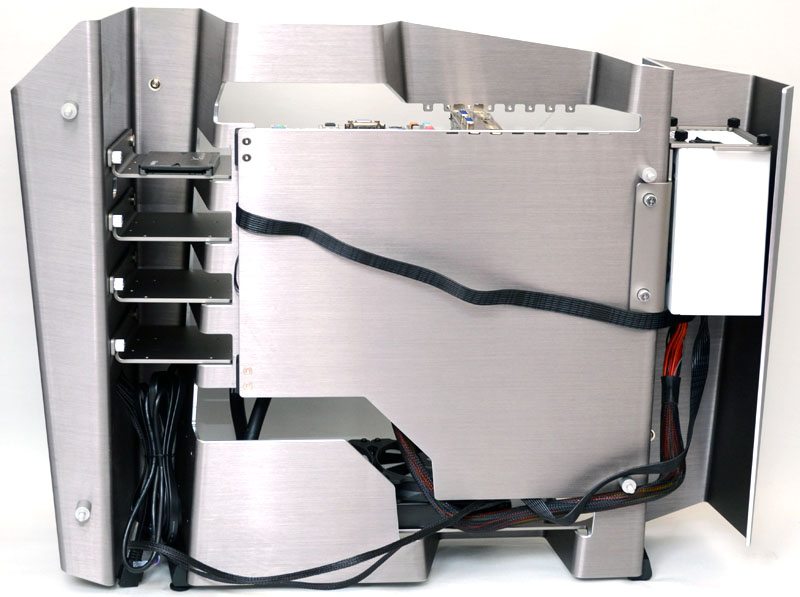
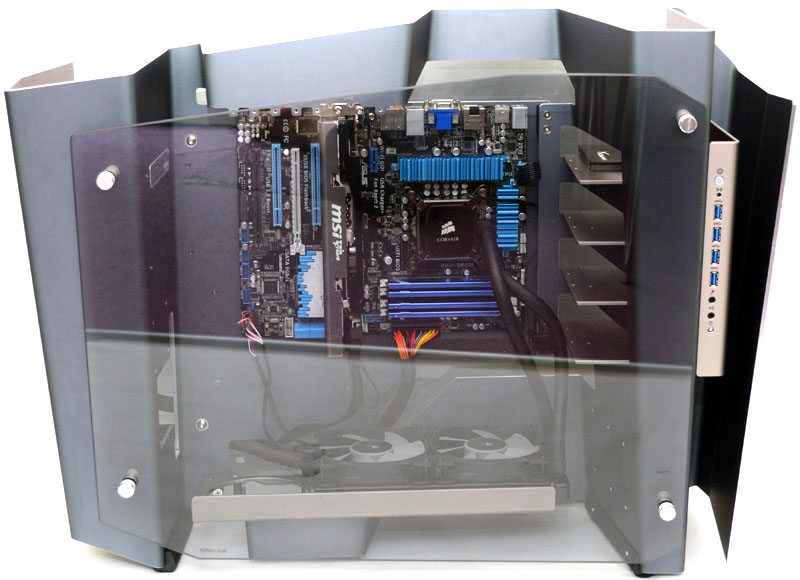
With the side panel off we can see there is a huge amount of space on the interior of the S-Frame.
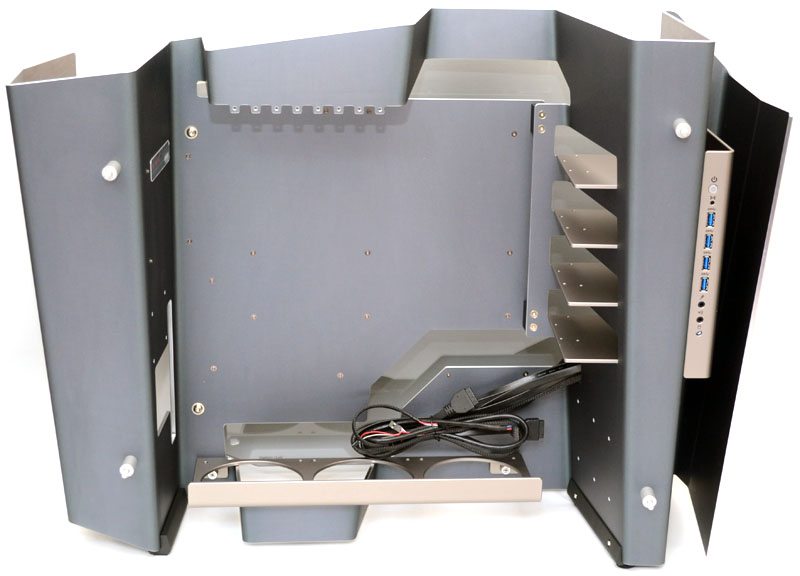
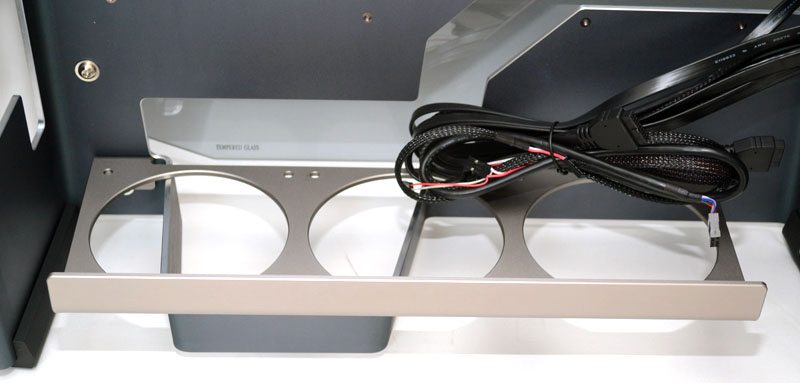
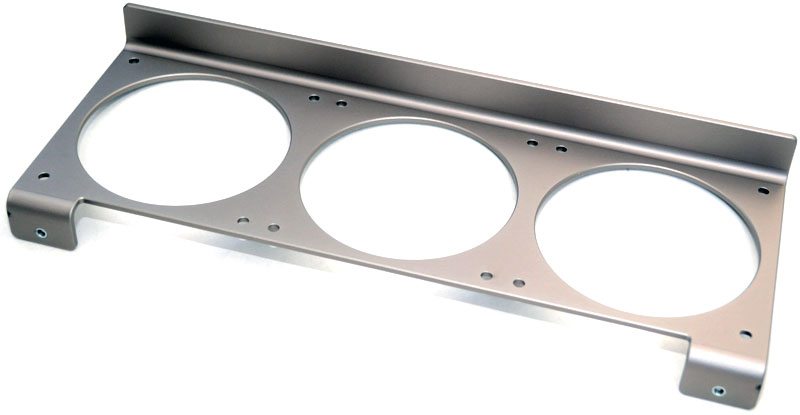
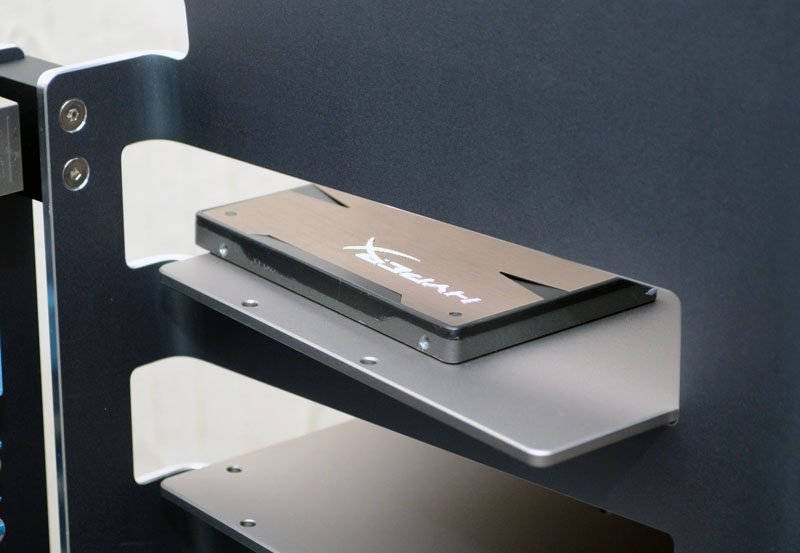
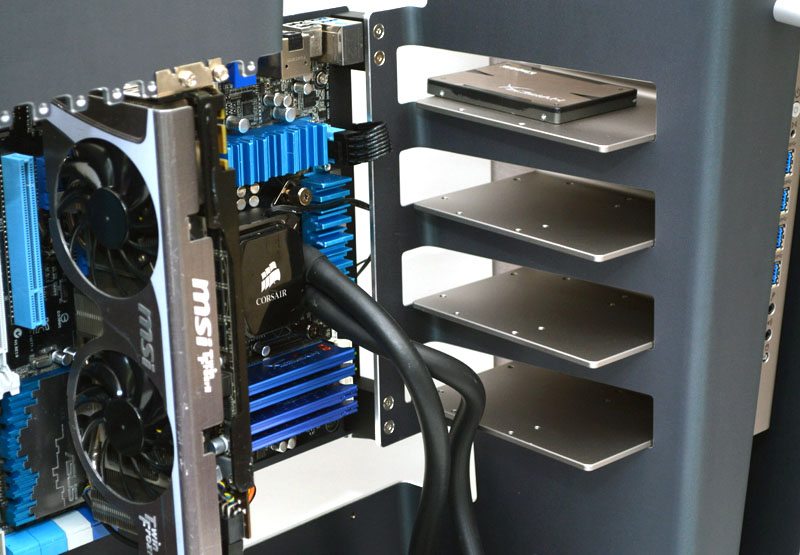
There are four removable hard drive trays, each made from brushed aluminium that contrast nicely with the darker colour of the main panel.
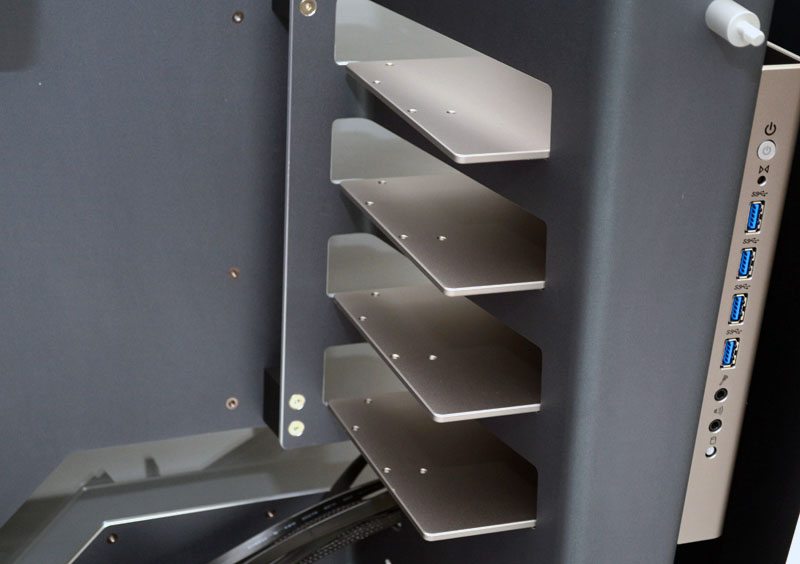
Each is held in place with a single screw on the left side.
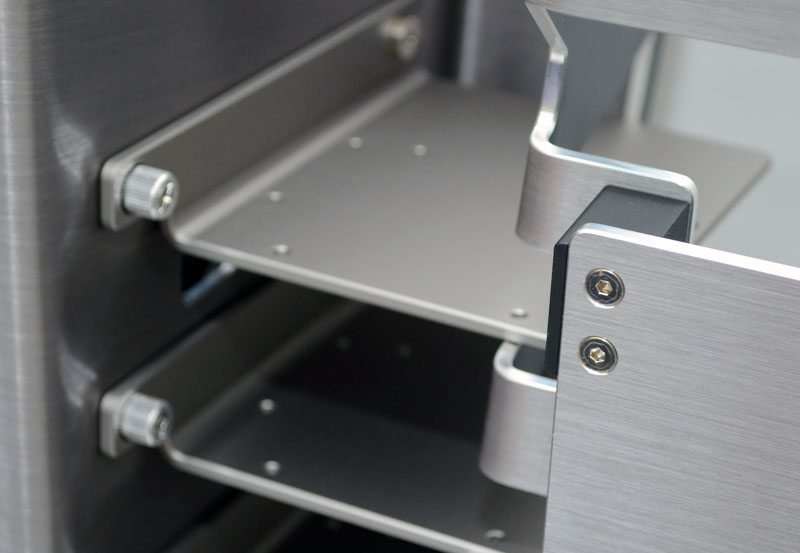
The back of each tray rests on a single slide over nut, overall this allows you to quickly remove the bay and get your drives installed, simple but effective.
Each tray comes drilled with holes to support either a 3.5″ drive or a 2.5″ drive.
The bottom fan mount will support up to 3 x 120mm fans or an equivalent size water cooling radiator.
The tray is easily removed with two thumb screws on its underside, while the front edge rests against the main frame of the chassis. There is a small rubber pad on the underside of the fan mount where it meets the chassis to prevent any unwanted vibration noises.
As with everything else on this case, the fan mount panel is really nicely finished and cut from high quality aluminium.
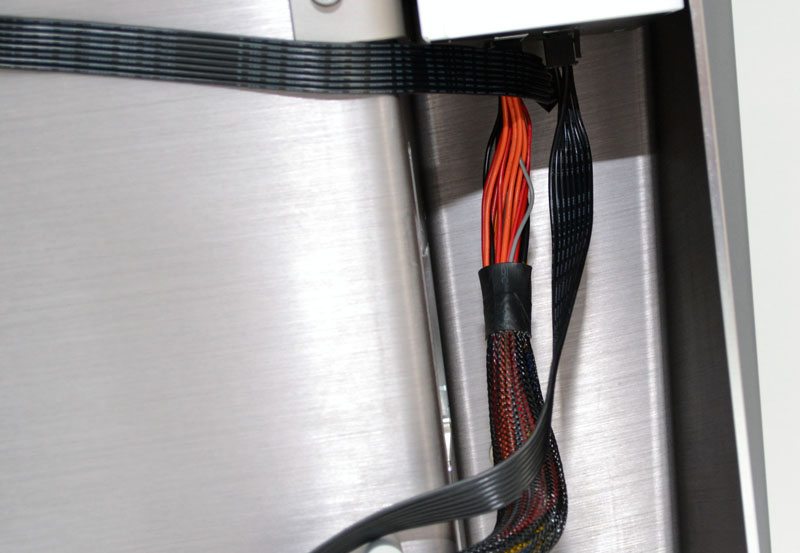
The internal cables of the S-Frame are black with the exception of the last few inches of the front panel cables. Flat USB 3.0 cables have been used which should help with cable routing and black sleeving has been applied to everything else.
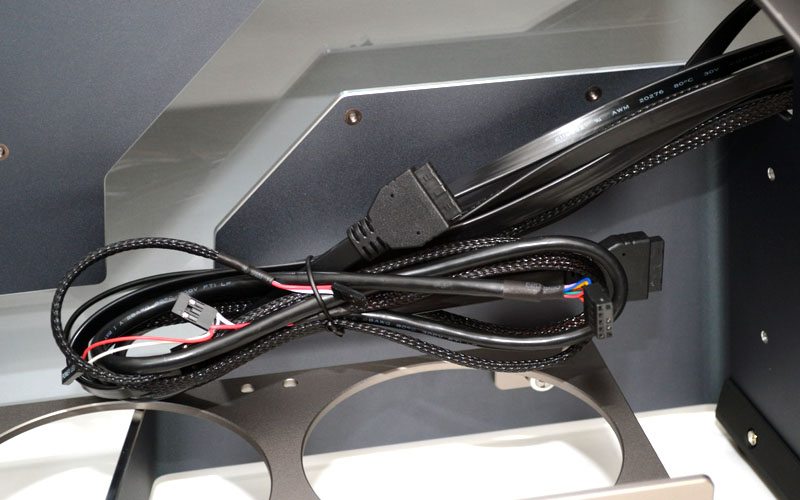
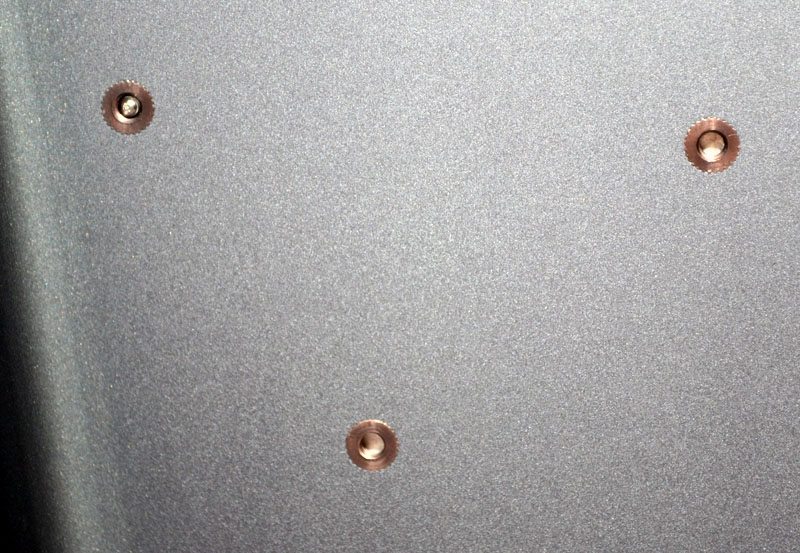
The motherboard stand-off pegs are not pre-installed and can be fitted into these nicely finished screw mounts on the interior of the chassis.
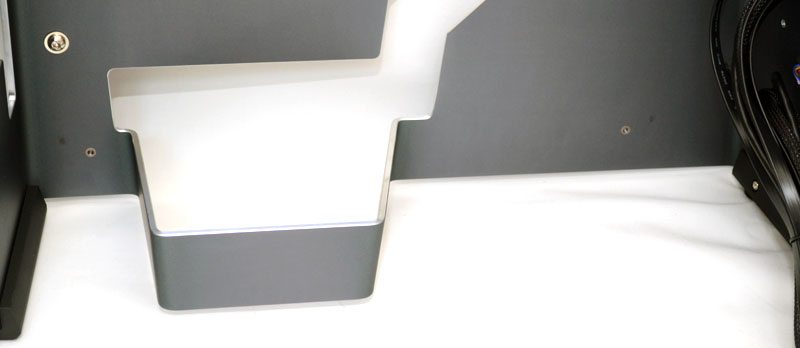
A long strangely shaped cut-away below the motherboard will allow for a multitude of cable routing options, whilst also adding a nice touch of style to what could have been just a flat back panel.
Ooooh what is this, looks like we have a one-of-a-kind serial number on our chassis, thank you In Win!
Around the back of the chassis there really isn’t a lot going on, just a clean panel and plenty of room to route a few cables.
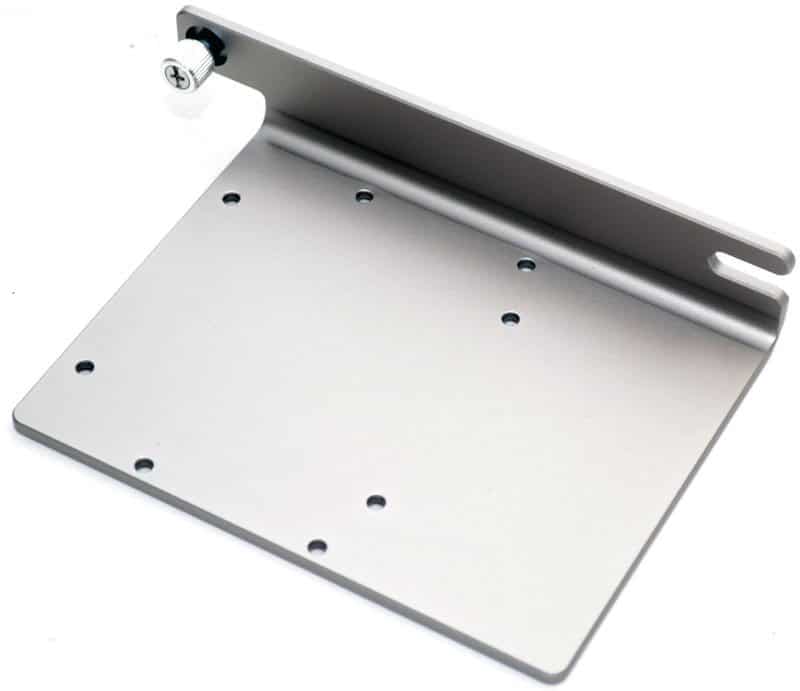
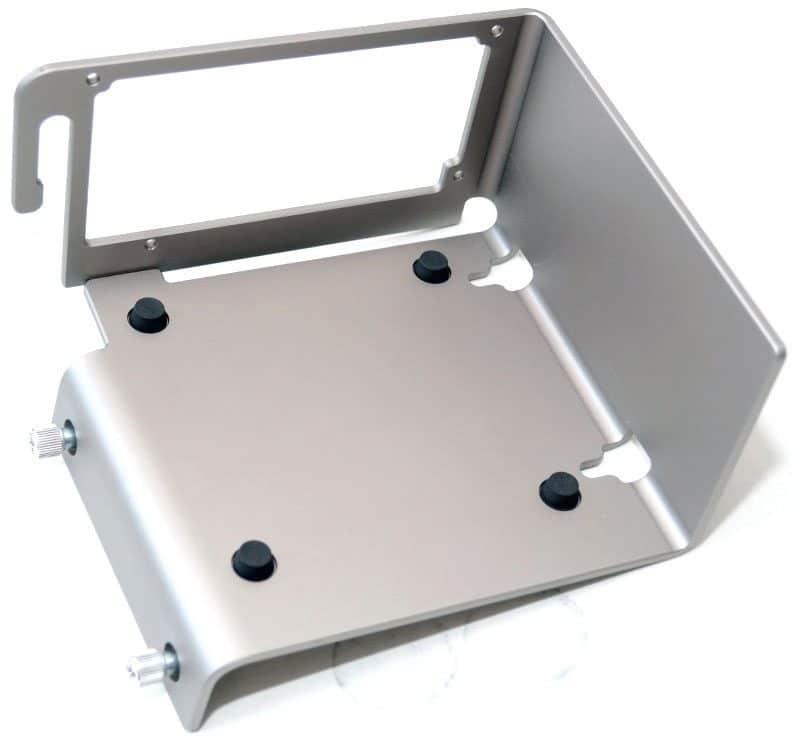
The PSU mount at the back features a removable bracket made out of, can you guess? More high quality aluminium.
Mounted in a similar fashion to the hard drive bays, the PSU bracket can be unscrewed and slid out to allow for an easier PSU installation process.

The base of the PSU bracket features four thick rubber pads. Also notice the “n” shape on the side of the back plate? That is used to hold your PSU power cable down, stopping it sticking up in the air above the chassis.
Complete System
Before we get to the complete system, I decided to snap a few bonus shots of the installation process to better show off some of the chassis features. Here you can see the PSU mounted to its bracket as well as the four custom PSU thumb screws that were included with the S-Frame.
Neatly mounted back in the chassis with the fan facing toward the back and the heat exhaust pointing upwards.
On the underside you can see the cable connections, and they’re not as tricky to reach as they look.
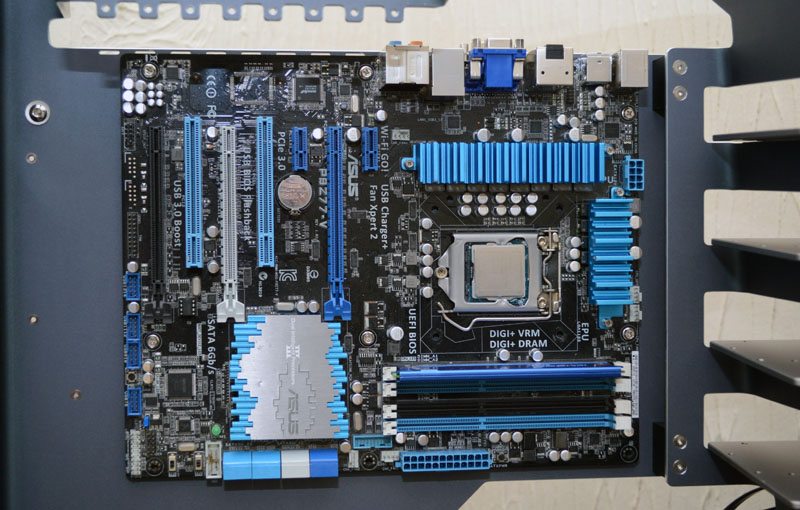
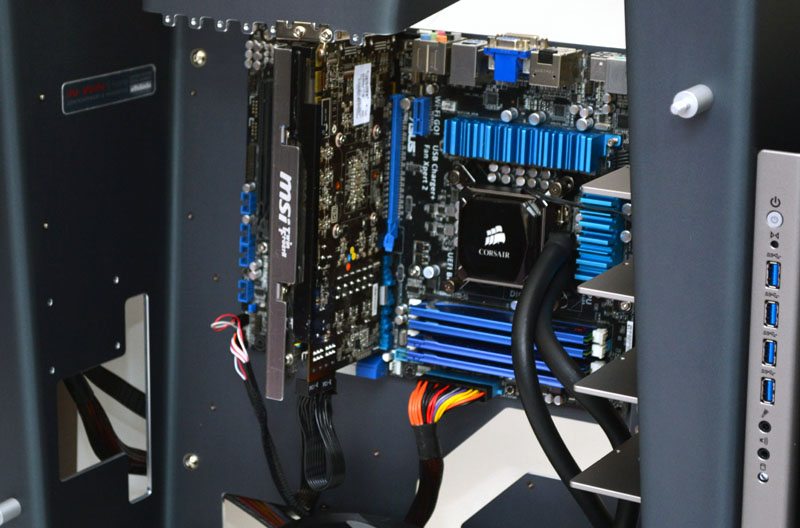
Motherboard installed easily enough after I mounted the motherboard stand-offs. Just don’t do what I did and forget to put the CPU cooler bracket on first, as there is no cut-out behind the motherboard to assist with this.
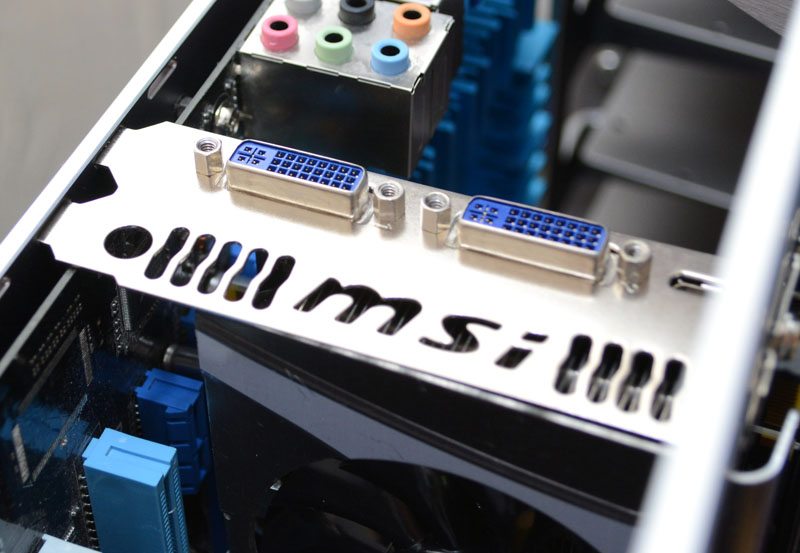
GPU mounted vertically and screwed in place on the top front edge of the main chassis panel.
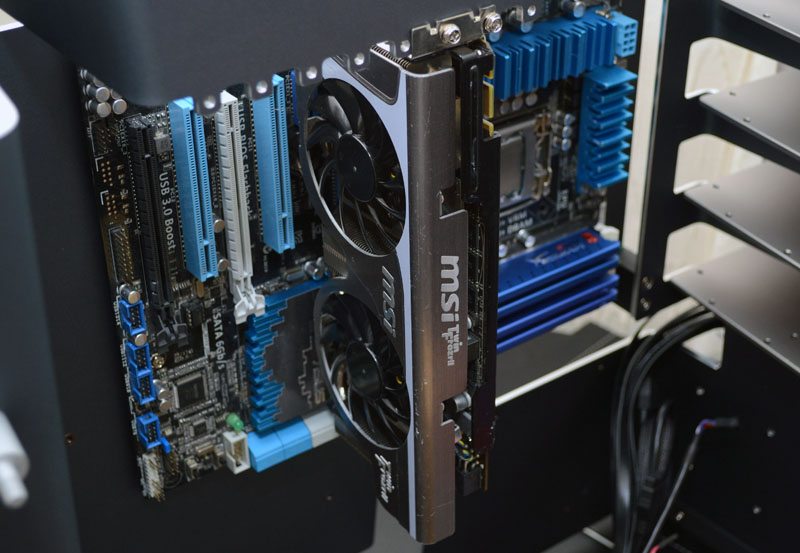
The system does look strange without a back plate over the motherboard or anything surrounding the GPU back plate, but at least there is nothing to block airflow.
Hard drive on its plinth like mount, would look nice with some soft under-lighting here.
The total build should have taken me around 30 minutes, at least that is what I estimate it at since I had to remove the GPU and motherboard completely to install the CPU cooler backplate, because I’m an idiot and forgot to do this first.
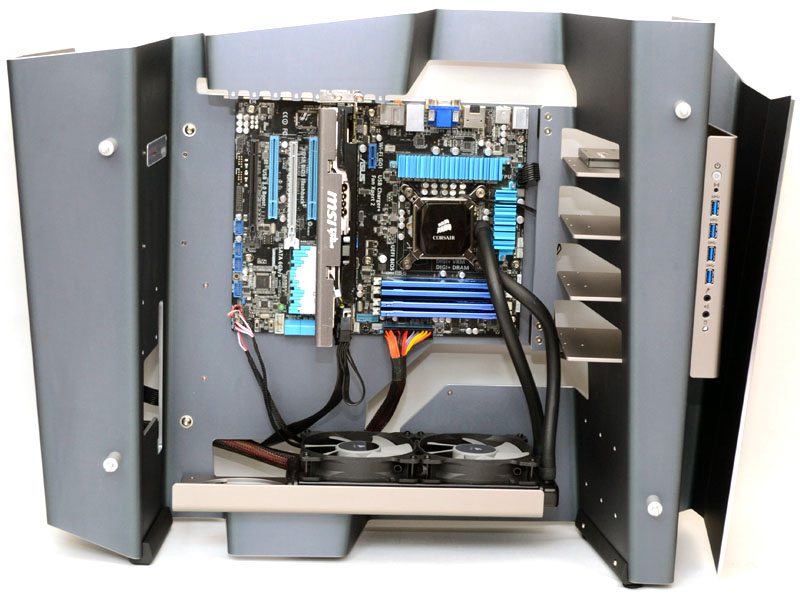
Despite its very exposed design I was still able to achieve a relatively clean looking build. I’m sure even better results could be achieved with colour matched components, not to mention cut-to-length braided cables to reduce any cable management issues.
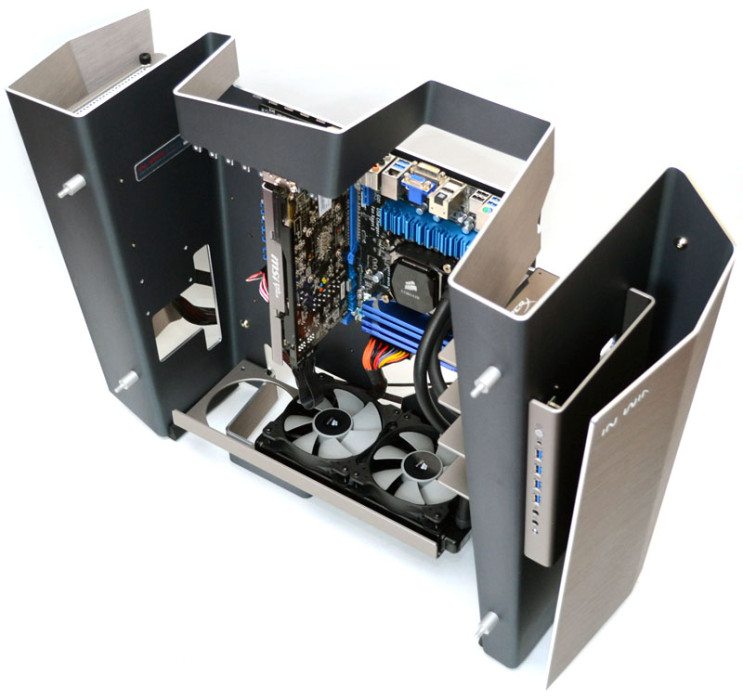
There is ample room for long graphics card here and certainly more than enough room for a multi-GPU setup, and airflow is unlikely to be an issue given the open air / top exhaust layout of the chassis.
The radiator mount at the bottom was quite low and the angle was putting a little strain on the H100i pipes, but nothing too severe, I would suggest either a cooler with longer hoses or a custom set up if you’re planning to use water cooling with this case.
The hard drive bays are really nicely laid out and there is just enough room to the right of the motherboard to route any extra cables to them.
My demo build is a little sparse, so there aren’t a lot of cables around the back of the motherboard. I think with a little case these could be routed relatively out of sight. In Win did include some cable clamps, but I would suggest using some adhesive Velcro cable ties.
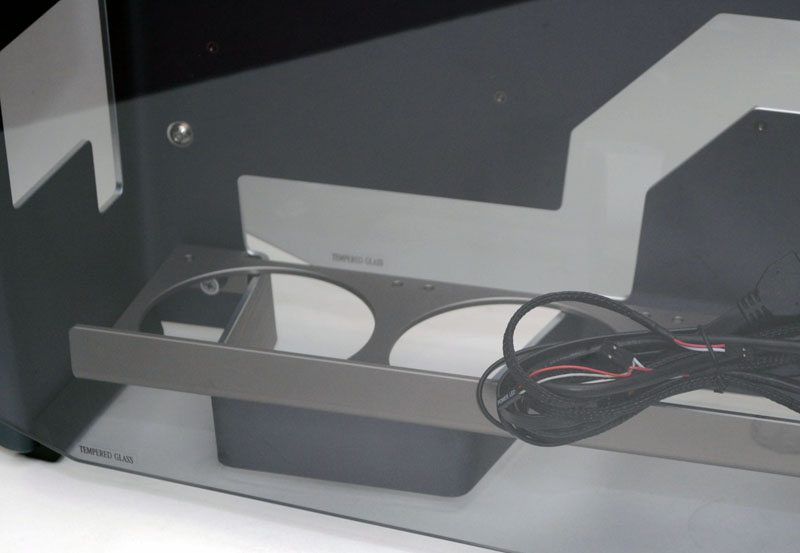
The large recess below the PSU features a cut-out to route cables, but use it wisely as these cables will be on show from the left side panel, which is why I chose to route mind around the back. This space below the PSU does allow for longer PSUs but can also be used to tie up any excess cable.
With the side panel back in place you can see what I mean about cable management, but cable braiding and a few adhesive strips will soon tidy that up.
Overall a very nice looking build, reasonable cable routing, with plenty of space between all major components.
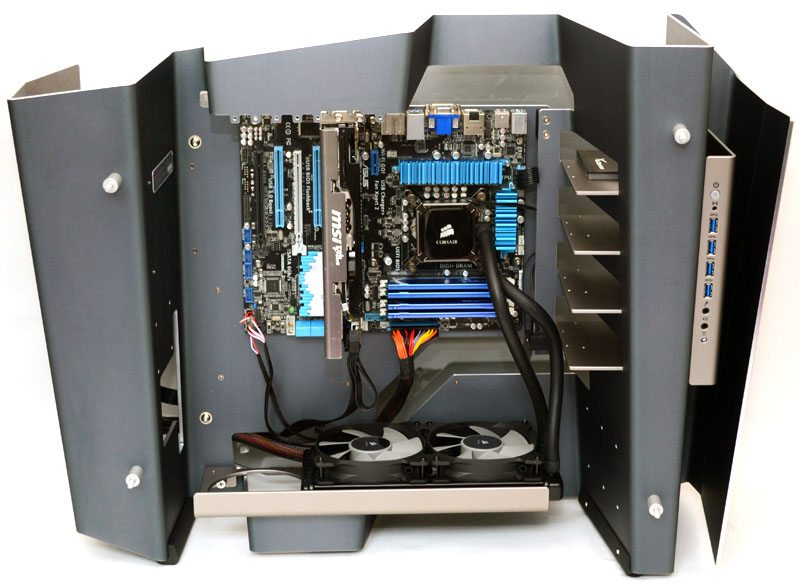
The slightly tinted glass gives us a great view of the interior and this will work wonders for those who really want to show off their components.
You will of course need a little extra care, as you could potentially drop things inside the case. A free falling pen could easily jam up in your fans if you’re not careful.
The last shot of the day, I feel like I should be putting this case on a stand in an art gallery, it’s simply stunning.
Final Thoughts
Price
OK there is no easy way of putting this, so I’ll just come right out and say it, the S-Frame is so expensive that it’s far out of the reach of your average consumer. You need a fat wallet and a love for things that are rare and unique. Priced at $799 in the US, whilst customers in the UK can pick it up from Scan.co.uk for a snip under £780 and yes I know that’s now how currency conversion rates work, but that’s the price you pay for a 1/500 limited edition product that uses the best materials and precision engineering.
Overview
In Win have really raised the bar with the S-Frame, their design team should be treated to a couple of weeks holiday somewhere nice, because they’ve created something that is a true work of art. Of course I also think that this is a true love hate product, much like any work of art, there will be people out there that love it and those that think it’s an overpriced pile of scrap metal. Of course this much isn’t going to bother In Win that much as there will be more than 500 people in this world that love it and that can afford it.
The S-Frame may be expensive, but even if it were affordable it’s still not idea for a lot of peoples needs. It’s incredibly long and pretty wide too, meaning that it’s not exactly ideal for sticking under your average desk. It really wants to be put on top of a desk to really show it off, and even then you’re bringing all your components to ear height. This means that loud components will be pretty audible given the open air design of the case, so a little extra care to invest in quiet components will certainly reap rewards.
There are no dust or debris filters either, so if you live in a dusty house you’re going to be taking that side panel off a lot to clean out your radiators, fans and other components. Fortunately the chassis is actually remarkably simple in terms of interior design, so quickly removing the panel to give it a quick wipe down won’t be too much effort, even if you do have to do this every few days.
Of course the short falls are a minor upset to the huge benefits of this case, it’s a real treat on the eyes and when polished up, with a few subtle interior lights and a nice desk you can bet your friends jaws will hit the floor when they see it. It’s the kind of case I can see being used in the bosses office of a large games development company, it’s certainly something of a statement and has an air of superiority about it. It’s also likely that someone investing in a case of this value is planning a build of similarly heavy investment and the nature of the chassis design certainly makes it mod friendly.
To sum up, would I buy this case? No not really, not even if I had enough money spare for one and that is simply because I have no where to put it. That and it would be quickly covered in hand prints from my kids. I do love this case though and if I had a place to do it justice, I would happily sport one of these on my desk. There is a market for it, but it’s certainly not your average consumer. I was going to award the case our innovation award simply based on the manufacturing processes and overall design. Assuming money and space are not an issue, then Editors Choice is easily within its grasp as In Win promised an uncompromising ultra-premium quality case and that is exactly what this is, right down to the very last detail. I wouldn’t mark down a Bugatti Veyron because it’s big and expensive, they’re just by-products that result from this kind of quality.
Pros
- Exclusivity, only 500 will be made
- Truly unique design, nothing else on the market like it
- Spacious interior
- Easy to mod
- Water cooling support
- High quality materials
- Incredibly durable build quality
- Support for long graphics cards
Cons
- Long chassis length makes it unsuitable for most under-desk areas
- Dust could become an issue fairly quickly
- The price

In Win S-Frame Open Air Limited Edition Chassis Review
Thank you In Win for providing us with this sample.


