Lian Li PC-Q37 Mini-ITX Chassis Review
Peter Donnell / 8 years ago
Introduction
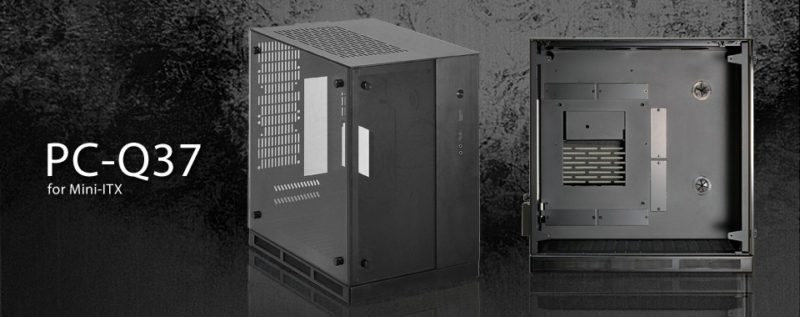
The masters of aluminium chassis designs are back on eTeknix once again, as Lian Li roll out their latest mini-ITX chassis design, the PC-Q37. Keeping up with current trends in chassis design, as they always do, Lian Li are packing plenty of tempered glass into their new chassis design, so it’s sure to appeal to those who want that premium look and feel from their build, as well as a great way to show off their new hardware.
“The PC-Q37 features a two compartment design, separate the system into two compartments, one is motherboard and graphics card section, another one is HDD and power supply unit section.”
Featuring a dual-chamber design, which isn’t exactly common for a mini-ITX chassis, the PC-Q37 sports room for 320mm graphics cards, a 220mm SFX power supply, room for a little water cooling and some fans (although no fans come pre-installed.)
A Closer Look – Exterior
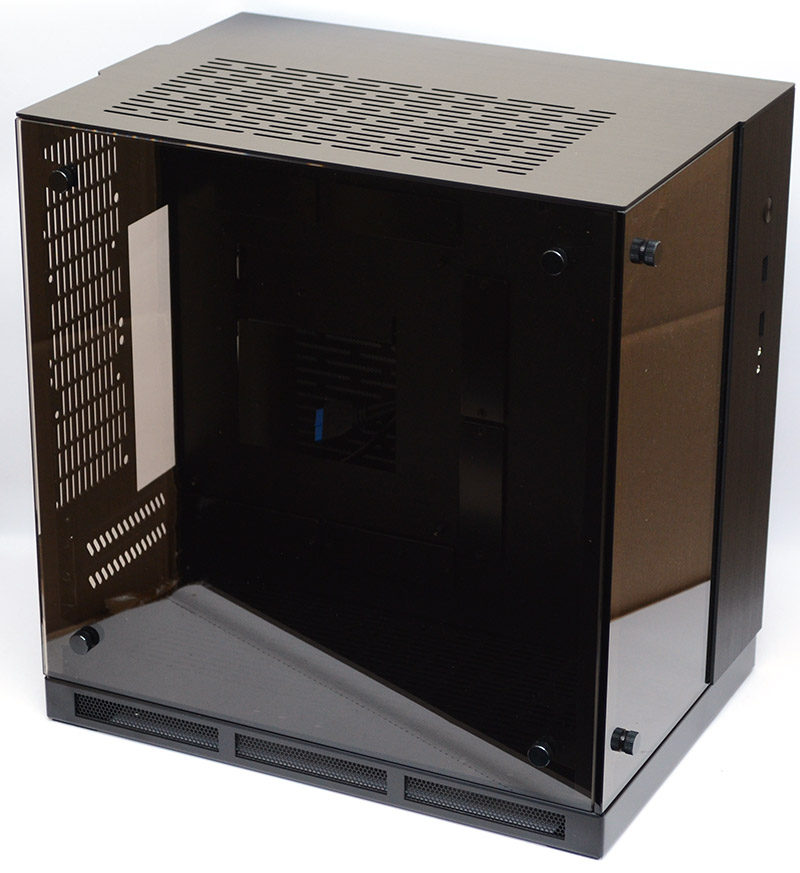
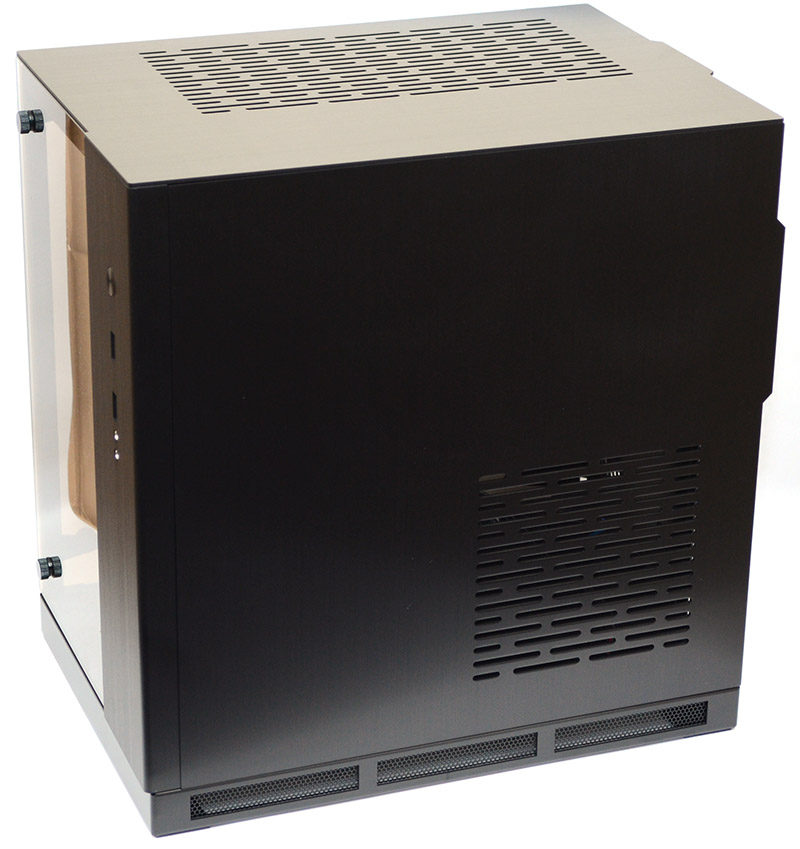
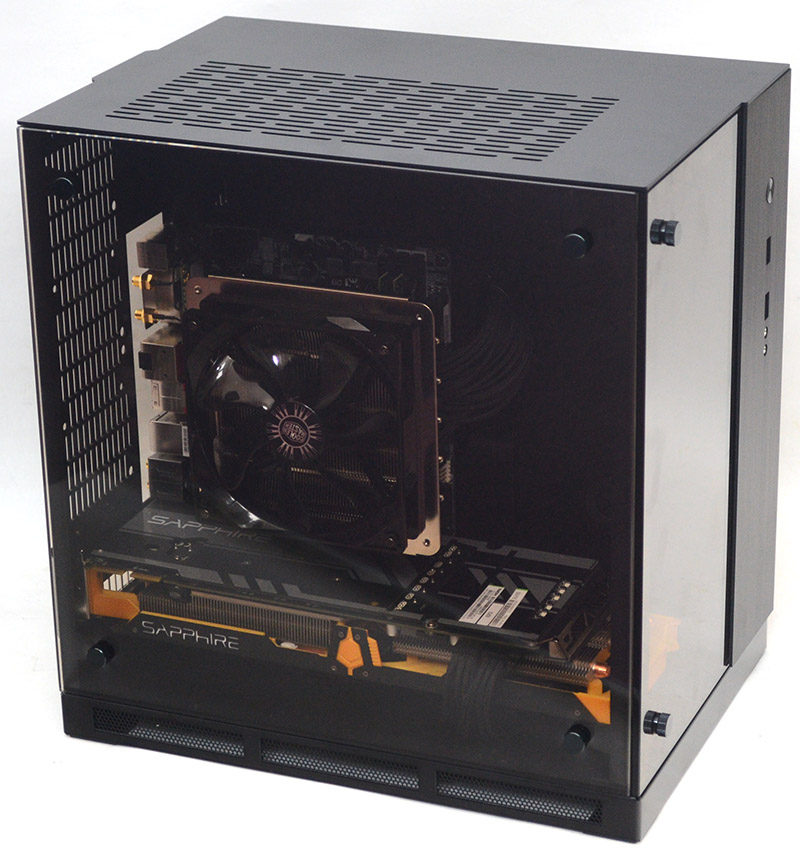
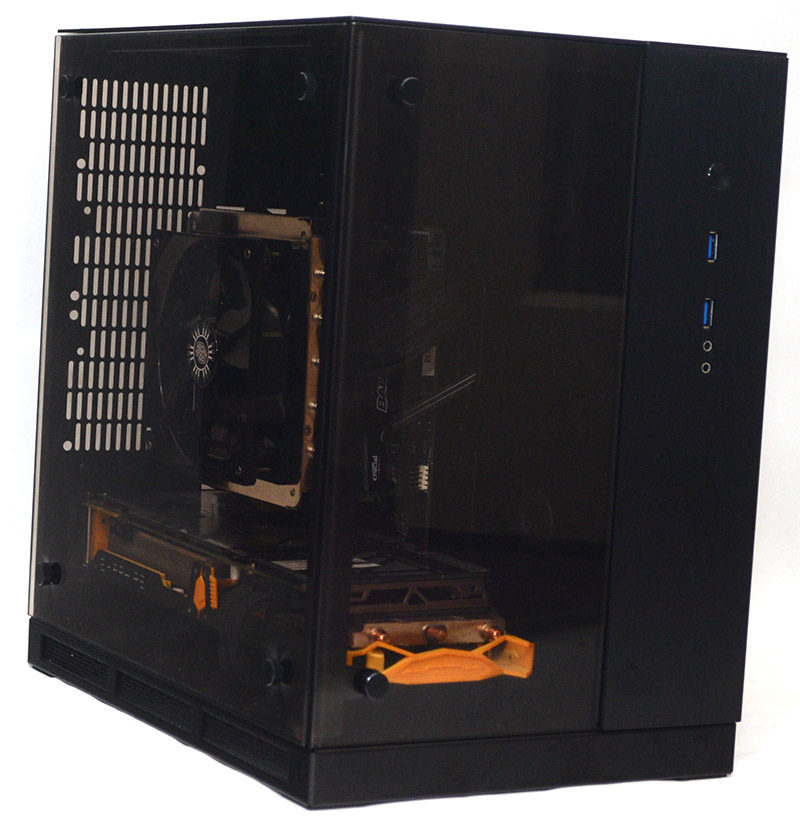
The PC-Q37 is pretty small, but that’s to be expected given its mini-ITX motherboard support, but it is also quite wide and long for its form factor, meaning it should easily handle a larger graphics card. On the left side and on a large part of the front, you’ll find two gorgeous tempered glass panels, each held in place by aluminium thumbscrews on their corners.
Along the bottom edge of the chassis, a nice amount of ventilation to allow airflow into the chassis to keep things cool.
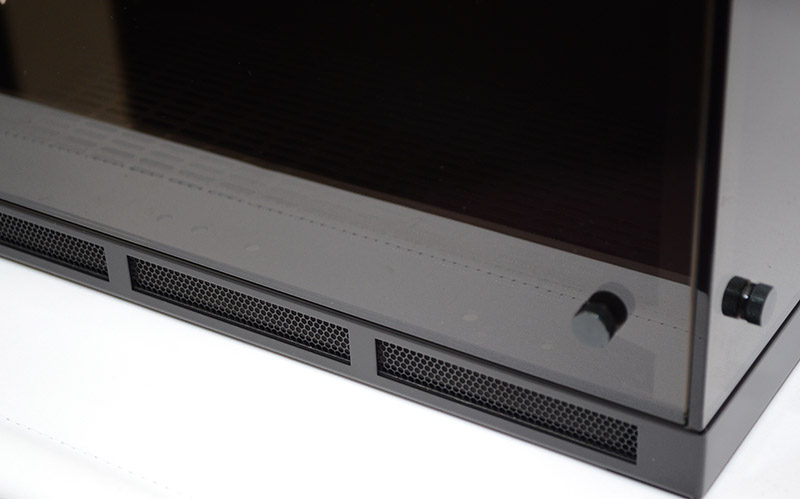
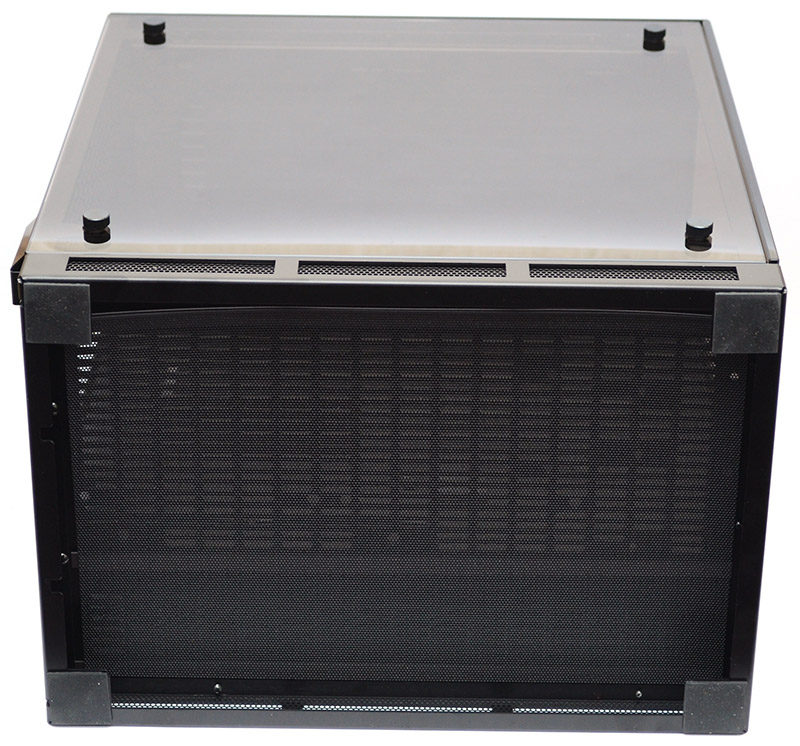
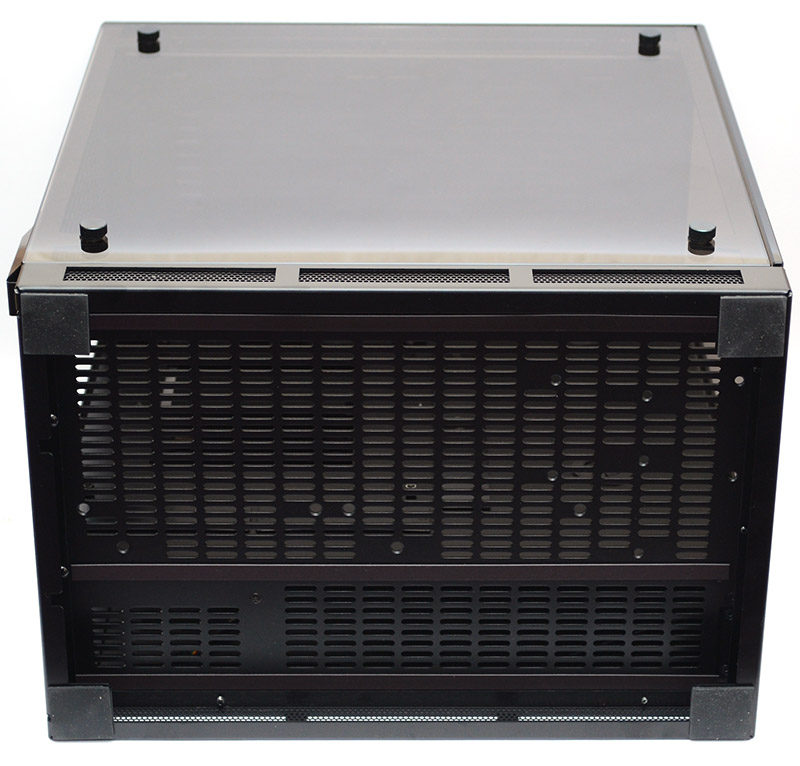
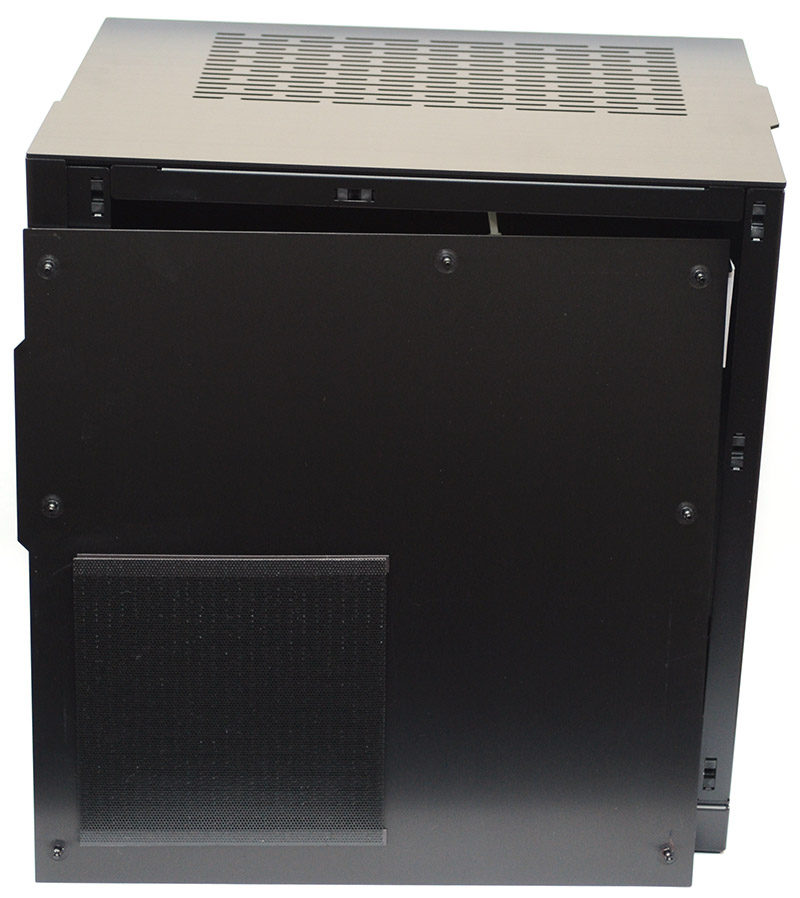
The right side panel is black aluminium and comes with a large ventilation section in the rear bottom corner. The ventilation is located to provide airflow to the PSU mount and comes with a magnetic dust filter on the interior. The panel is mounted on durable push-pins, so just give it a good pull to remove it, and push it back on to lock it in place.
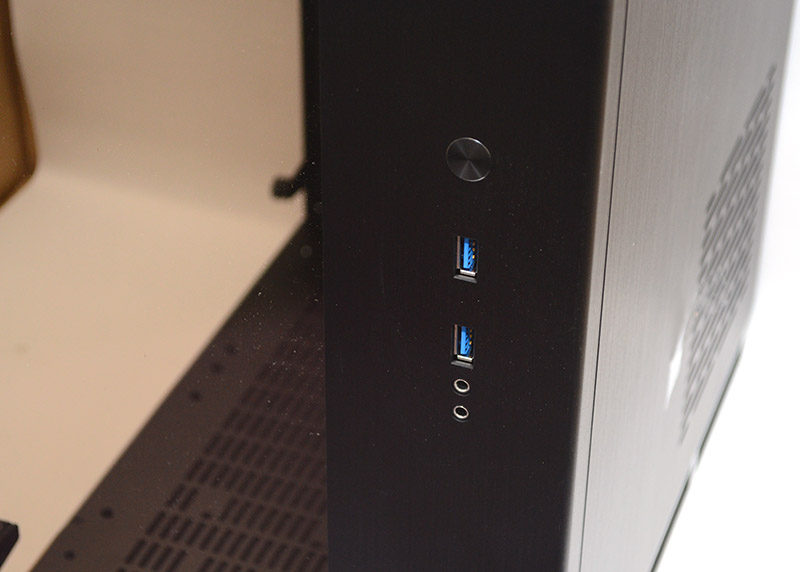
Tucked into the front panel you’ll find a nice and compact I/O panel, with power controls, a pair of USB 3.0 ports, and audio jacks.
Around the back, you can see how the chassis is split into two chambers, with one side having room for the PSU, while the motherboard and expansion card slots are on the other. There are some fan mounts here too, should you wish to install a couple of 80mm exhaust fans.
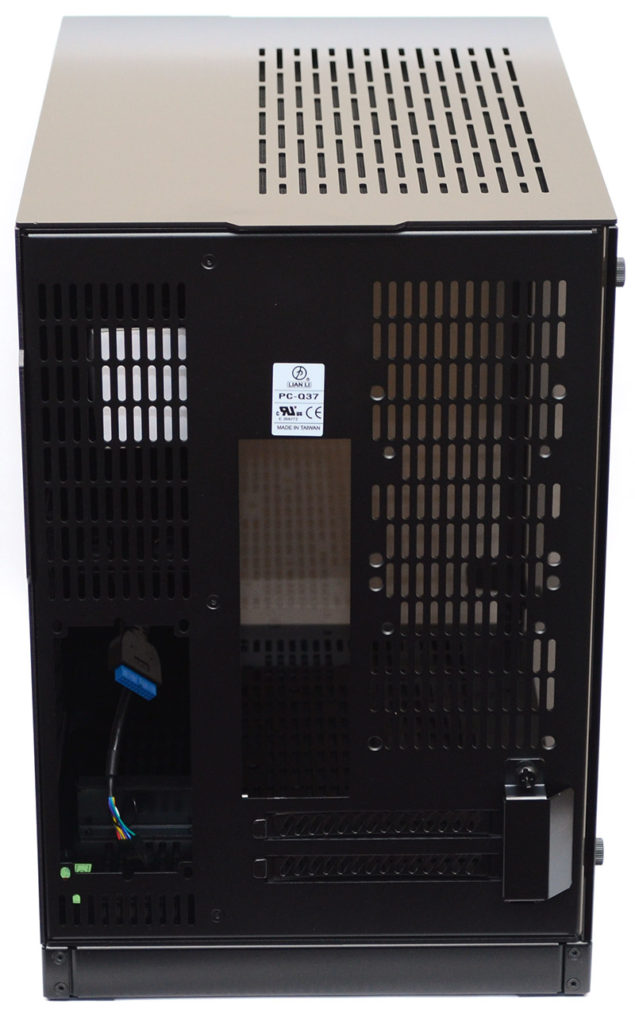
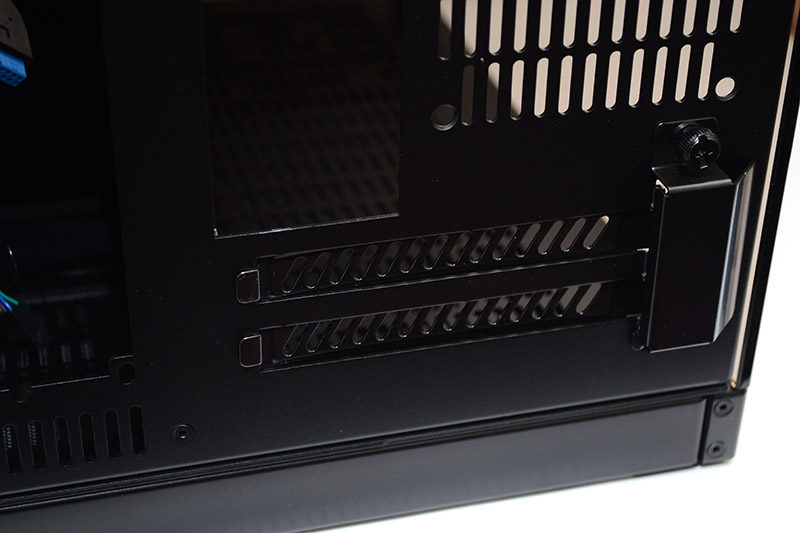
There are two expansion slots, but since this is a mini-ITX chassis, it’s obviously tailored for dual-slot GPUs rather than two separate cards.
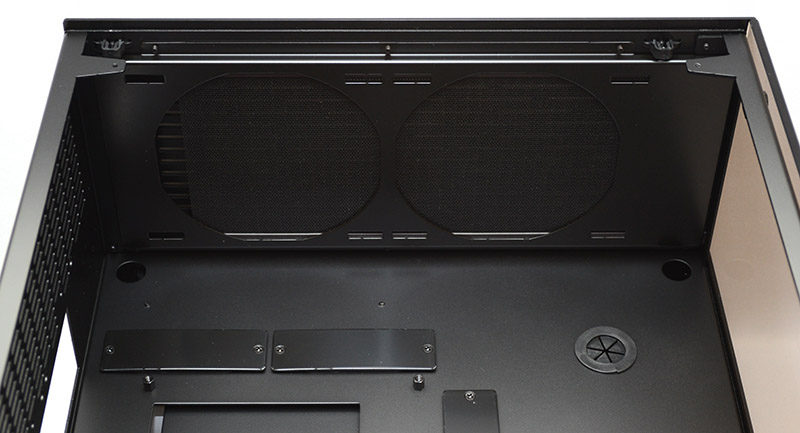
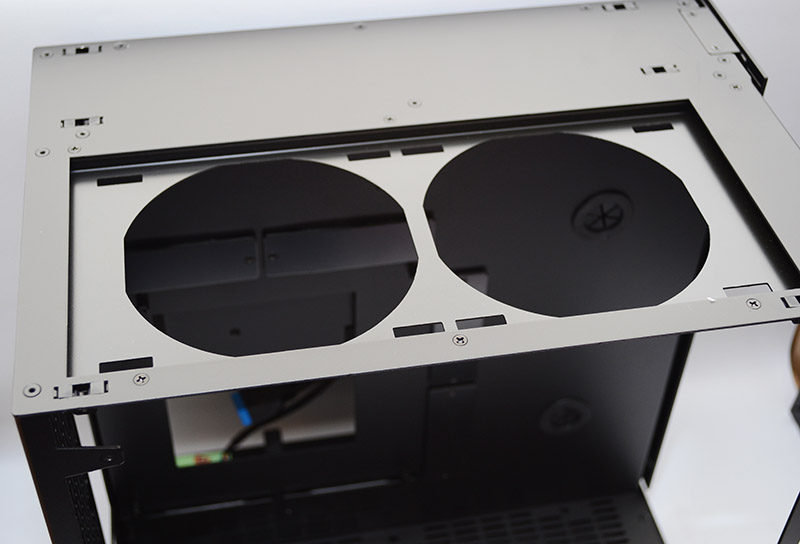
The top panel is another push-pull mount, so you can pop that panel right off when you need to. It has another big ventilated section, which is ideal for any top mounted cooling, which we’ll take a closer look at in a moment.
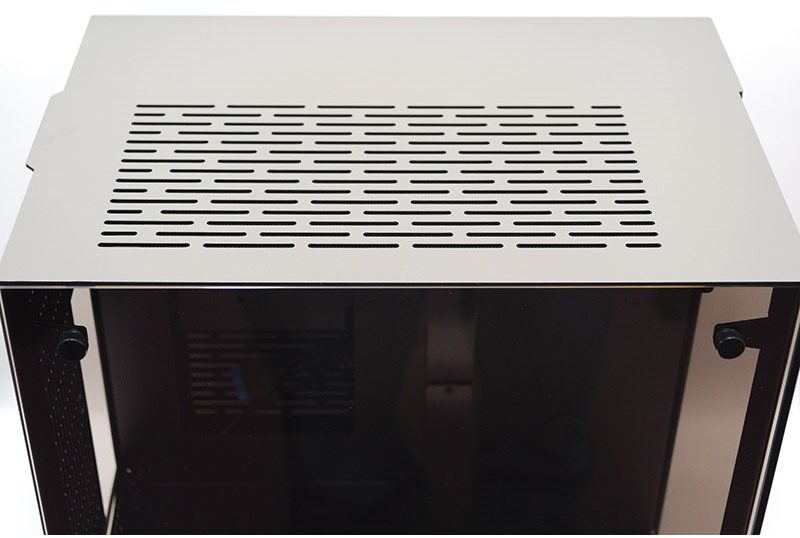
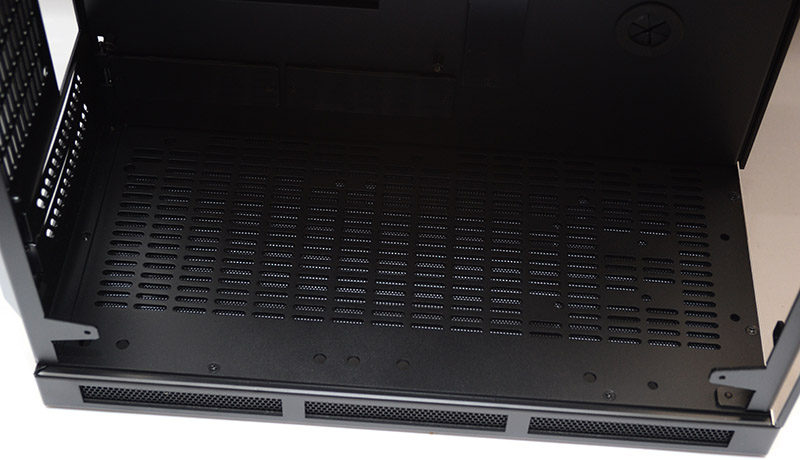
On the base, you’ll find four hard-wearing rubber grips on the corners, as well as a full-coverage magnetic dust filter to ensure you get clean airflow into your system.
Behind the filter, you’ll find a few fan mounts, but keep in mind that these will only be available if you don’t have a graphics card installed, as that would take up the space in the bottom of the chassis.
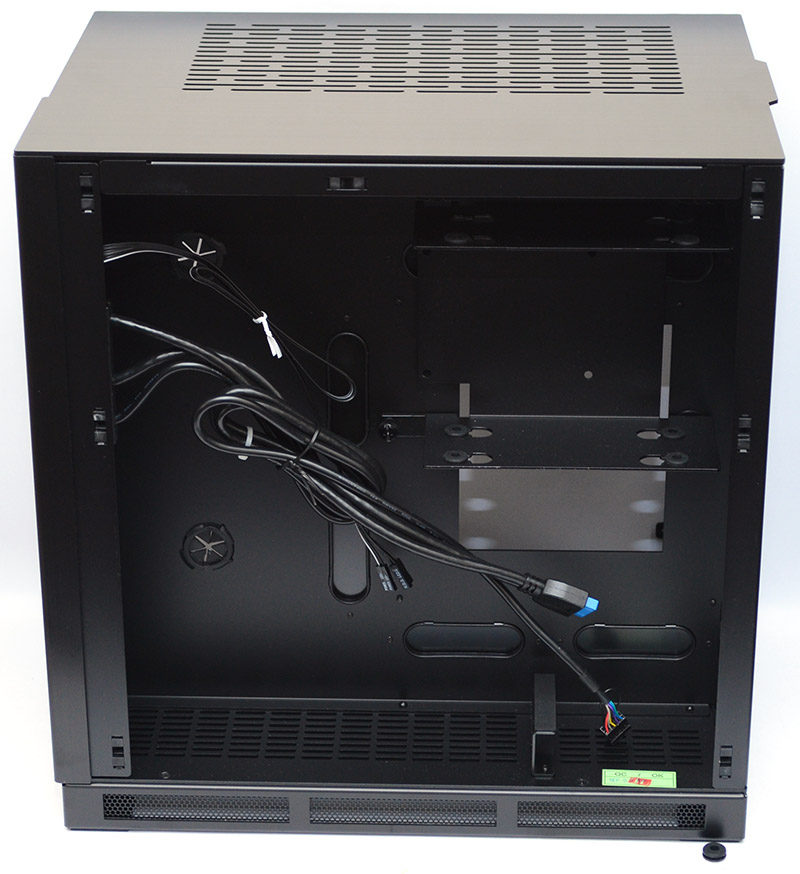
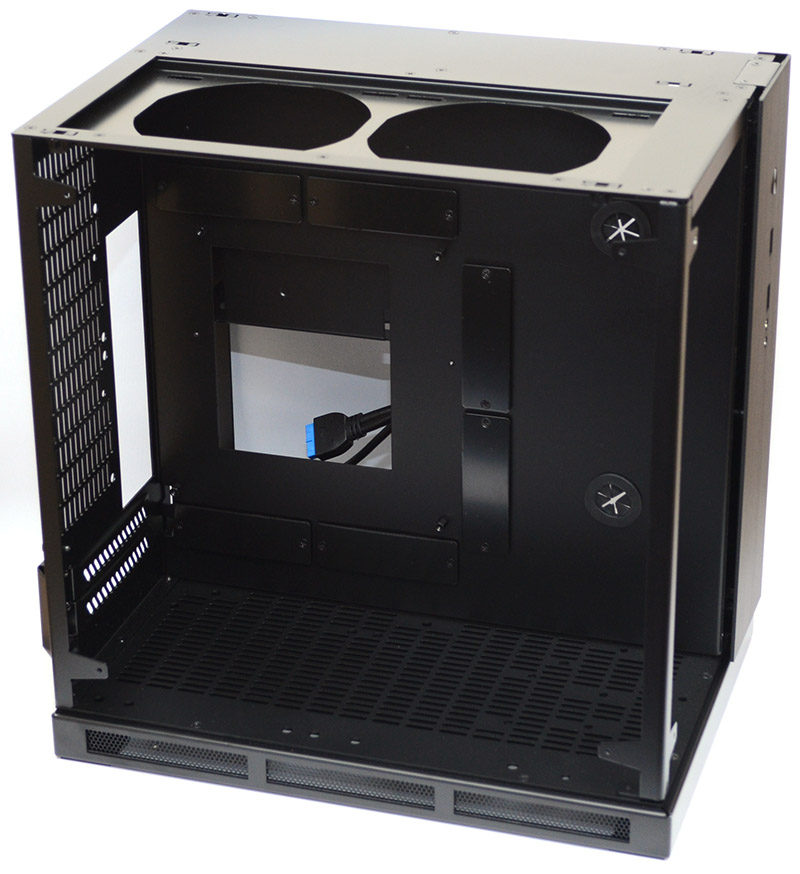
A Closer Look – Interior
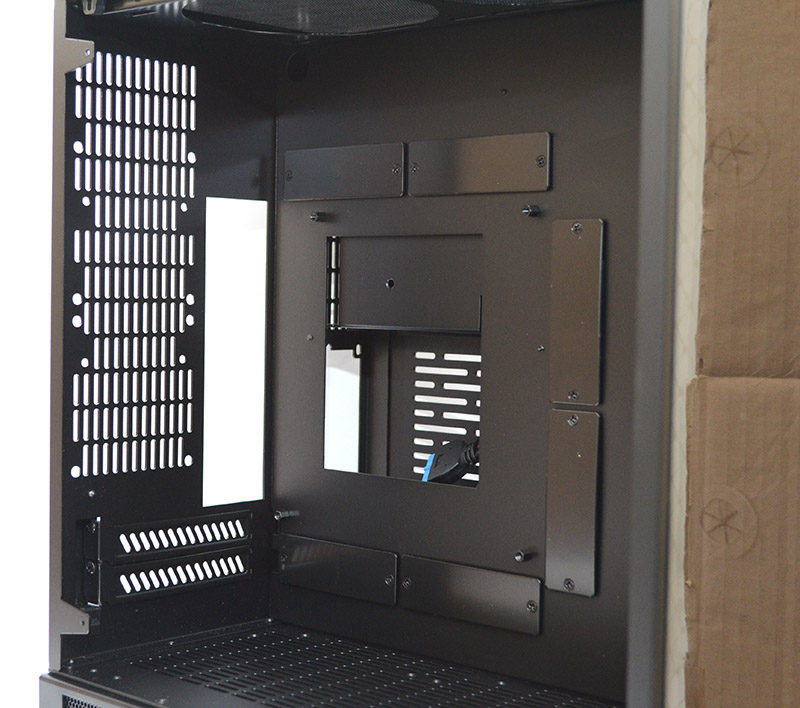
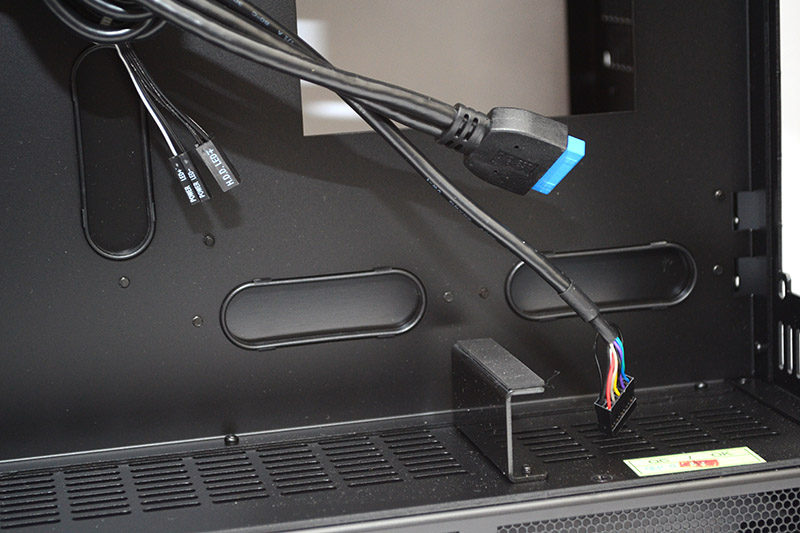
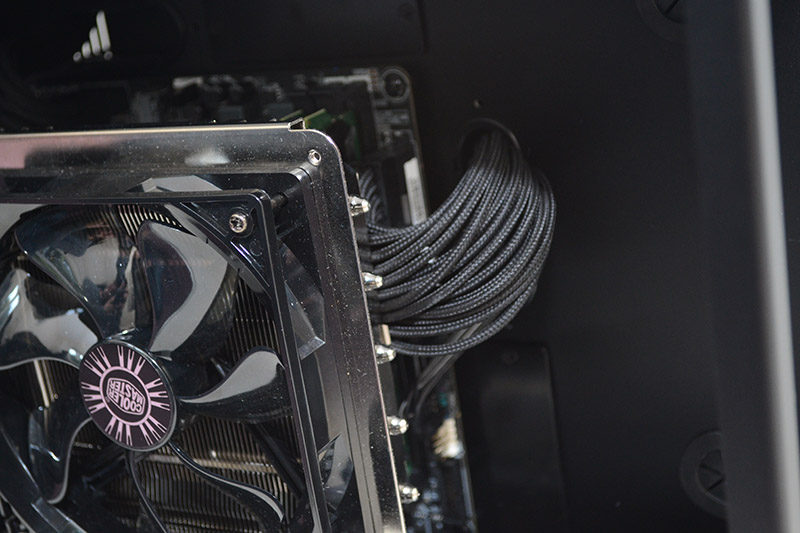
With the side panel removed, you can see the benefit of the dual-chamber design, as it looks super clean in here. There are six cable routing holes around the motherboard, two on the top, two on the right, two at the bottom, and what’s really interesting is that they have metal covers screwed into place. These covers can be removed, revealing a cut-out hole, but if you’re not using them, they stay perfectly hidden and don’t leave your chassis full of holes; that’s a really nice touch. There’s also two small rubber grommets towards the front, which should prove handy for routing water cooling tubing from a pump hidden in the rear compartment of the chassis.
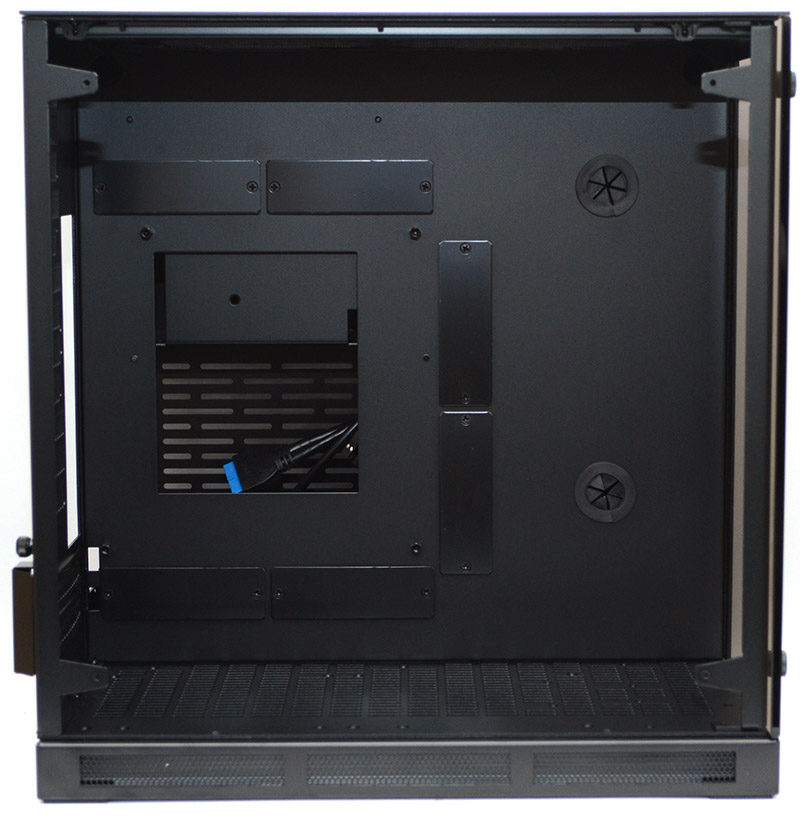
In the top of the chassis, there is room for two 120mm fans or a 240mm radiator, and there’s certainly a good amount of clearance above the motherboard too, so a good radiator setup shouldn’t conflict with other components.
There’s loads of ventilation in the base, which is obviously going to be beneficial to your
In the back, you’ll find room for two optional 80mm fans. In total, that means you can have two 120mm in the top, two 120mm in the bottom and two 80mm in the back. There’s an extra set of screw holes there too, as you can mount a single 2.5″ drive on the rear fan mounts, of course, you can only do so if you’re not installing a fan here.
With the right side panel removed, you can see the magnetic dust filter for the PSU which I mentioned earlier. It comes off easy enough, meaning you can easily clean it and remount it.
There’s quite a lot of space in the rear compartment, which is going to be a huge benefit for cable management. There’s also more than enough room here to house a good quality water cooling pump should you need one.
On this side, you can see those cable routing holes too, which are currently covered up on the other side to keep things looking neat and tidy. There’s room for a side-mounted SFX PSU here, with a rubber strip to rest it on to prevent scratches and vibrations.
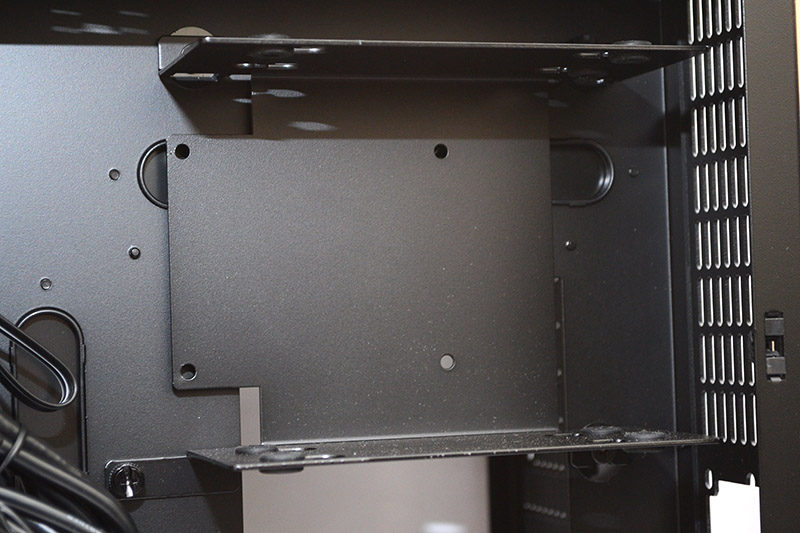
At the top, a removable HDD bay with support for 2 x 3.5″ and 1 x 2.5″ drives.
Under the top panel cover, you’ll find another magnetic dust filter, making that three magnetic dust fitlers in total for the PC-Q37.
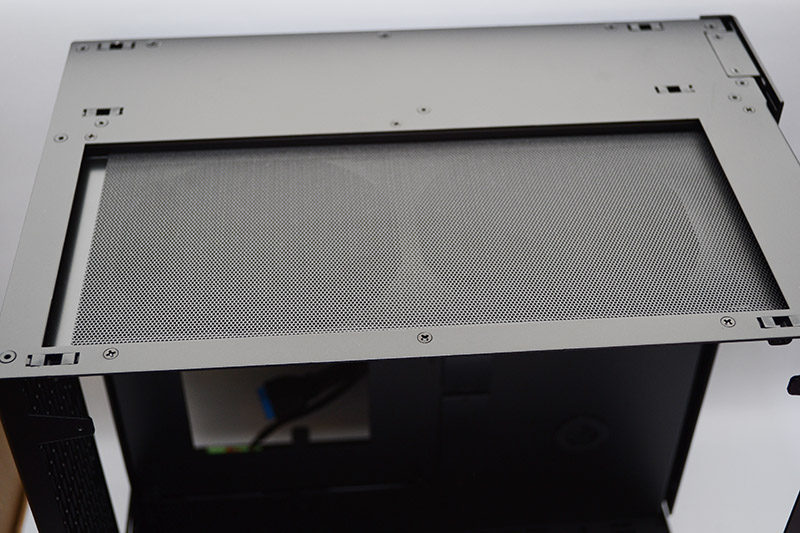
There are two 120mm mounts which are easily accessible, perfect for fans or radiators in the top of the chassis.
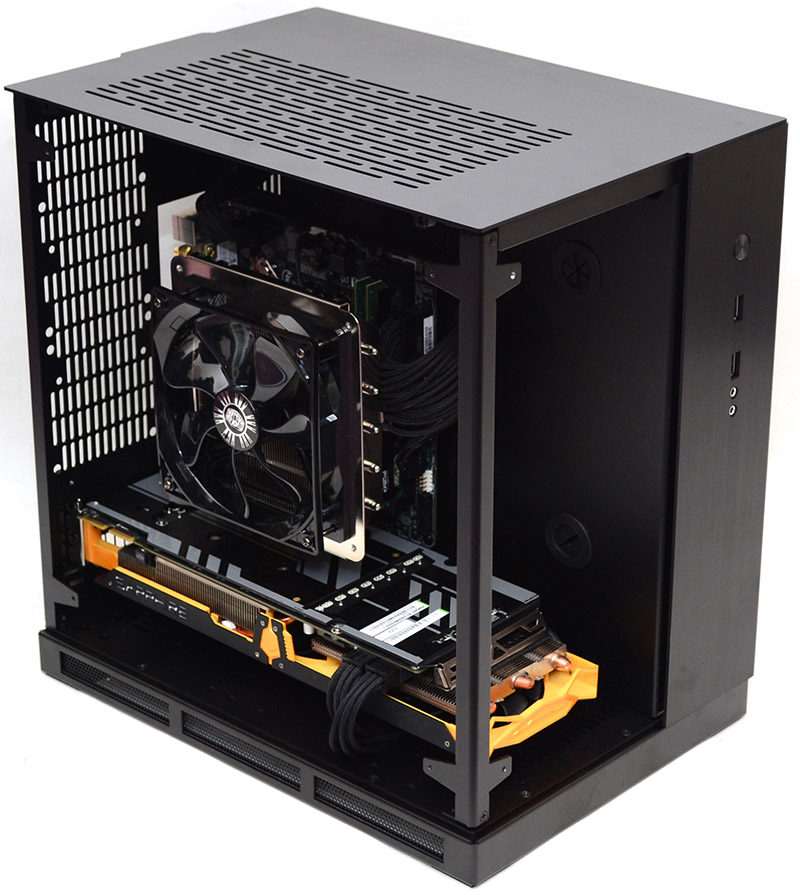
Another cool thing is that with the front panel and side panel glass removed, you have quite a lot of room to work with. Those using the maximum length of GPU will be able to take the card through the front panel should it not fit through the side.
Complete System
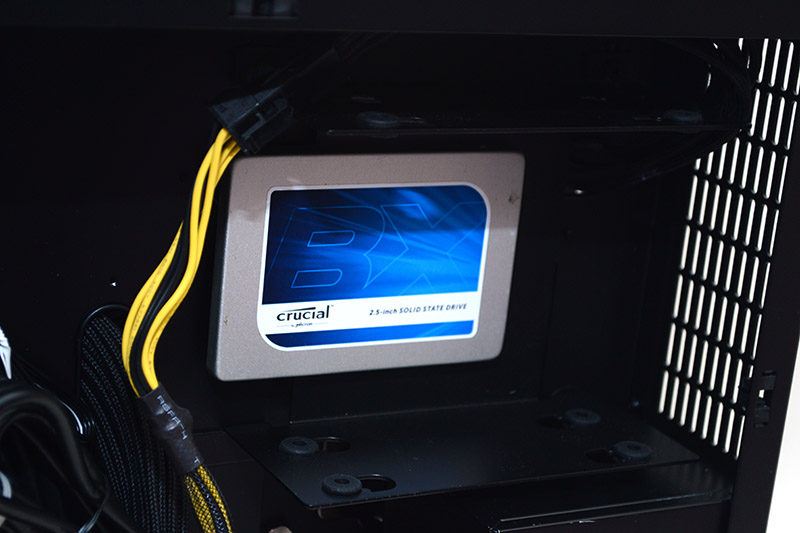
In the back of the chassis, I’ve fitted an SFX PSU and a 2.5″ hard drive. The cable management looks pretty chaotic, but that’s more a byproduct of my non-modular PSU. That being said, there’s still a huge amount of free space here and a few cable ties would free up any room you needed for other hardware, such as a water cooling pump.
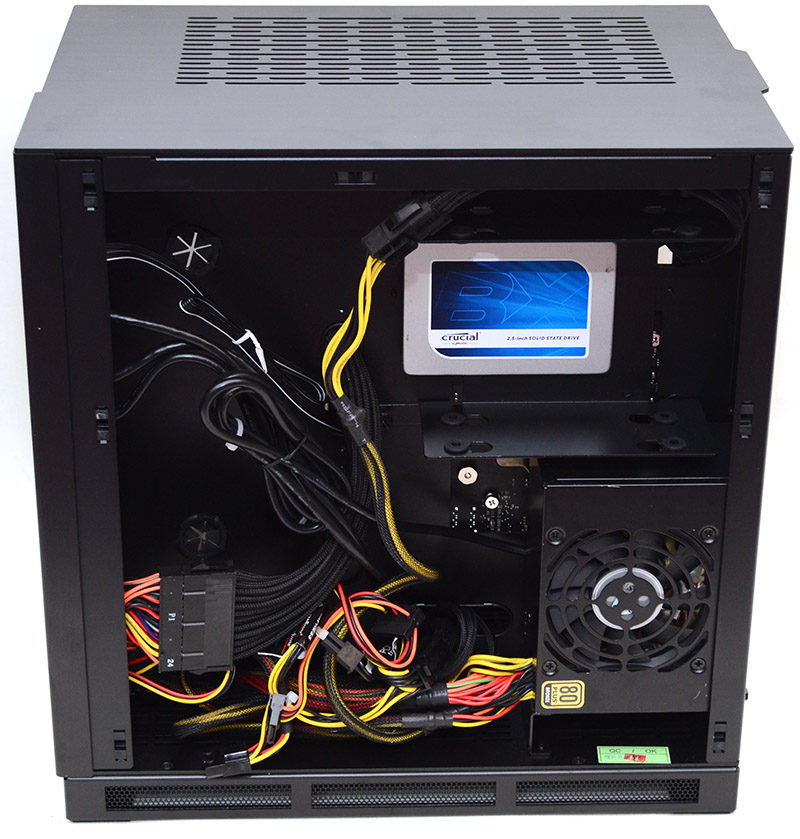
The hard drive bay works easily enough, with a 2.5″ drive screwing directly to the back of it, leaving both of the 3.5″ bays available to use.
Pop the right side panel back in place, and scruffy cables and all are hidden out of sight, keeping the left side of the build looking neat and tidy.

The cable management is insanely good on this build. I did use some black cable extensions to keep things looking smart though, as it would be a shame to leave it looking cheap when everything is on show through all that glass.
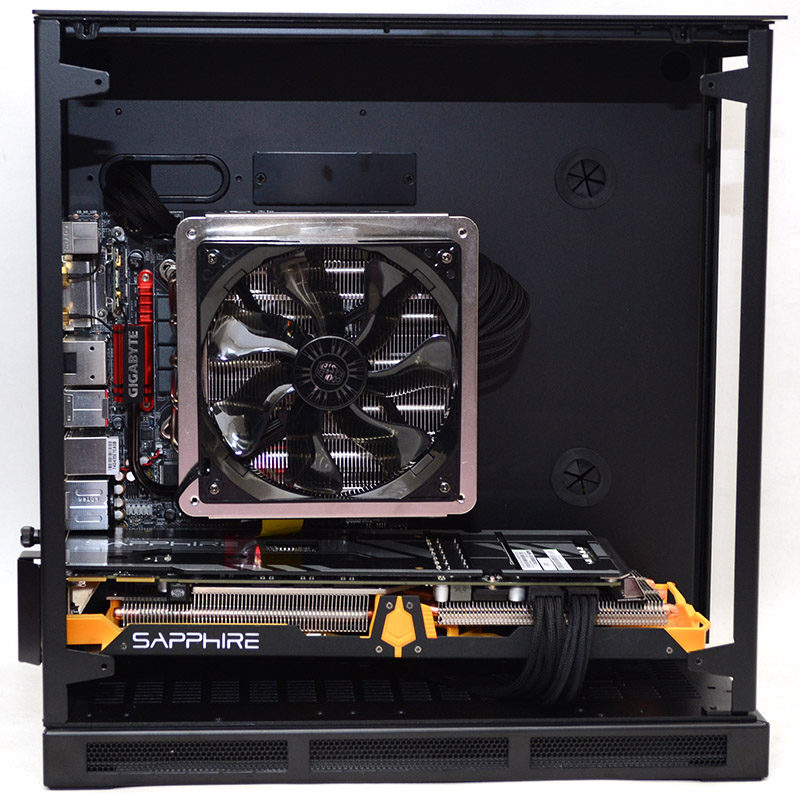
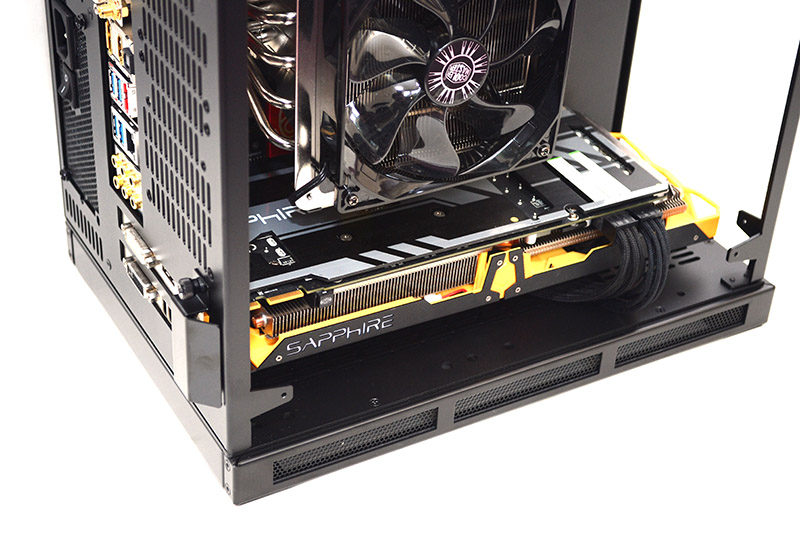
The Sapphire 270X Toxic is far from a small GPU, but it fits in the PC-Q37 perfectly, and being able to remove the front panel glass really made it so much easier to get the card installed.
There’s a decent amount of clearance on all sides of the GPU, which is great for airflow below the card to keep it cool, while also leaving room for wider cards, or water cooling brackets.
The cable management cut-outs are super easy to use, and having the aluminium screw on covers means that any holes you don’t need stay covered and blend in with the rest of the chassis perfectly.
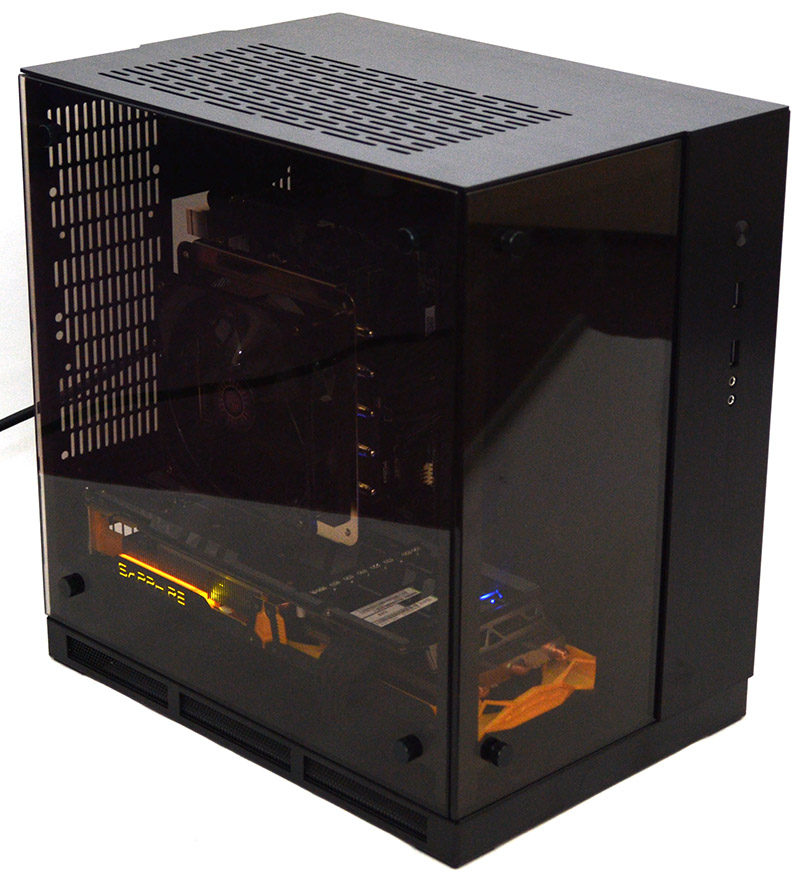
All glass panels back in place, and you get a rather fantastic view of your hardware. There’s a slight tint to the glass which does a nice job of hiding cables and fittings while showing off the highlights of your build perfectly.
Even from the front, you get a pretty good view and that’s perfect for those who want to show off their custom loop cooling, GPU and more.
The whole thing looks even cooler with the power on, as you see the lights glowing inside the case. I’m sure it would look even better if you threw in a few LED fans or a lighting kit too.
Final Thoughts
Price
Crafted beautifully from aluminium and tempered glass, this was never going to be a cheap chassis, but as the saying goes “you get what you pay for.” The Lian Li PC-Q37 WX is available in the US for around $229, and a UK release will be following fairly soon, but you could easily expect a price in the ballpark of £200.
Overview
I’m a little bit in love with this chassis, from the moment you take it out of the box you can tell it’s a premium quality product from top to bottom, inside and out. Working with it was an absolute joy, and when you really get into it, you can see a lot of thought has gone into its overall design and layout.
The build quality is as good as it gets, with a very strong and lightweight chassis, backed up by two panels of thick and tinted tempered glass. If you had this on your desktop, you know it is going to look great. The dual chamber design is ideal for those who love a clean looking build, moving the PSU, hard drive bays and possibly even some water cooling hardware such as a pump, all out of sight. I love the cable routing too, instead of the usual rubber grommets, those aluminium covers can be left in place and looking smart, just remove the ones you need and you’re good to go.
When it comes to showing off your motherboard, CPU cooler and graphics card, a tempered glass window is perfect. The PC-Q37 must be twice as good then, as it has two glass panels, right? Of course, the aesthetics are one thing, but the ability to lift out that front glass panel was a huge benefit to the installation process too. This is a small chassis after all, so having that extra bit of elbow room to maneuver the GPU was a big benefit overall.
The only kicker here is the price, this isn’t going to appeal to the average consumer but more the professionals out there. If you want a great looking chassis that’s going to be out on show for your office, or even just a compact water-cooled system, it’s going to appeal to your deeper pockets. Of course, if you can splash the cash on it for a daily gaming rig, you wouldn’t regret it, as it’s one of the nicest mini-ITX products on the market today.
Pros
- Exceptional build quality
- Two tempered glass windows
- Dual chamber design
- Compact design
- Great cable routing options
Cons
- Quite expensive
“It may be expensive, but you’ll struggle to find anything this well made or good-looking at any other price range. If you’re eager to have a clean-looking build that shows off the best-looking parts of your hardware, the PC-Q37 is the way to go.”

Lian Li PC-Q37 Mini-ITX Chassis Review


