Anycubic Kobra Max 3D Printer Review
Brandon Dodman / 2 years ago
Setup & Calibration
Once the printer is assembled the calibration process is relatively simple and just requires a little time to fine-tune exactly. Upon first boot of the printer you will need to have the printer do a manual homing before you start printing, this will calibrate the home for the printer which will allow the printer to know its exact coordinates for a perfect print.
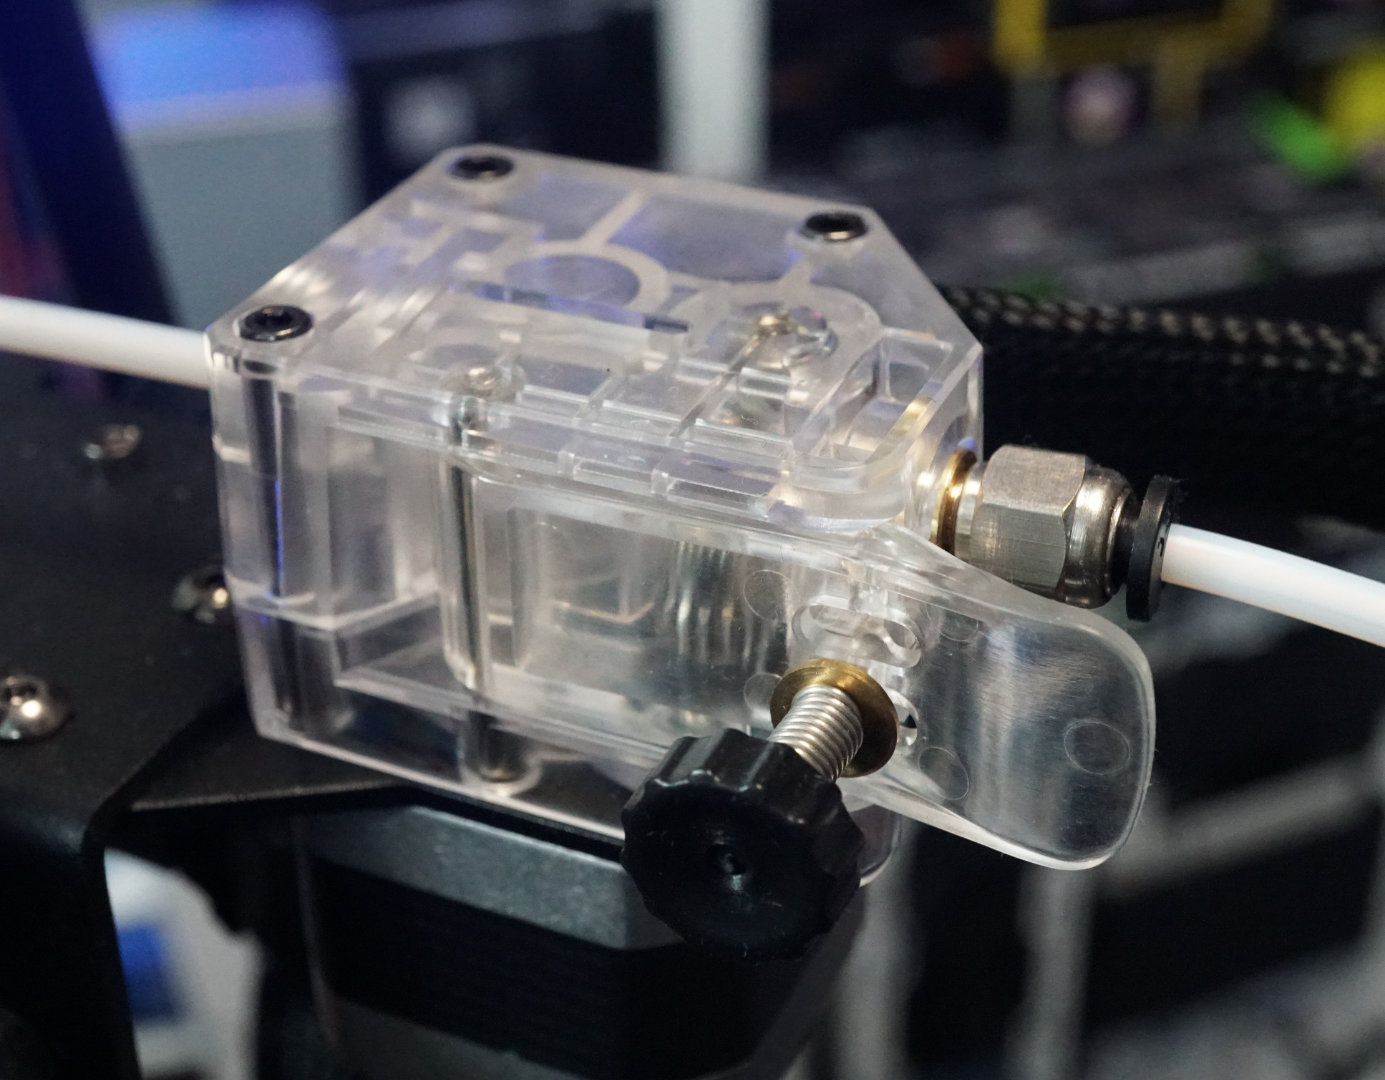
After homing the printer you will need to adjust extruder tension. To do this you need to navigate to the filament page in the Prepare page of the menu and select filament in, if the printer isn’t already at the right temperature for this step it will now begin heating up. Once it is at the correct temperature you will need to press the filament in button again for the extruder to begin moving, you then insert the filament and wait for it to reach the hot end and starts extruding. With the filament extruding you will need to adjust the tension on a spring-loaded screw until the filament is coming out cleanly.
The final aspect of calibration is the Z-Axis Offset, this is an incredibly important aspect as it can ruin an entire print. Unlike the Prusa that I am used to, the Z-Axis offset has to be done during a print instead of being a separate calibration option. To begin the process you need to start printing a model (there is one on the included micro SD card) and when it starts printing you need to keep an eye on the first layer to make sure that it matches the guide in the instructions. It is a good idea to cancel the print multiple times to allow yourself more time to be certain of the first layer, you can always see how the results come out though and adjust accordingly.
Calibration Cube
A Calibration cube is quite as simple as it sounds, it is a cube that features an “X”, “Y” and “Z” embedded in it for each respective axis of the printer. The embedded letters allow you to look for any warping or layer shifts on the corresponding axis and will let you know which axis needs adjusting. Generally, you will be printing many of these cubes one after another making changes where necessary until you have a perfect cube. The calibration cube we used can be found on Thingiverse here.
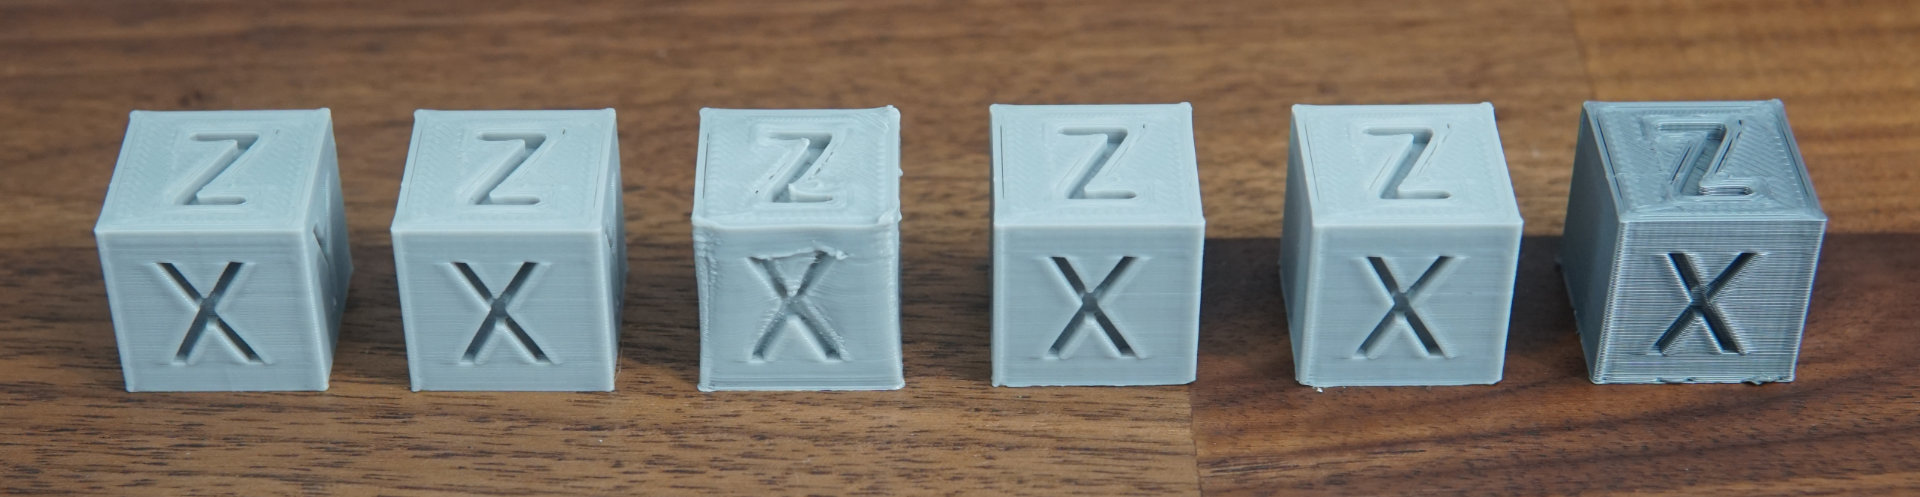
We printed five calibration cubes and a sixth in a different material. With each print, we had adjusted some settings until we found the right balance of everything to print a good cube. The settings we changed were the z-axis offset and the extruder tightness. We never reached absolute perfection but I believe this may be because of the slicing program we used and not the printer itself.


You can see all of the tests we did here in closer detail and see how changes to the printer as small as 0.05mm can make a difference to print quality, and also how the different materials behaved differently and ended up having a different look, ignoring the colour difference of course.


