be quiet! Pure Loop 2 FX 360mm AIO Liquid Cooler Review
Mike Sanders / 2 years ago
Installation
While the front cover to the manual for the be quiet! Pure Loop 2 FX, the interior quality is quite notably less nice. In terms of the information presented though, it provides an excellent combination of written instructions and diagrams helping you easily ascertain what you have to do to get this fitted to your system.

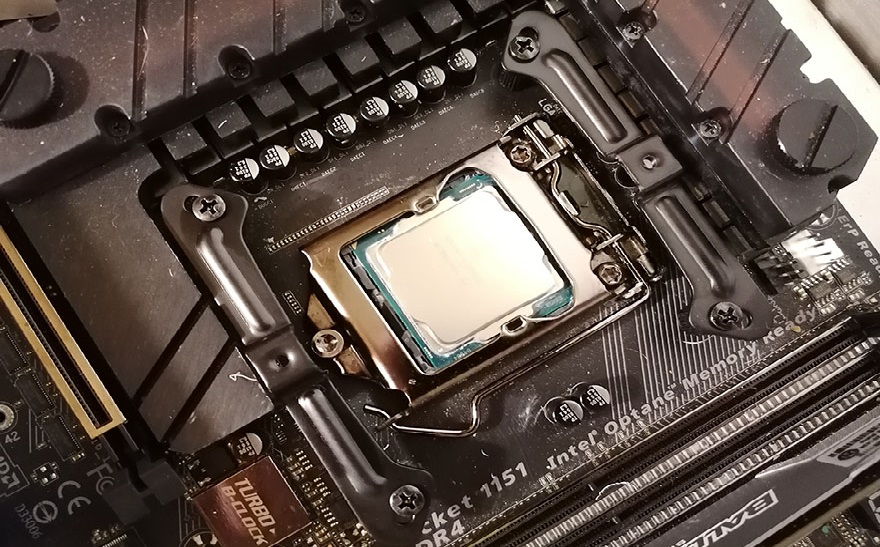
Mounting
While a vast improvement on their older mounting system, their new methodology still isn’t as entirely easy as it could be. It’s not necessarily difficult, but there are a lot of very fiddly aspects at play here. You have a lot of small screws, and yes, even rubber spacers, that require a fairly steady hand and a decent bit of patience.
It’s not impossible, but if you were installing this within an already assembled system (within its case), you’d undoubtedly find it a lot harder than us with the benefit of an open bench. Overall though, it’s not bad, but once again, be quiet! do still have more than a little room for improvement in terms of their installation methodology. More than anything though, I sincerely wish that they’d provide a spare screw and rubber spacer in their accessories because, through one very easily done slip, you could be spending the next 10 minutes hunting for a part you very much require!
Overall Thoughts
From out of the box and onto our test bench, the be quiet! Pure Loop 2 FX took us roughly 15-20 minutes to install. This is, clearly, quite a notable amount of time, but it does predominantly come down to three key factors.
Firstly, as noted above, the installation methodology isn’t the best or easiest to work with.
Secondly, the manual provides no real information in regards to the hub controller. Sure, it’s fairly intuitive, but with so many cables it can feel a little… Overwhelming. With the lack of any specific directions even on the hub itself (other than the connector to your motherboard to direct the PWM settings), while the hub controller is undoubtedly a helpful addition, a step-by-step guide of hooking your AIO up to it (and your motherboard) would’ve helped hugely.
And the third time factor? Well, this is an unavoidable one and that’s simply the remit that as a 360mm AIO, you have 3 fans to install to the radiator. Getting the fans and 12 screws in place simply takes time, but this is clearly entirely unavoidable and no grumble at be quiet!

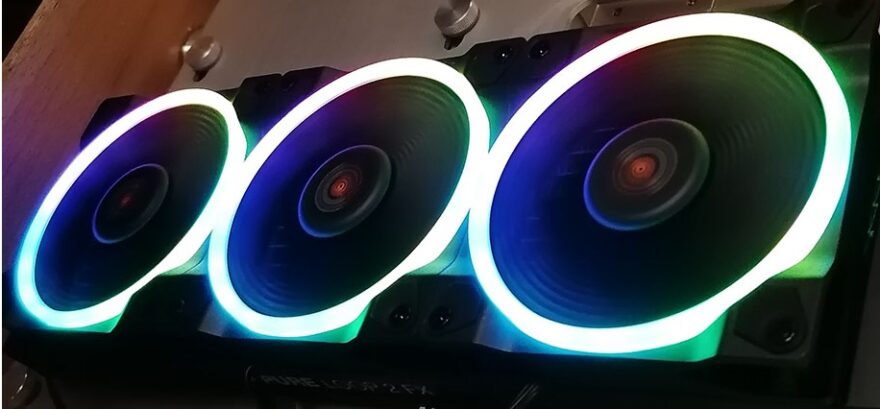
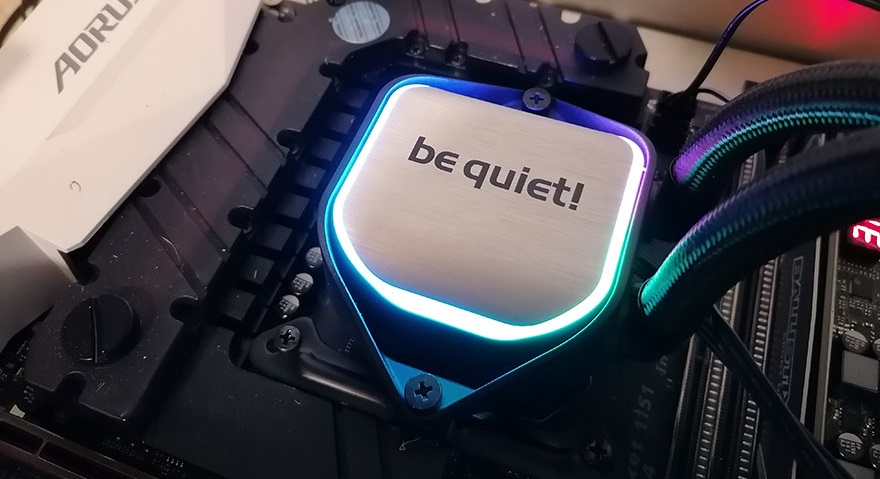
Once installed though, the ARGB lighting effects on both the CPU and radiator fans look excellent. They’re bright, vibrant, punchy, and offer plenty of customisable patterns through your motherboard’s ARGB controller. – Overall, while aspects of the be quiet! Pure Loop 2 FX’s installation could be easier, it’s not impossible or, indeed, overly difficult. If you take your time, have some care with the smaller parts, and pay attention, you’ll get it right!
Will it perform anything as well as it looks though? Well, let’s fire our test bench up and find out!