Corsair 2500 Series Dual Chamber mATX Case Review
Peter Donnell / 3 months ago
Interior
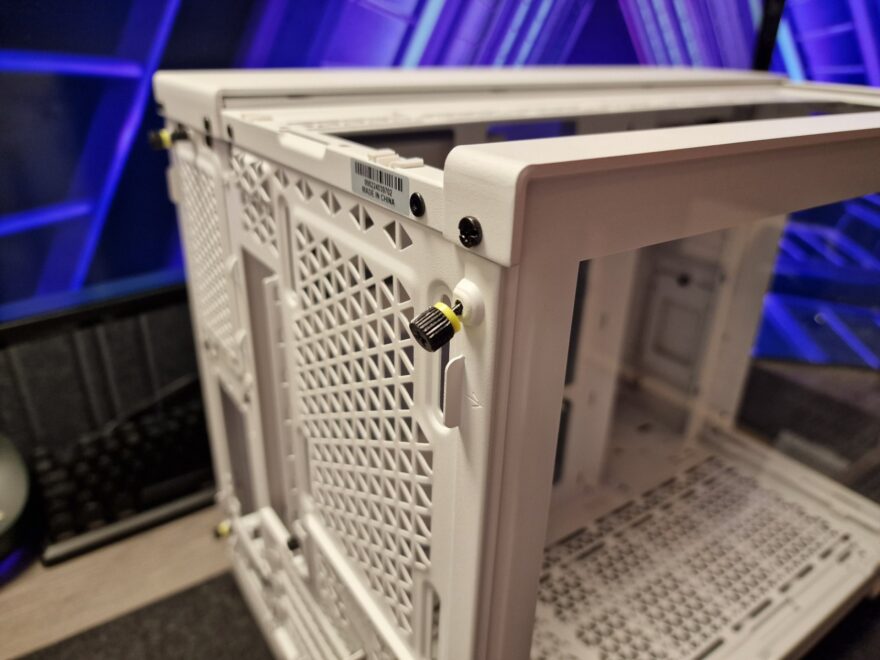
I like little details, and the side panel screws have their own little yellow rubber grommets, and the screws are designed to stay in the socket when you open the case, so you’re unlikely to lose them.

The glass panel is screwed in at the back but uses pegs on the top to secure it further, and three hooks on the bottom.

So you unscrew it, pull the top edge forward, and then lift it off of the hinges to remove it.

There’s a lot of space in here, as while this is a micro-ATX case, it’s a relatively large micro-ATX case! There’s room enough in the bottom of the case for a 360mm radiator, but keep in mind GPU thickness will be an important factor in what you can fit in the bottom of the case. At the very least, some fans, or just some passive air intake are still welcome features.

The mounts support 120/140mm spacings, or you can mount 120mm hardware nearer or further away from the motherboard, which is pretty cool.

Cable management is a big deal for this case, especially since the build is going to be so visible, doing a good job will be vital to getting a great final product. There are numerous holes, around and behind the motherboard, as this case will support the new motherboard with hidden power connectors.

There’s a gargantuan recessed section here, allowing vast amounts of room for a radiator or fans. There should be little issue getting a thick 240mm radiator in here, and there are two SSD mounting plates behind the front panel too.

To give you an idea of the space, I can fit my Yeti mug in here just fine, not that I expect this was the intended usage, but at least if you’re not putting a cooler here, there’s room for a cool action figure or something.

Tucked into the side of this recess, there are three large rubber grommets, matching the white aesthetic of the case, and they’ll be black in the black version of the case too.

Around the back, you can easily unscrew and pop-off the mesh panel to get access.

There’s a good amount of space behind the motherboard, but keep in mind, that the lower section is for your PSU, while the upper section is for the HDD cage, with some space between allowing for storage of excess PSU cables.

This HDD cage is simple enough, with two 3.5″ trays that also support 2.5″ drives.


