Kingston HyperX DDR3 1800MHz 4GB Dual Channel Kit
Andy Ruffell / 14 years ago
Overclocking
The first step when overclocking is to make sure the memory is running at stock settings and is stable. Therefore, we made sure to run the memory at 1800MHz with the stock timings of 9-9-9-27 @ 1.7-1.9V. The voltage really does depend on your motherboard and power supply, and how efficiently the power can be pushed through to the memory.
Once we were able to boot into Windows using the stock speeds, we made sure that the memory was stable using various software. This also included coming out of Windows and running Memtest, which will flag any errors or stability issues up.
When overclocking memory there are many factors including the speed (DRAM Frequency), timings and voltages. Each aspect plays its part and limits the memory in some shape or form leaving different results depending on the scenario you use.
As a for instance, you could loosen the timings as far as they go which will enable you to get a higher overclock in terms of frequency, but the bandwidth will be affected due to the loose timings. We therefore believe that the best performance increase when overclocking is obtained by keeping the voltage and timings at stock, whilst pushing the frequency to its limit whilst keeping stability in mind.
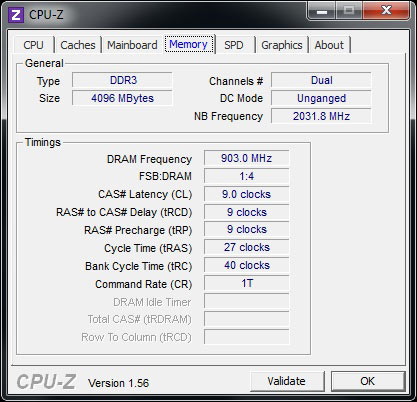
We were able to increase the DRAM frequency from the stock 900MHZ (1800MHz DDR3) to the stock 900MHz whilst maintaining the timings of 9-9-9-27 at 1.7-1.9V. How good are we? By having a voltage range, you’d expect at least 1MHz but by giving a little bit of extra juice to the modules, it didn’t help in the slightest. By loosening the timings and pushing the voltage up even more, we can expect a bit of scope for overclocking but for the quest of getting the best performance, it seems to run straight out of the box.


