Netis WF2375 AC600 Wireless Outdoor AP Router Review
Bohs Hansen / 7 years ago
Setup & User Interface
The setup and initialization of the Netis WF2375 are neither difficult nor does it take a long time. But you can save yourself some trouble by doing it in the right order. Before you mount it at its final location, I’d recommend that you keep it close to your normal setup as you’ll need to change a few things. Keeping the unit close to you allows for an easy view of the LEDs and thereby the unit’s status.
The cabling is easy, and you’ll just have to follow the included quick start guide. It guides you through the physical process as well as on how to connect to it. The latter requires more work than the first. But before we continue any further, I recommend that you head to Netis’ official product page for the access point and download the latest firmware. You’ll need it, and it’s easiest to do now before you continue with the setup.
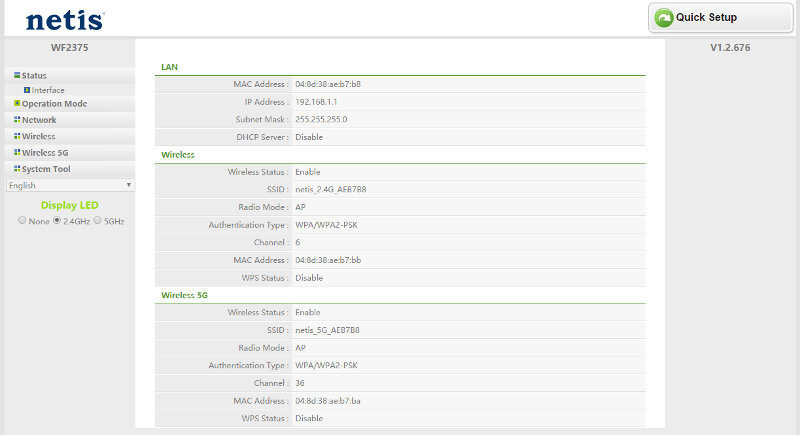
By default, the access point comes with a static IP address, and no DHCP enabled. The default IP address is 192.168.1.1 which means that it most likely will conflict with your existing network setup. To prevent this, we’ll disconnect our test system from any other network connection, set the IP address manually, and then connect to the access point’s web interface to configure it.
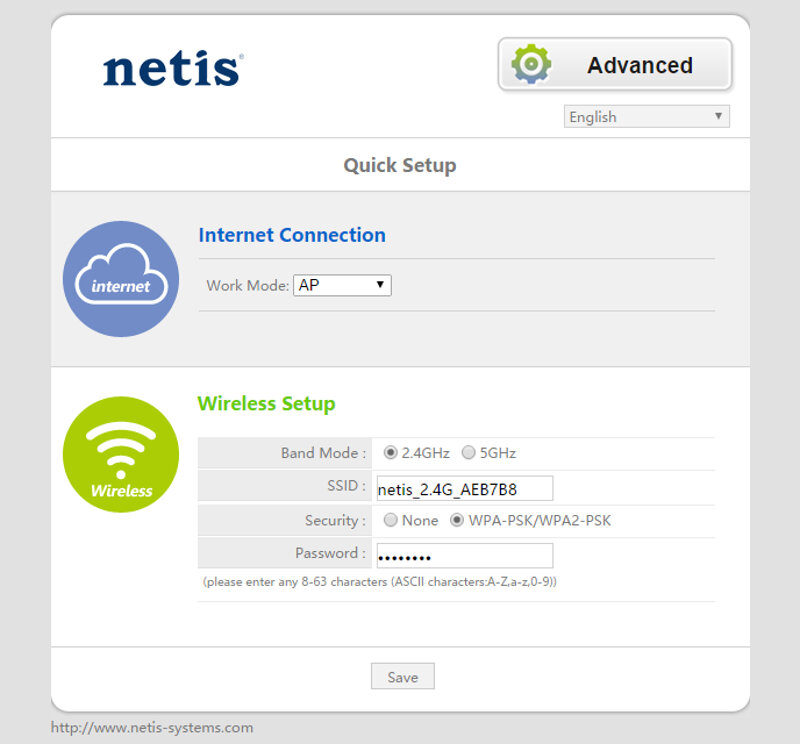
The basic setup doesn’t give use many options besides the mode and wireless basic wireless settings, so we will switch to the advanced setup instead. While there aren’t many options here either, there are more and the ones that we need.
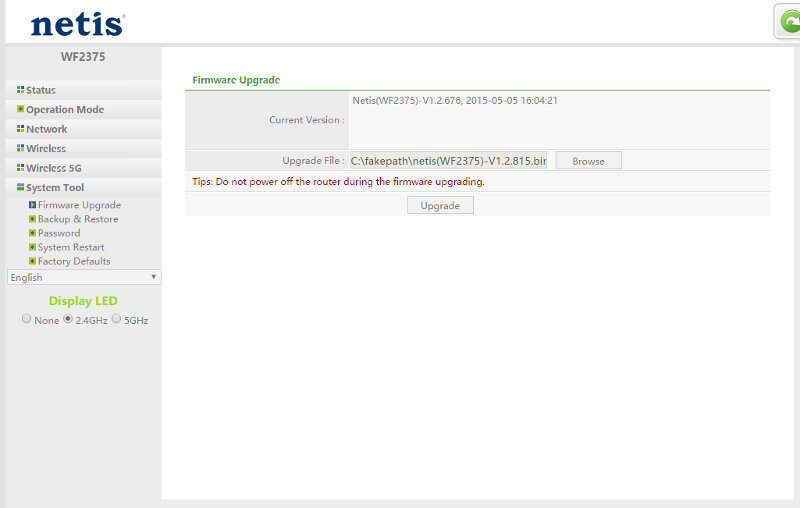
Your instincts will most likely tell you to go and change the network settings on the access point. This would allow you to revert your client back to its normal settings, but doing so now will result in you having to start over with the IP settings again. Instead, we’ll head deeper into the interface and upgrade the firmware first. The firmware upgrade will reset all your settings, and as such, it should be the first thing to do.
Since we need internet access to download the firmware and our setup most likely doesn’t have that at this point, it’s good that we already downloaded it before we started.
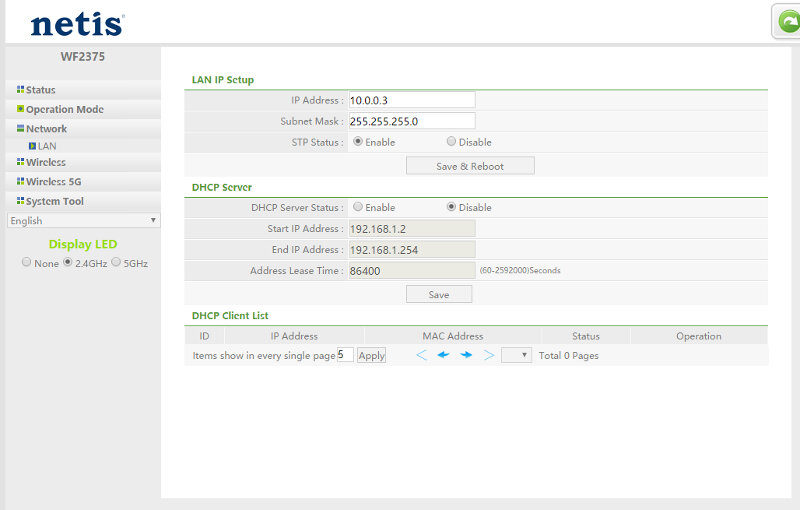
The firmware upgrade is quick, and once the access point has restarted itself, you can continue with the setup. We can now head into the Network/LAN settings and change the WP2375’s settings to something that fits our setup. You can enable the DHCP server on it, but that’s only needed if you want to run it in an access point router mode. In most scenarios, your standard router will handle the DHCP and two DHCP services running at once will probably create more conflicts that it will do you good.
And now we’re done with the basic setup. You can either continue with your settings or move the AP to its final mounting location.


