The case is easy enough to open up, just pull on the glass at the back of the case, and it pops out a bit. You can then get your hand in there and lift the glass up and out of the way.
There’s some foam on the inside, keeping the glass to metal seal nice and tight, while also preventing any unwanted vibrations between the two.
The interior looks great, albeit, it looks broadly the same as most NZXT recent cases from recent years. There are a few little tweaks though, but really, nothing significant. The length is slightly shorter, but it’s still a big case, so I doubt you’ll be short on room for even the largest GPUs on the market.
The PSU shroud offers up plenty of ventilation, cable routing holes, and a good-size cutaway from any front-mounted cooling. Of course, it’ll also hide the PSU and all your excess cables too.
There’s a cable cover that weaves through the case, starting here with an NZXT logo and covering the PSU shroud.
It then moves towards the top, offering up a stylish way of covering the bulk of the motherboard cables. There’s an elongated screw hole too, which could be used to mount liquid cooling hardware.
Actually, there’s another vertical screw mount back here too, and it never hurts to have options.
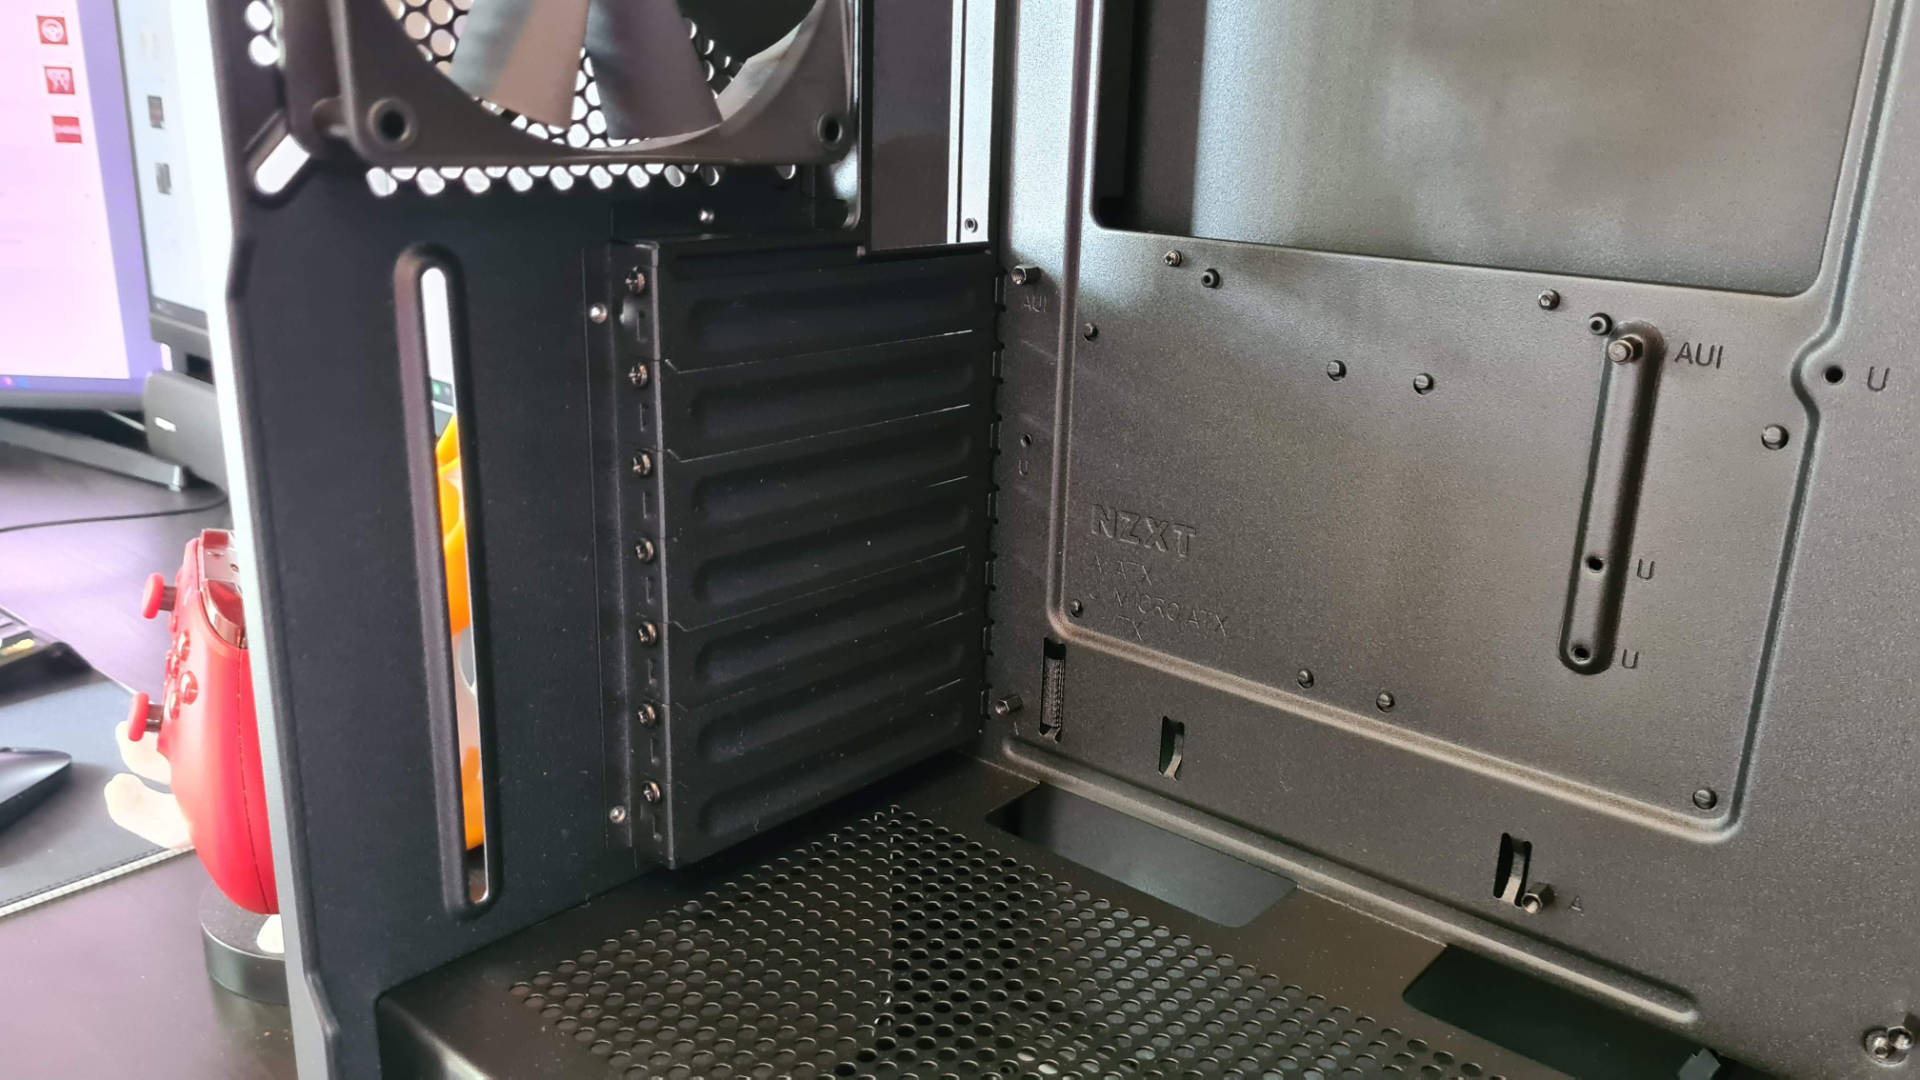
The case has two NZXT fans pre-installed, one in the front and one in the back. However, the fans sit on the outside of the frame, leaving much more space on the interior. However, there’s easily enough depth here for a 30mm radiator and more fans, if you wanted to use a push-pull configuration.
There’s room for a 360mm radiator in the front and in the top, but you’ll need to keep a check on those clearances in the front top so that hoses don’t conflict.
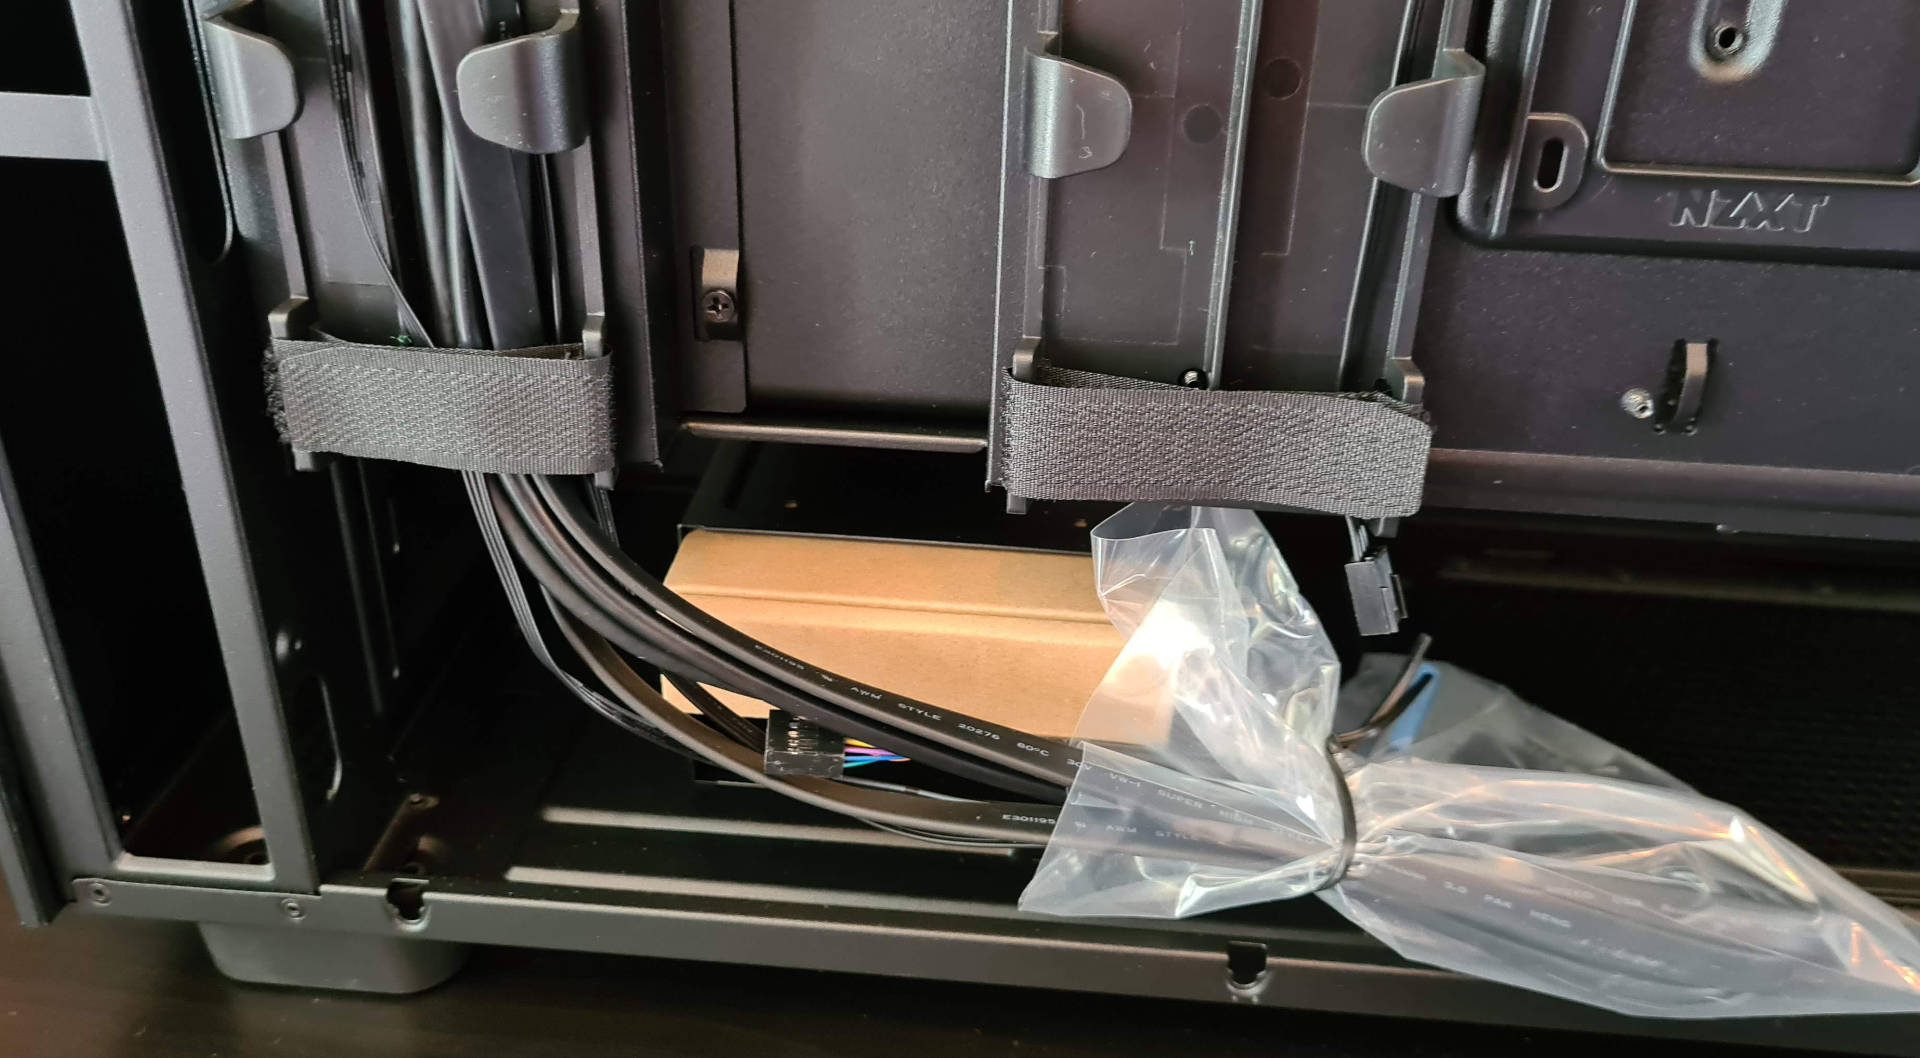
There are a lot of nice things going on behind the motherboard too. As you can see, there are Velcro straps everywhere, ten of them in total. There are also multiple cable tracks and cable tie loops. Honestly, if you build a system in this and your cable routing is a mess, you only have yourself to blame.
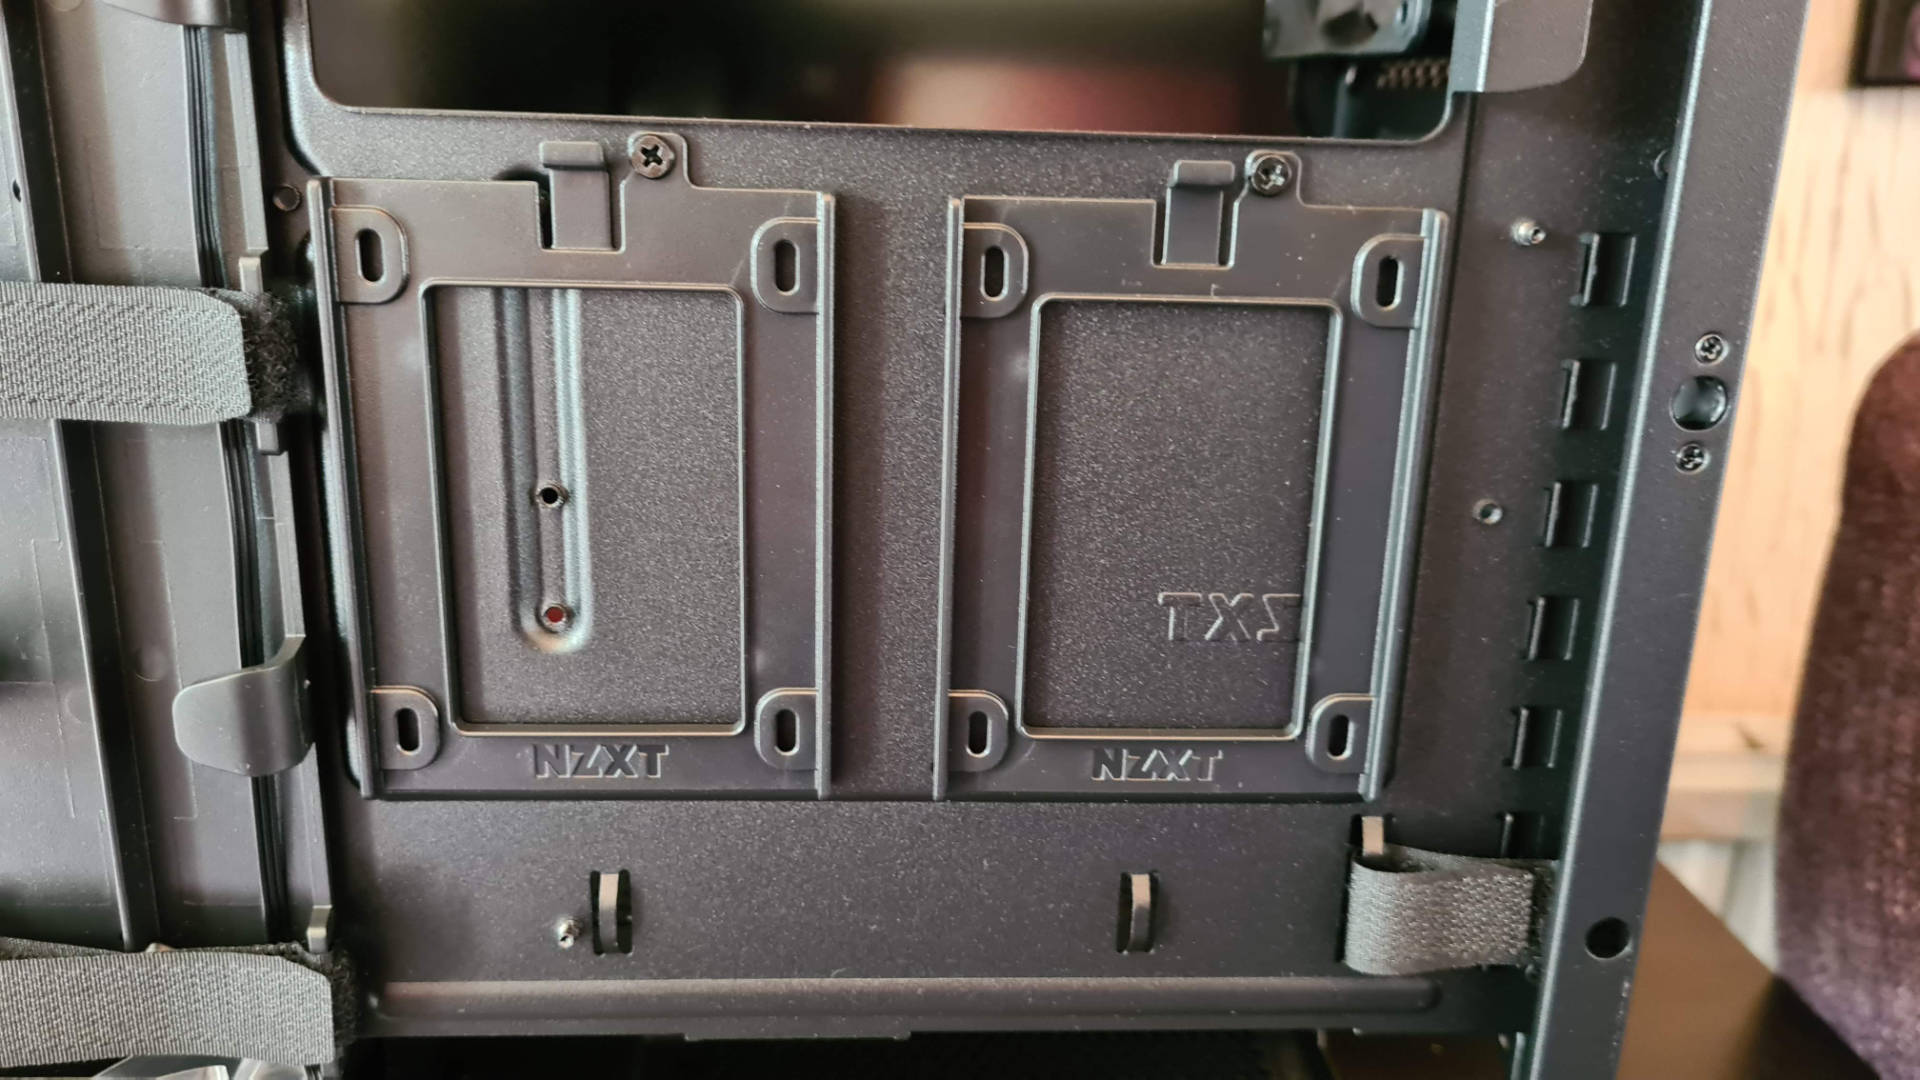
There are two SSD mounts right behind the motherboard.
Plus the HDD tray in the bottom can hold either 2 x 3.5″ or 2 x 2.5″ drives.
There’s loads of room for an ATX PSU. However, if you are short on space, the HDD cage can be moved/removed to suit your needs.
Finally, up on the top, you can loft off the entire metal panel, which is surprisingly heavy on its own. Below it, there’s a full-length dust filter.
Lift out the dust filter for easy cleaning, or to access the 120/140mm fan and radiator mounting bars below it.
MADFINER Games is a globally recognised Czech independent game studio that has recently released a…
Are you a fan of GeForce NOW? Well, if you are, or if you're still…
The next Helldivers 2 warbond is coming and recently Arrow Head Studios have revealed what…
110% mechanical keyboard with 109 keys in a UK ISO layout V-silk PBT keycaps with…
Recent years have seen Small Form Factor (SFF) PCs become increasingly popular. Obviously they are…
Introducing the Next Level Racing® Go Kart Plus cockpit, designed for the whole family to…