Synology DiskStation DS716+II 2-Bay SMB NAS Review
Bohs Hansen / 7 years ago
A Closer Look at the Details
Before we look at the NAS unit itself, let us have a look at what is inside the box we purchased. Naturally, there is the NAS itself, and you get a welcome and quick-start note along with a pack of screws for 2.5-inch drive usage. You also get a couple keys for your drive trays.
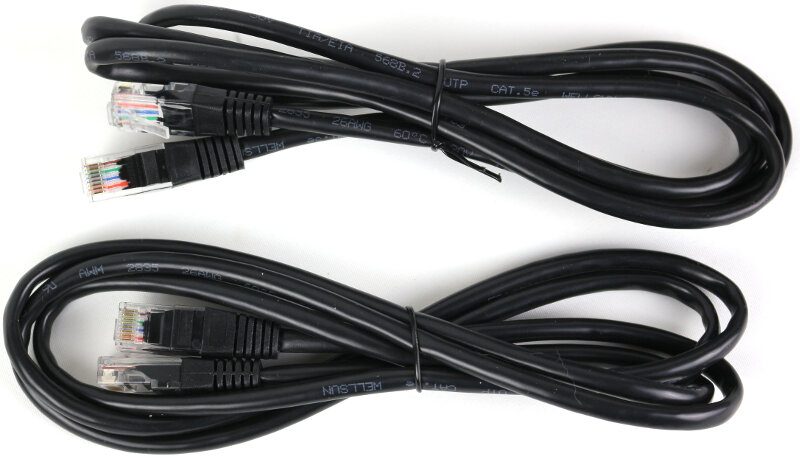
There are two RJ45 Cat5e network cables included, allowing you to connect the NAS with its full capabilities out of the box.
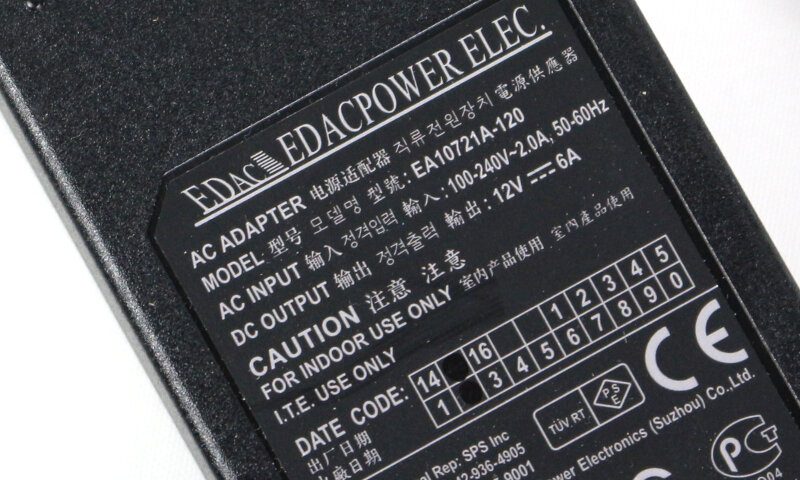
Naturally, there’s also a power supply included. The unit wouldn’t be much good without power. The connection cable will be one that fits for the region where you purchased it.
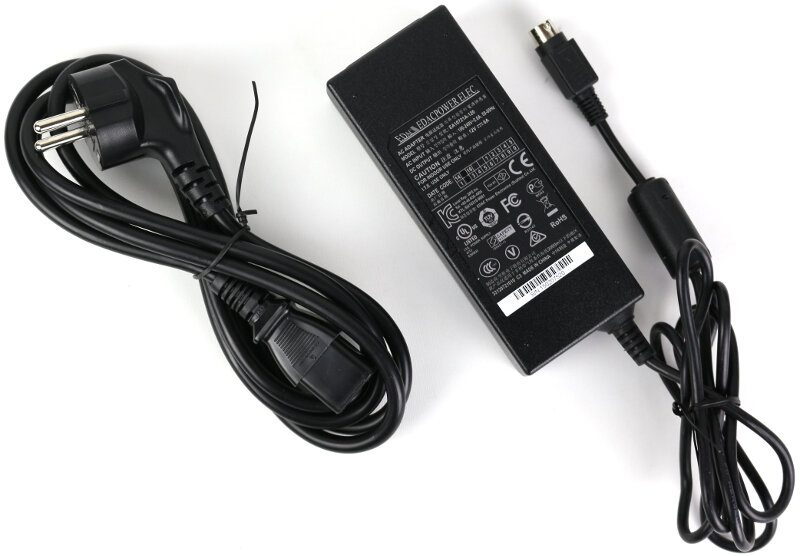
The power supply can deliver 6A at 12V, and that equals to a maximum power output of 72W.
The DS716+II NAS
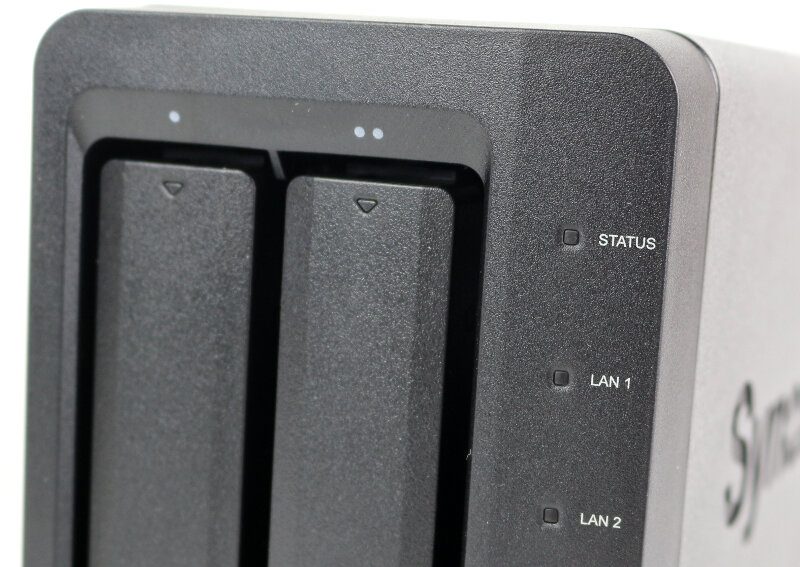
Now that we had a look at the accessories, it is time to have a look at the NAS itself. It’s packed with features despite its small size. Starting with the front, we have the power button and USB one-touch-copy button at the bottom, together with a USB 3.0 port. The buttons have built-in LEDs which double as activity lights. The drive trays each have a lock that can secure the trays and prevent accidental ejection.

The dots above the drive trays show which bay is which for easy recognition. When the software tells you that you need to do something with drive number X, then you’re able to identify it this way instead of guessing. Each of the drive trays has a LED forwarding stripe built in, bringing the drive’s activity into the drive bay. General status and the two Gigabit Ethernet LAN ports also have their own LEDs.
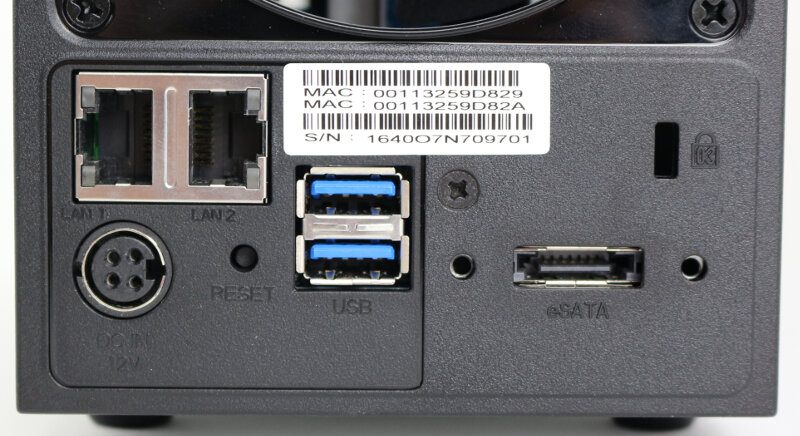
The rear side is where the majority of the connectors are. We see the two Gigabit Ethernet ports along with the two USB 3.0 ports and the single eSATA connector. There is also the ability to secure the system with a Kensington security lock.
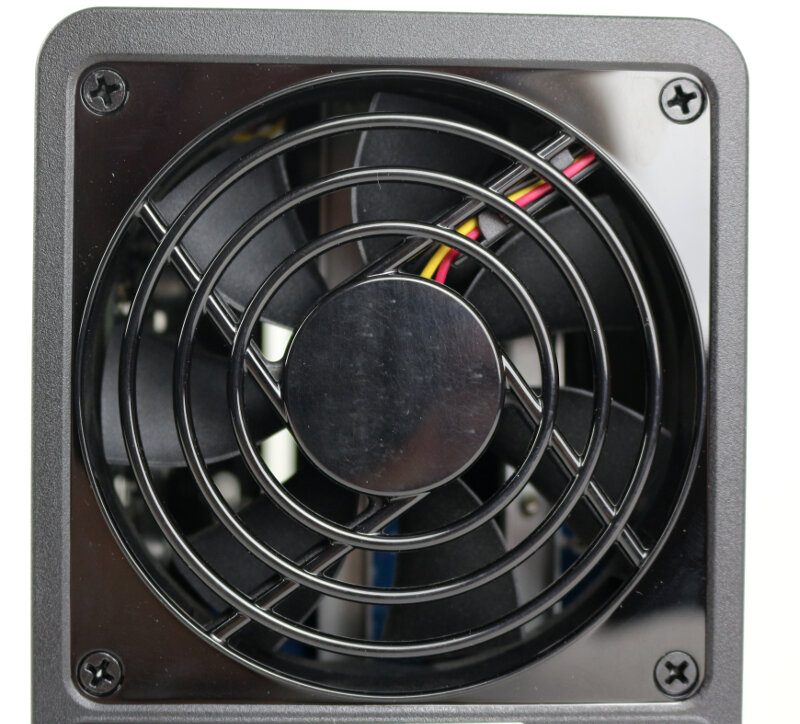
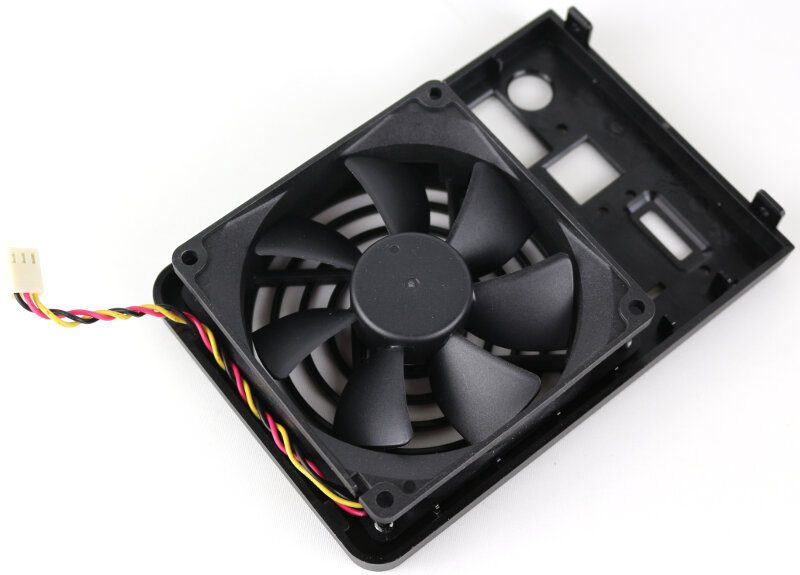
A single 92mm fan cools the system, and that is more than enough for a NAS like this. It doesn’t generate a lot of heat on its own, but the 92mm size keeps the noise level to a minimum.
The NAS draws fresh air in through the sides of the NAS. The Synology logo on each side also functions as an intake area. Fresh air also comes from the front and goes around the drive trays to keep the drives cool.
The drive trays offer tool-less installation for 3.5-inch drives. Simply pop the side ledges out, insert the drive, and pop them back in. Smaller 2.5-inch drives, such as SSDs, require you to use the included screws.

A look inside
It isn’t difficult to take the NAS apart either. Three screws are all it takes to remove the rear panel which has the fan attached to it. The easy fan access is great for cleaning purposes.
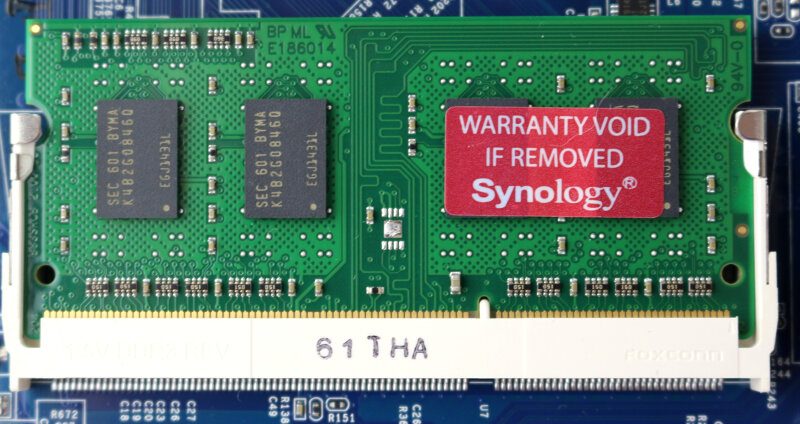
Removing the motherboard itself is a bit more tricky, but it isn’t something you’ll need to do. When you removed the rear panel, the top slides right off and get access to the SO-DIMM socket. A memory upgrade is the only reason you’ll need to open it up this far.
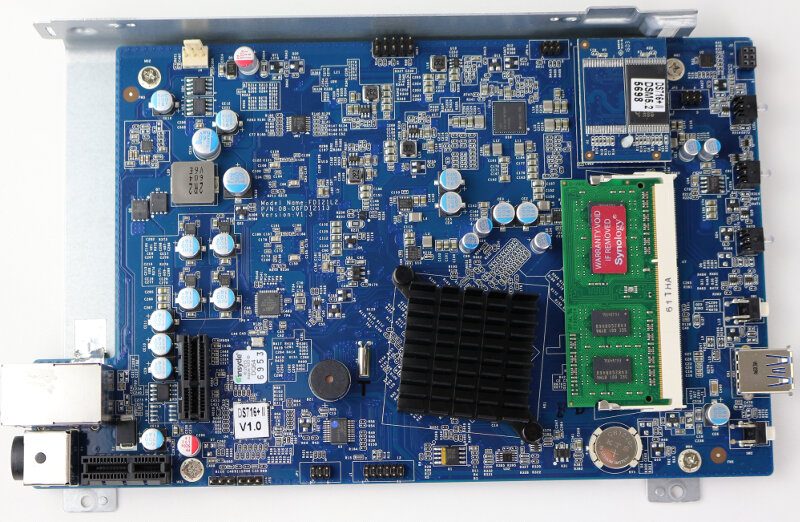
Sadly the system only features a single SO-DIMM socket which means that the memory will run as single-channel. However, it does support up to an 8GB DDR3 1600MHz module in the slot. Upgrading the memory can make the system more responsive and faster in the general loading of display items.
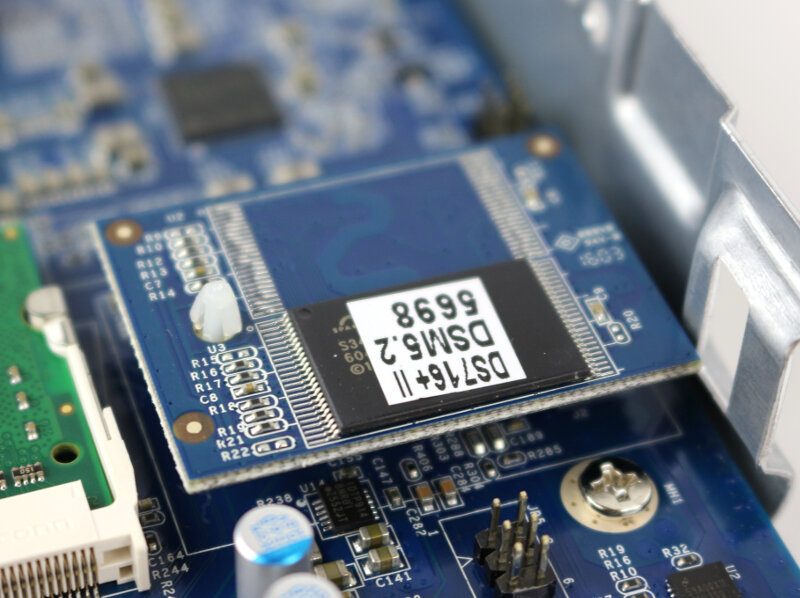
A USB flash module stores the operating system itself, and that is a method that we have seen in a lot of other NAS devices.
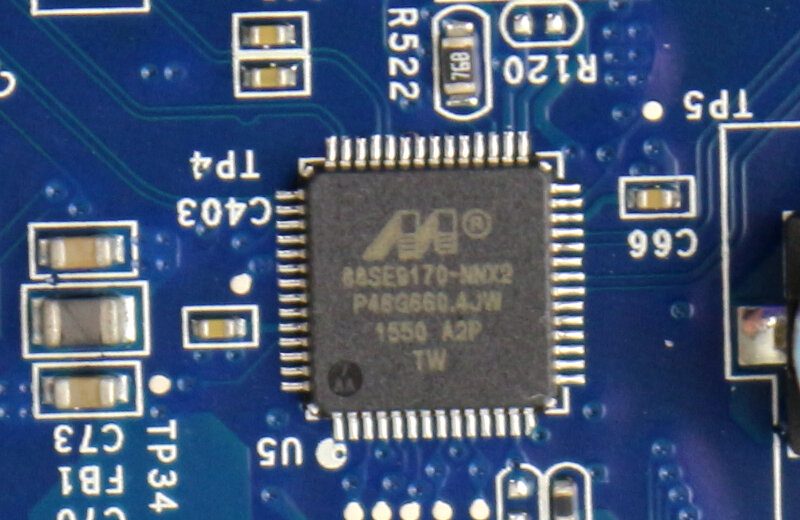
There aren’t a lot of extra chips on the motherboard, but we can spot the Marvell 88SE9170 bridge controller. It is a dual 6Gbps SATA port PCIe 2.0 x1 bridge controller, and it is the one that connects our two drive bays with the system.
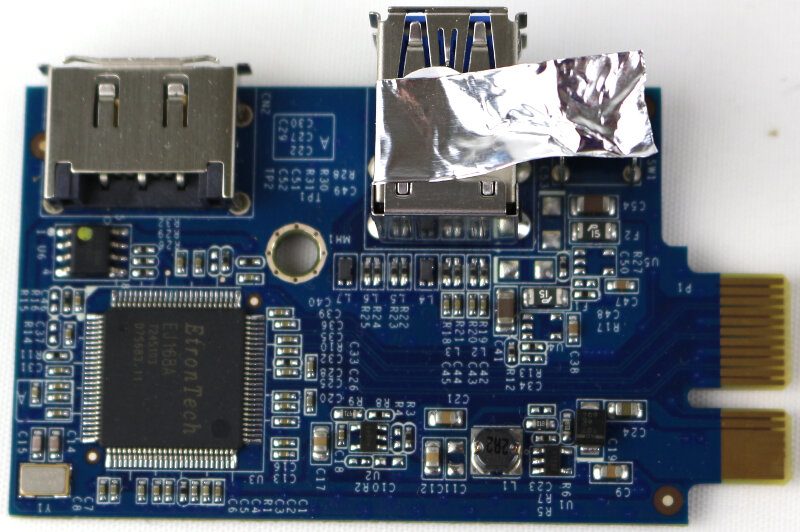
Daughter Boards
The Marvell controller connects this PCIe bridge card, and that’s the one your drives connect to when you slide the bays into the unit.
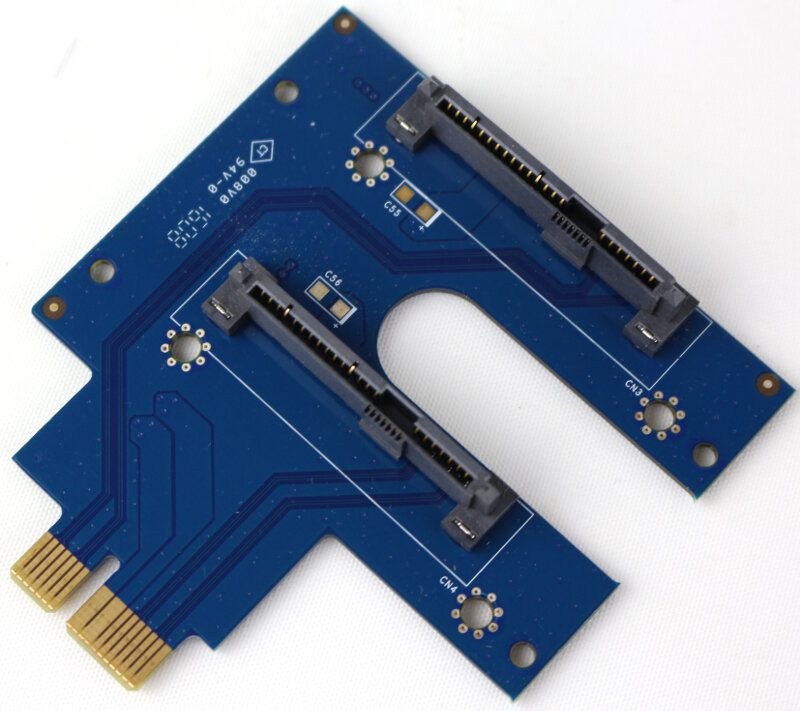
There is a second daughterboard at the rear of the unit, holding the rear USB and eSATA ports. This add-in card features an Etron EJ168 USB 3.0 Host Controller. It can perform with 5Gbps total, meaning 2.5Gbps per port when used simultaneously. The CPU control the front USB port.