Thermaltake Smart DPS G 650 Power Supply Review
Peter Donnell / 7 years ago
 Many of you likely have a fairly standard power supply, not to say that it’s a bad unit, but that it’s a simple case of turning on your PC, it does its job, and you never really think about it. Thermaltake might not be the first to create smart PSU technology, but the benefits these units can provide over a standard unit are huge, as we’re hoping to find with their new DPS G 650W Gold unit today.
“The Thermaltake SMART DPS G Gold Series are smart power supply units that incorporate various high-tech components, leading technology and Eco-friendly commendations, featuring 80 PLUS Gold certification with a semi-modular that always accommodate any mainstream build under any circumstance. The combination of Smart DPS G Gold and three intelligent platforms – DPS G PC APP 2.0, DPS G Smart Power Management (SPM) Cloud 1.0, and DPS G Mobile APP 1.0 helps users not just monitor smart power supply units, but also save the energy, reduce CO2 emission, and eventually protect the Earth.”
The DPS G offers a range of features, such as desktop software and mobile apps that allow you to monitor and adjust the performance of your systems from anywhere in the world. For systems that need to be running full-time, especially for something like a rendering rig or workstation, power delivery and efficiency are extremely important, especially so for those running many systems simultaneously.
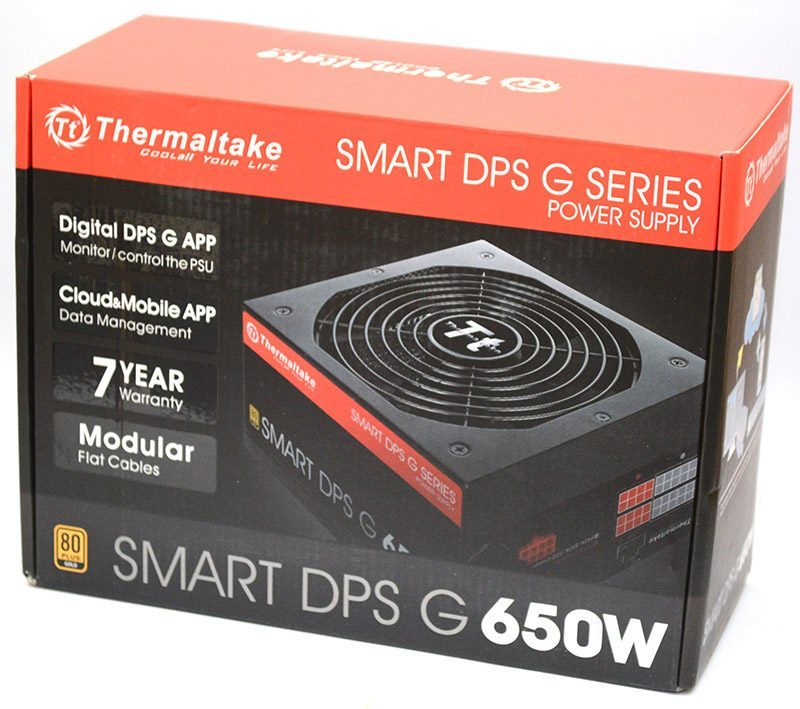
Packaging and Accessories
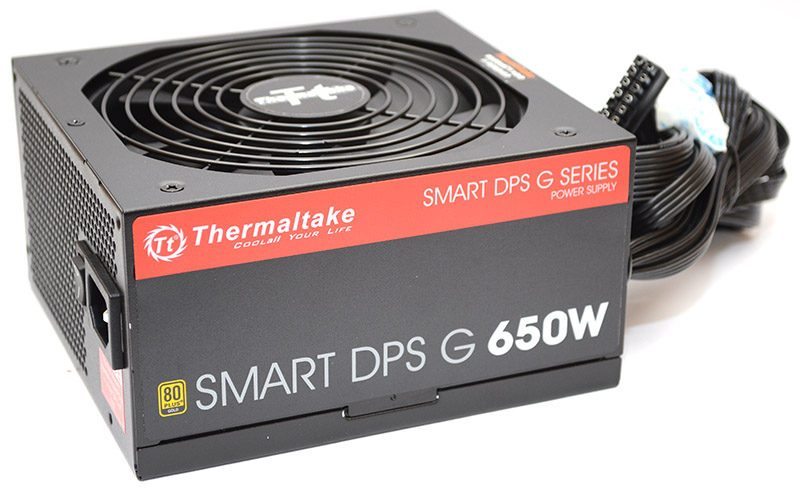
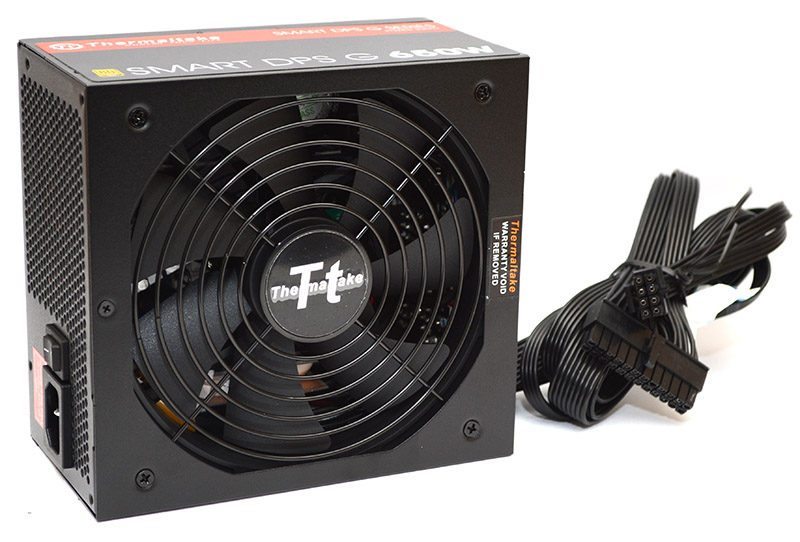
The box is nicely designed, with bright colours, a good image of the PSU, and information about the warranty, app and modular cables.
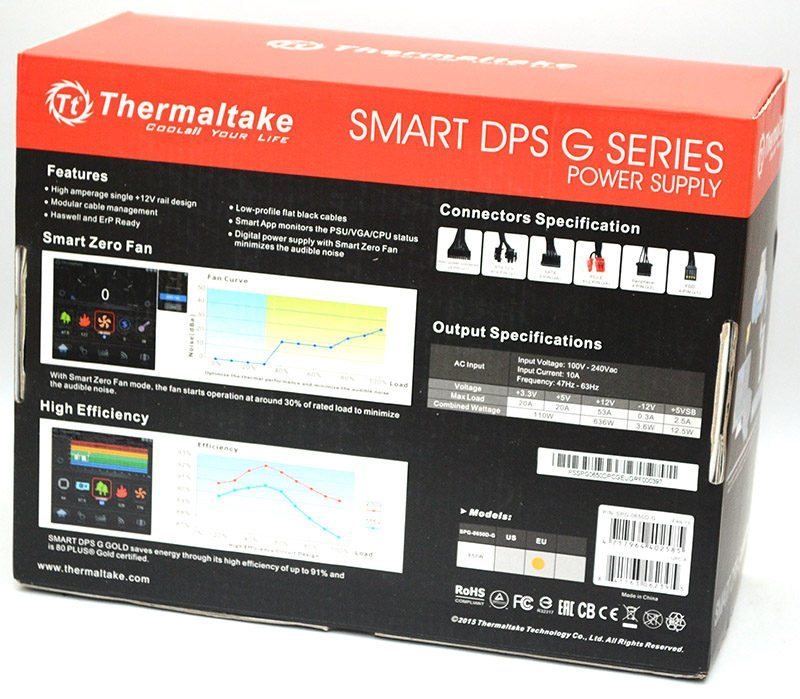
Around the back, a list of all included cables, power ratings, and more details about the smart features.
In the box, you’ll find the mains power cable, some cable ties, four mounting screws, and the usual documentation.
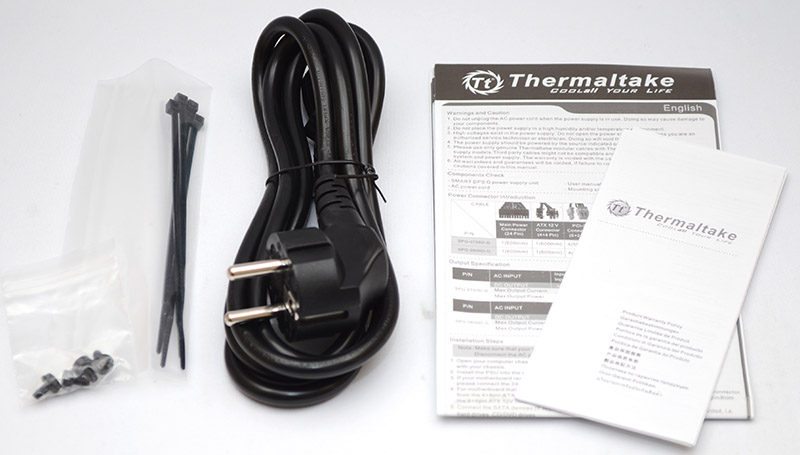
There’s also a handy protective bag for storing all of the modular cables.

For a 650W gold rated unit, the DPS G is a nice and compact unit, and while the design isn’t anything too fancy, it looks presentable with it’s black paintwork and red highlights.
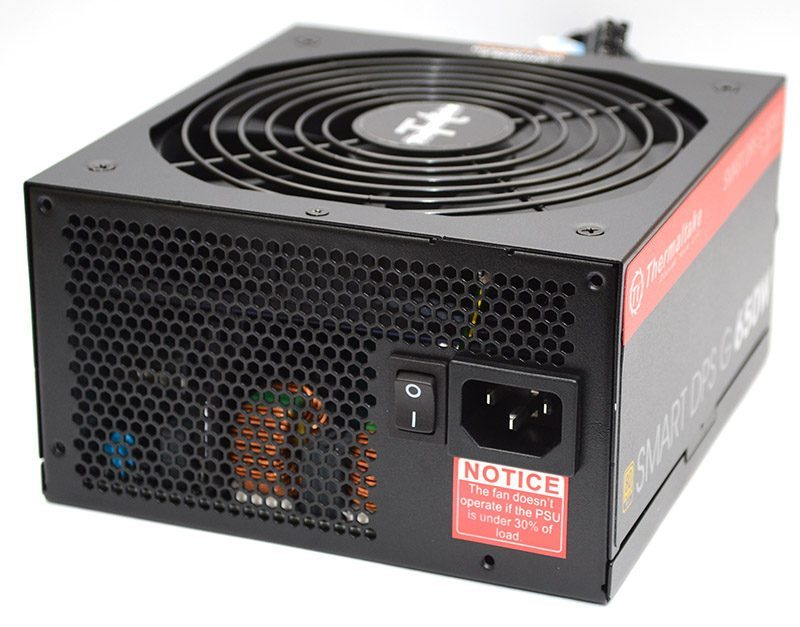
Around the back, plenty of ventilation to help keep the unit cool, a master power switch, as well as the power jack. There’s also an important warning that reminds you the fan will not spin when the PSU is under 30% load.
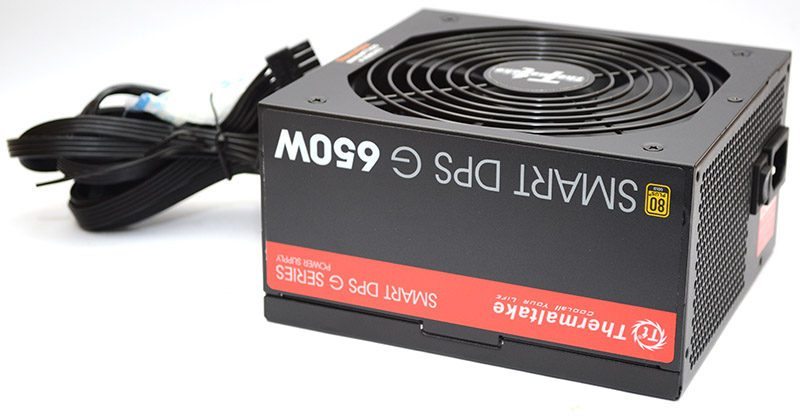
Another large decal sticker on the other side.
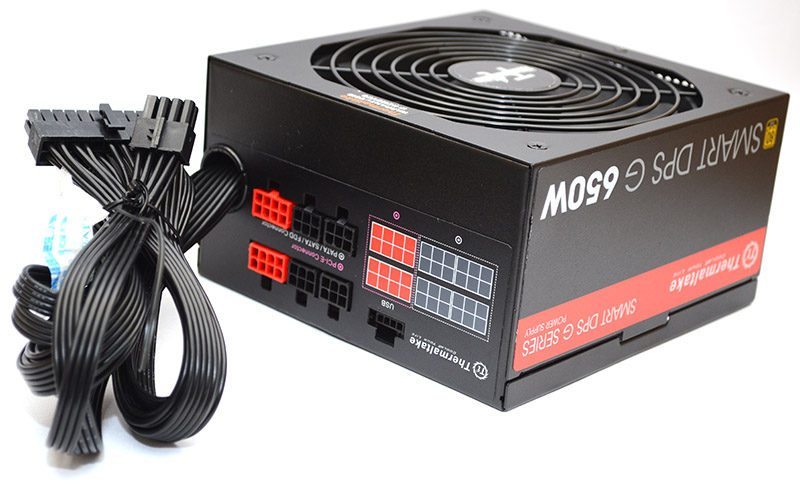
The PSU is semi-modular, which means the motherboard 24-pin and the CPU 4+4 pin are hard-wired, which is fine as all systems require them. What I do like is that even though they’re hard-wired, they’re all black and all flat cables, so cable management should be much easier. There as six connectors on the back of the PSU, 4 x 6-pin for peripherals and 2 x 8-pin for PCI-E.
The fan opening is huge, with a durable metal cover that should allow for plenty of airflow.
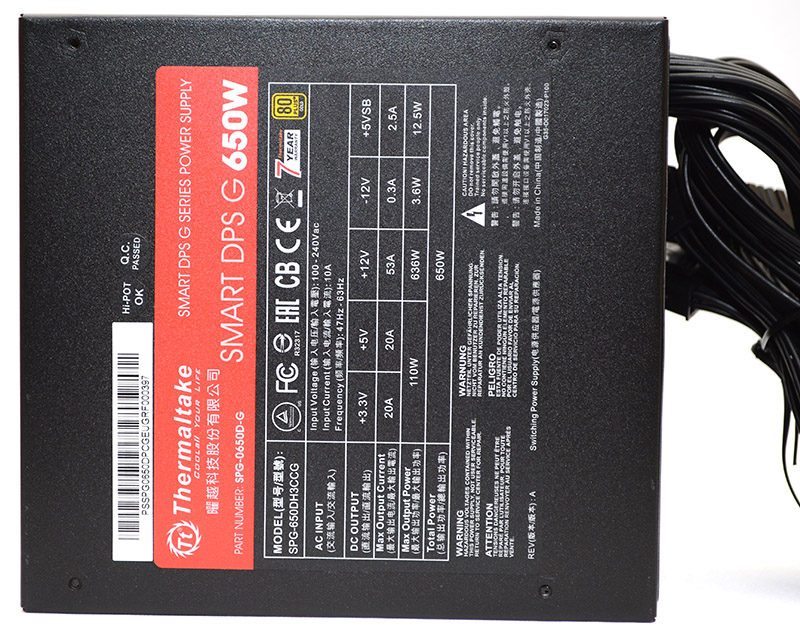
The base of the unit has the specifications sticker, where we can see that the +12V rail can deliver an impressive 53A @ 636W, more than enough for a high-end gaming or workstation system.
Cables
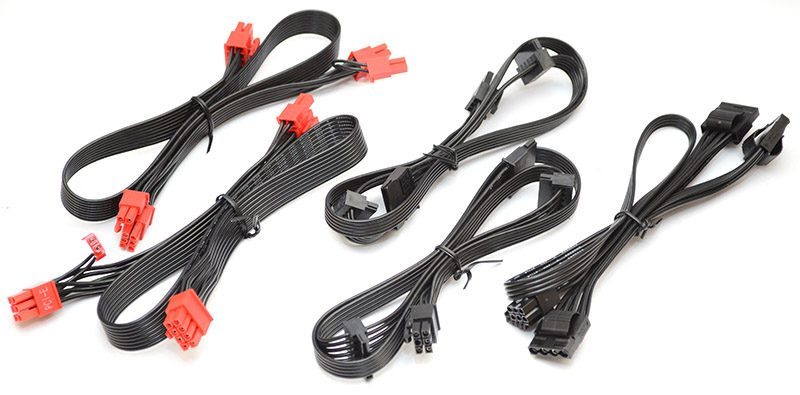
The cables are colour coded to match the ports on the back of the PSU, which is nice, but I’d have preferred all black. on the hardware end. All the cables are a flat design, with the two PCI-E cables offering 6+2 headers and a good mixture of SATA and Molex for the peripheral cables.
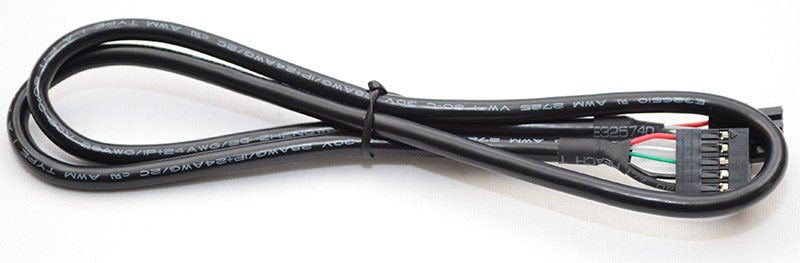
There’s also a special cable to connect the PSU to a USB port so that it can be monitored by the desktop
A Closer Look – Interior
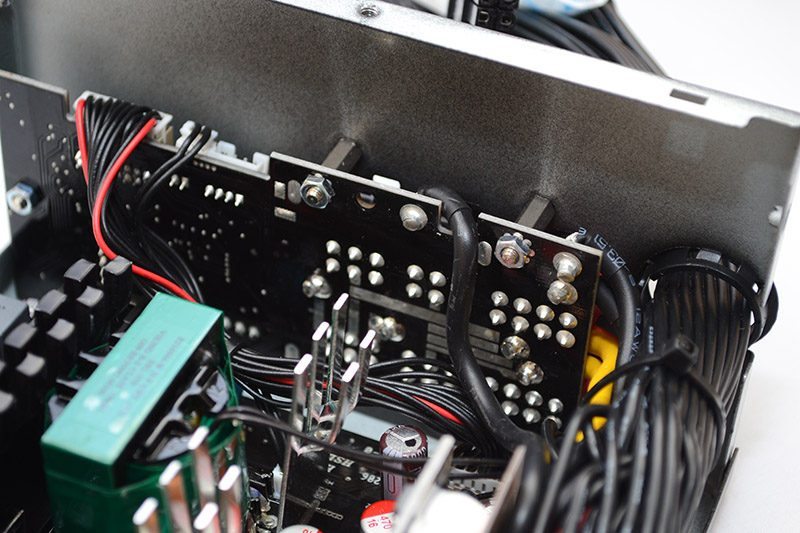
There’s a lot going on inside this power supply, more than we would normally expect to see in a 650W unit, but like a result of the various power management features.
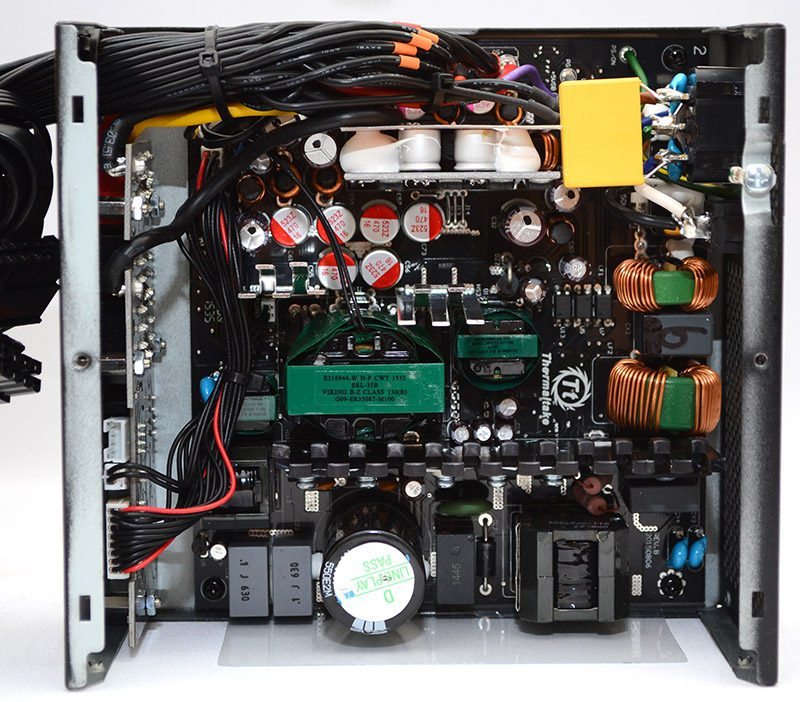
The power filtering stage looks robust and nicely shielded
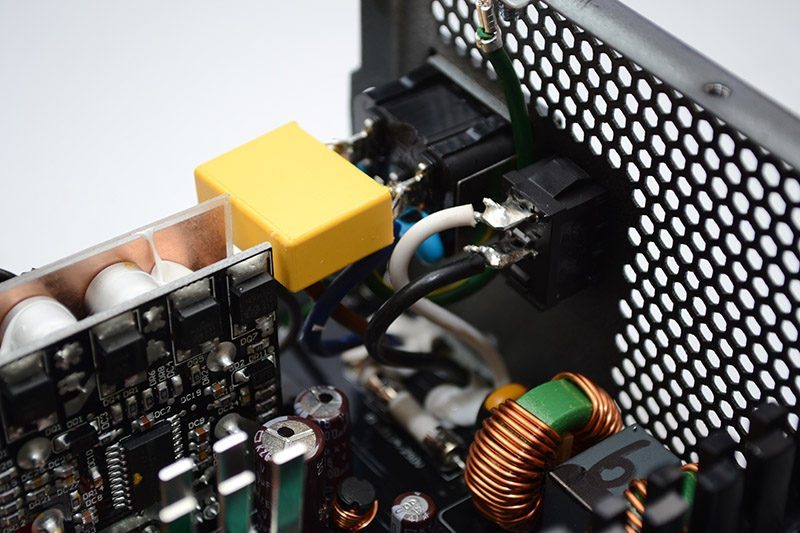
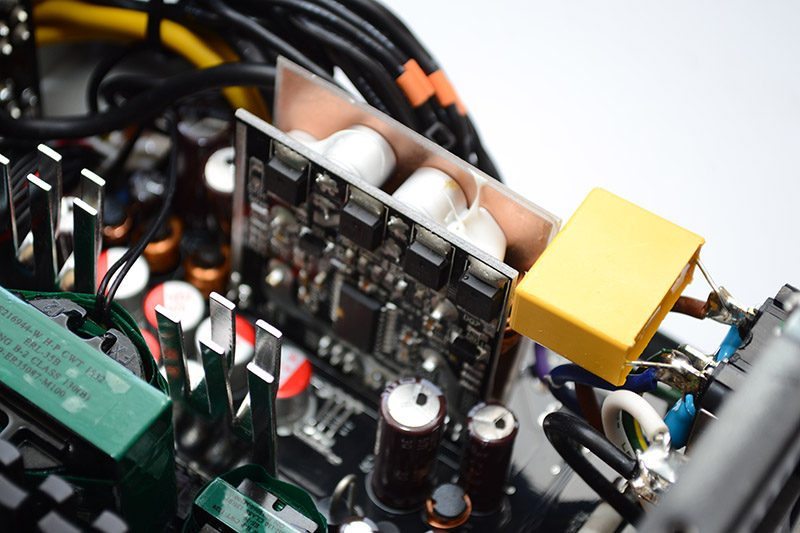
A few daughter boards are dotted around the PCB, which will help with overall cooling and airflow; these boards help regulate voltages.
For a modular PSU, there’s quite a lot of cable on the interior of the PSU, but it’s all kept over to the side where possible with sleeving applied at the solder points to keep everything well protected.
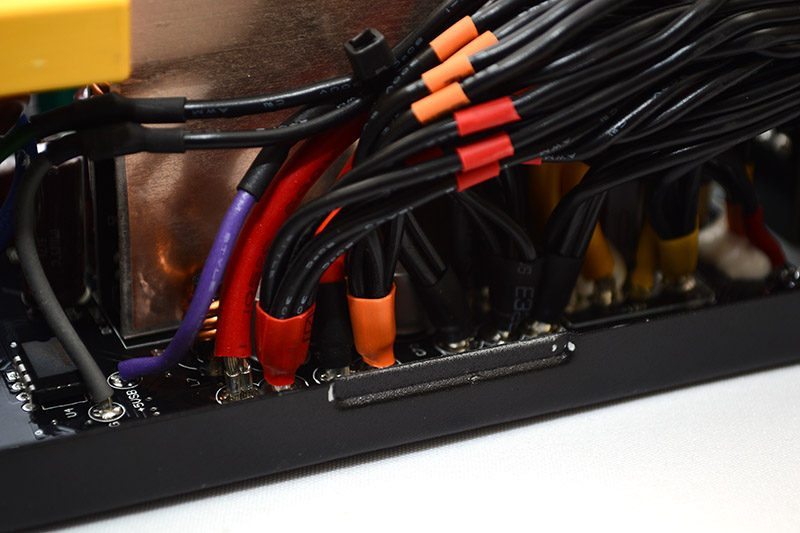
There are a few additional cables running from the modular cable PCB too, which are connected to various other sections as well as the fan. These are here to provide data from the various sensors in the PSU to the USB port at the back, allowing it to use the DPS G’s various smart features.
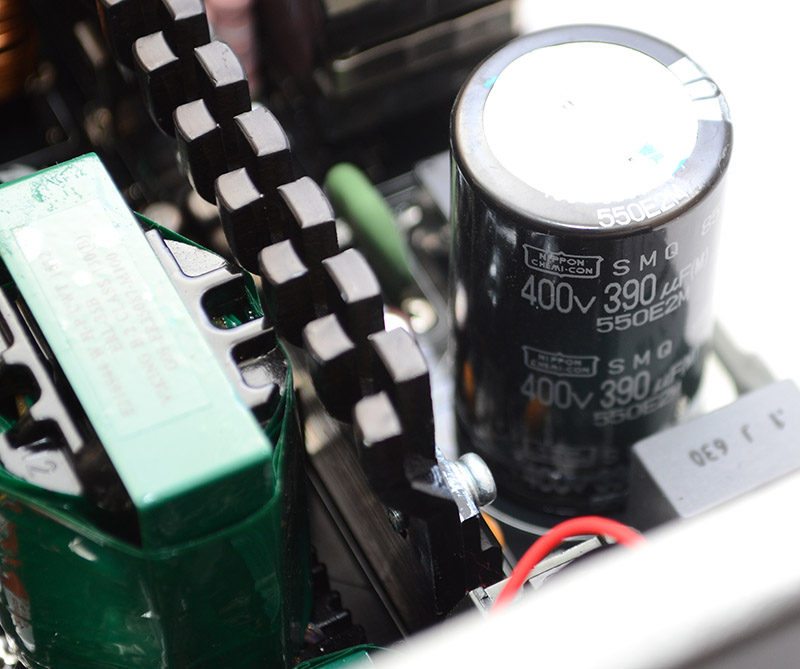
All the caps we can see in the unit are high-quality nippon chemi units.
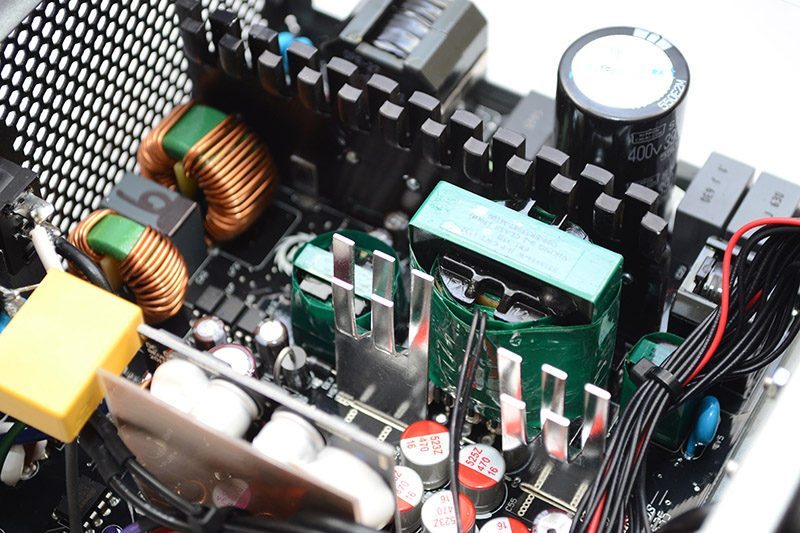
The main bulk capacitor is a 400v 390uf, and should have more than enough grunt to provide the 650W from this unit, at least when combined with the secondary caps.
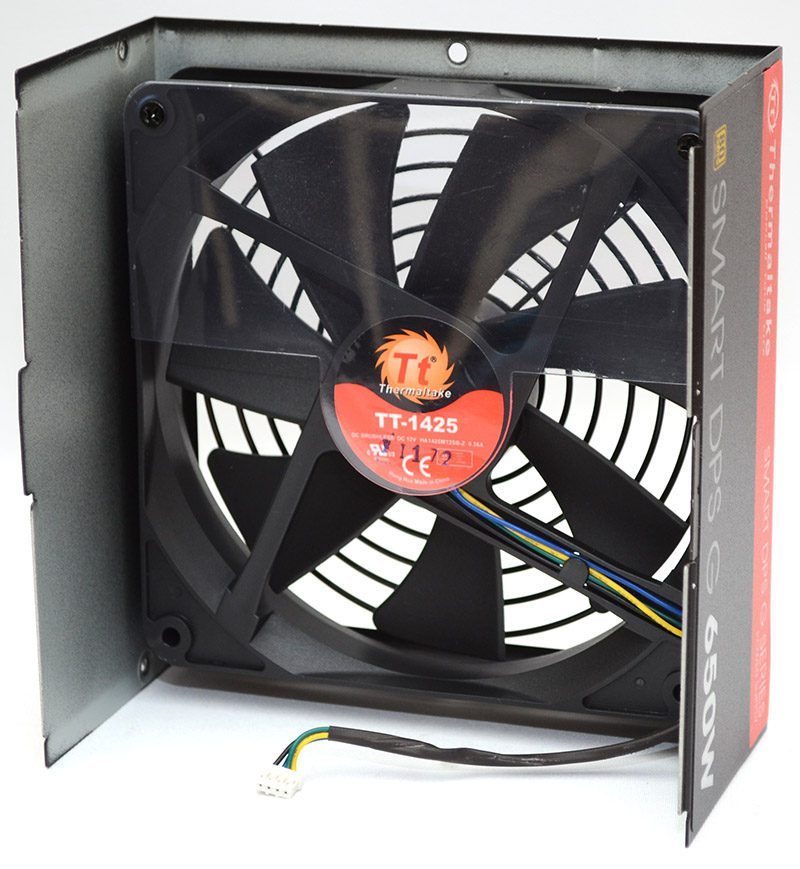
The fan is a Thermaltake TT-1425, a 140mm seven blade model, which seems to be a 1000RPM silent fan with a three cable setup (two for power, one for speed monitoring).
Test Procedure
At eTeknix we take the power supply testing procedure very seriously and have invested a lot of resources into acquiring the appropriate testing equipment. For all power supply reviews we test the power supplies with dedicated power supply testing equipment. This means we are able to get the most accurate results from our testing as opposed to using software benchmarks (such as OCCT) or multi-meter readouts which are broadly inaccurate.

Our test machinery is as follows:
- Sunmoon SM-5500ATE Active Load Tester (1200W rated)
- Stingray DS1M12 USB Oscilloscope
- Voltcraft DT-10L laser tachometer
The eTeknix test procedure involves:
- Testing each power supply at 20/40/60/80/100% load (with balanced load across all rails) and measuring PFC (power factor correction), efficiency (actual power divided by power “pulled at the wall”) and voltage regulation (deviance from expected voltages of 3.3/5/12 on the main rails).
- Measuring ripple with an oscilloscope at 20/40/60/80/100% load.
- Measuring fan speed after a stabilisation period of five minutes at each load scenario using the Voltcraft DT-10L laser tachometer and a reflective strip on the fan.
- Testing each power supply’s OPP (Over Power Protection) mechanism and seeing how many watts each power supply can deliver before shutting down
Other things to consider are that
- We recognise that a single yellow 12 volt cable can provide only 6 Amps before overheating (which corrupts voltage regulation and efficiency) and so we used an adequate number of cables for each power supply to ensure there is not efficiency loss from poor cables selection
- Our Sunmoon SM-5500ATE power supply tester is not capable of testing more than 300W on each of the 12 volt rails so where a power supply provides more than 300W on a 12 volt rail that power is distributed over multiple 12 volt rails on the load tester. For example a power supply with one 12 volt rail supplying 750 watts would be spread equally over three 12 volt rails on the load tester, a power supply with two 450W 12v rails would be spread over four 12v rails on the load tester, two 225W 12v rails for each of the 12v rails on the unit.
- We use the same time scale and horizontal millivolt scale on our oscilloscope for all ripple tests, that is a 20ms T/DIV (horizontal) and a 0.02 V/DIV (vertical) meaning the scale is from -80mV to +80mV, ATX spec dictates that the 12v rail must fall within 150mv of ripple and the 3.3/5 within 50mv so that scale allows us to include both 150 and 50mV peaks. (Some older PSU reviews use different scales which were later ditched as the visual representation they give is inadequate, in these reviews written measurements are provided only).
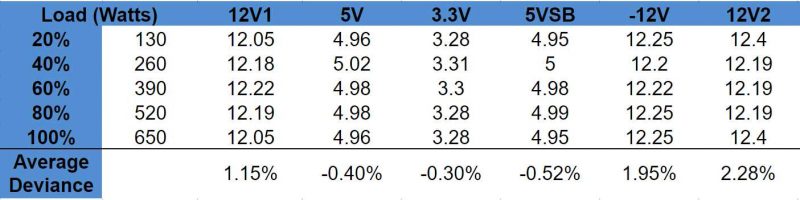
- Deviance is the terminology used to represent the way voltages diverge from the expected values
Efficiency, PFC and Voltage Regulation
Voltage Regulation
To test voltage regulation we load the power supply to five different load scenarios that give an equal spread of load across every single rail. So that means 20% on all rails, 40% on all rails and so on. We then calculate the average deviance of each rail from its expected voltage.
Power Efficiency
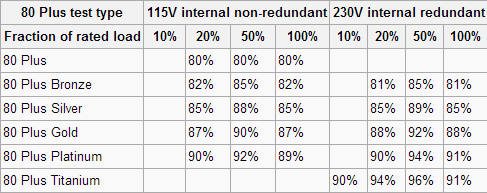
Power efficiency is measured by calculating actual supplied wattage divided by the wattage drawn at the wall/plug, multiplied by 100 to give a percentage. We then compare that to the particular 80 Plus certification the company claims to see if it meets that. You can see the 80 Plus certifications below, we always test 230v power supplies.
 Power Factor Correction
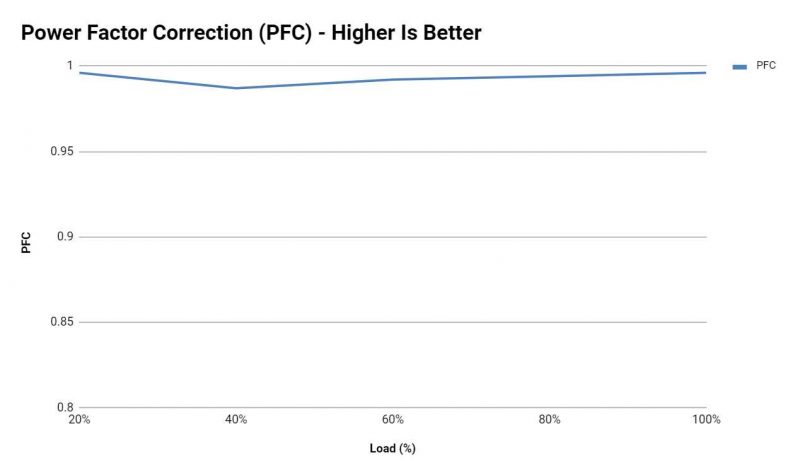
Power Factor Correction is the ratio of the real power flowing to the load, to the apparent power in the circuit. The aim of PFC is to make the load circuitry that is power factor corrected appear purely resistive (apparent power equal to real power). In this case, the voltage and current are in phase and the reactive power consumption is zero. The closer the number to one the better as this allows the most efficient delivery of electrical power (Source – Wikipedia).
Over Power Protection and Max Wattage
Power supplies often quote as having various protection mechanisms such and the most important of these is Over Power Protection. In our testing we crank up the power draw until the power supply either shuts down (meaning the OPP mechanism is present and working) or blows up (meaning it is either not present or not working). We then note the maximum power consumption before the power supply shut down (or blew up).

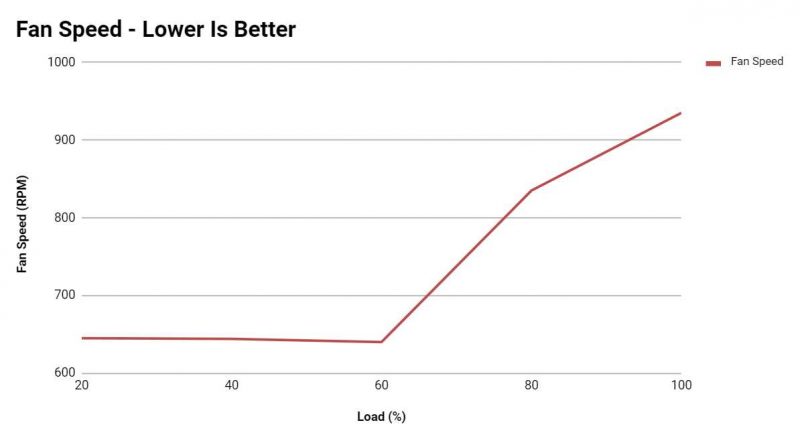
Fan Speed
When testing in a power supply laboratory it is difficult to take fan noise readings as the noise from the Sunmoon test equipment and air conditioning corrupts everything. The next best thing in our circumstances was reading off the fan speed with a tachometer to get an idea for the noise. The ambient temperature during testing held constant at 22 degrees, with 1 degree of variation. Each power supply had a consistent time period of 5 minutes to stabilise between each load scenario.
In my experience the following general relationships apply between noise levels and fan speeds, though it can vary greatly between the type of fan used.
- Below 800 RPM – Inaudible/Silent
- 800 to 1000 RPM – Barely audible
- 1000 – 1200 RPM – Audible but still quiet
- 1200 – 1400 RPM – Moderately noisy
- 1400 – 1800 RPM – Noisy
- 1800 RPM or higher – Intolerable