Thermaltake SWAFAN 12 & 14 RGB Fan Review
Mike Sanders / 2 years ago
Installation
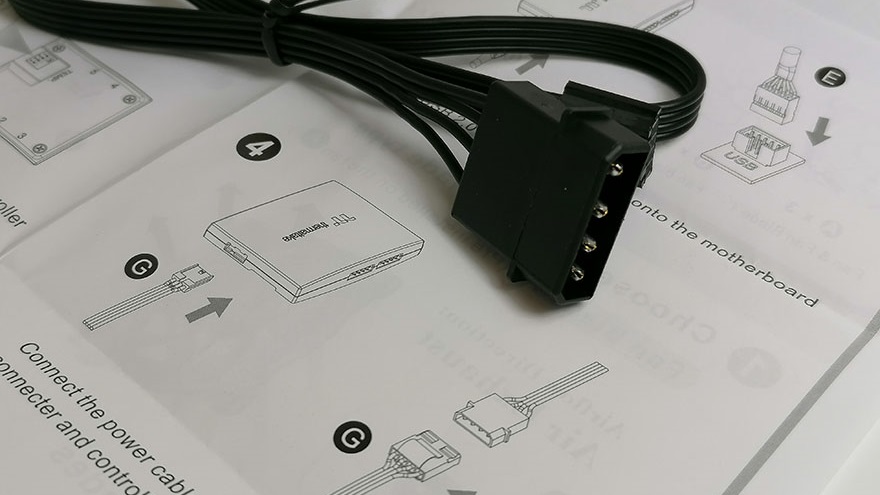
The manuals for the Thermaltake SWAFAN RGB radiator fans are both clear and well-detailed. Which is good because getting this kit hooked up isn’t as simple as simply sticking a 4-pin PWM adaptor into your motherboard.
The hub controller undoubtedly makes things simple by it acting as a primary connection point for all the fans. From this, you simply need to attach the power and then the USB header. With all this in place, and through Thermaltake’s TT RGB PLUS software, you’re ready to get customising!

One point of contention I do have, however, comes down to the aforementioned power connection. It’s molex, and why it’s molex I have no idea! – By and large, both SATA and molex power connections both provide 50 watts which should clearly be more than enough for the five fans the hub controller can support.
I’m not going to lie, I was genuinely shocked (not literally) that a new product released in 2022 still utilises molex as its generic power source. I mean, for those of you using fully-modular PSUs, how many of you reading this actually have a molex connection ready to go? Although I do on our test bench (for rare occurrences like this) I know for a fact that I don’t in either of my personal PCs.
Overall, unless Thermaltake has a really good and specific reason for choosing this over the far more conventional SATA, I think going down the molex road was a horrifically bad choice that certainly doesn’t speak of a new and modern product!
With that being said though, installing the fans and getting everything hooked up to the hub controller (presuming you have a molex power connection ready to go) isn’t difficult and takes no longer than it would to set up any other premium-level kit.
Before we see how well the fans perform though, let’s take a closer look at that reversible blade system!

Reversible Fan Blades
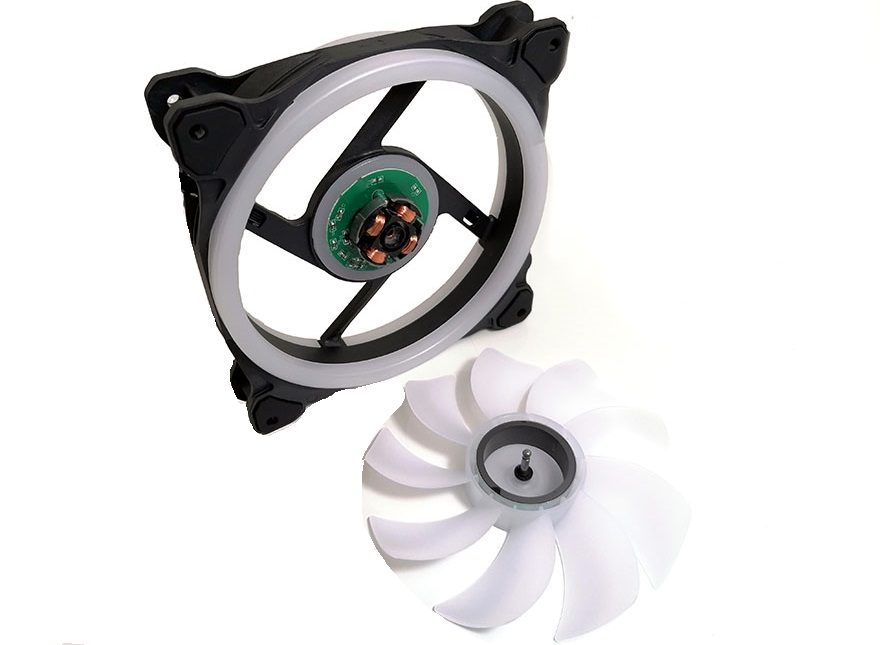
You’re almost certainly wondering at this point just how easy is it to replace the fan blades. Well, more accurately, swapping a push configuration for a pull. Well, in a word? Exceptionally. – When I originally saw this design I’ll freely admit that I was more than a little concerned that swapping the blades out was going to be a really consulted design.
In truth though, it takes no more than ten seconds. Probably less than five on your second attempt when you have the confidence in what you’re doing!
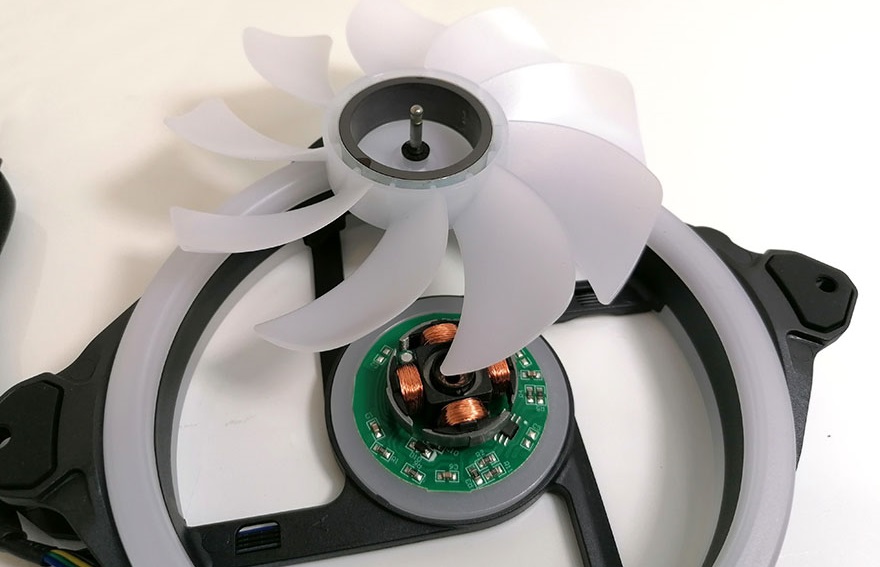
To remove the existing blade (which, FYI, comes out of the box in the default ‘push’ configuration) all you have to do is apply pressure to the rear of the fan. With a little force, the blade pops out exposing the central hub ready for you to simply push the other one in.
The amount of effort required is absolutely minimal and you can go from push to pull within literally seconds. – Admittedly though, doing this excessively will place significant wear on the bearing and although Thermaltake doesn’t specify exactly within their manual, we’d probably recommend that you do respect the process.
How can you do this? Well, primarily I suggest that you make sure you apply even pressure on as much of the rear of the fan blades as you can when removing to prevent/restrict any lateral force. In addition, I’d probably suggest renewing the lubrication (see the aforementioned syringe) every 15-20 removals, or each time you swap the configuration after a sustained period of use.
How much should you use? Thermaltake doesn’t say. I do, however, suspect that it’s hard to go wrong if you use your good judgment. You want to lubricate it after all, not drown it!

Performance
When reviewing fans, we attempt, as best as possible, to test the officially rated specifications to ensure that they operate, roughly speaking, within the suggested performance remits. – We will freely concede that our methodology for this testing is far from perfect, but we do think it important to at least check that on an indicative level if nothing else, the fans perform roughly as ‘advertised’.
Our usual methodology for this testing is setting the fans to 100% speed output and then measuring the airflow (CFM), fan rotational speed (RPM), and acoustic output (dBA). Again though, we are hardly in scientifically sterile conditions so we always suggest that our results should be taken as indicative, but not categorical.
With the Thermaltake SWAFAN 12/14 RGB, however, we clearly have a bit of an unusual situation here as the fans can operate in two separate configurations; push or pull. So, twice as much testing, but for this product, we’re more than happy to do it! – In regards to general use, however, the status pressure of the ‘push’ configuration is clearly higher so if you are choosing to use these as radiator fans, this is clearly the notably more potent function. You can, however, accept the following results as generic ‘case fan’ utilisation.

SWAFAN 12 RGB
Airflow Performance – STANDARD PUSH CONFIGURATION
- Rated Airflow – 53.02 CFM
- Recorded Airflow – 51.90 CFM
Fan Speed
- Maximum Rated – 2000 RPM
- Maximum Recorded – 1998 RPM
Acoustic Output
- Maximum Stated – 30.5 dBA
- Maximum Recorded – 30.5 dBA (adjusted to account for ambient noise)
Airflow Performance – REVERSE PULL CONFIGURATION
- Rated Airflow – 54.85 CFM
- Recorded Airflow – 53.4 CFM
Fan Speed
- Maximum Rated – 2000 RPM
- Maximum Recorded – 1997 RPM
Acoustic Output
- Maximum Stated – 36.5 dBA
- Maximum Recorded – 36.9 dBA (adjusted to account for ambient noise)
SWAFAN 14 RGB
Airflow Performance – STANDARD PUSH CONFIGURATION
- Rated Airflow – 77.6 CFM
- Recorded Airflow – 76.8 CFM
Fan Speed
- Maximum Rated – 2000 RPM
- Maximum Recorded – 2003 RPM
Acoustic Output
- Maximum Stated – 34.5 dBA
- Maximum Recorded – 35.1 dBA (adjusted to account for ambient noise)
Airflow Performance – REVERSE PULL CONFIGURATION
- Rated Airflow – 71.3 CFM
- Recorded Airflow – 70.3 CFM
Fan Speed
- Maximum Rated – 2000 RPM
- Maximum Recorded – 2001 RPM
Acoustic Output
- Maximum Stated – 40.5 dBA
- Maximum Recorded – 42.5 dBA (adjusted to account for ambient noise)
Overall Results
So, in conclusion, our results clearly indicate that within a reasonable margin of error in our imperfect testing environment, both the Thermaltake SWAFAN 12/14 RGB cooling fans perform entirely within their expected remits. – The push performance is, of course, generally better than pull, despite this, however, the reserve configuration is still surprisingly competent, and, dare I say, surprisingly excellent. Any way you look at this though, these fans, regardless of how they are configured, get a full 100% pass from us in terms of stated performance vs real-world performance!
Lighting – Bright and Bold!
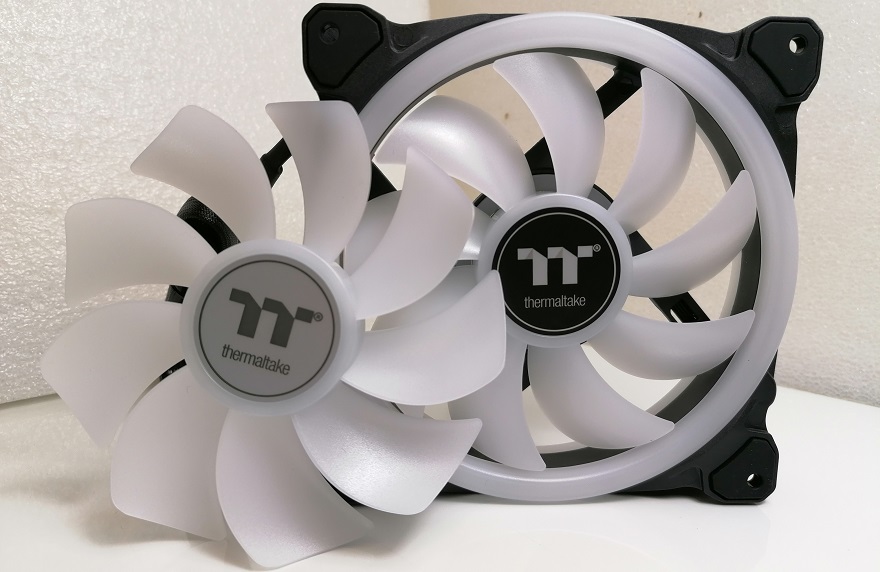
It is, of course, no surprise to find that the lighting effects on the Thermaltake SWAFAN 12/14 RGB are excellent. They are bright, bold, vivid, and through the utilisation of the TT RGB PLUS software, offer a colossally huge range of customisation features. – And this isn’t just limited to the fans as a whole. They can be configured individually including control of each of the 30 LEDs present on each fan.
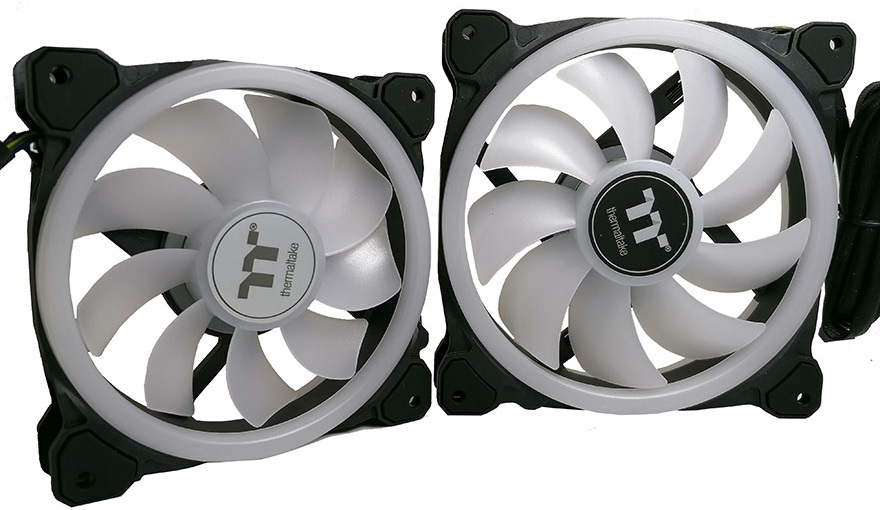
A key factor in the design of SWAFAN, however, is undoubtedly seen in the fact that these can be set to a pull configuration without losing any of the RGB lighting effects. As you can see in the image below, with one kit running pull and the other push, aesthetically speaking, there’s absolutely no difference whatsoever. Well, aside from the fact that the central fan hub on push is black and silver on pull (which, of course, is important to make it distinct for those who can’t just tell the orientation by looking at the blades).

In terms of the customisation though, some of the pre-set functionality offered in the TT RGB PLUS software is exceptionally impressive. This can be configured to reflect system temperature, ambient temperature, and it can even be set to react to music (as per the video below).
No, I would freely concede that in many cases software packages for RGB functionality are not fantastic, and while the Thermaltake TT RGB PLUS is still not perfect by any means, it is (in my opinion) one of the best currently available to work with. You can keep things simple with a nice preset pattern, or you can go absolutely insane and in-depth fiddling with each individual LED. The only limit is your imagination!
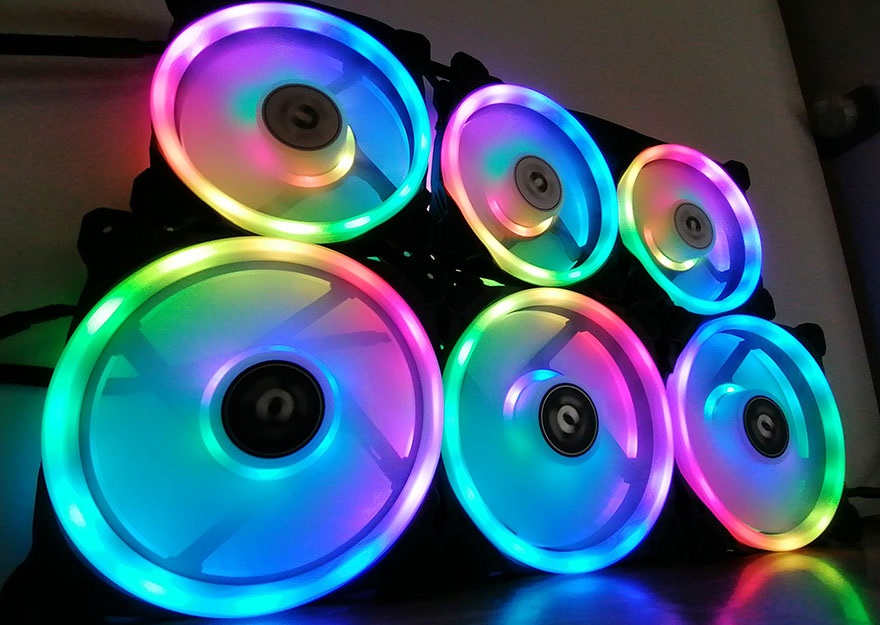
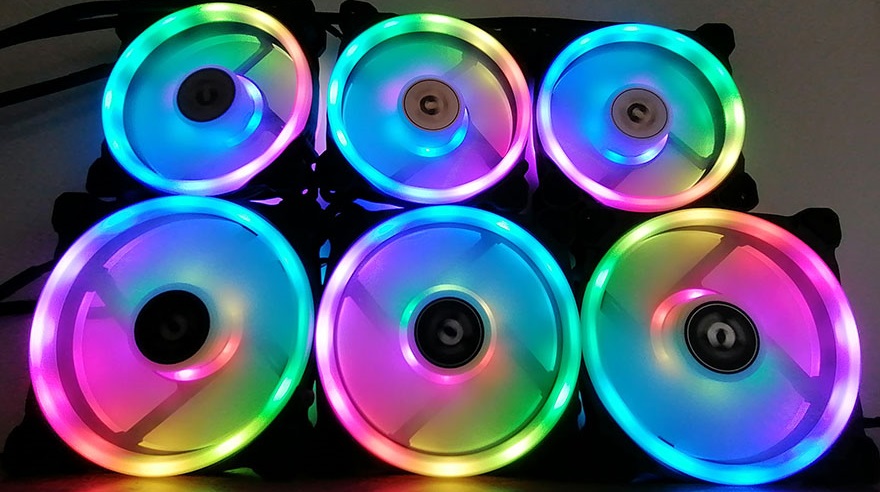
Fans In Action
As often is the case with any RGB product, it’s one thing to tell you how good the lighting effects are, it clearly takes things to a much better level, however, to just simply show you. – For the sake of clarification, the above fans 120mm fans have been set with the ‘reversible’ blade whereas the 140mm at the bottom are on the standard configuration. – Note though that, as mentioned often throughout this review, you are free to swap and configure these within their specific kits how you see fit.


