Thermaltake View 71 TG Full-Tower Chassis Review
Peter Donnell / 7 years ago
A Closer Look – Interior
Opening up the chassis it’s as easy as removing two front screws on the front of each panel. the door/window then simply swings open on the mounting bracket, allowing you to tinker with your hardware.
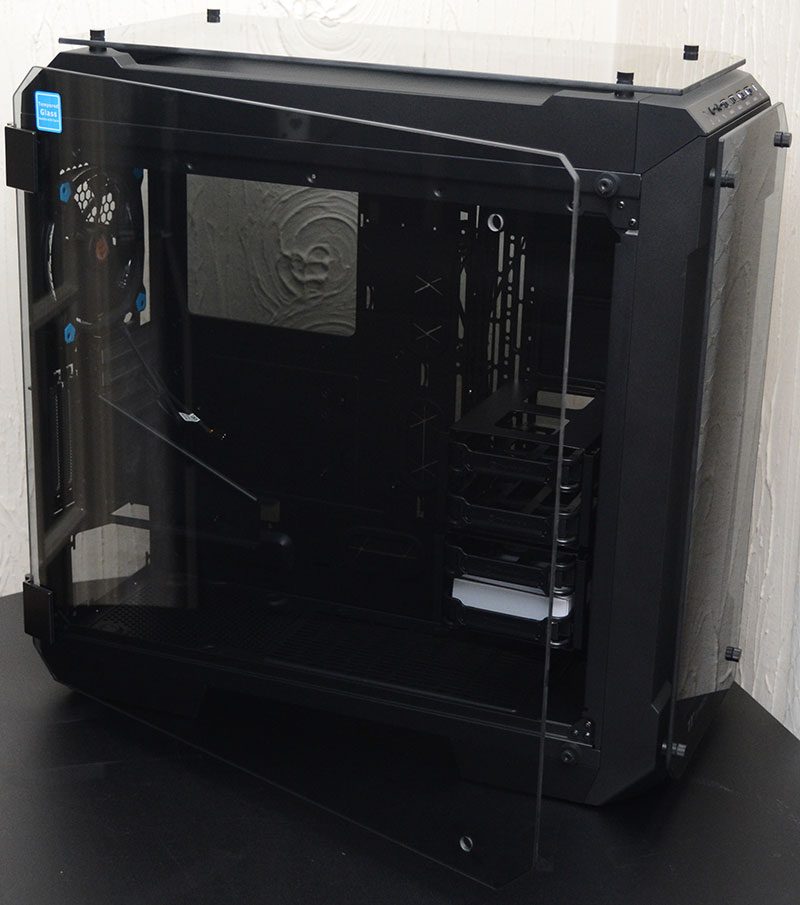
When you need to do more extensive work inside the chassis, simply lift the panel up off of its hinges and put it safely to one side. The front and top panels also remove by simply undoing their thumb screws and lifting them off. The interior of the chassis is vast, which is good news for those planning to install any of the larger graphics cards on the market, as well as extensive custom loop water cooling hardware, and any other fun modifications they want to make.

Bottom Radiator Mounts!
In the base of the chassis, you will find an extensive amount of space to install your power supply and any extra space can be used to Mount water cooling pumps, radiators, fans, and more. The HDD bays are raised from the base of the chassis, so getting radiators right up to the front panel isn’t going to be an issue.

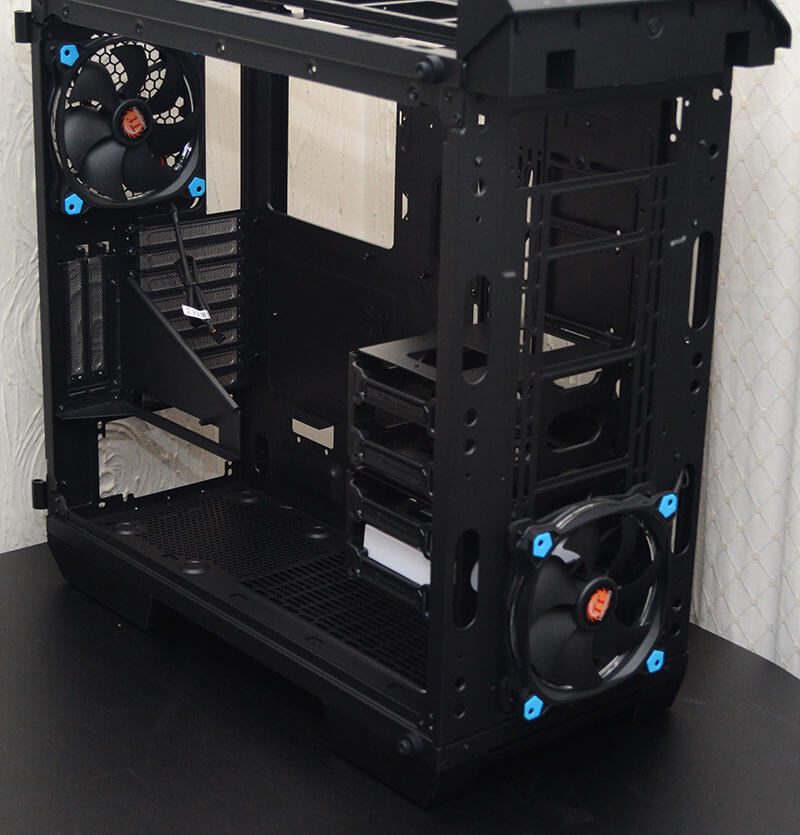
Vertical GPU
Moving up, there are eight expansion slots, each fitted with a reusable and ventilated metal cover. What’s really cool is there are also two vertical ones, and a supporting GPU bracket so you can really show off your graphics card. Annoyingly, the riser cable is sold separately. However, many modders may wish to use their own aftermarket ones anyway.

There are two pre-installed 140mm RGB LED fans included with the chassis. you’ll find one at the bottom of the front panel, and the other here in the rear of the chassis. Two fans may not seem like a lot for a chassis of this size, but it is targeted at the enthusiast and modding markets, who are more likely to use their own aftermarket fans or those that are best suited to the water cooling radiators and all the hardware.

In the front of the chassis, there is another full height 120/140mm spacing fan and radiator mounting bracket, and you’ll find the same again in the top of the chassis. This means that you will be able to install large radiators in the bottom, front, and top of the chassis, as well as the smaller one at the rear.
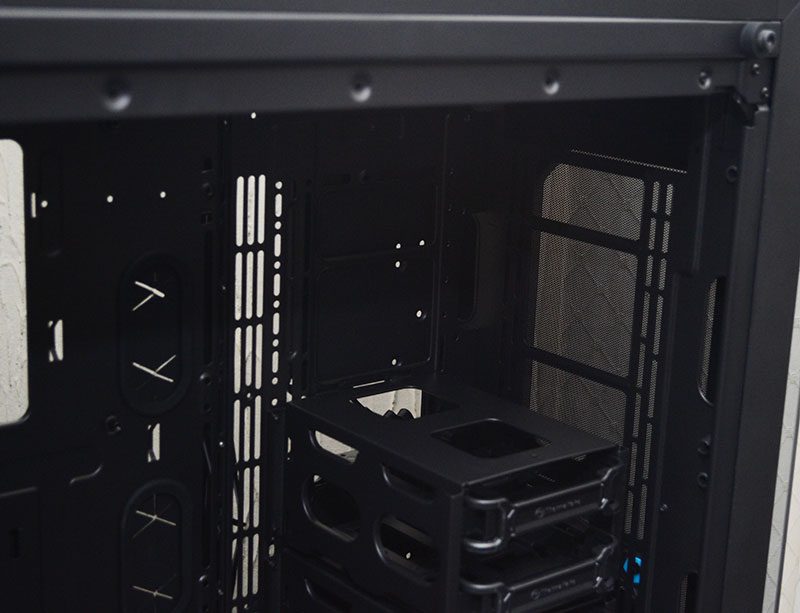
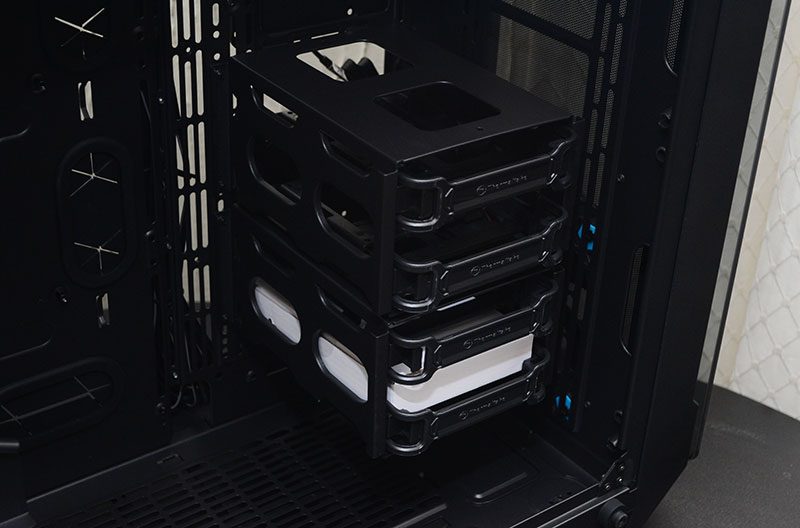
Removable HDD Bays
Each of the two hard drive caddies expended from the backplate of the chassis. each of these to caddies has two removable hard drive trays, supporting both 3.5” and 2.5” drives. Of course, if you need this space for other hardware, you can remove the bays completely, or even adjust the height and configuration to suit your needs.
There are extensive cable routing options throughout the chassis, with durable rubber grommets on all major points. you’ll also notice here at the rear there is a multitude of long screw mounts, which are going to be well-suited to various water cooling brackets and kits that you might find with reservoirs, pumps, and similar hardware. However, you can even mount a radiator parallel to the motherboard tray.

Extensive Cable Routing
At the rear of the chassis, there is a cavernous amount of cable management space. For those running a multitude of thick cables, cable extension, sleeved cables, and huge amounts of hardware connection cables, you’re not going to have any trouble keeping everything organised back here.

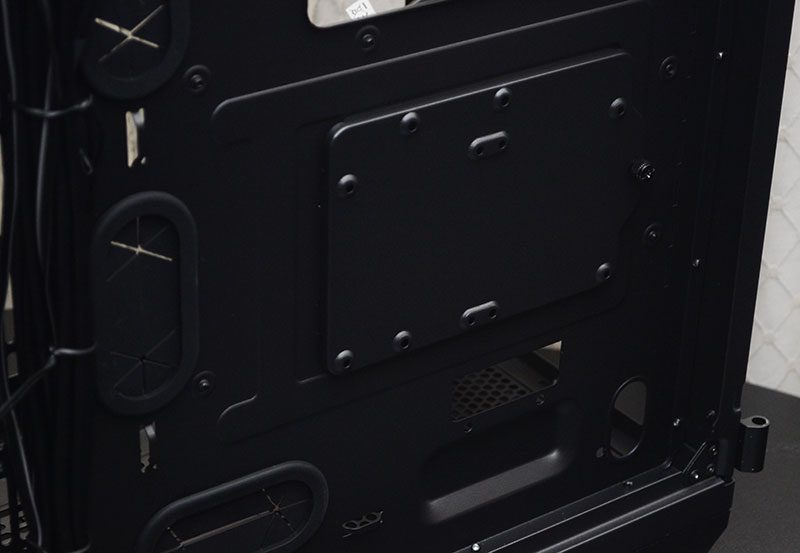
On the left side, there are two removable mounting plates, each supporting 2.5” hard drives, and even 3.5” hard drives in various configurations. This will obviously be of benefit to those removing the front hard drive bays to make room for other hardware. It also means you can keep some of the more unsightly 3.5” hard drives neatly out of the way and presentable.

There is a third similarly designed hard drive mounting bracket on the right-hand side, giving you even more storage options on top of the vast amount already on offer.
More Filters!
The top glass panel is easily removed, behind which you will find a huge magnetic dust filter that will aid with clean airflow within the chassis.

The same is true on the front panel, with another nicely fitted dust filter. What’s important is that as best I can see, there are no unprotected air gaps into the chassis, so dust build-up should be very well maintained.

Extensive Radiator Support
The entire front panel housing is easily pulled away from the case too, Allowing you to get full access to the fan and radiator mounts that reside behind it.
As does the top panel, which also features a quick release mounting rail. You can lift this entire bracket out of the chassis, making radiator installations easier, while also providing another angle of attack to get your arms into the chassis while installing on modifying your hardware.


