Thermaltake Core V71 Full Tower Chassis Review
Peter Donnell / 10 years ago
Introduction
Today is a great day in the eTeknix office, as I’m very happy to have yet another high-end chassis from the legendary Thermaltake. The Core V71 was first seen earlier this year at CES 2014 and we saw it again at Computex in Taipei a couple of months ago, now we’re finally able to get hands on with this beast and put it to the test.
The Thermaltake Core V71 has been designed with customisation in mind, its capable of handing extreme gaming rigs that have been built around extreme levels of air or water cooling. It features extensive radiator support and comes equipped with three powerful 200mm fans as standard, which already sets it apart from many competing brands in terms of air cooling. Of course all the support included for high-end builds will come at a premium, as you can expect to pay in the region of £120 for this beast, but when it comes to premium grade system builds, that really is only a drop in the ocean compared to the cost of your other components such as graphics cards and a CPU. Either way, it will be interesting to see just how much return on investment you can get for paying a premium on your chassis and compared to products of a similar spec from the likes of Corsair and Fractal, it’s still competitively priced.
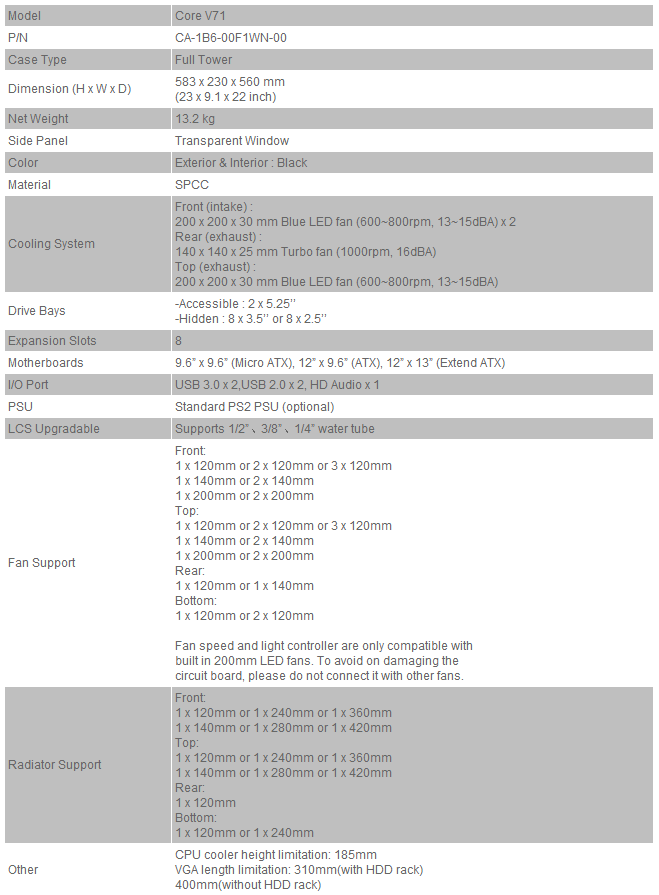
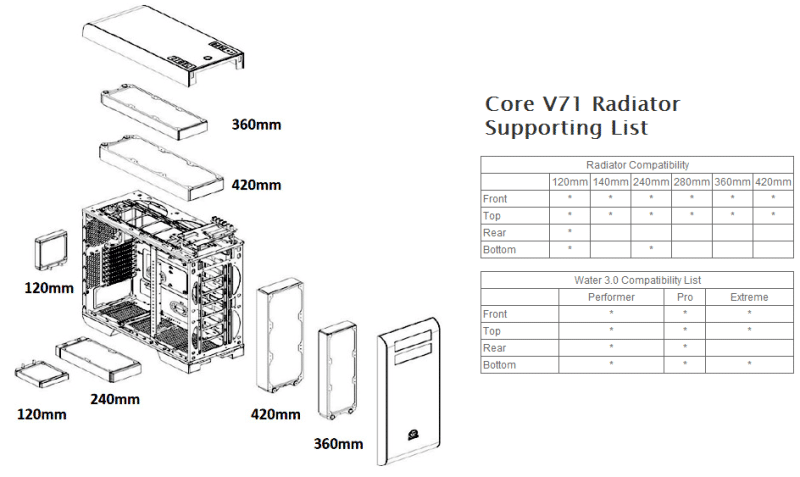
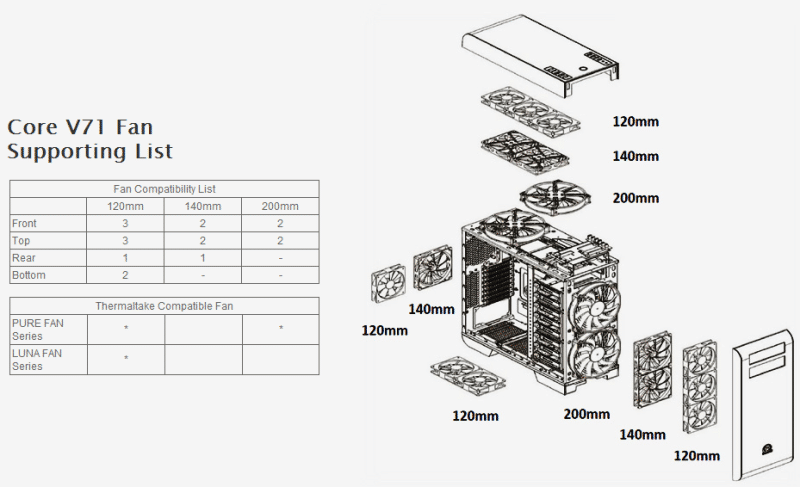
The chassis has been designed with a highly modular interior, with fully removable hard drive bays, two storage stealth mounts behind the motherboard that support 2.5″ or 3.5″ drives, extensive water cooling and radiator support, room for ATX motherboards, large power supplies, plenty of cable routing space and more. First up we can see on the two charts below just how extensive the cooling support is on the V71, with room for two radiators up to 420mm in length and a multitude of smaller ones in various configurations and an equally vast array of fans.
The V71 comes fitted with one 140mm rear fan and three 200mm fans as standard, one on the top and two in the front, but there is still room for a fourth should you really want some thundering airflow.
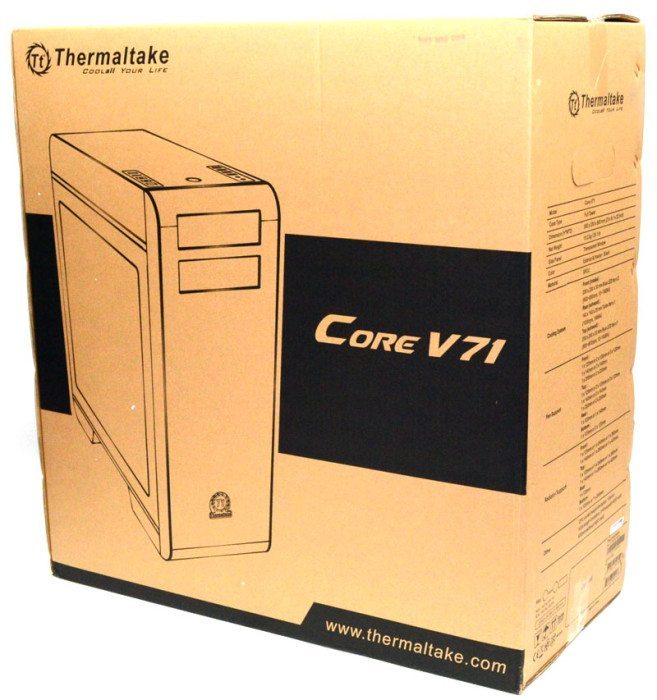
The box is pretty standard with a high contrast image of the chassis on the front and the full specifications down the side. Nothing fancy, but at least you know your budget isn’t being wasted on a fancy box.
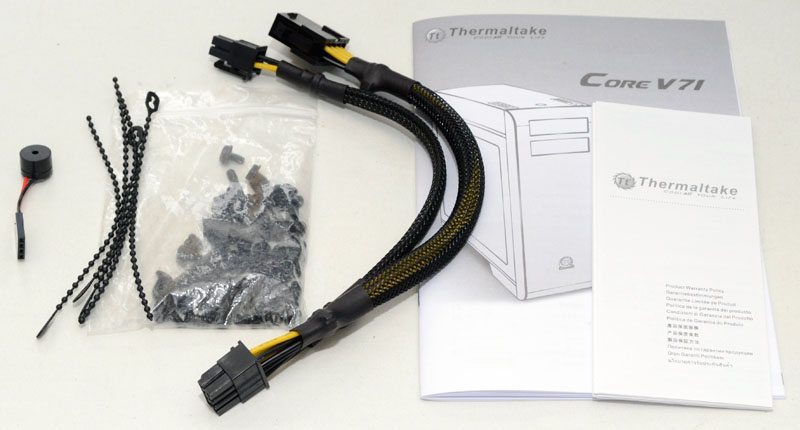
In the box you’ll find everything you need to get you started. An internal speaker, some cable ties, all the screws needed to install a motherboard, PSU, hard drives, GPU’s etc, as well as a 4+4 pin motherboard extension cable and a simple installation guide.
Exterior
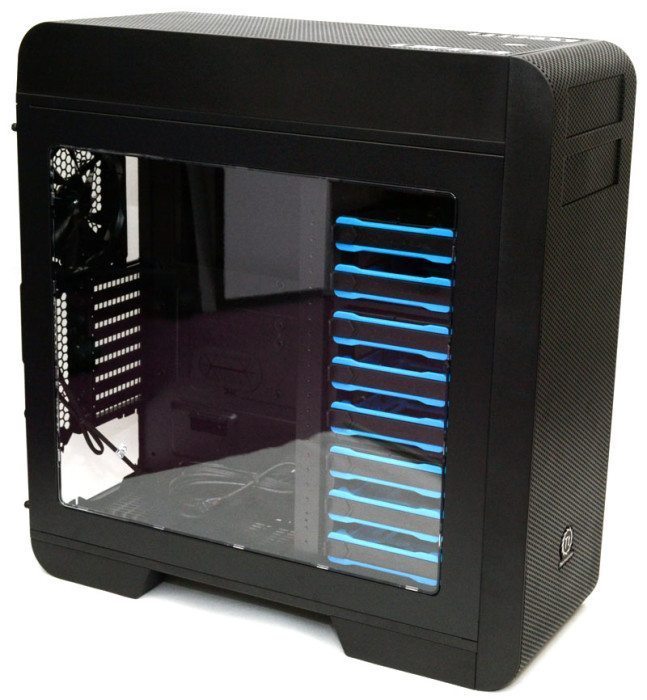
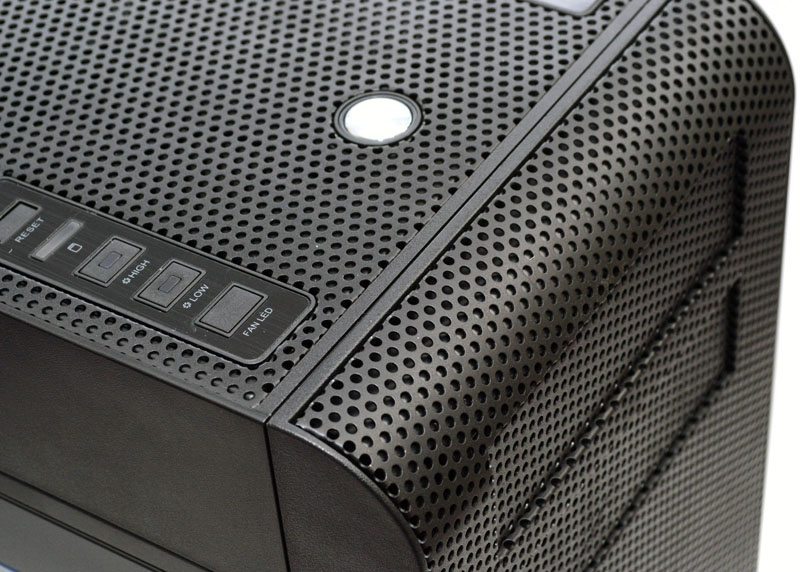
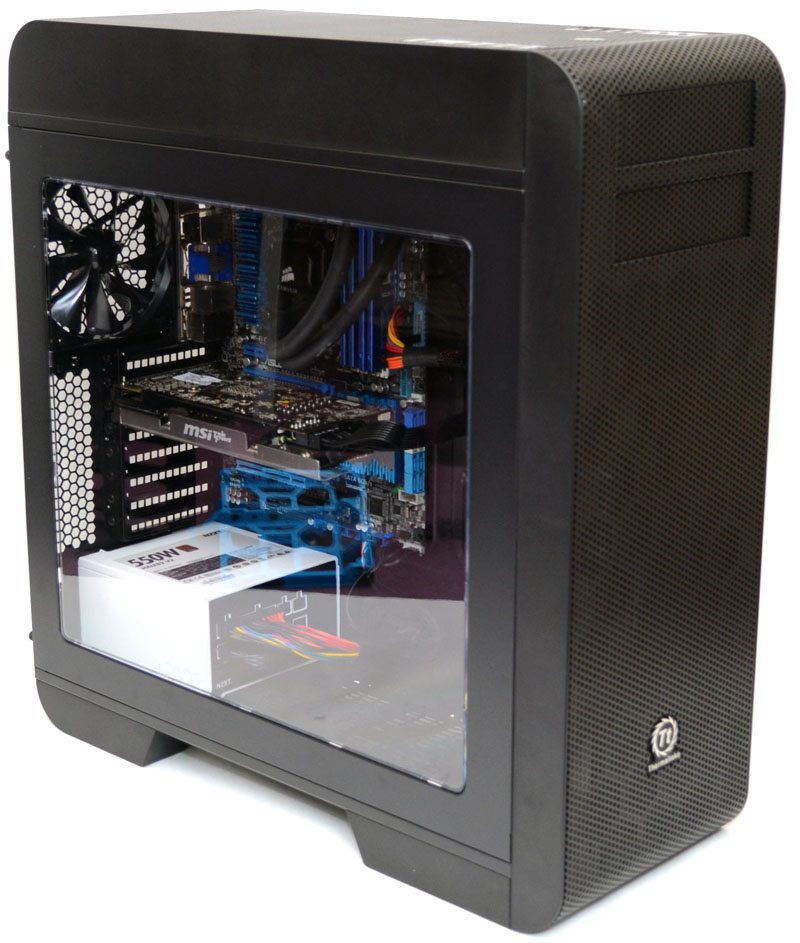
The chassis features a pretty aggressive design with thick black panels and heavy-duty metal mesh-work on the front and top panels. Down the left side you’ll find a huge side panel window with crystal clear perspex that gives an uncompromising view of the chassis interior, great for showing off your gaming rig.
The right side panel is finished in powder black and features a large recess to allow extra cable routing space, handy if you’ve shoved a ton of spare cable behind your motherboard.

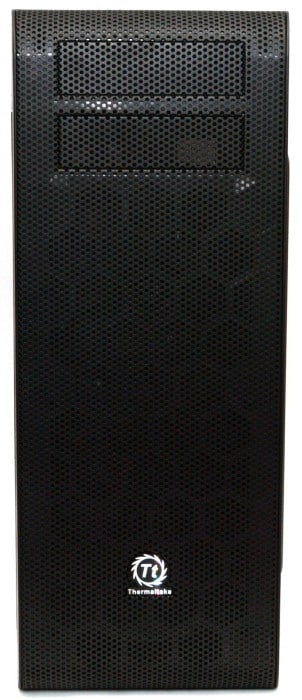
The front panel is pretty monolithic in terms of aesthetics, although the camera flash is allowing you to see the front ventilation, it’s generally not that visible under normal lighting conditions. There are two 5.25″ covers at the top and a small metallic Tt logo near the bottom.
The mesh is really nicely finished with plenty of ventilation for those vast radiator mounts and 200mm fans which reside behind it.
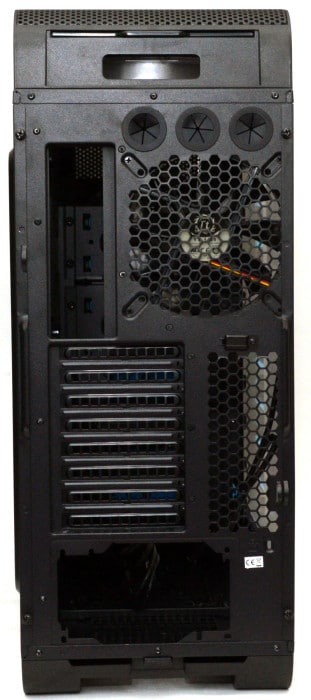
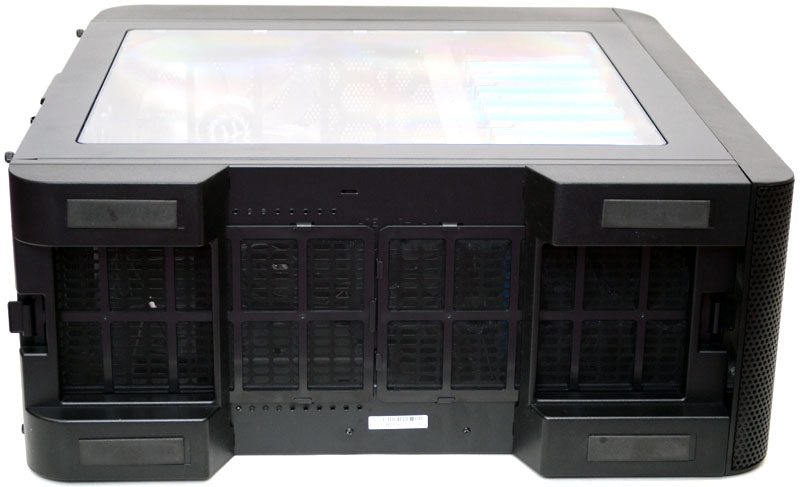
Around the back you can see the top panel extends way above the top of the main chassis, providing extra room for fans and a full length top air filter. Below that you’ll find three rubber grommets, a 120/140mm fan mount, eight expansion slots and a bottom mounted PSU area with another slide out dust filter.
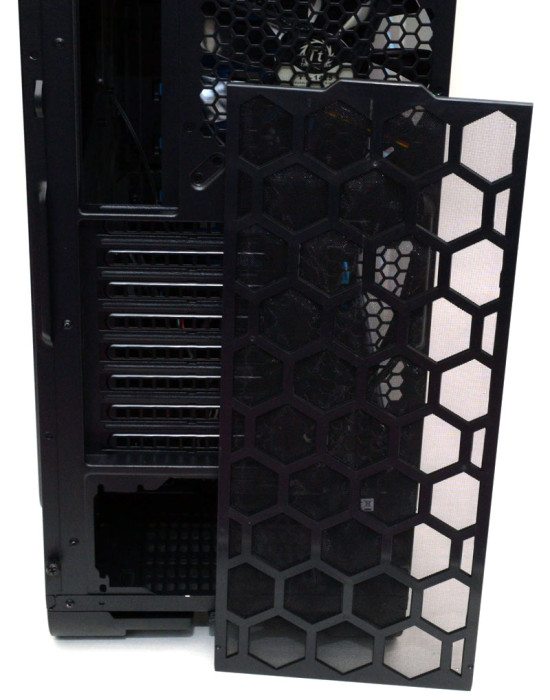
All the dust filters on the chassis are easy to remove and cleaned, which will help with maintaining a clean airflow.
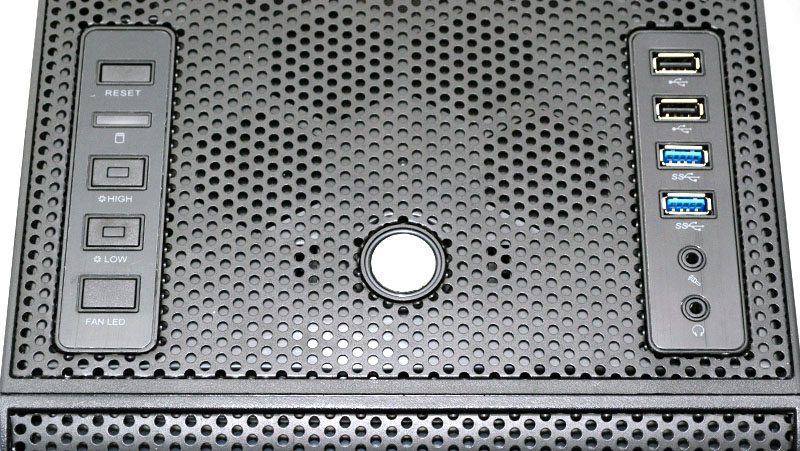
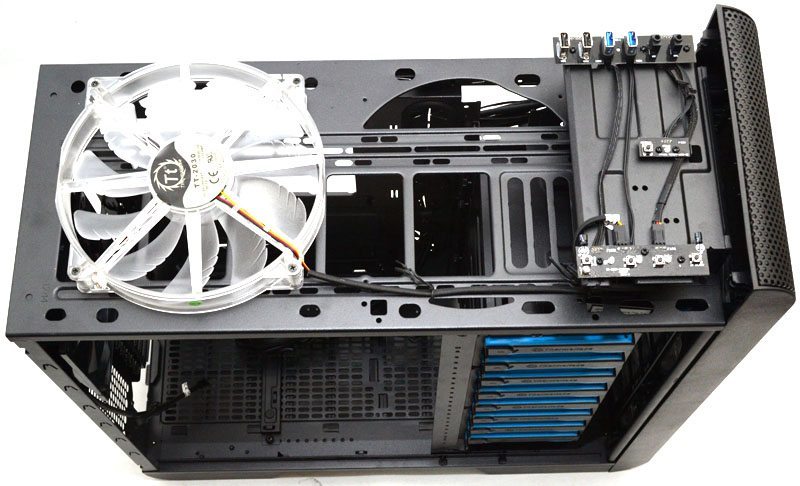
The top panel features loads of ventilation with the main I/O panel located towards the front.
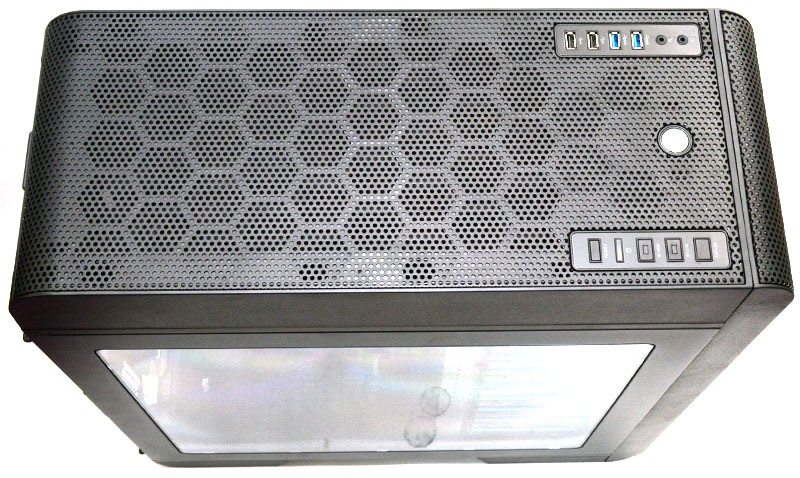
On the left you’ll find the reset button, HDD LED, a two-speed fan toggle (high / low) and the FAN LED control. On the right are two USB 2.0, two USB 3.0 and HD audio jacks, finally you’ll find the master power button located in the centre.
The underside features four very large and wide feet, perfect for providing a stable base for your heavy water-cooled system; you’ll also find four tough rubber grips on the base to prevent it sliding around and to also help reduce vibration from the system. Two large air filters cover the entire base of the chassis, one slides out from the back, the other front the front (after you pop off the front panel), allowing for quick and easy maintenance of the underside airflow.
Interior
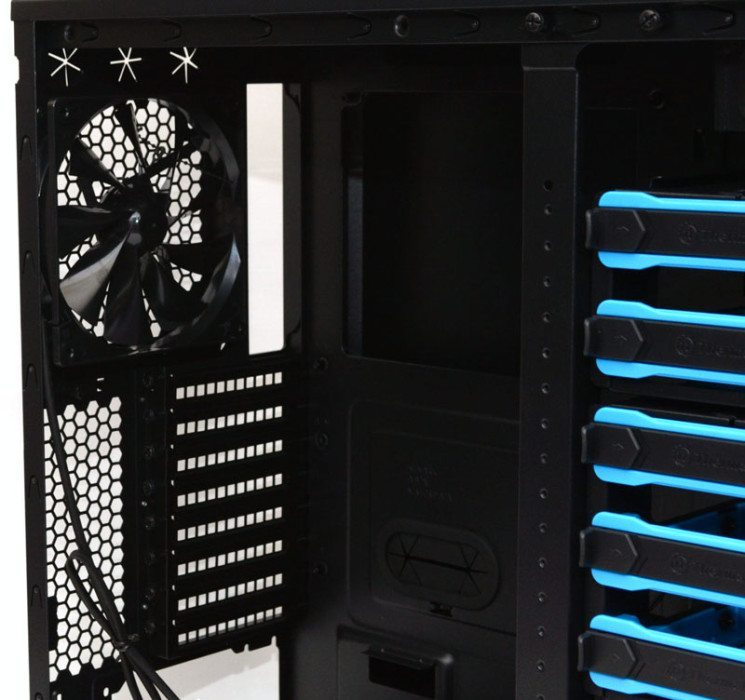
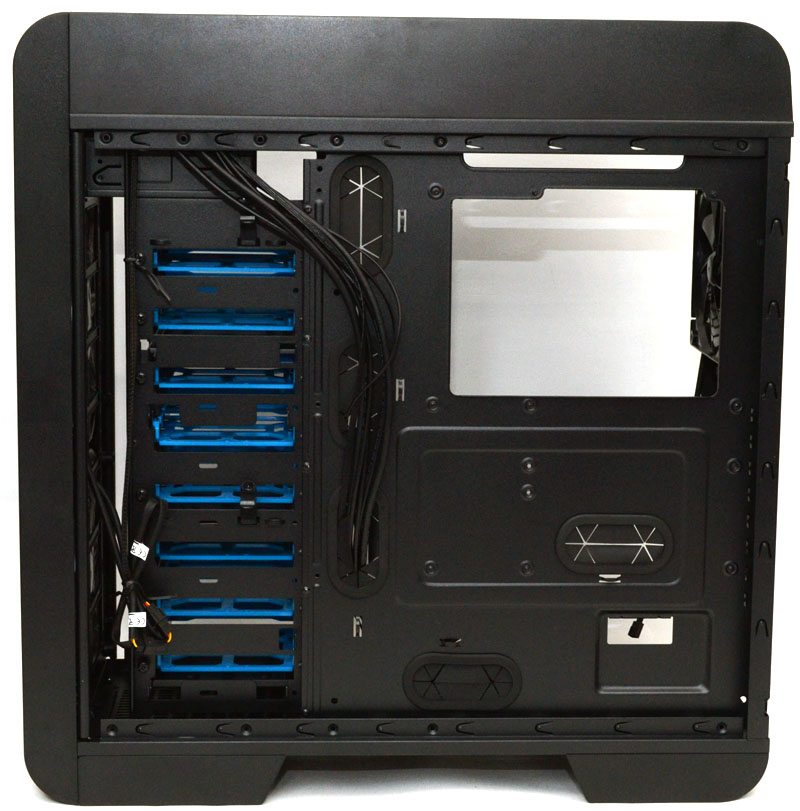
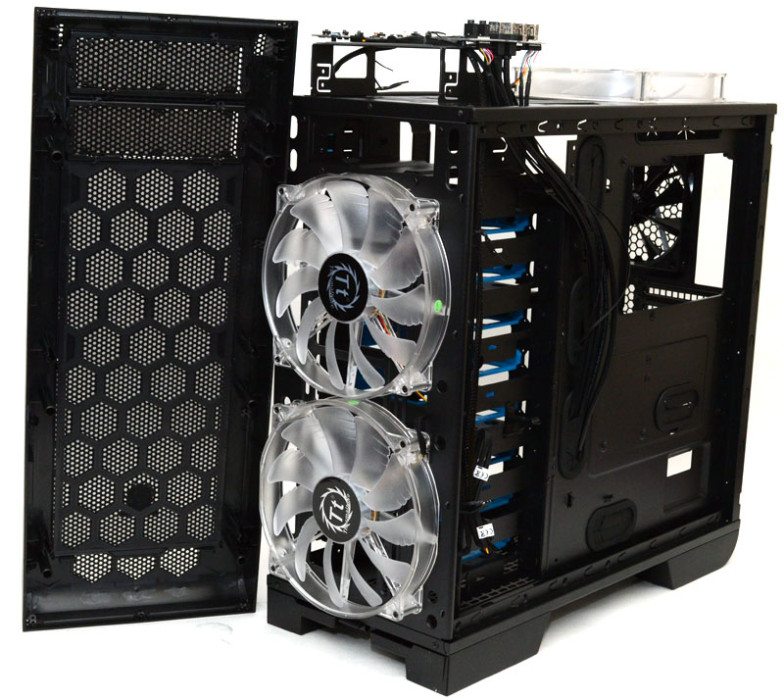
The interior has been treated with the same powder black finish as the exterior, giving it a very stealthy look that should mean the only thing you see when peeking through the window is your shiny components; oh and the bright blue trim on the storage bays of course. The motherboard tray features a huge cut-out that will certainly help with cooler installation / removal.
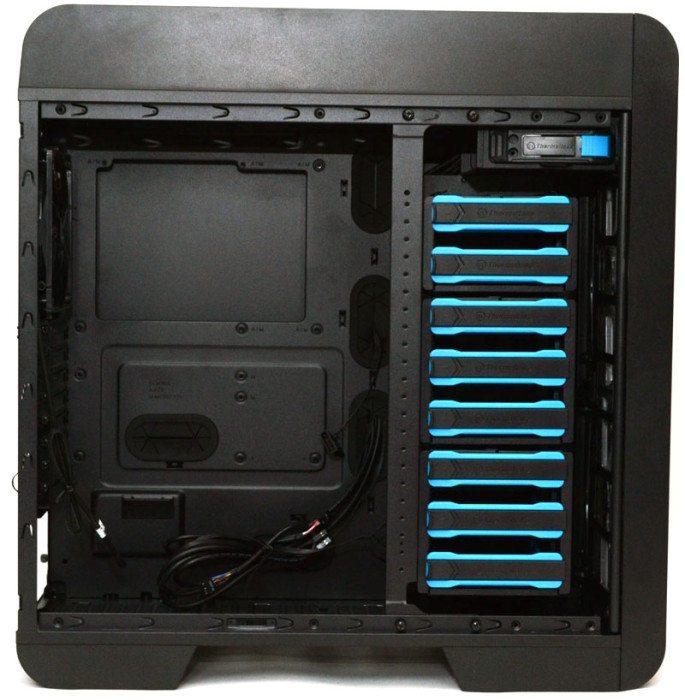
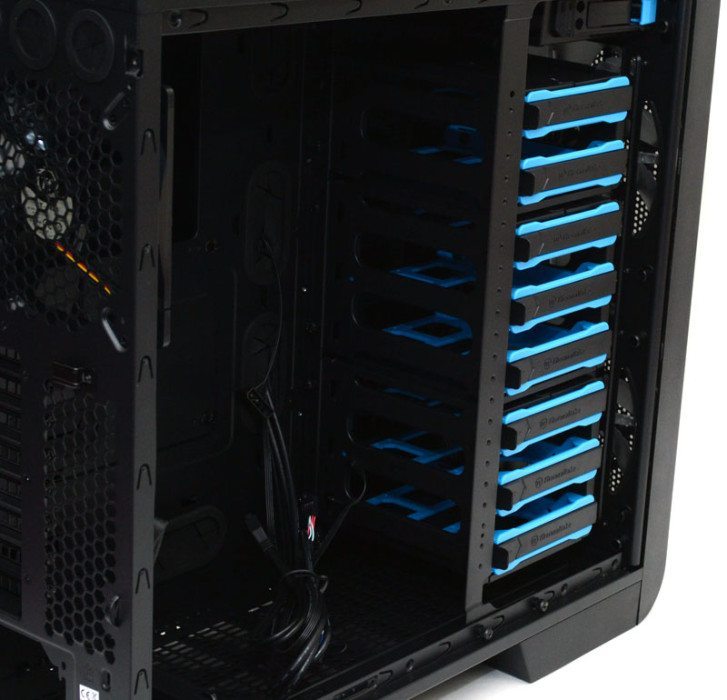
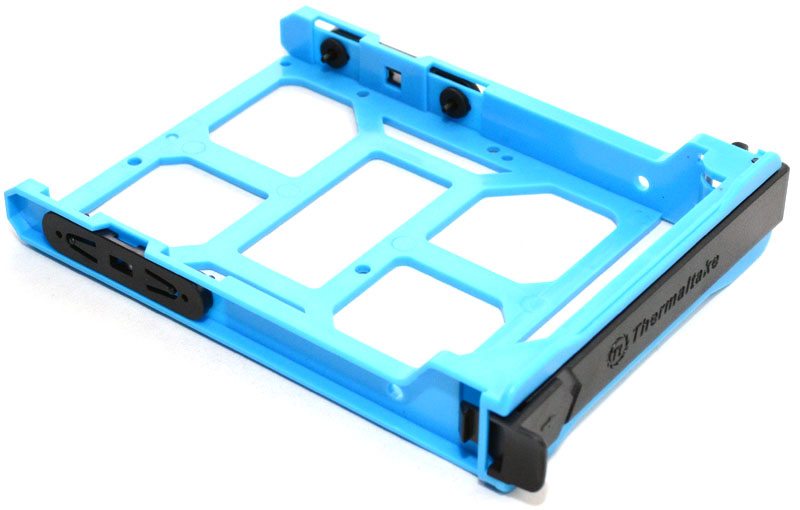
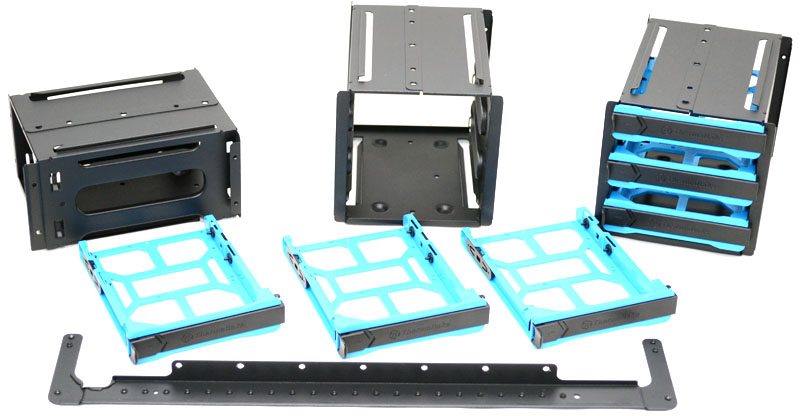
The hard drive bays are laid out in a 3+3+2 format, although each can be removed separately and placed in any order you like, giving you a lot of flexibility over how you arrange your storage components.
Even the top bay can be stripped out, freeing up even more space for front mounted cooling or case mods.
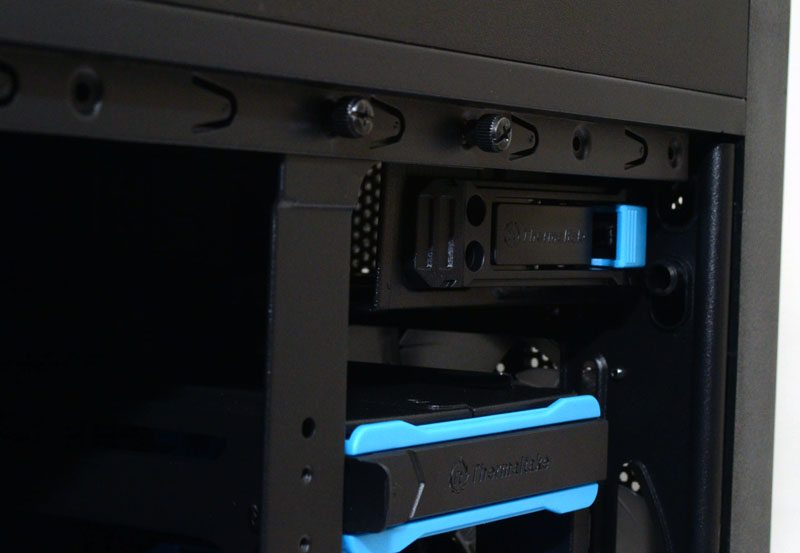
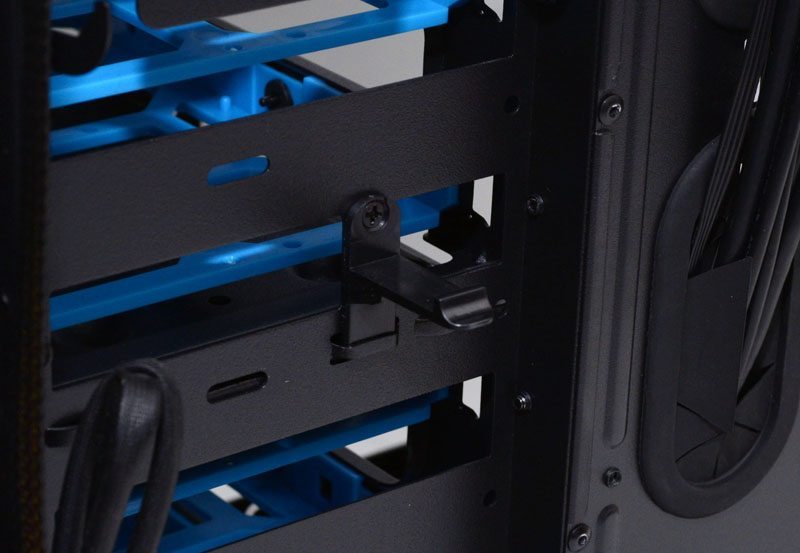
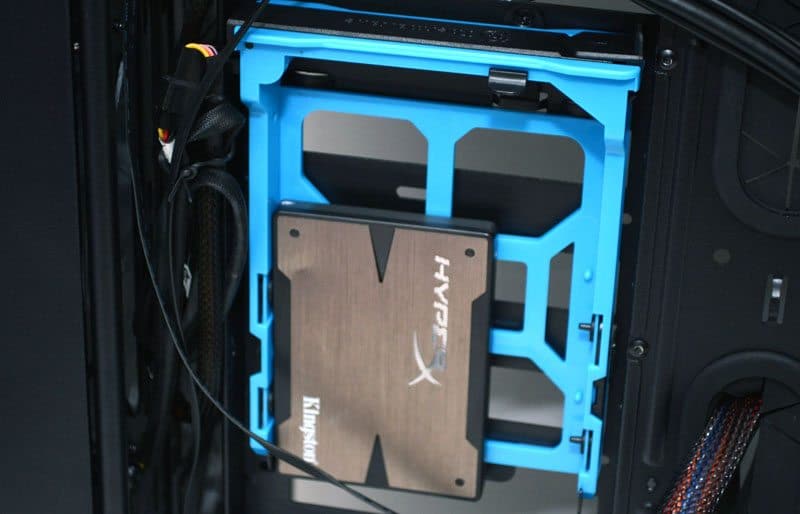
Each hard drive tray supports 3.5″ drives with a tool free mounting system, or you can use the included screws to mount 2.5″ drives. The drive trays can also doubt as the mount for the rear stealth mounts, but we’ll take a better look at how that works shortly.
In the back you’ll find a pre-installed black 140mm fan with black sleeved cable. Each of the expansion bays is fitted with a reusable ventilated cover and thumb screws for easy component installation and removal.
Here you can see the top fan and radiator mounting mesh, it’s a universal mounting system with long screw holes to allow you to best position any cooling solutions, whilst also offering maximum support for different spacings.
The PSU mount feature a movable support bar with two tough rubber pads on it. this can be adjusted back and forth or removed completely to ensure your PSU is mounted correctly, regardless of its size.
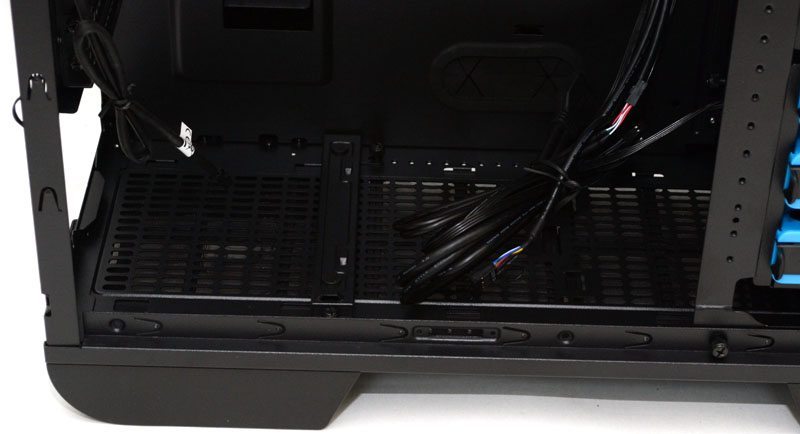
There’s plenty of room for cable routing here, it doesn’t look much but it’s more than doubled by the recess on the side panel, so even if it looks a little full here once your components are installed, you shouldn’t have any trouble getting the panel back in place. Cable routing options are very good, with five large grommets and several more openings around the motherboard, along with a few cable tie down loops to help keep things tidy.
The hard drive trays can be removed from the front of the system and once the hard drive bays are removed (since adjacent drive bay mounting screws cause conflicts) you can hang two of them round here.
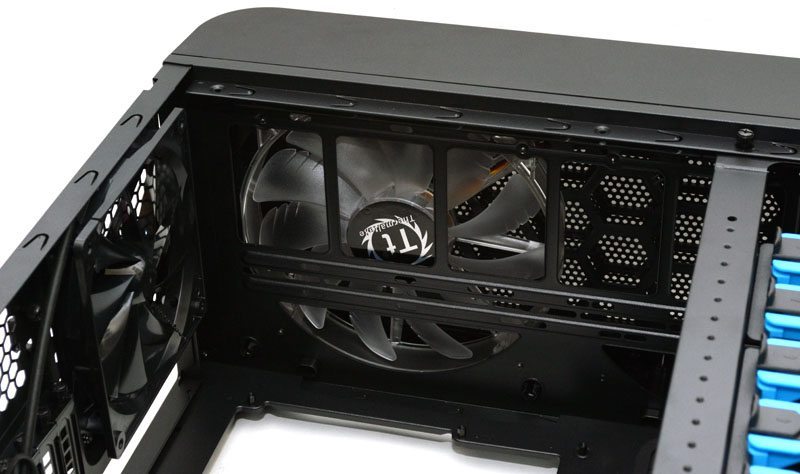
Under that massive top panel you’ll find space for two 200mm fans, you can also better see that extensive universal mounting section with more screw holes than you’ll likely ever need. The fan controller is also on display here, you could easily disconnect the pre-installed fans and attach your own if you felt the need to.
Two more 200mm fans in the front, by removing the front cover (a good tug on the base of it will do the trick) you gain access to the front air filter which pulls out for easy maintenance.
Here is the hard drive bay assembly. Not only can you remove the bays individually, but you can also remove the side support for them, freeing up even more space within the chassis. Let’s move onto the build section and see what it looks like with these components stripped out.
Complete System
Total install time on the Core V71 was around 40 minutes, a little longer than it usually takes me to put this kind of system together, but extra time was needed to remove the hard drive bays. The hard drive bays were all fitted with thumb screws, there was a lot of them and it can be time-consuming, although stripping them out is hardly a job you’ll be doing regularly so it’s hardly an issue.
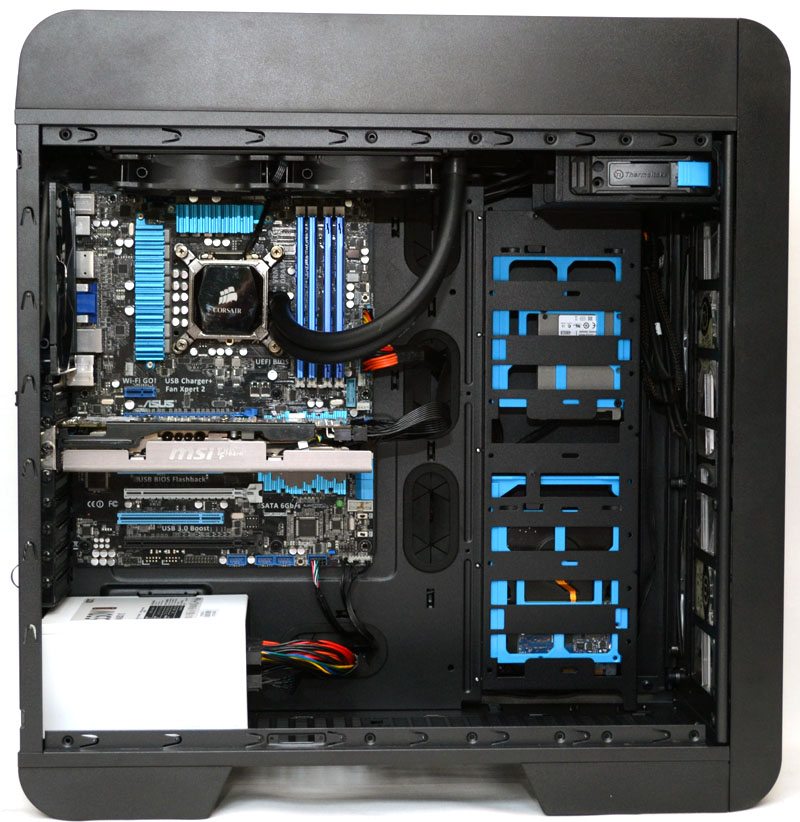
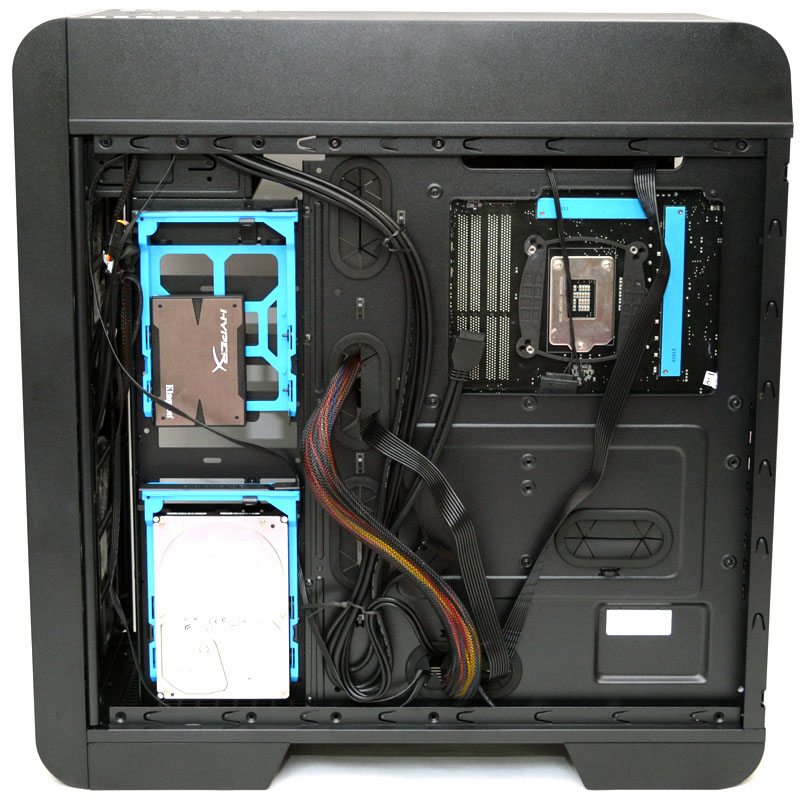
With all drive bays removed you’re left with a vast amount of space in the front of the chassis which can be used for front mounted water cooling radiators, reservoirs, pumps and other modifications. You can also just strip them out to give the interior a nice clean look and free up any airflow obstructions from the massive front fans, whilst also leaving room for literally any length of GPU that is currently available.

In the back you’ll see there is room for super-long power supplies, so those building hefty mining or rendering rigs that require 1500W PSUs or more shouldn’t have any issues.
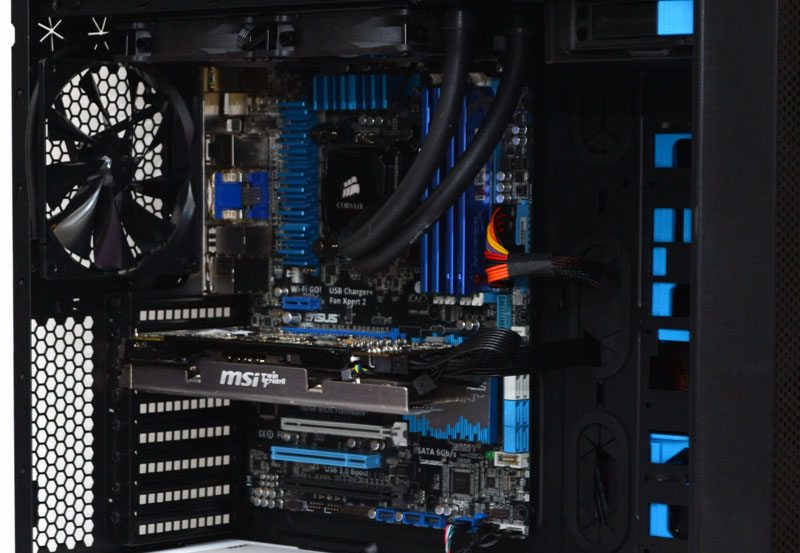
The cable management is excellent, with several large rubber grommets in ideal locations to handle all the cables for your major components; airflow is unobstructed and it also helps keep things aesthetically pleasing.
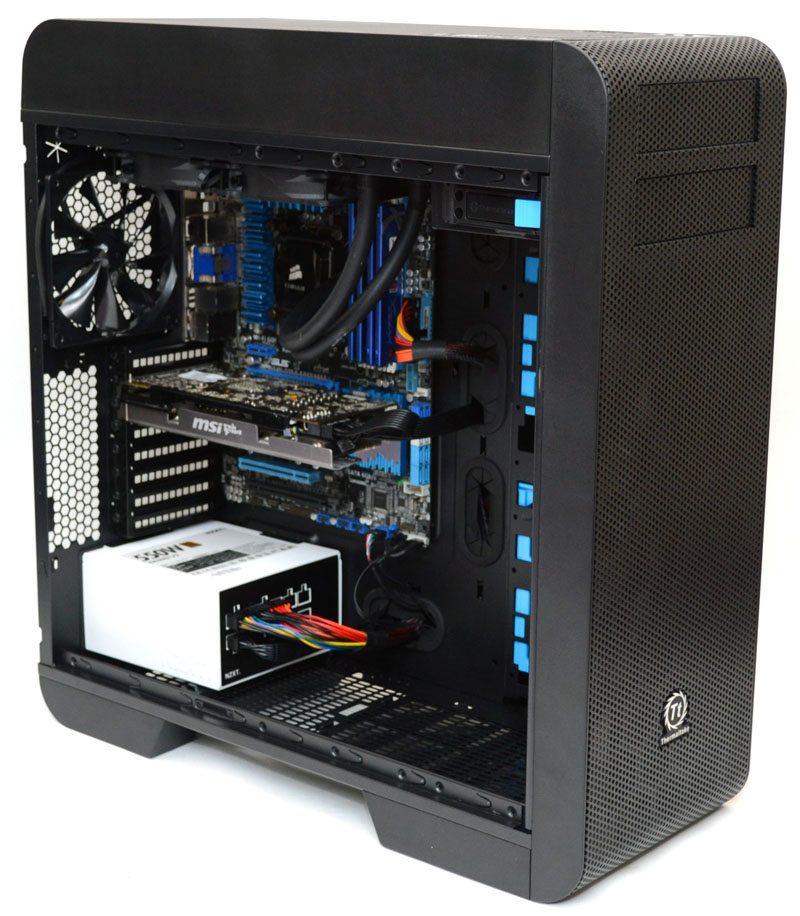
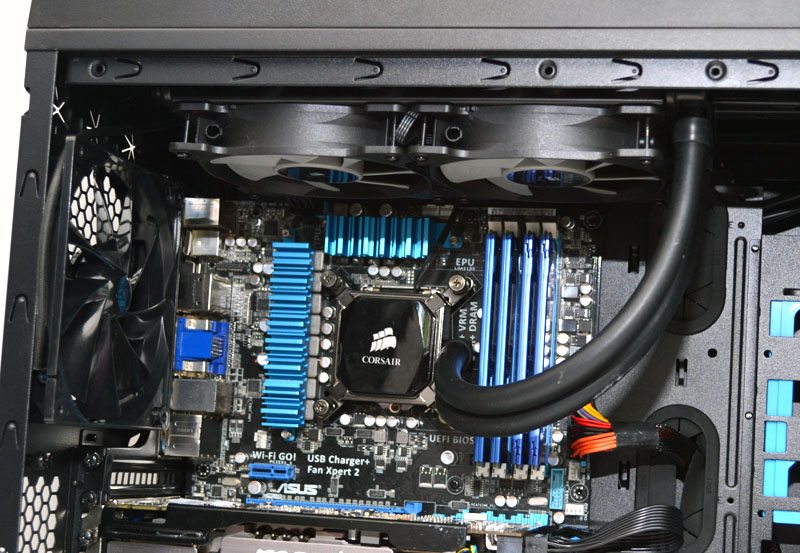
There is more than enough room for a slim radiator and a set of fans in the top, but of course I still have the 200mm fan installed above the radiator, so easily enough room for a large push-pull configuration here.
Cable routing is relatively tidy, it looks a little cramped, but the recess in the side panel will take care of any bulky cables easy enough. As you can see, I’ve mounted two hard drives into the removable drive trays from the front and mounted them in the back of the chassis.
Each bay easily clips into place thanks to two hooks at the bottom and a clip at the top.
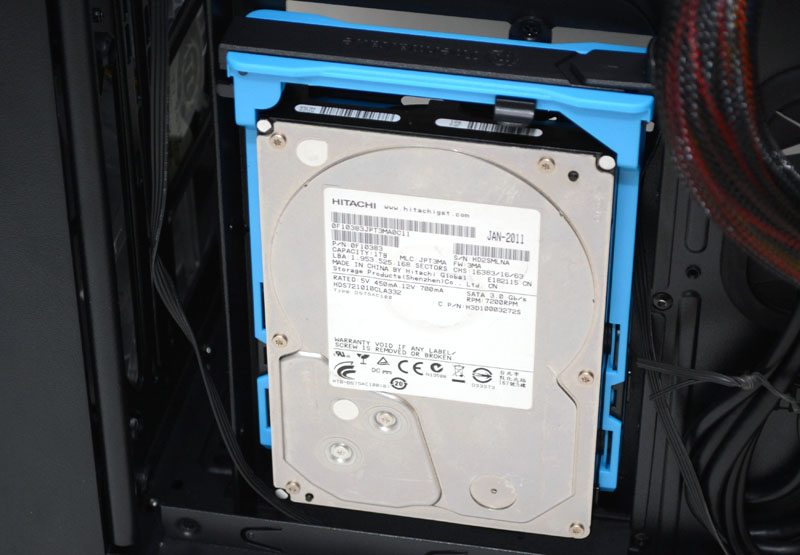
You can mount either a 2.5″ or 3.5″ drive and let’s be honest, you don’t see many chassis supporting 3.5″ drives behind the motherboard! This is very impressive.
Side panel back on and you can see just how clear that side panel window is, giving you a great view of the chassis interior and it’ll look even better if you’re planning on throwing some lighting into your build.
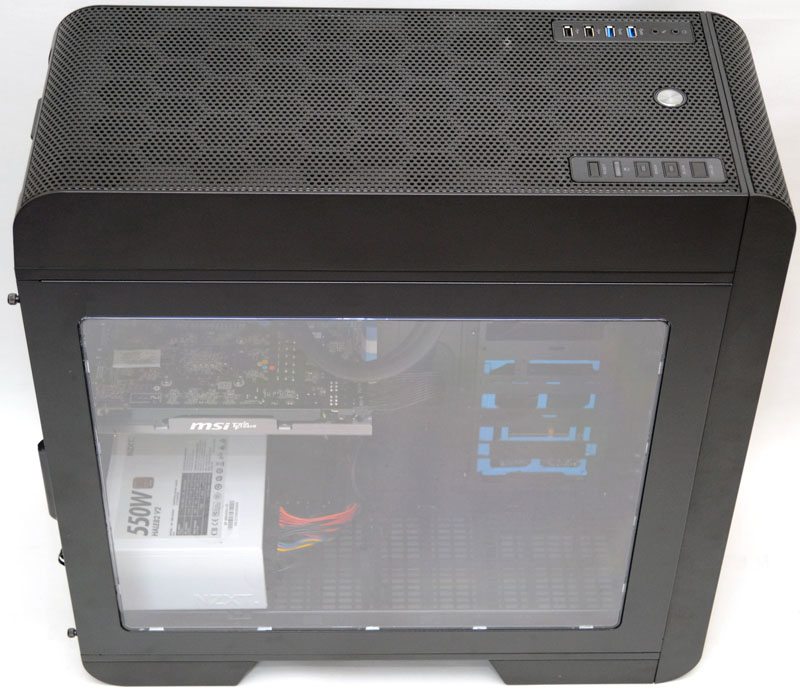
Overall a very bold design with some very clean exterior looks and a great view of the interior. This should prove a popular choice for those who want to mod their case, add water cooling or just want to have a great looking chassis overall.
Final Thoughts
Price
The Thermaltake Core V71 is a premium grade product, so it can be quite expensive and most retailers have it listen in the region of £130 here in the UK and around $169.99 in the US. At time of writing there was a good deal at Scan.co.uk for £106 + shipping, which for a chassis of this specification is a great deal, even at full retail price is very competitive when compared with similar priced offerings from Coolermaster, Corsair, NZXT and many more.
Overview
Thermaltake have once again gone all out with their latest chassis; component support is incredibly high in the Core V71 and for those looking to invest in a high-end gaming rig, the cavernous interior is going make easy work of any high-end graphics cards, motherboards and more. The biggest factor is of course the cooling support, with extreme performance graphics cards and CPUs requiring significant air flow to help keep them cool, the more fan and radiator mounts you have to work with, the better. Obviously the Core V71 has a lot of support for a wide range of fan and radiator configurations and even if you’re not interested in saturating the chassis with a complicated custom loop cooling system, you’re still going to benefit from the 1 x 140mm and 3 x 200mm fans which come pre-installed.
Build quality is rock solid throughout, from the metal work on the front and top panel mesh, to the removable drive bay array. Everything feels robust, nothing rattles, nothing squeaks and all this is very important as when you’re loading your rig up with 50KG of radiators and water equipment, you want it to be able to withstand the weight. I’m confident that the V71 would survive more than a few knocks and bumps without too much issue.
The case is packed full of features that add value for money, the pre-installed fans, a built-in fan controller, every intake is filtered with high-quality, easily accessible and washable dust filters, a massive side panel window, rubber grommets on the cable routing and more. The price may creep into three figures, but you’re certainly getting a lot back for your money.
The design is pretty bulky, but it has to be to accommodate such large components. I’m not 100% a fan of the external design as I prefer a sleeker look, but it’s certainly far from being ugly; all subjective of course. The case also seems very mod friendly, large panels that are easy to work with, bays that are easily removed and loads of extra space will certainly prove popular with those who like to create custom builds.
“There are lots of great chassis out there for high-end gaming rigs, but few can offer this level of cooling support in this form factor or this price range. The price may seem high, but compared to rival offerings it’s certainly competitive and the Thermaltake Core V71 should be very high on your list of considerations for your next gaming rig.”
Pros
- Extensive cooling support
- Four high-quality fans pre-installed
- Fully modular and removable hard drive bays
- Rear hard drive mounts that support both 2.5″ and 3.5″ drives
- Four large washable dust filters
- Highly competitive price tag
- Durable build quality
- Large side panel window
Cons
- None

Thermaltake Core V71 Full Tower Chassis Review
Thank you Thermaltake for providing us with this sample.


