Aerocool Project 7 P7-C0 Pro Chassis Review
Peter Donnell / 7 years ago
A Closer Look – Exterior
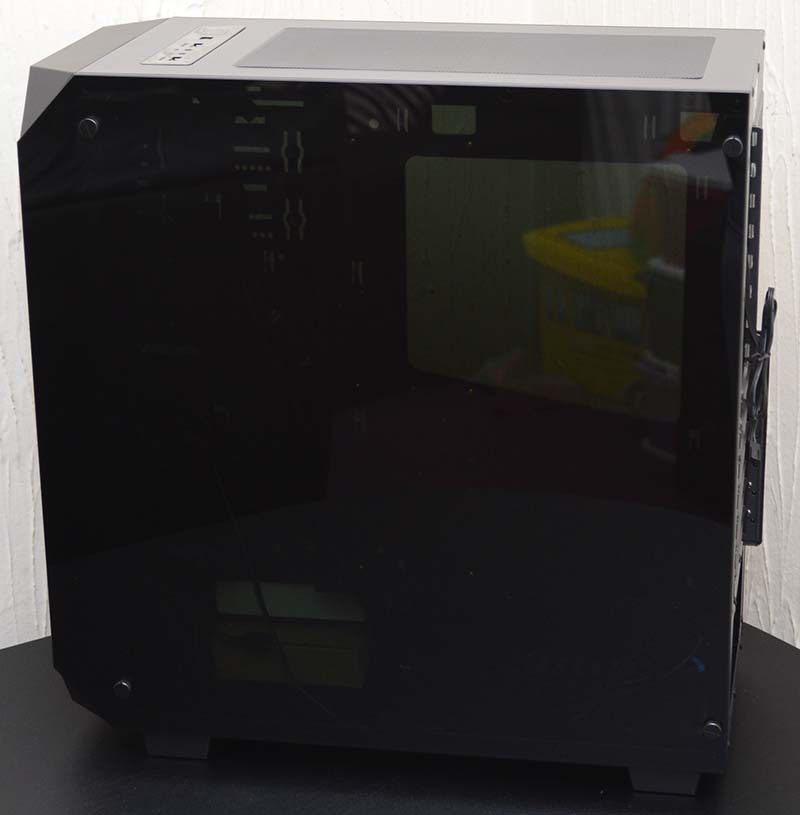
The first thing you’ll notice about this chassis is that dual tempered glass design. Both the left and right side panels are dark tinted tempered glass. This is going to be a great way to show off your hardware, and will no doubt look great once you fire up the built-in lighting.
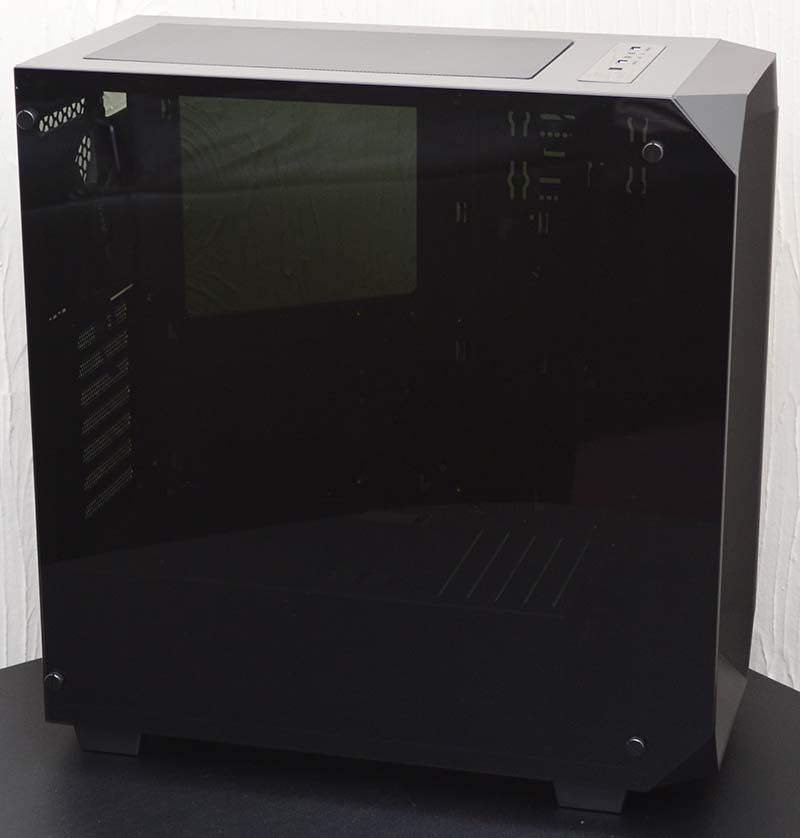
Both side panels look the same, and I love their cut corner design on the front panel. It’s nothing crazy, but it’s a little twist that adds to the overall aesthetics. Unfortunately, double windows do mean your cable routing will have to be spot on, as any flaws will be on show.
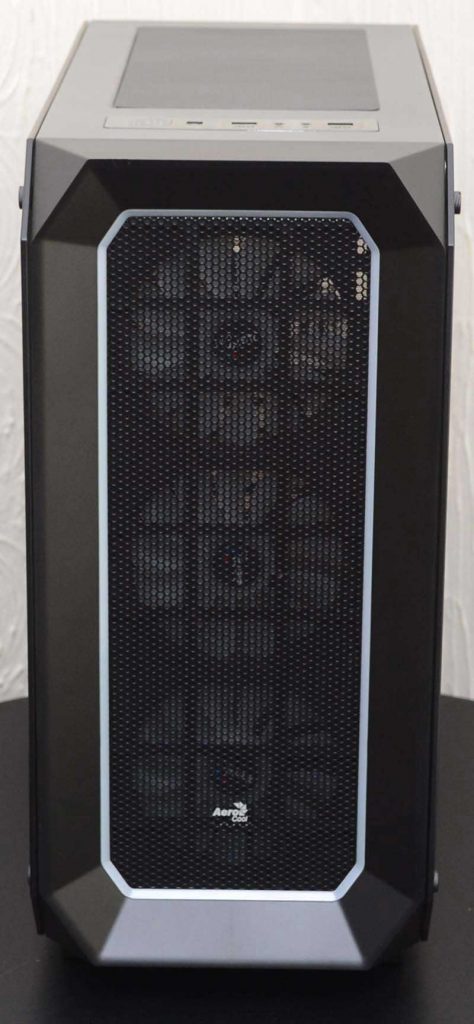
The front panel has a unique design too, with an angular surround that gives it a stylish and futuristic vibe. Around the fan mesh, you’ll find a strip of RGB lighting wrapping around the whole thing. Behind that, you can see the three pre-installed 120mm RGB LED fans. Overall, it’s a very nice looking panel and should provide a huge amount of airflow to your build.
Around the back
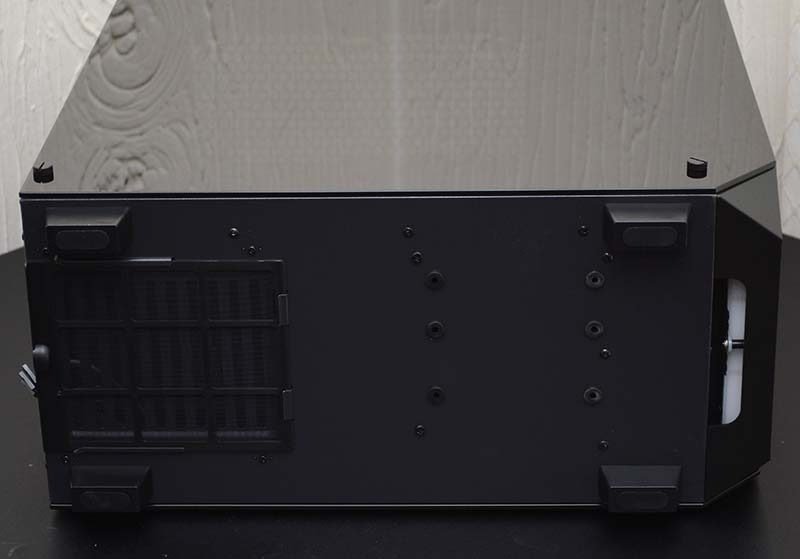
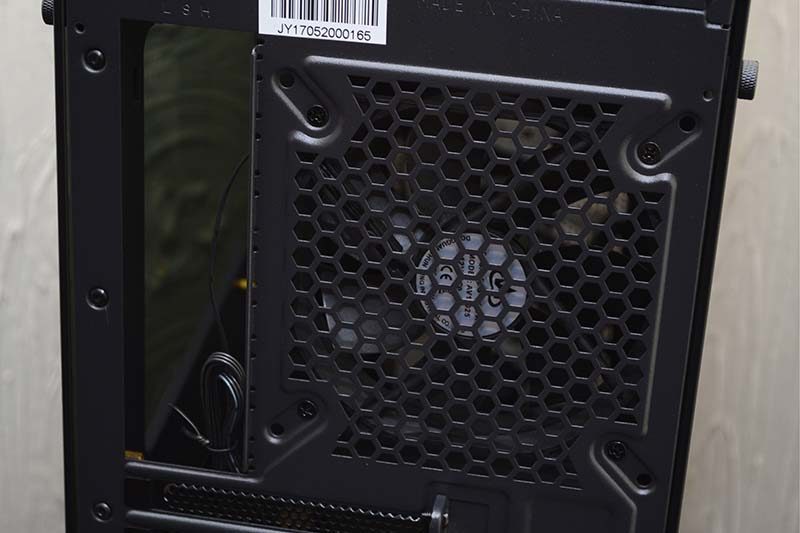
Around the back, things look pretty straight forward. There’s a 120/140mm fan mount, with a single 120mm exhaust fan pre-installed at the top. Below that, there are seven expansion slots, each fitted with a reusable metal cover, as well as a screw guard. Finally, you’ll find the PSU mount in the base.

The rear fan isn’t RGB like the ones in the front, but at least with 120/140mm mounts, you’ve got the option to fit your own, or even an AIO cooler here.
The PSU will need to be mounted fan down, as it’ll be under the PSU shroud. There’s a slide out dust filter at the back though, ensuring the PSU gets its own clean air flow.

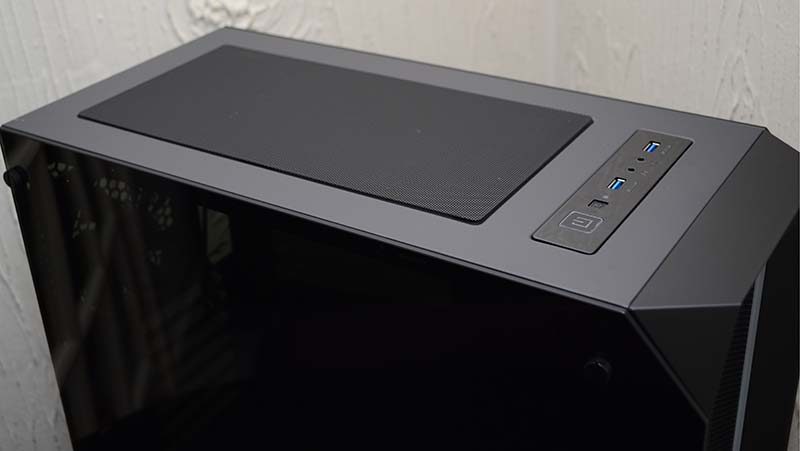
Up top, there’s a compact but practical I/O panel, with a pair of USB ports, and HD audio jacks. Of course, you’ll also find the basic power controls too.
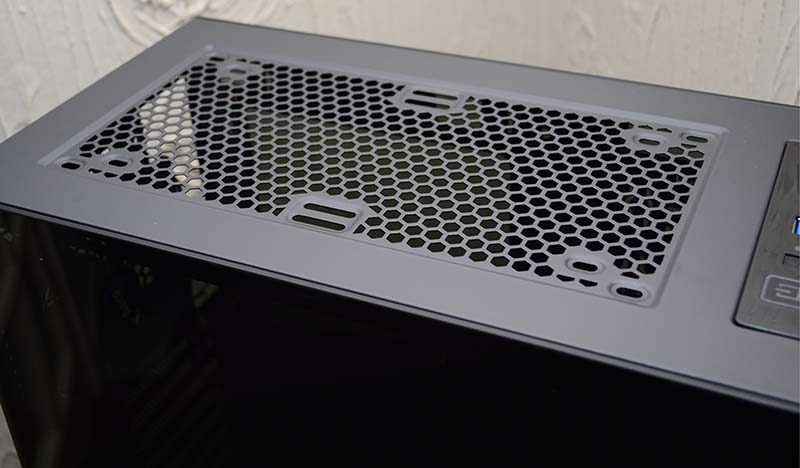
The magnetic dust filter on the top lifts off for easy cleaning. However, behind it you’ll find room for a pair of 120 or 140mm fans, although it doesn’t look like there’s clearance for a radiator here, so you may have to mount one on the front panel if you need one.
Finally, on the base of the chassis, there are four small plastic feet with hard rubber grips. These provide good ground clearance for the PSU air intake. Near the middle, there are a few screws, allowing you to remove the 3.5″ HDD bay that resides under the PSU shroud.