be quiet! Dark Rock Pro 3 CPU Cooler Review
Installation
Installing the Dark Rock Pro 3 CPU cooler is literally one of the hardest physical tasks I’ve ever undertaken in my adult life, I’ll explain why shortly. The first task is simple enough, screw on the AMD or Intel brackets to the bottom of the CPU block.

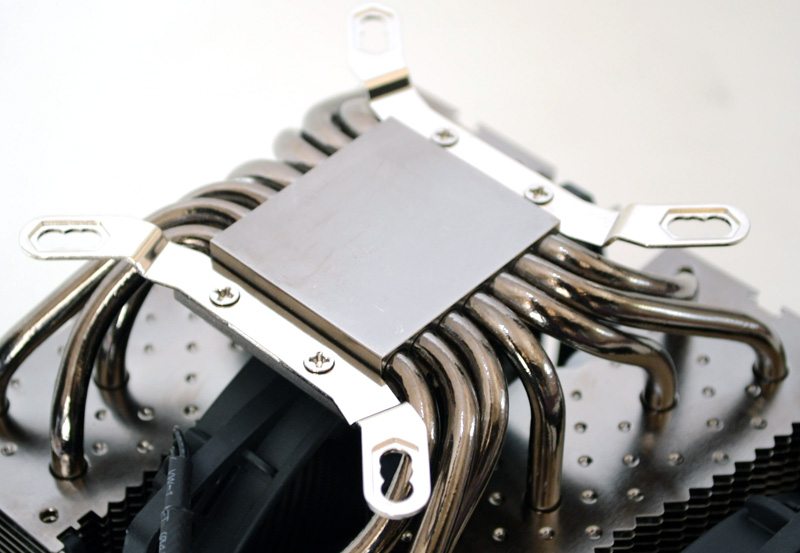
Push the four long screws through the appropriate hole son the back place and place on the back of the motherboard.

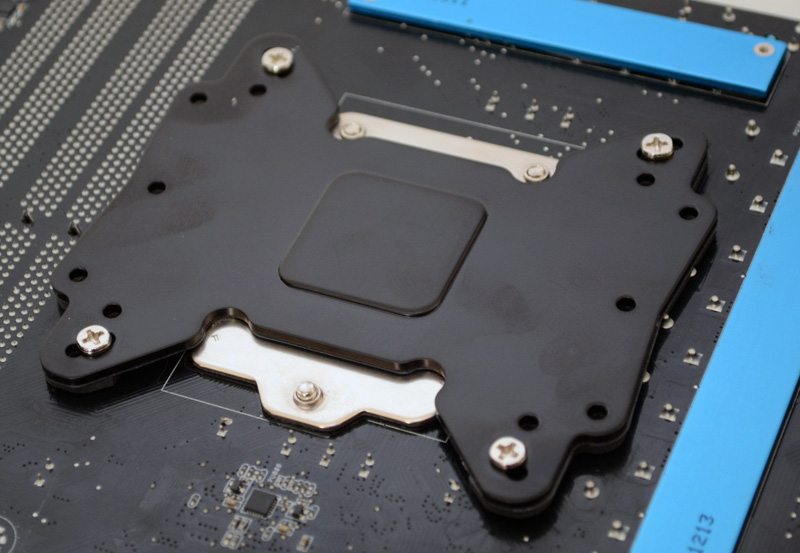
Four retention clips hold the whole thing in place, so far so good. Unfortunately, this is where mounting this cooler becomes a small nightmare.

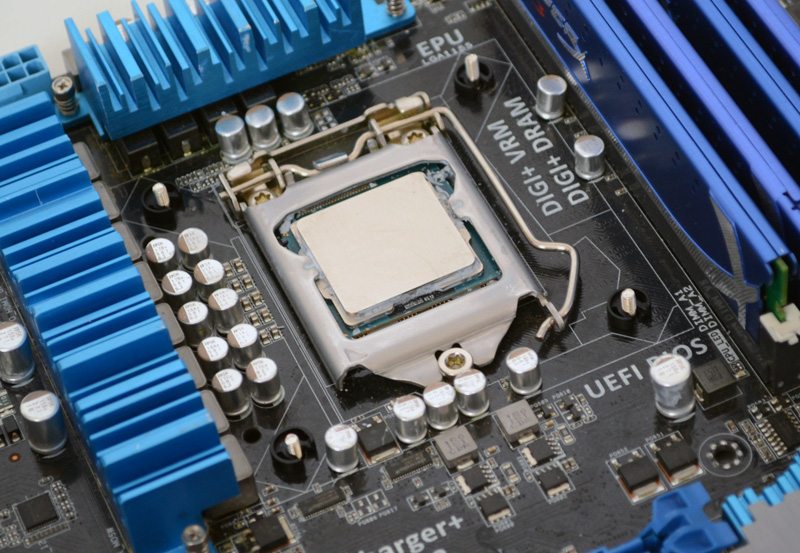
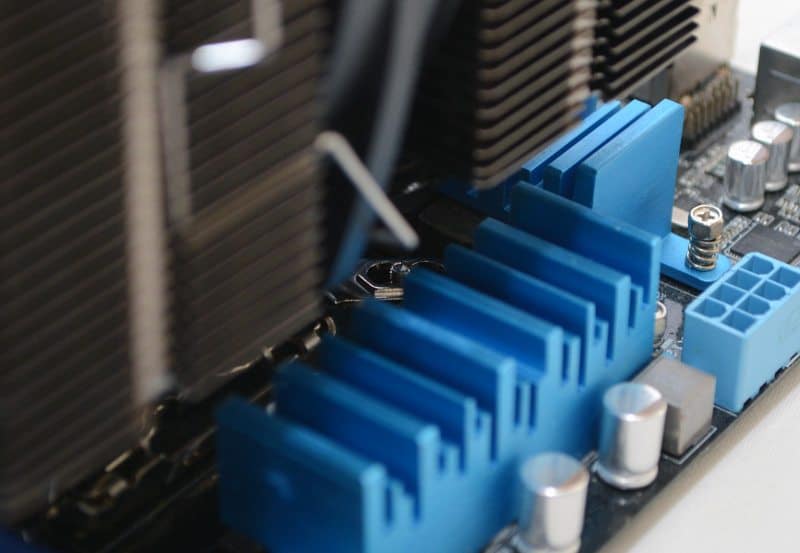
Place the cooler over the motherboard and you can immediately see that this causes huge overhang on the MOSFET coolers, as well as on the ram modules on the other side. The two screws nearest the top PCI slot are tricky, but not impossible to tighten.

This bolt was unfortunately my biggest headache, requiring me to move one of the blue heat sinks on the motherboard and the use of a pair of needle nose pliers to get it installed.

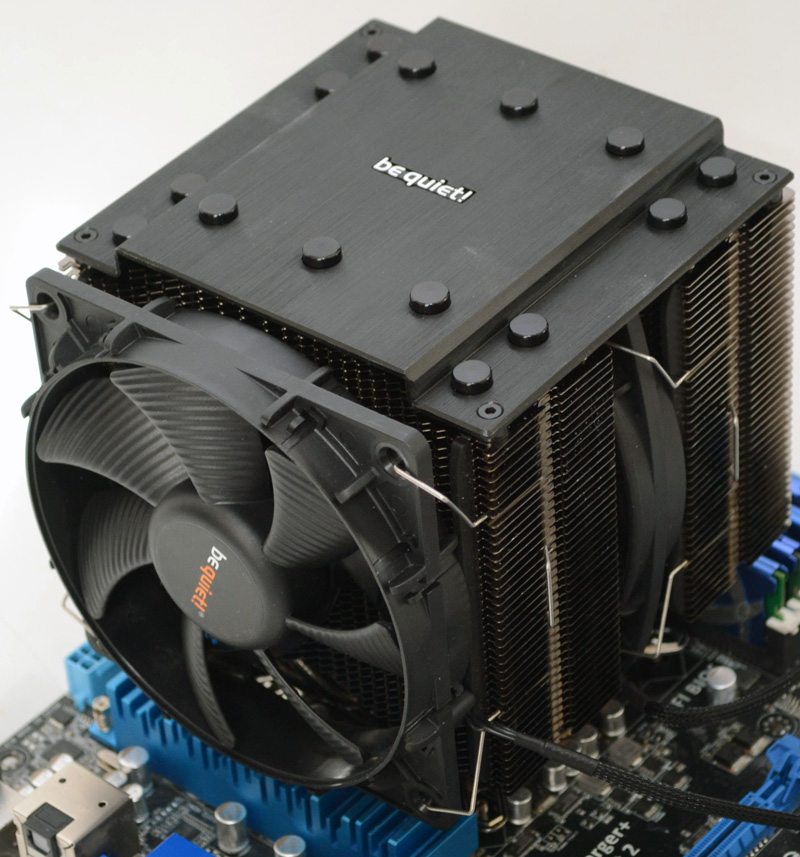
No matter the orientation of the cooler, you’ll find that the screws are very difficult to access and that removing the fans will make little or no difference. Total install time was over 1 hour, and this is with the motherboard removed from the test bench, as there is no way you could install this with your motherboard already inside a chassis, keep that in mind when purchasing.


No man it’s just too gargantuan, it’s probably better suited to something like a test bench, not a common 9 to 5 PC case.
Great test, and clearly detailed info – even when I have one myself already, here is still loads of info to find & learn. Thank you.
However guys, the assembly isn’t bad for everyone. Imagine, there’s possibility of fitting this one, even without removing the motherboard. How come? Ask AMD CPU users. Fitting this one on my Phenom II x4 960T BE 3,0GHz – 3.4GHz Turbo (currently OC 3,8GHz – 4.0GHz Turbo) without any hassle at all takes about 15-20 minutes including fitting the thermal compound. And not in huge case, but in budget Zalman Z3 Plus – which has been chosen by me for great look and it’s great potential for modifications I’ve made already :)
So I rather way much love than hate – this incredibly easy assembly (for AM2, AM3 & AM3+ sockets), this silence, this temperatures (29*C Idle 45-46*C Stress), and also love it’s appearance in this case:
http://images68.fotosik.pl/551/00e6f98092efe467.jpg
http://images66.fotosik.pl/550/3de8356e3d540333.jpg
Ten fans in total in my case, which both in this cooler runs around 1325 RPM (smaller) / 925 RPM (bigger) and rest of them never exceed 800 RPM – late night, when all sounds at home and on the outside gone my working on this PC is still pleasant.
This block of cooling engineering even partly visible through side panel window still looks respectful. Very.
I didn’t found any info about maximum TDP of CPU this cooler can manage – and this one is quite big, as it will does his job with huge 250W of Thermal Design Power. And that’s make it as a very universal choice for any CPU on the market.
Great test, and clearly detailed info – even when I have one myself already, here is still loads of info to find & learn. Thank you.
However guys, the assembly isn’t bad for everyone. Imagine, there’s possibility of fitting this one, even without removing the motherboard. How come? Ask AMD CPU users. Fitting this one on my Phenom II x4 960T BE 3,0GHz – 3.4GHz Turbo (currently OC 3,8GHz – 4.0GHz Turbo) without any hassle at all takes about 15-20 minutes including fitting the thermal compound. And not in huge case, but in budget Zalman Z3 Plus – which has been chosen by me for great look and it’s great potential for modifications I’ve made already :)
So I rather way much love than hate – this incredibly easy assembly (for AM2, AM3 & AM3+ sockets), this silence, this temperatures (29*C Idle 45-46*C Stress), and also love it’s appearance in my case (see pic.).
Ten fans in total in my case, which both in this cooler runs around 1325 RPM (smaller) / 925 RPM (bigger) and rest of them never exceed 800 RPM – late night, when all sounds at home and on the outside gone my working on this PC is still pleasant.
And this block of cooling engineering even partly visible through side panel window still looks respectful. Very.
I didn’t found any info about maximum TDP of CPU this cooler can manage – and this one is quite big, as it will does his job with huge 250W of Thermal Design Power. And that’s make it as a very universal choice for any CPU on the market.
Great test, and clearly detailed info – even when I have one myself already, here is still loads of info to find & learn. Thank you.
However guys, the assembly isn’t bad for everyone. Imagine, there’s possibility of fitting this one, even without removing the motherboard. How come? Ask AMD CPU users. Fitting this one on my Phenom II x4 960T BE 3,0GHz – 3.4GHz Turbo (currently OC 3,8GHz – 4.0GHz Turbo) without any hassle at all takes about 15-20 minutes including fitting the thermal compound. And not in huge case, but in budget Zalman Z3 Plus – which has been chosen by me for great look and it’s great potential for modifications I’ve made already :)
So I rather way much love than hate – this incredibly easy assembly (for AM2, AM3 & AM3+ sockets), this silence, this temperatures (29*C Idle 45-46*C Stress), and also love it’s appearance in my case (see pic. below).
Ten fans in total in my case, which both in this cooler runs around 1325 RPM (smaller) / 925 RPM (bigger) and rest of them never exceed 800 RPM – late night, when all sounds at home and on the outside gone my working on this PC is still pleasant.
And this block of cooling engineering even partly visible through side panel window still looks respectful. Very.
I didn’t found any info about maximum TDP of CPU this cooler can manage – and this one is quite big, as it will does his job with huge 250W of Thermal Design Power. And that’s make it as a very universal choice for any CPU on the market.