Everybody Can NAS, a Beginners Guide to OpenMediaVault
Bohs Hansen / 10 years ago
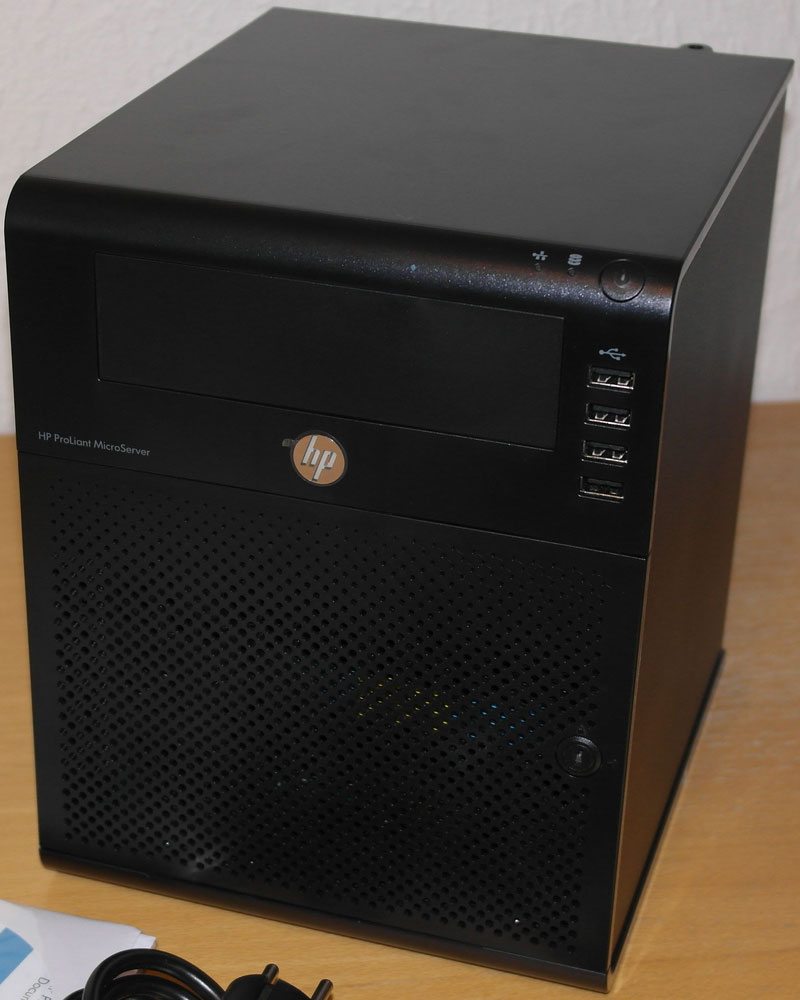
Exterior
The first thing I noticed when unpacking it and having the first look, was how simple the device looks and I’m sure it will blend in well in most places.
The Front Side
At the top of the device, we have the power button and two LEDs, one for network and one for HDD activity. Just below them, we have the 5¼ inch bay that can be used for anything you like. It is intended for an optical drive, but very few need that in a NAS and ends up in problems with auto-mount and share more often than not. On the right side of the drive bay, we have four USB 2.0 ports.
The HP logo on the middle acts as power and error LED and shines a bright blue when the device is running. Below the logo, we find the door to the magic. It comes with a simple lock to prevent sticky fingers inside.
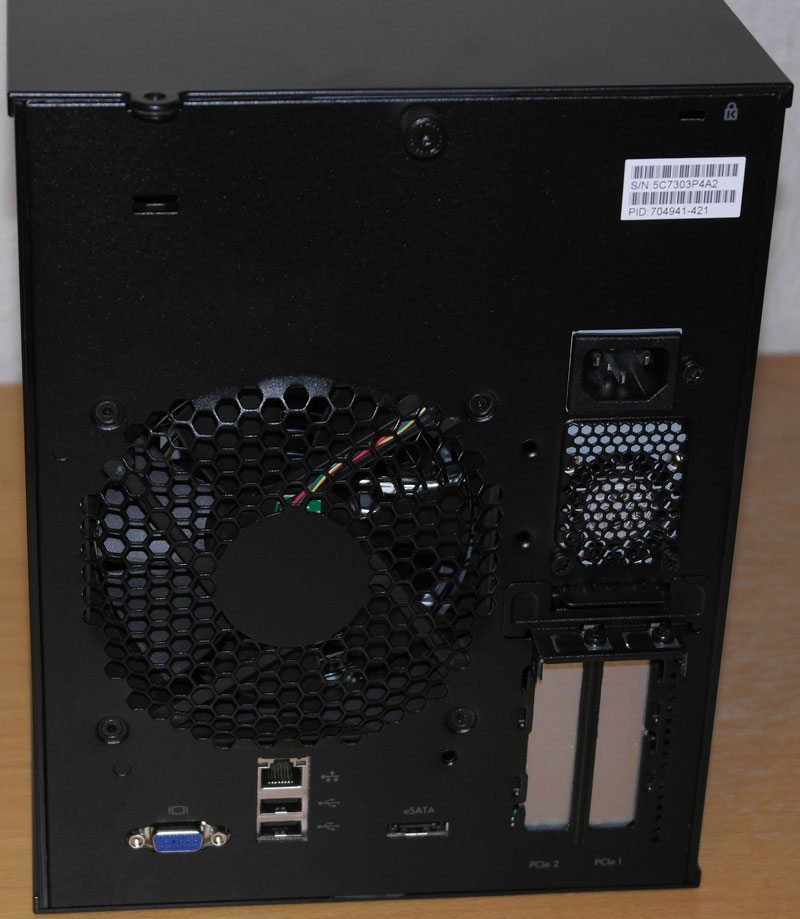
The Rear Side
Turning the server around, we see the obligatory Kensington Lock at the top right corner. At the top left we have another security ring that can be used to prevent the top cover from being opened. The thumb-screw in the middle is for removing the top cover.
A bit further down to the middle we have the 120 mm fan that cools the entire unit and the small PSU next to it. A little note to modders who wish to replace the fan, it does not use default pin assignment and you will have to redo the wiring if you wish to replace it. Guides for this can be found on the web if needed.
At the bottom, we have a D-sub VGA port, a Gigabit RJ45 port, two USB 2.0 ports and an eSATA port. We also see the 2 low profile extension slots that can be used with PCI-Express cards. People who wish to use those should keep in mind that the PSU only delivers a total of 150 watts.