Linksys WRT3200ACM AC3200 MU-MIMO Gigabit WiFi Router Review
Bohs Hansen / 7 years ago
Setup & Initialization
The setup of the WRT3200ACM is as easy as it can be. Connect power, turn it on, and if you are on a wireless connection, connect to the default SSID with the information found on the bottom of the router. Now it’s working, but it isn’t configured yet.
You can either manually connect to its IP address (192.168.1.1) or use the official Linksys Smart Wi-Fi app for Android or iOS devices. Should you be on a Windows, MeeGo, or Sailfish mobile, then you simply use a browser app as you would on your desktop. More help for this can be found in the quick-install guide you found inside the box.
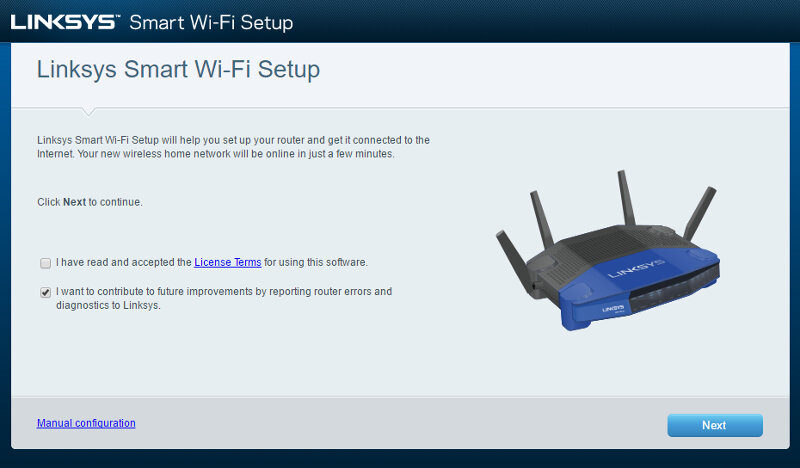
Once connected to the router, you’ll be greeted with the setup guide that will change the basic settings according to your input in a few simple steps. But first, you must agree to the terms of usage, as with any device. You can also select whether you want to provide anonymous statistics and bug reports to Linksys.
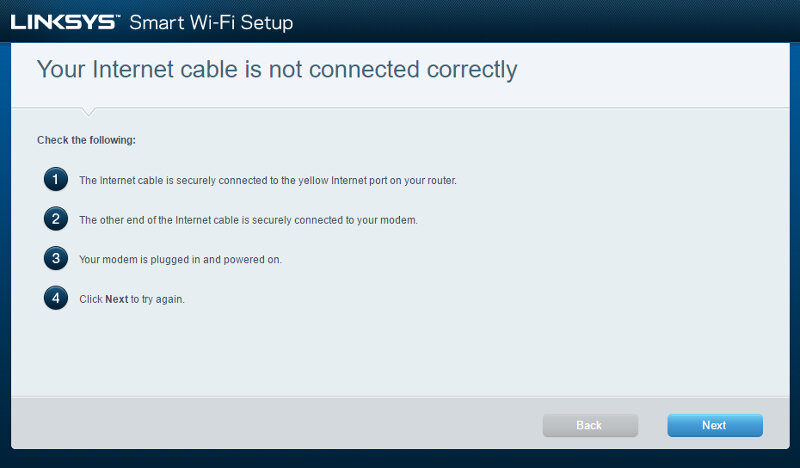
The setup will warn you and let you know in case that you haven’t connected everything properly. In this case, I hadn’t connected the WAN cable yet.
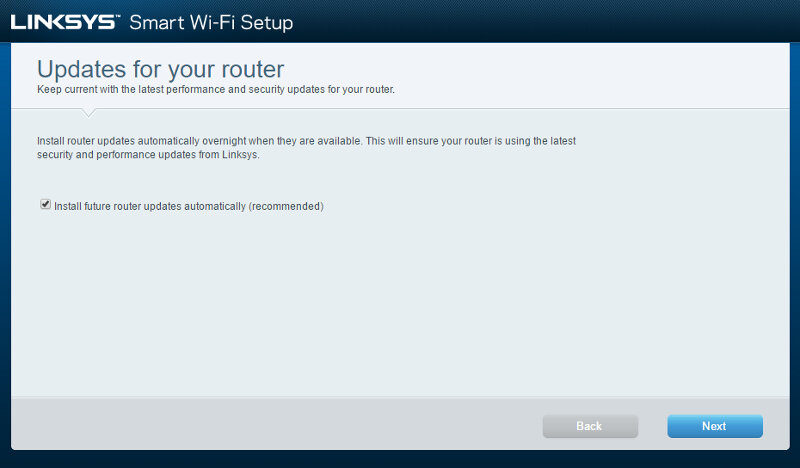
If everything is connected properly, the setup will continue. The first thing you need to select is whether you want the router to install firmware upgrade automatically as the become available or not. I would recommend to turn this on as you don’t need to worry about updates later on in the device’s lifecycle.
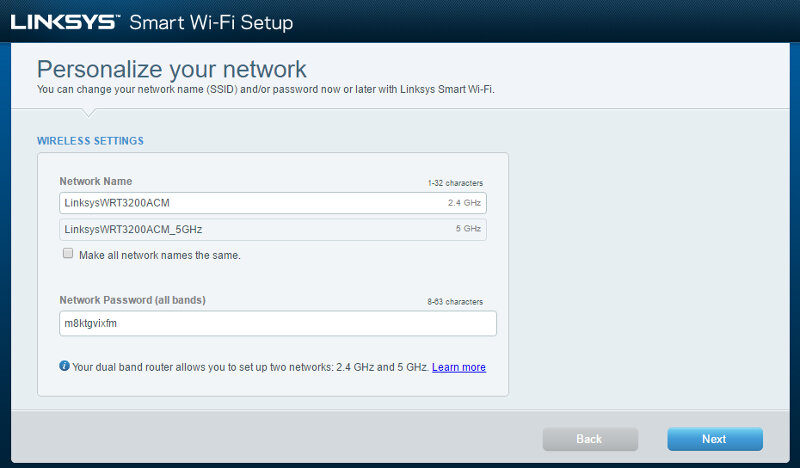
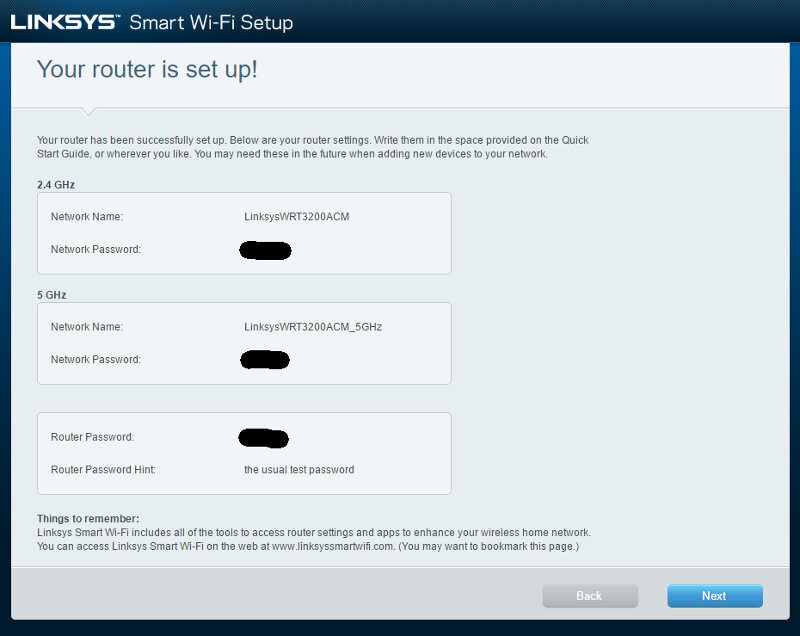
We also need to configure the network settings. We can have individual names for the 2.4GHz and the 5GHz band, or we can set the to the same. During the setup, you only need to provide one password that will be set for both networks, but you can change that in the full setup.
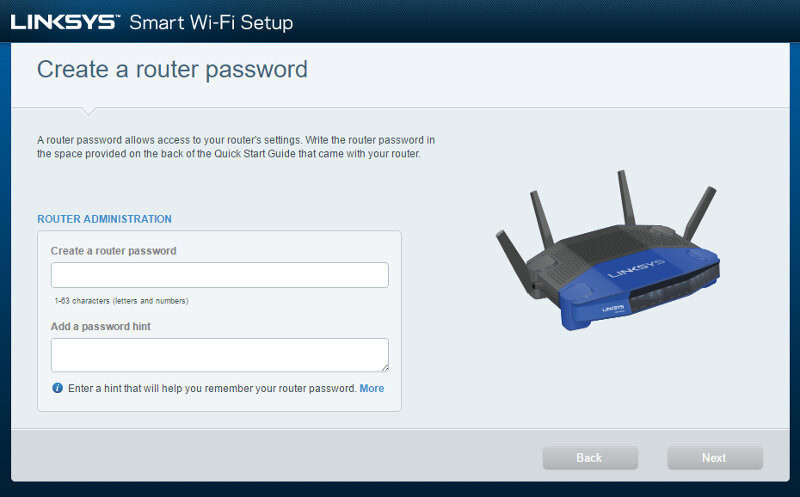
The last thing to set is the router password. You shouldn’t pick the same as you set for the Wireless networks, but make sure that it is something you remember. You won’t need it often, but you’ll have to reset the router to factory settings if you forget it and want to get back into the system to change the configuration.
And that’s it. You get a final view on your settings before they are applied to the router.
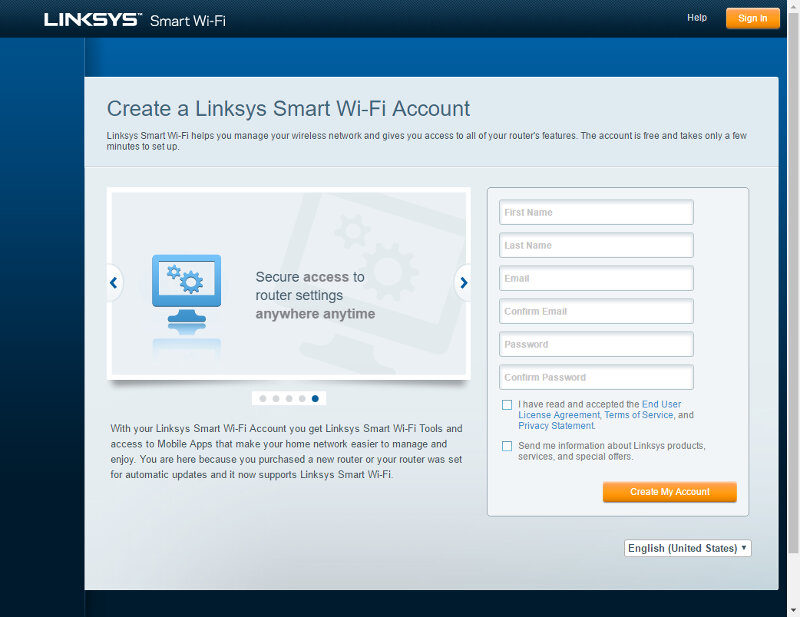
There is one optional step which lets you create a Linksys Smart Wi-Fi account. With such an account you can control and monitor your router from everywhere. It allows for easy remote login through your browser as well as the smart apps. Stay in control from everywhere. It is free but optional.

Creating an account only requires your name, email, and a password. You’ll have to confirm it through a received email, so make sure you enter everything correctly.
And that’s all there is to it. Now that the basics are configured, we can edit all the other settings. Below is a screenshot connected through the Smart Wi-Fi account. We see that we have a full view on everything as if it was a local direct connection. The only difference is the secondary colour which is darker.

Here is a shot of the local view which uses a brighter secondary colour. The rest is the same as through the Smart Wi-Fi account.
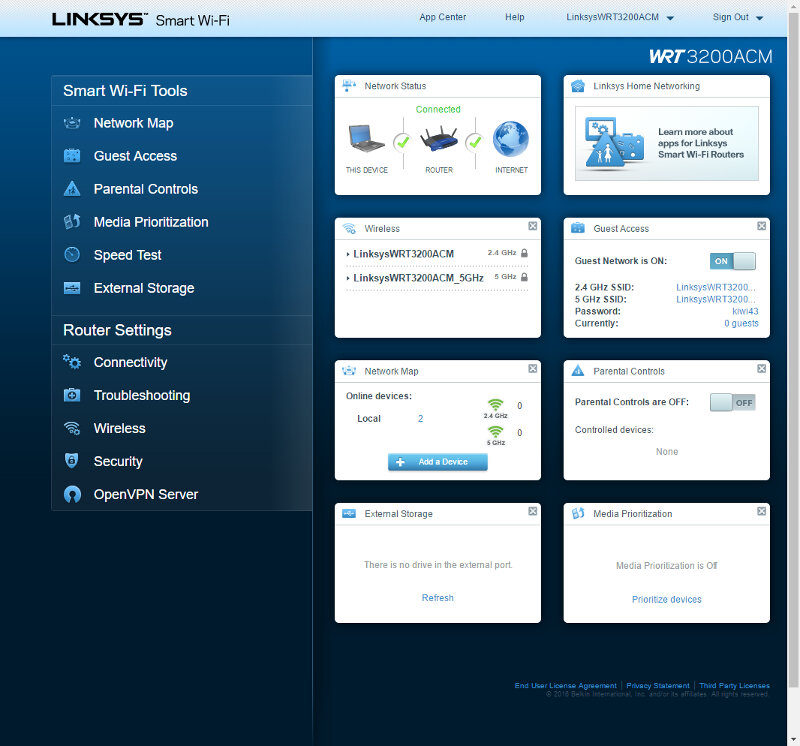
Besides the colour change, the sign-out button from local view has changed to your name instead.


