MSI Vortex G65 6QF Gaming PC Review
John Williamson / 8 years ago
A Closer Look
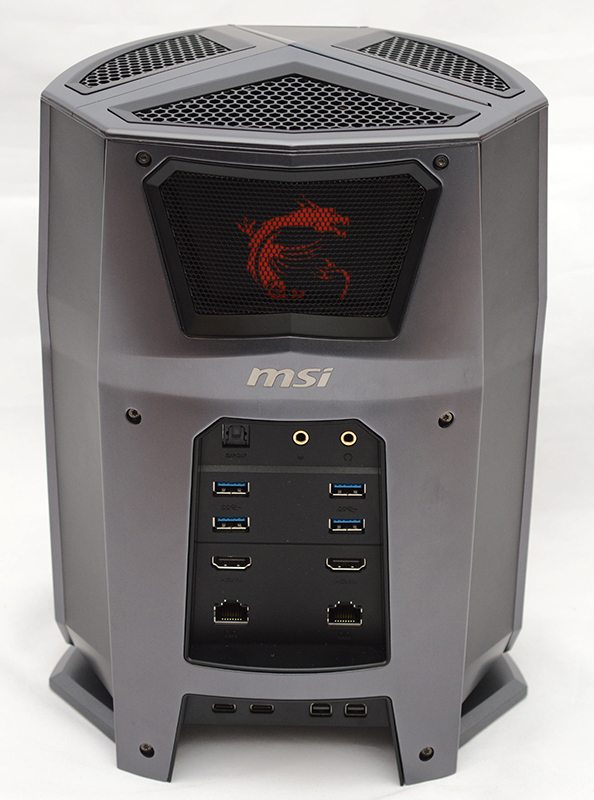
The Vortex’s cylindrical design is undeniably unique and adopts a rather simplistic yet luxurious design philosophy. I’m really fond of the subtle curves and the two-tone contrast between the luscious silver side panels and black front. Furthermore, the MSI gaming badge helps identify the product without being too distracting and adds to the unit’s sophisticated appearance. Please note, the power button is integrated into the black portion and this contributes to the cleaner look. The lack of connectors could be an issue for some users, but I personally think it’s a good move because there’s less clutter.

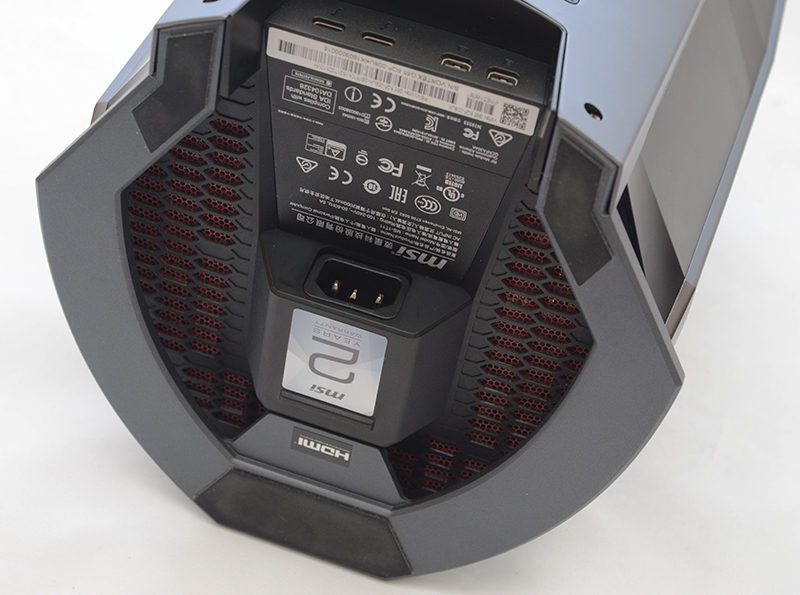
On the rear section, we can see MSI’s iconic gaming dragon logo which illuminates through a ventilated cover. Once again, this looks fantastic and showcases how unusual the product’s design is. Unfortunately, it’s not the most sensible idea because you cannot see this stunning inclusion when the system is positioned on a desk. As you might expect, hot air rises from the bottom and is expelled through three large vents on the lid. MSI has dubbed their innovate cooling solution, Storm Cooling which revolves around a rotating column airflow direction and offers superb performance at respectable noises levels. This is very impressive when you consider the chassis’ tiny stature. Connectivity-wise, the Vortex includes an S/PDIF optical out, microphone jack, headphone jack, four USB 3.0 ports, two HDMI, dual Killer E2400 RJ45 ports, two Thunderbolt 3 and two mini DisplayPorts.
This is an amazing array of connectors and offers superb flexibility. For example, Thunderbolt 3 is capable of supporting insane speeds up to 40Gbps and can drive dual 4K displays. Furthermore, it’s possible to attach extremely high-end storage devices and reap the benefits of fast charging up to 5V/3A.
Another strange element of this system is the power supply which has a 450-watt 80+ gold rating and adopts the SFX form factor. The AC adapter protrudes outwards from the main chassis but it’s only by a small degree and works remarkably well. This means you can easily connect the AC adapter and route the cable in a tidy manner. This is an ingenious move because there are so many custom parts in the Vortex which make it frightfully difficult to employ a normal power supply mount. Here we can see MSI used strong rubber feet to prevent the unit from sliding and there’s superb ventilation throughout the entire build.
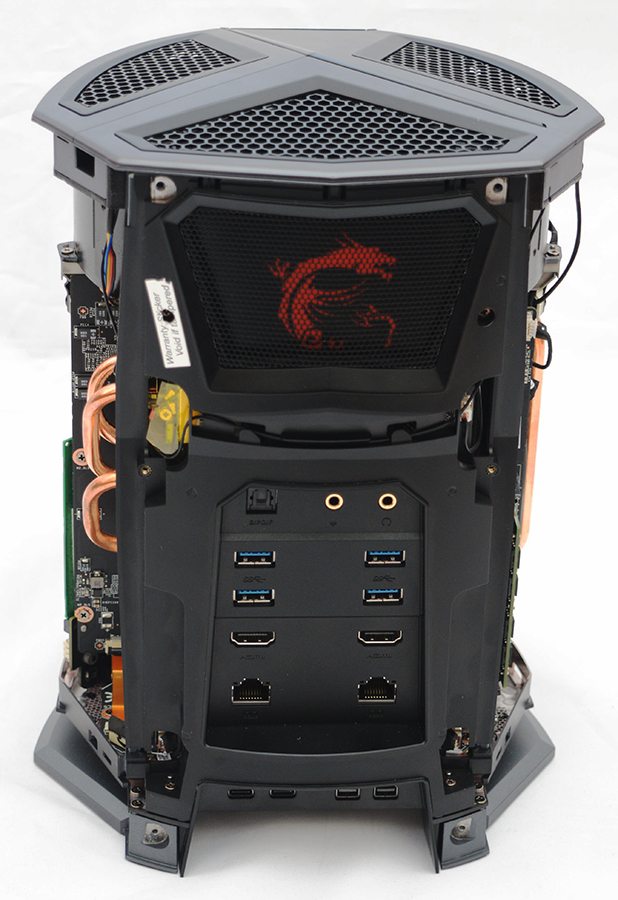
Removing the side panels isn’t recommended and requires the use of a professional screwdriver set. Please note, MSI have used security Torx screws to stop consumers from performing upgrades or maintenance. While you can technically remove the panels without touching the warranty void screw, it’s not going give you the proper access to make any changes. Evidently, the sealed design is meant to be left well alone so make sure you select the model which suits your maximum budget. Once the two panels have been removed, we can see the humongous top fan, and two MXM GTX 980s with identical cooling apparatus. The MXM modules and beefy heatsinks are installed with the utmost precision and every millimetre of the chassis has been properly taken advantage of.

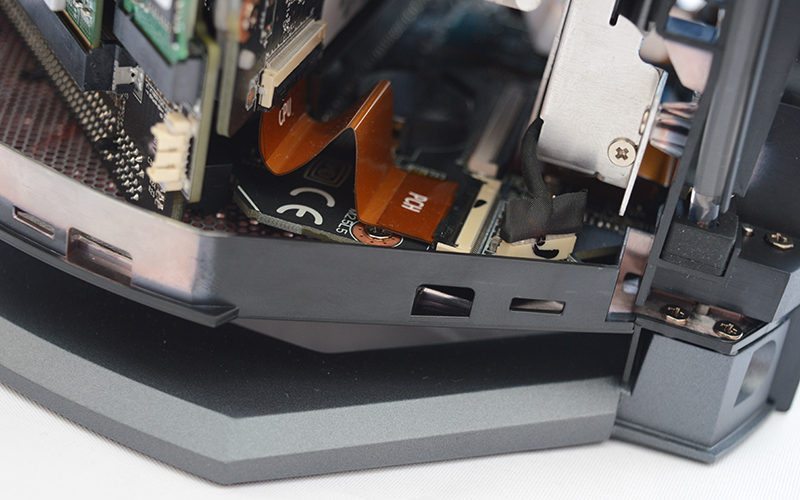
After you’ve removed the rear cover, there’s not much to see apart from where the Torx screws were previously held in place. Saying that, you can take a brief look at the Wireless module and grooves which help with cable management.
From this angle, we can see one of the Samsung SM951 NVME drives which slot into a 32GB/s connector and provide astonishing read/write speeds. Next to the graphics mainboard, there’s the huge CPU cooler with multiple copper heatpipes and a thick aluminium heatsink. This level of engineering is sublime and showcases what’s possible with premium hardware and a clever design team. I really love the idea of having the adjacent mainboards and foam padding to protect certain components. Even the fan cable has been held down using thick insulation tape.
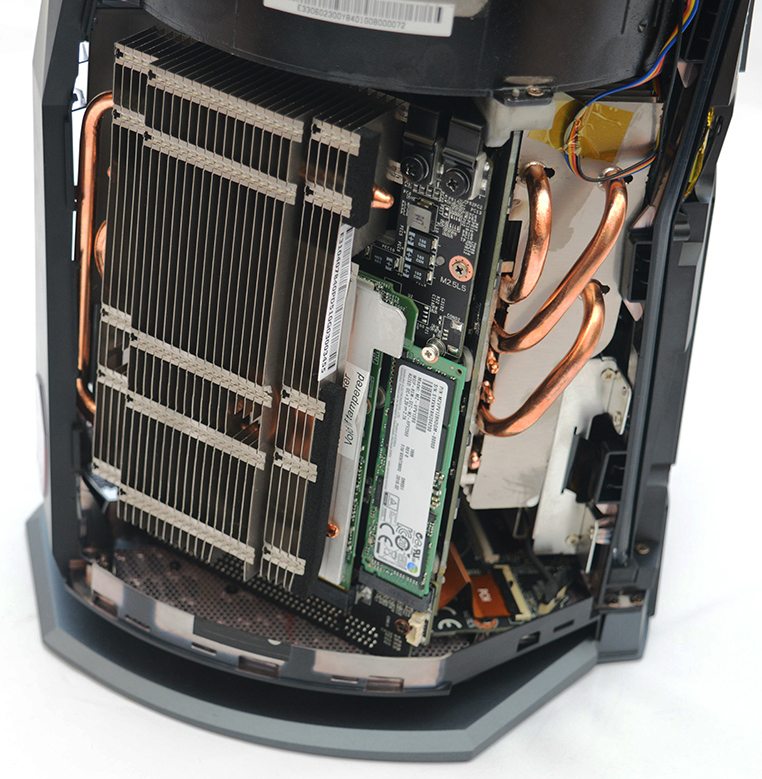
On the opposite side, MSI has incorporated four DIMM slots which theoretically should hold up to 64GB. However, I’ve not had this figure clarified so the maximum capacity could be lower. Please remember, even with four modules, you’re limited to the Z170 chipset’s support for dual channel memory. Nevertheless, I believe the memory placement is excellent and remains well within the confines of the chassis. Not only that, the memory slots are kept away from heat sources like the GTX 980 to allow for cooler running.

The device’s chipset labelled PCH and CPU mainboard are bridged using a ribbon cable. This is a really neat arrangement and the ribbon cable didn’t show any signs of coming loose.
As expected, the main cooling fan screws into a supporting piece just above the PCB. It’s also interesting to see the fan’s width which exemplifies how much cooling power it can provide under extra strain.

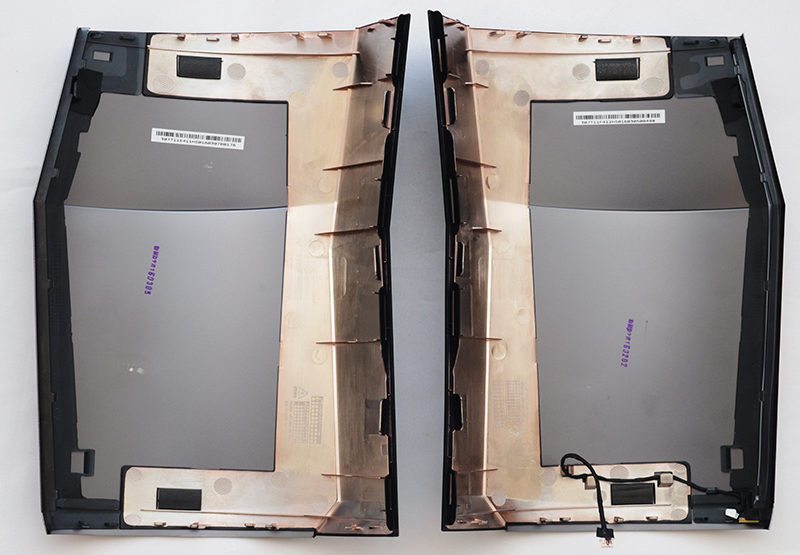
The side panels appear to be a mixture of plastic and aluminium and feel extremely strong. They connect using plastic tabs and it takes some considerable force to pry them free. Luckily, enough the plastic is robust enough to cope with heavy pressure and didn’t snap during the initial tear-down. Please remember, one of the panels contains a lead which connects directly into the mainboard to power the RGB lighting. If you’re removing the side panel, it’s imperative to gently lift one side before unplugging the lighting cable.
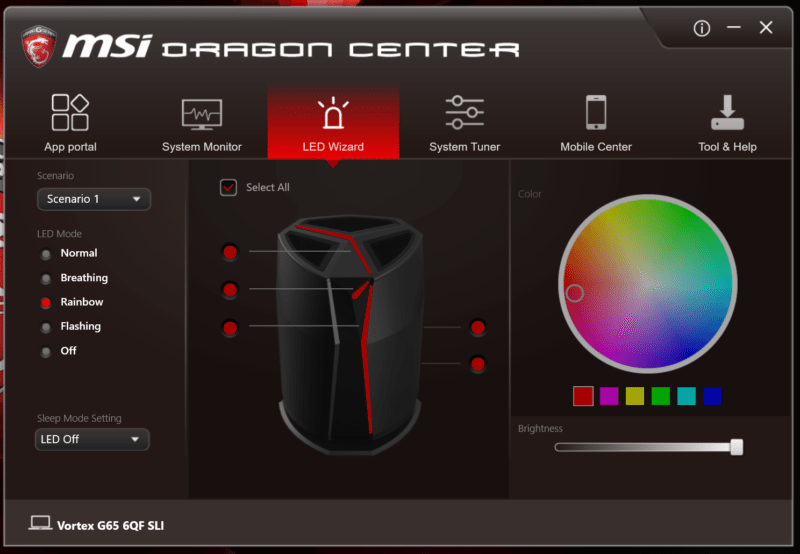
MSI’s Dragon Center software is phenomenal and contains a really pleasant user-interface. By default, the CPU is set to 4.0GHz but you can easily alter this figure and overclock it without any technical expertise. This application can be deployed to change the fan mode and configure various profiles.
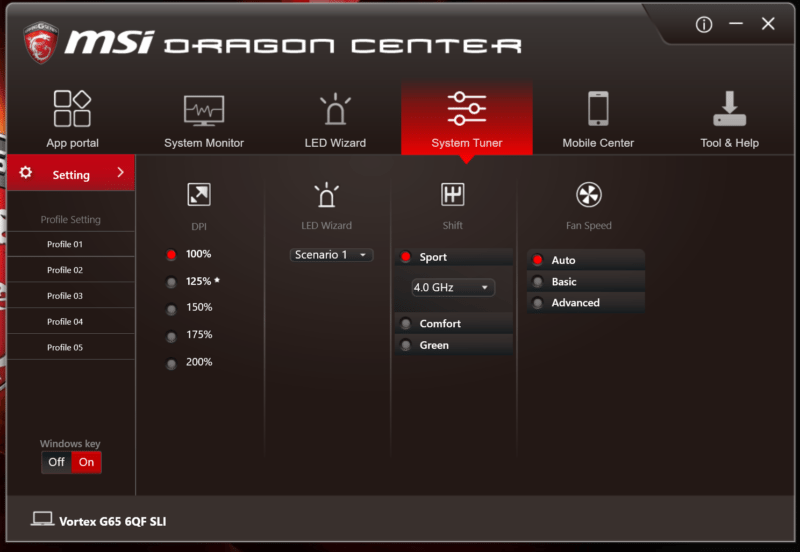
The LED Wizard allows you to modify the lighting to your favourite colour or choose from a number of vibrant transitions. Some of these are a bit ostentatious but they’re fun to use to show the system off to friends and family members.
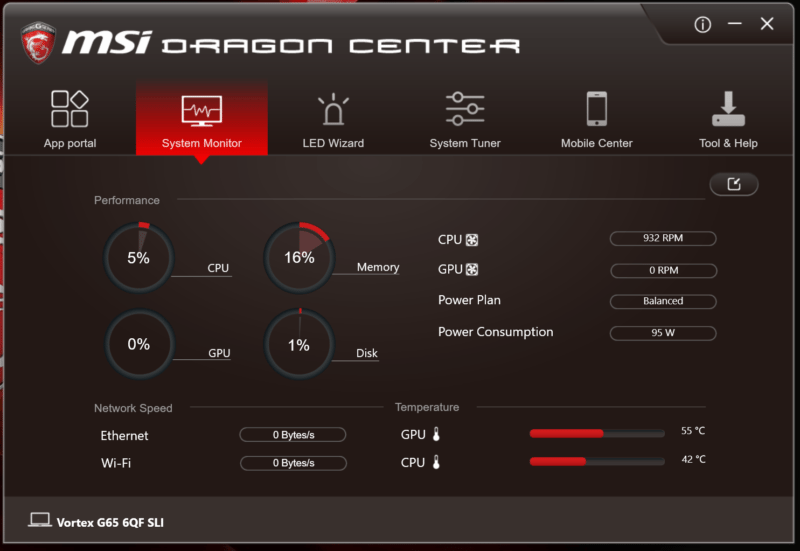
Next up is the System Monitor tab which displays temperatures and informs you of the utilisation levels.