Synology Router RT1900ac High-Speed Wireless Router Review
Bohs Hansen / 8 years ago
Initialization and Connectivity
Connecting to your new Synology RT1900ac router is a breeze and everything you need to know is written on the label at the bottom of the device: Its default IP address, username, and password; and you can use any browser that you like for this.
Initialization
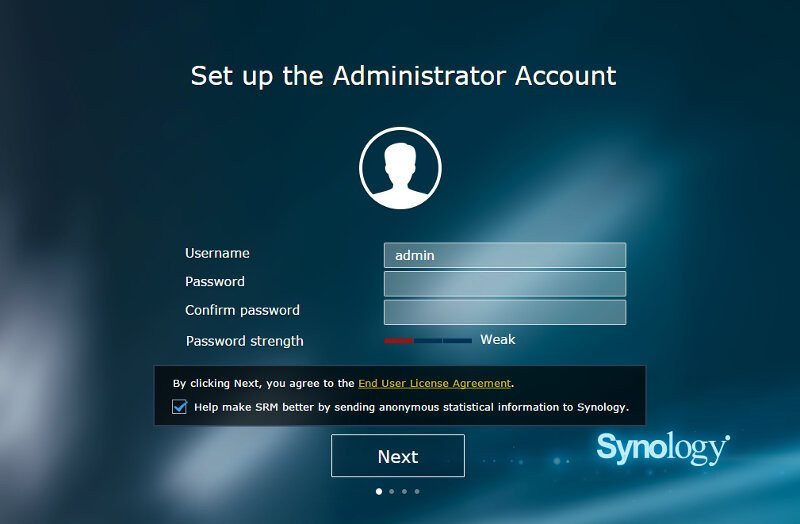
The first time you connect to your new Synology router, you’ll be presented with the initialization and setup guide. It is only a few step and you are ready to use your fancy new hardware.

The first thing that you’ll need to provide are the details for your administrator account. You can also choose to send anonymous statistical information to Synology if you wish to do so.
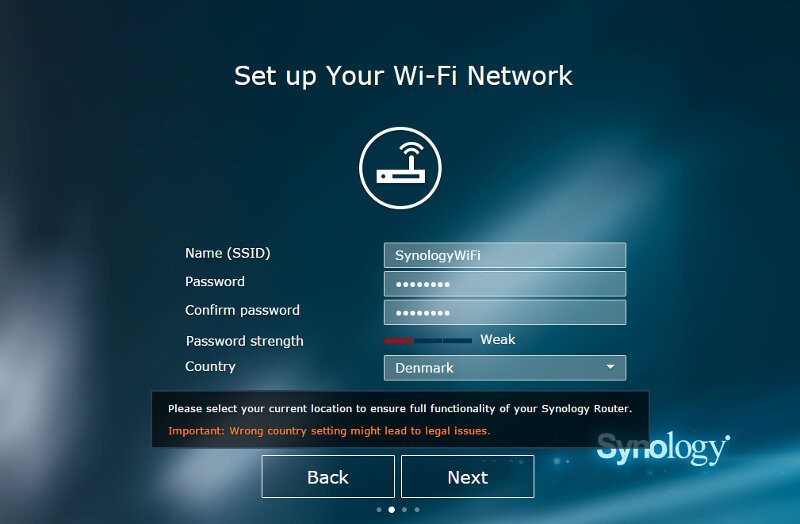
Next you will need to give your wireless network a name and define the password for it. You should also pick the correct country in order to make sure that it works flawlessly with the rest of your hardware. Not all regions use the same specifications.
The final part is to decide what operating mode you’ll want the RT1900ac to use and whether external access to the operating system should be allowed or not.
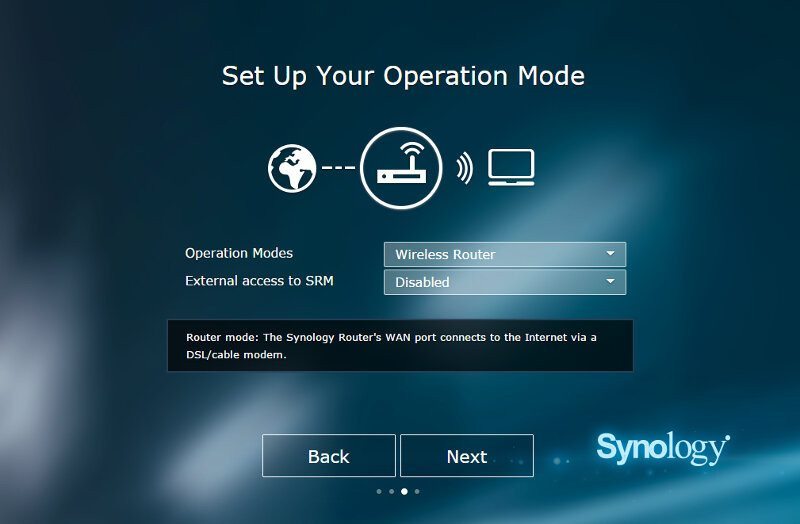
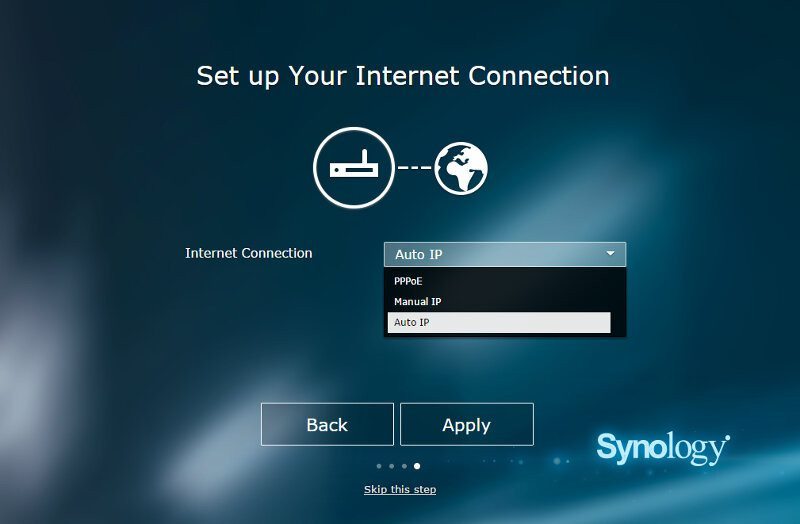
I picked Wireless Router as it is the device’s main usage and as such I’ll also need to define my internet connection type. Available options for this are automatic IP assignment (DHCP), manual settings, or PPPoE.
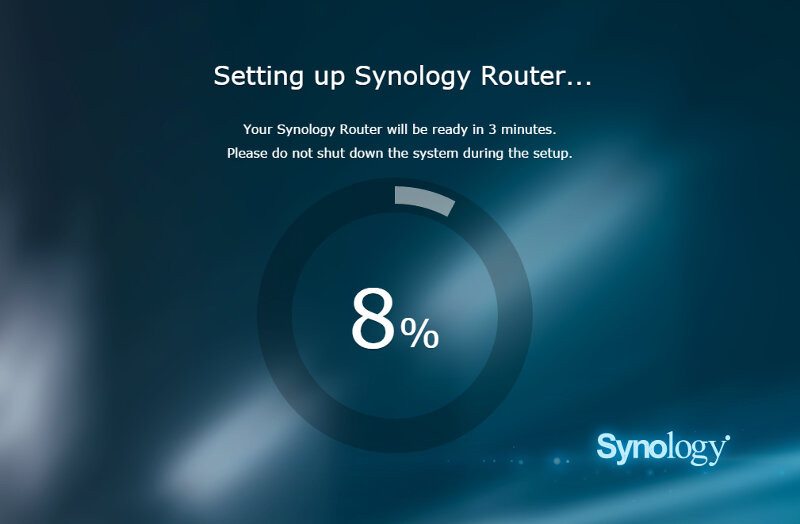
That was all, your new RT1900ac router will now apply your settings and get the router ready for usage.
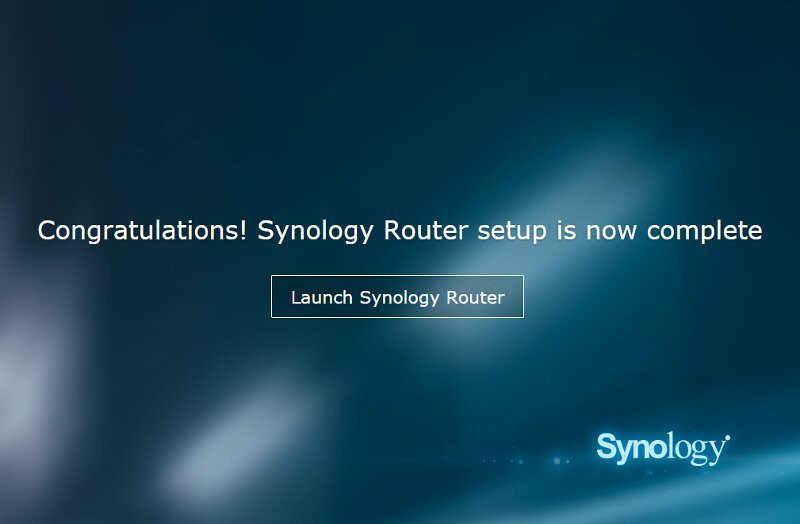
When it has completed the setup, you can hit the big button on the final page to head on over to the administrator interface and continue with your settings.
Dashboard
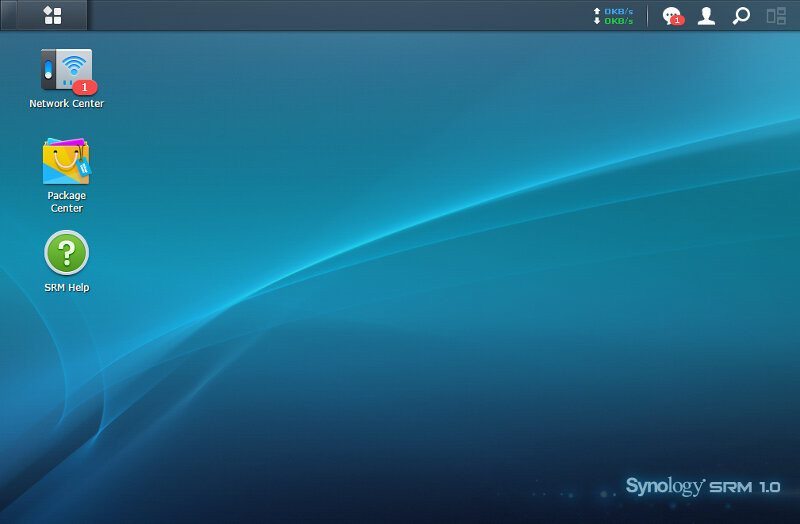
I already showed you the dashboard on the first page, but it’s worth showing again. The Synology Router Manager (SRM) looks very much like Synology’s DiskStation Manager which is nice. It is a great system that’s easy to use for advanced and novice users alike.
The taskbar at the top makes multitasking as easy as it is to view the traffic and notifications right away.
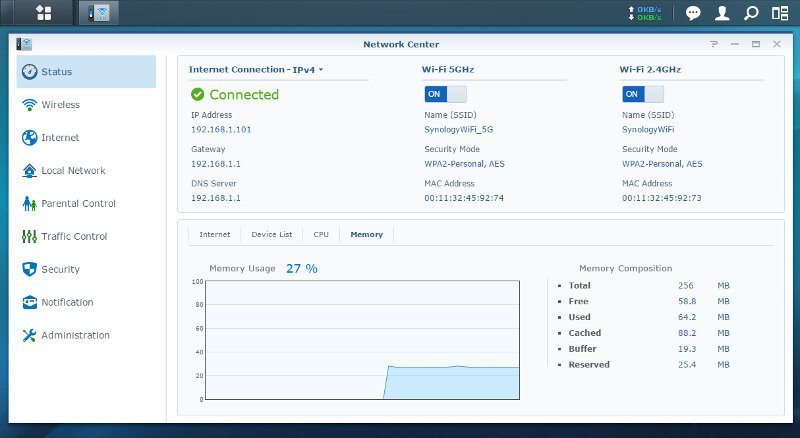
Network Center
The network center could also be called the control panel as this is where you’ll find all the basic router features. The initial page is a status page that quickly gives you a view on the routers connections, both wired and wireless, as well as usage information.
Wireless (Wi-Fi)
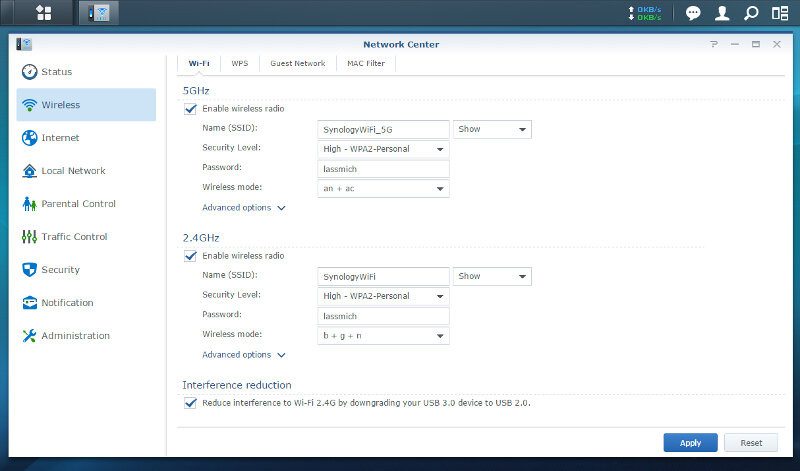
Moving on and further into the Network Center and the first thing that we find are the Wireless settings. It has all the settings that you’d expect from name to mode selection and encryption, but there is an interesting function at the bottom of the first tab. You can downgrade your USB 3.0 port to USB 2.0 speeds in other to reduce interference with the 2.4GHz band.
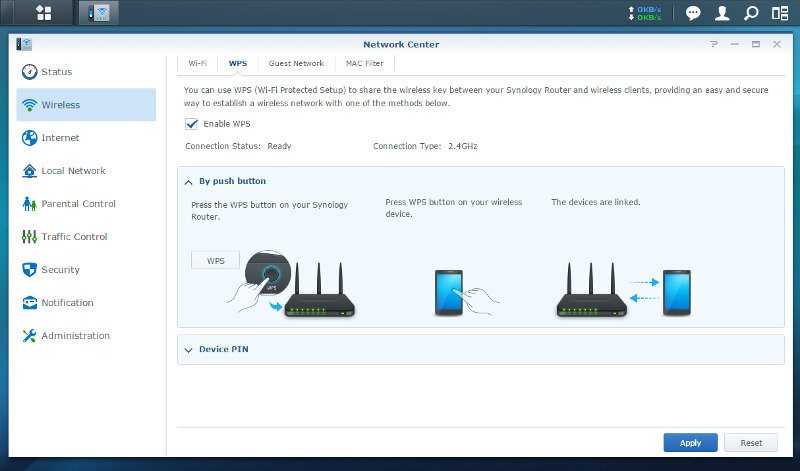
WPS allows you to connect devices to your router with ease, either by use of the WPS button of a device PIN number for those devices that come without a button but still support WPS.
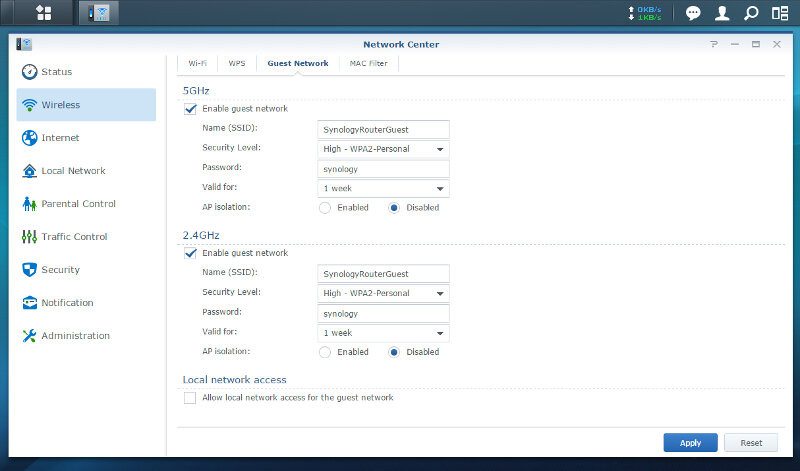
Synology’s RT1900ac also features guest networks, allowing you to give visitors a more controlled access to your network and internet connection.
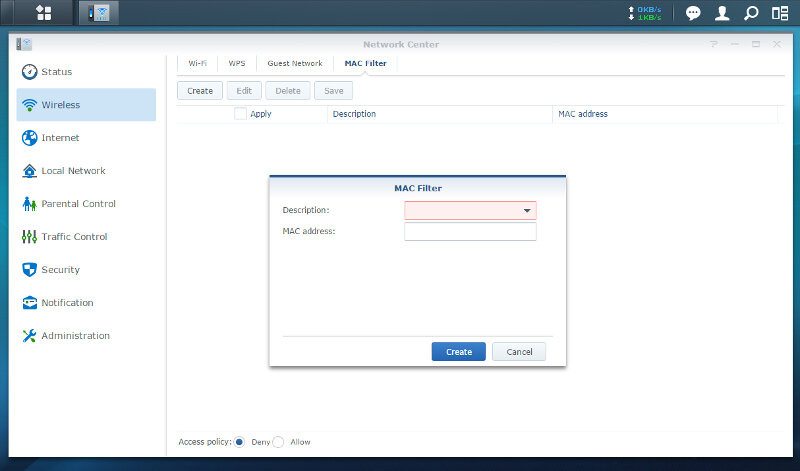
The final tab is a basic MAC filter page.
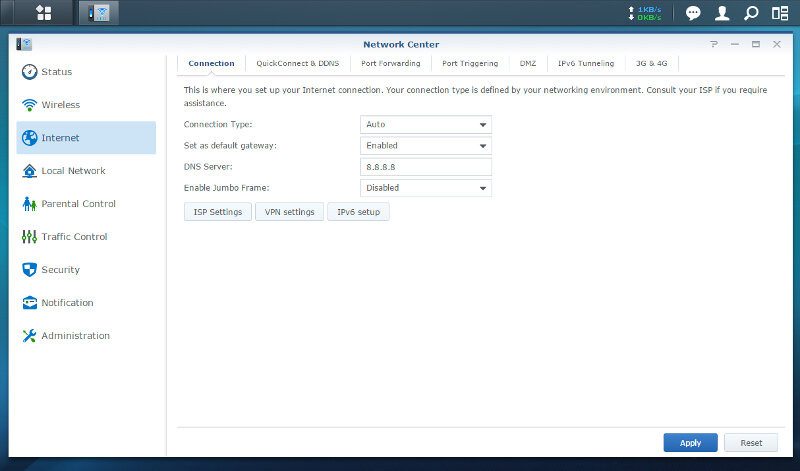
Internet (WAN)
We only saw a small part of the internet connection options during the initialization and we find the rest here. The first page is very similar to what we saw and this is where you set all the basic internet properties.
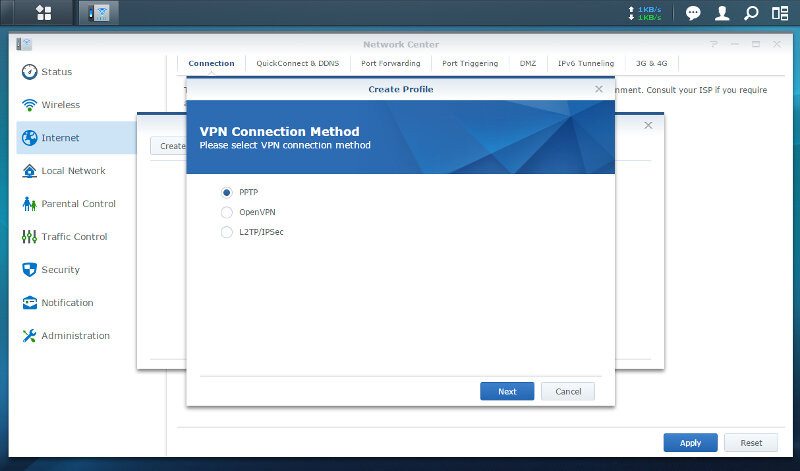
The Synology RT1900ac also supports VPN modes for your internet, a thing that’s a must these days. VPNs used to be a thing only large companies used, but it has since made its entry into homes all over the world in order to maintain a bit more anonymity and safety.
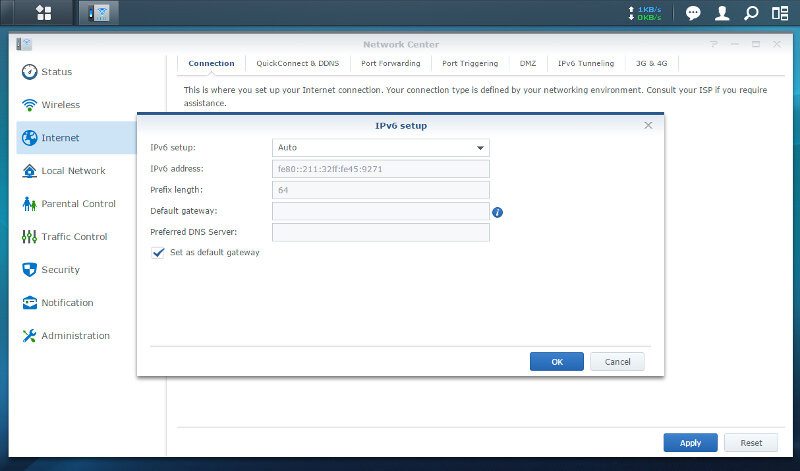
Naturally, the RT1900ac fully supports IPv6
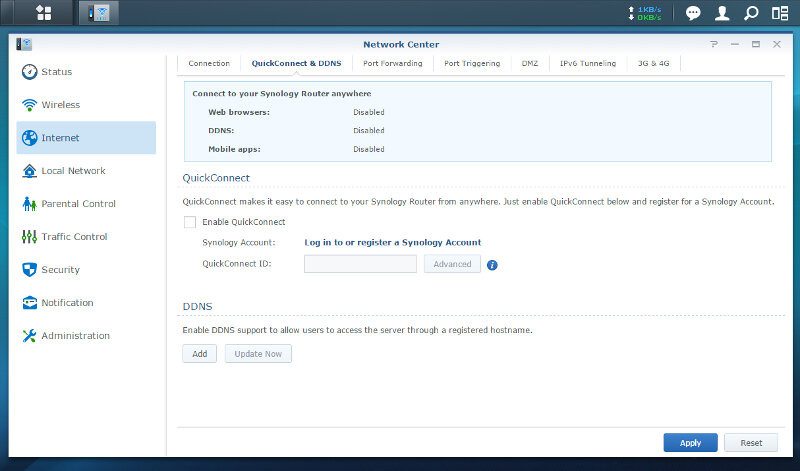
That was only the first of many tabs in the internet settings and the next we get to is for easy connection to the device from anywhere. Synology added QuickConnect support that we also know from their NAS. It is a simplified dynamic DNS service that allows you to connect safely to your router no matter where you are – as long as both devices have connectivity. The RT1900ac also supports classic DDNS services such as NO-IP.org and a lot more.
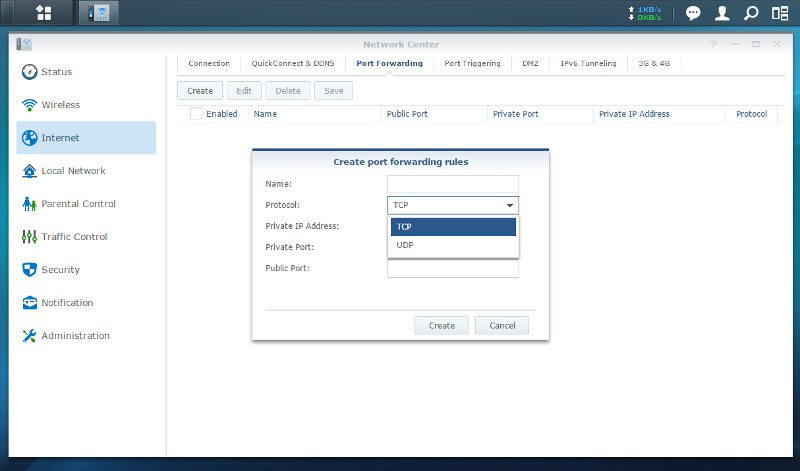
Port forwarding and port triggers are vital roles for your router, at least for the part where UPnP doesn’t take care of it for you.
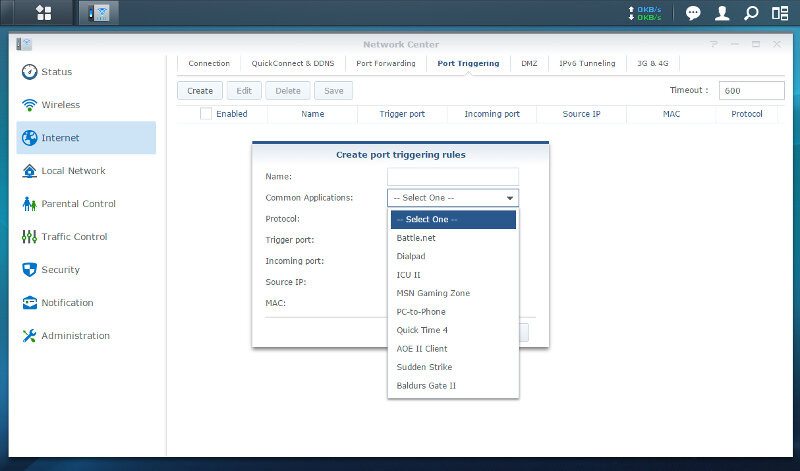
For the port triggers you’re able to create your own or select pre-made settings from the drop down combo box.
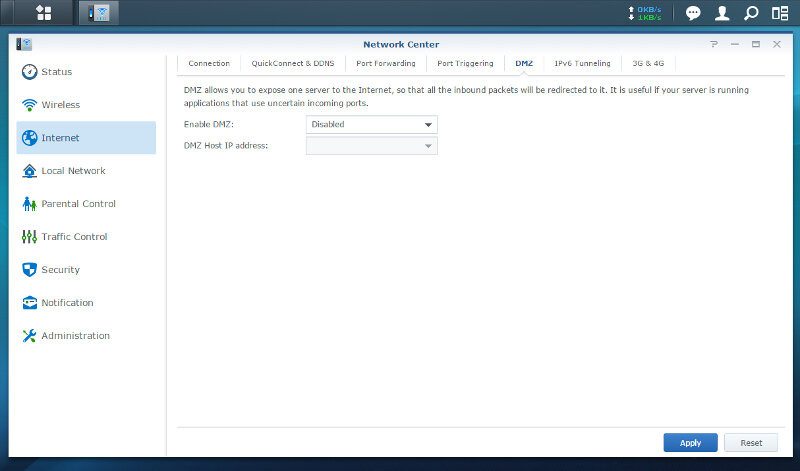
DMZ might not be a service that will be used a lot by home users, but it is good to have when needed and naturally it’s also supported here.
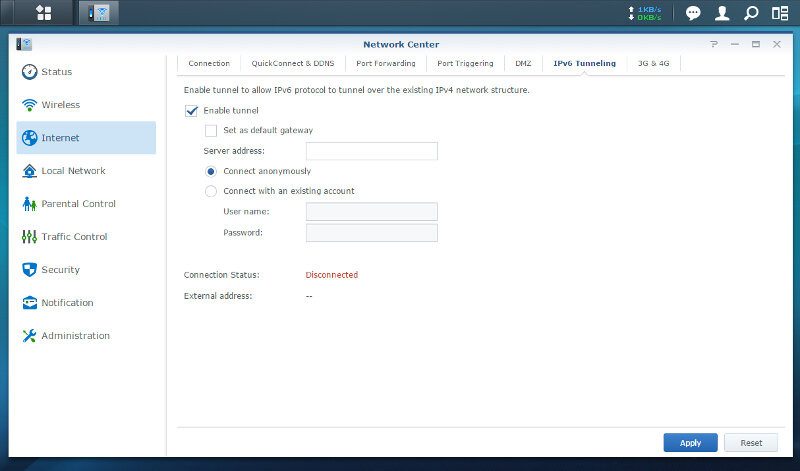
IPv6 should have taken over a long time ago, however, quite a few device still rely on IPv4. The RT1900ac supports IPv6 tunneling over existing IPv4 network infrastructures.
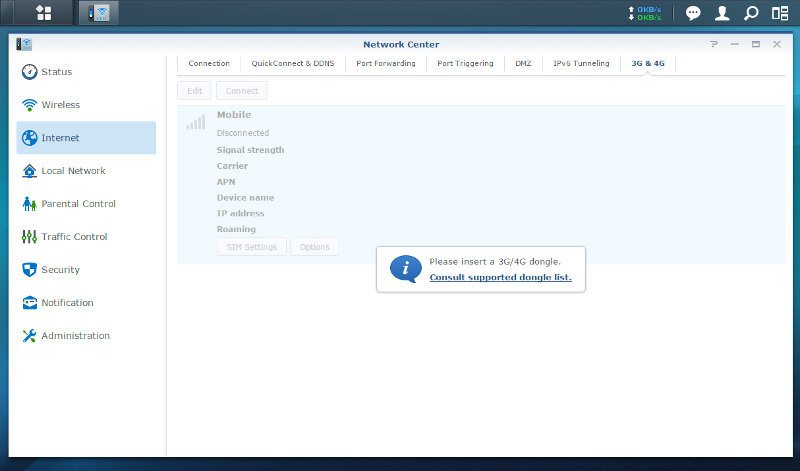
Should you not need the built-in USB port for storage, then you can connect a USB modem and make the RT1900ac into a mobile connection for 3G and 4G connections.
Local Network (LAN)
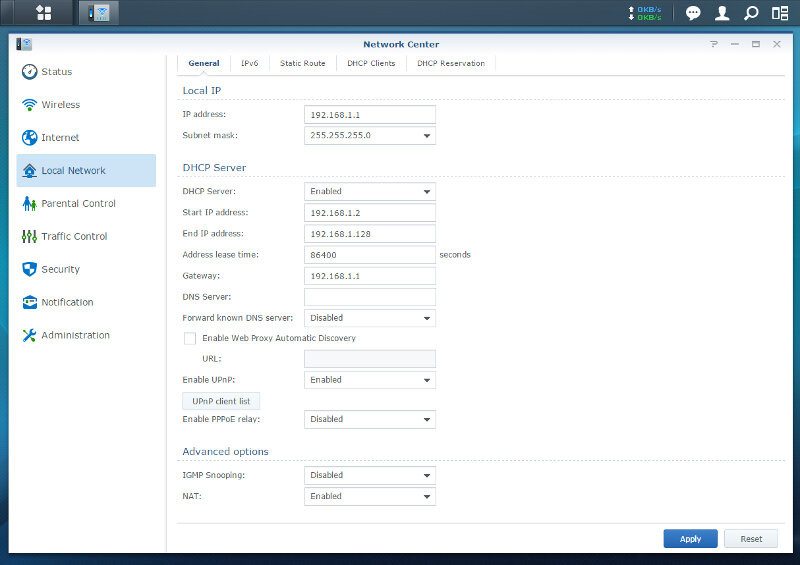
Your local network is the last part of the basic network setup and you’ll find what you’ll expect here. You can define the routers IP and LAN settings as well as toggle the DHCP settings and view the UPnP client list. IGMP snooping and NAT are also found at the bottom of the first tab.
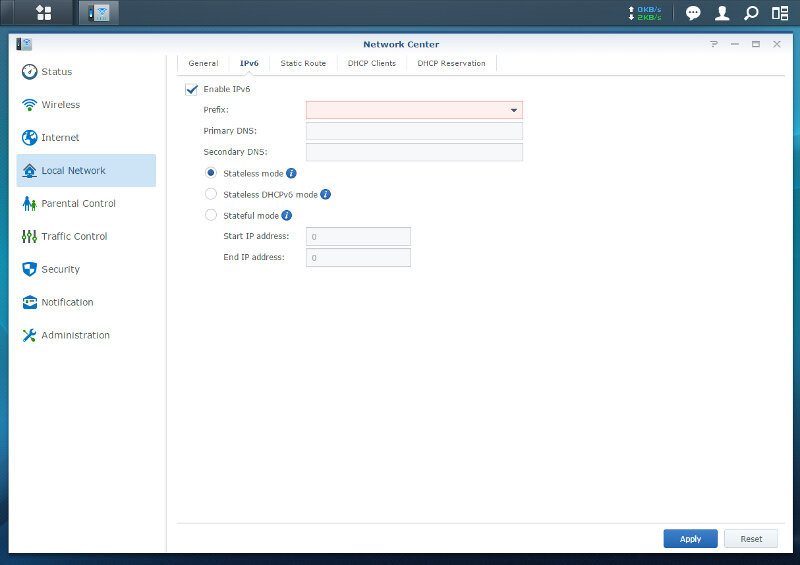
We got our basic IPv6 settings.
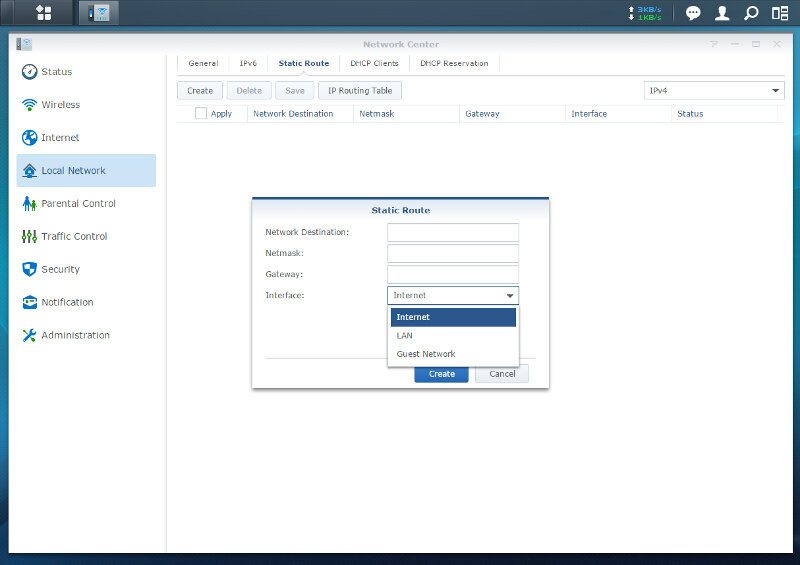
We can define static routes for our interfaces.
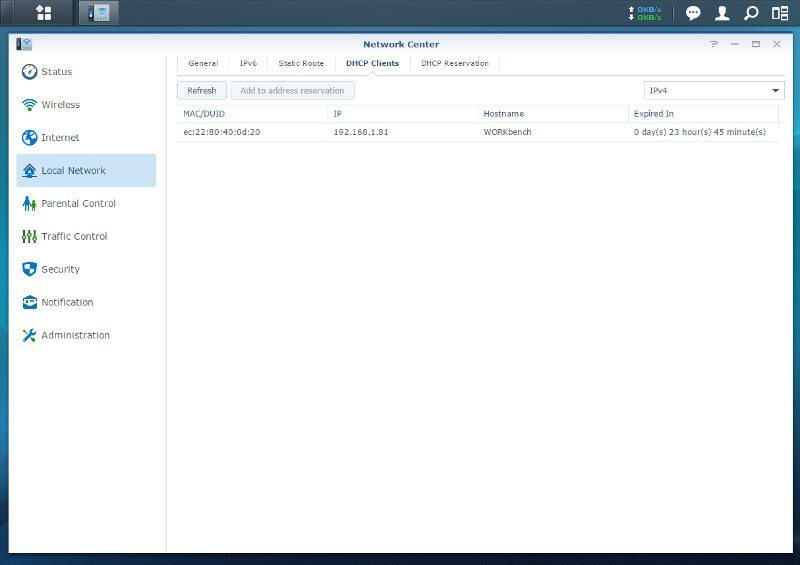
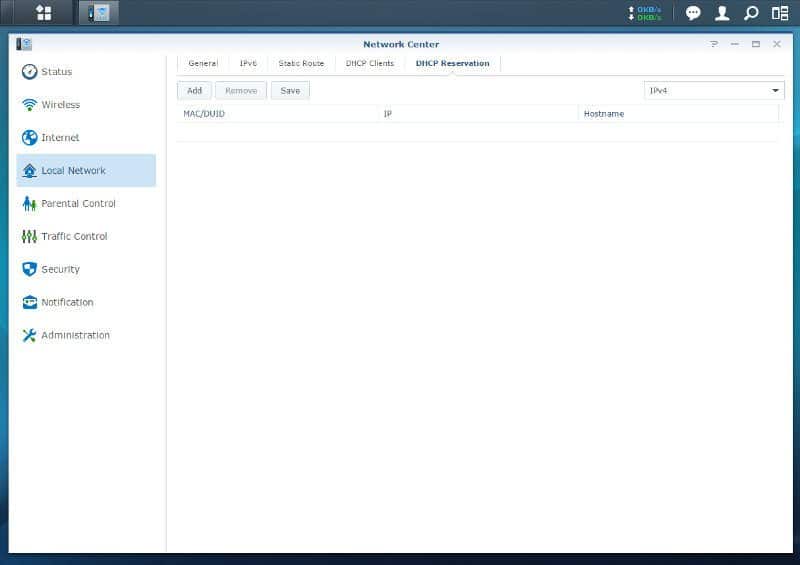
And we can view the active DHCP clients as well as reserve them based on their MAC address.
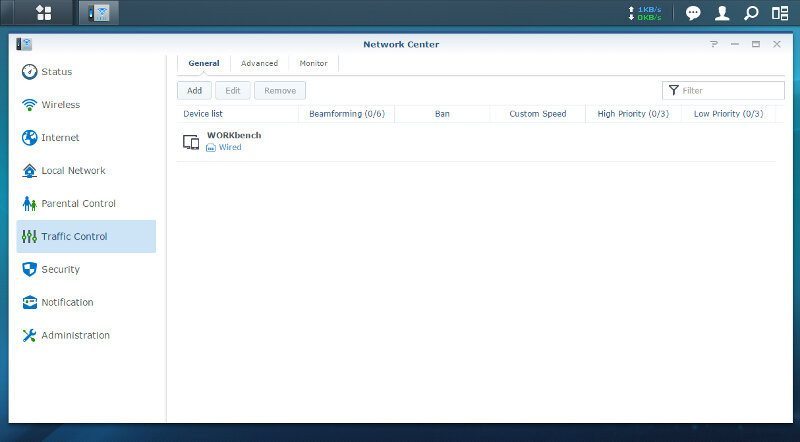
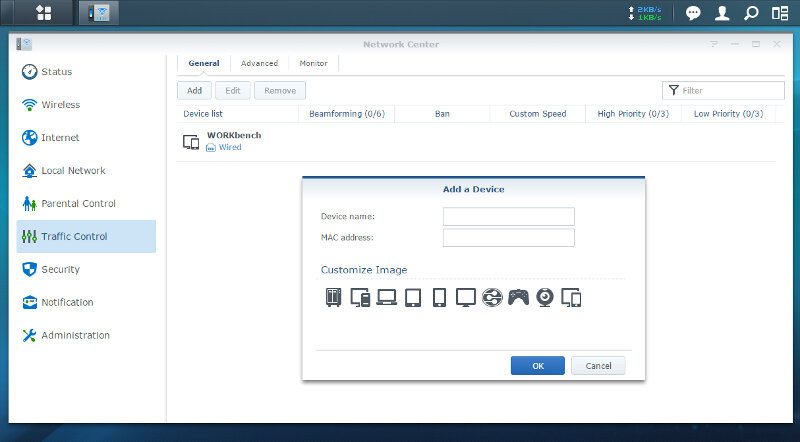
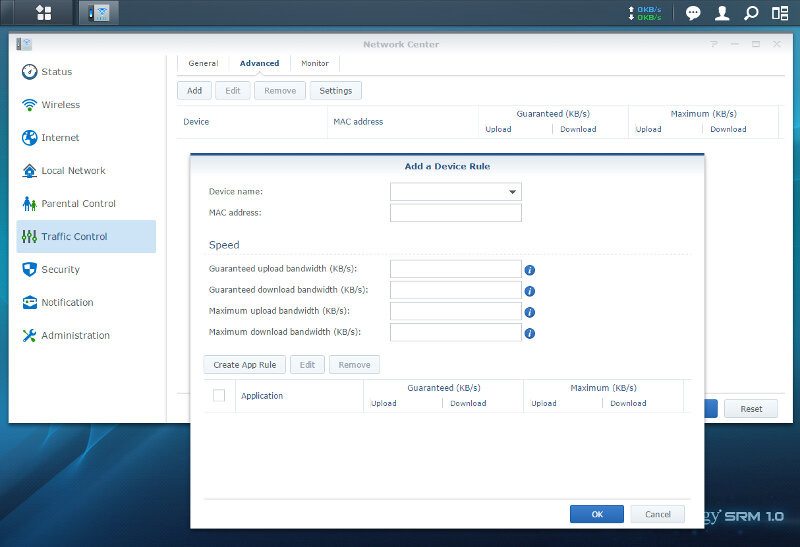
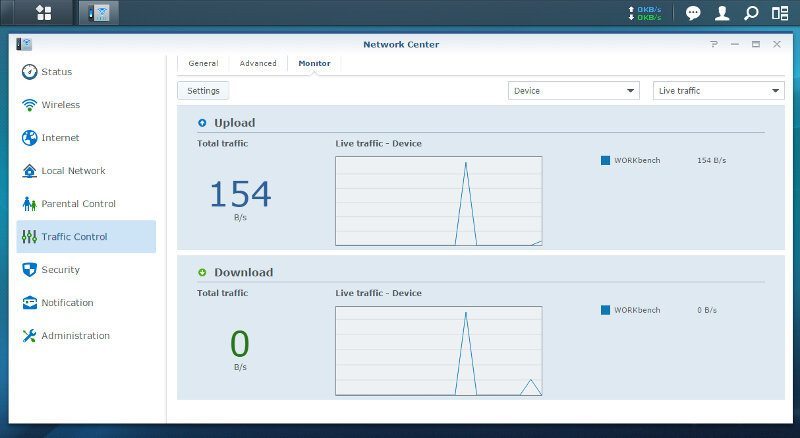
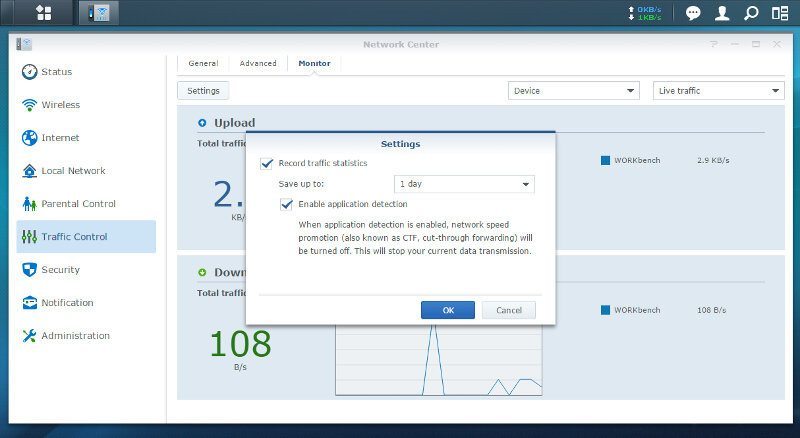
Traffic Control
Synology’s SRM has one more feature in the connectivity segment that is really cool, and that is the Traffic Control. With it you can define a list of devices on your network that should have either guaranteed or maximum speeds set. You can also define images for each device for easy recognition in the list.