Thermaltake Riing Silent 12 Pro Air CPU Cooler Review
Mike Sanders / 6 years ago
A Closer Look
What first struck me in regards to the design of the Thermaltake Riing Silent 12 Pro is the unusual manner in which the contact plate is not central to the cooling fins. This design choice has clearly been made to accommodate the fan while ensuring that there will be no issue in terms of RAM compatibility. This unbalanced design does, however, make installation a little tricky. I often found that when attempting to fix the cross bracket, I had to hold the cooler in a very awkward position. It was possible, but not particularly easy.
This is, of course, preferable though to having any kind of RAM clearance problems.
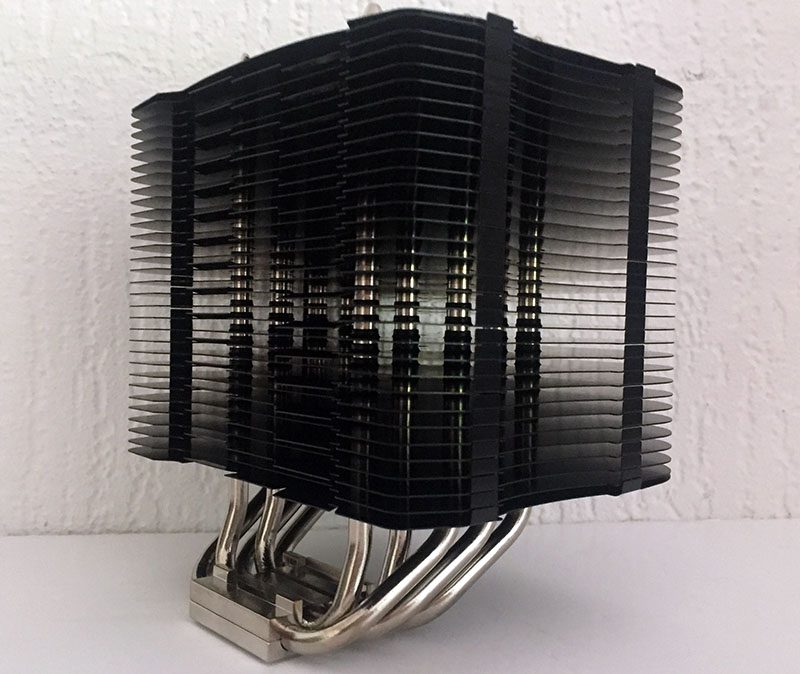
The cooler itself has a nice high gloss black finish. With 10 pipes leading from the contact plate to the cooling fins, this should also provide some excellent heat dissipation. As can be seen in the photo below there is a gap to the center through which you are allowed access to install the other bracket to the mounting plate. We will comment more on this later in the installation.
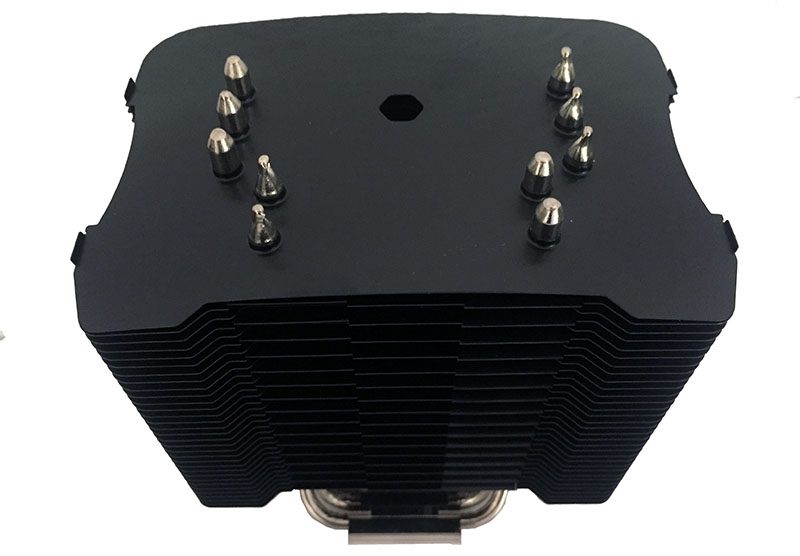
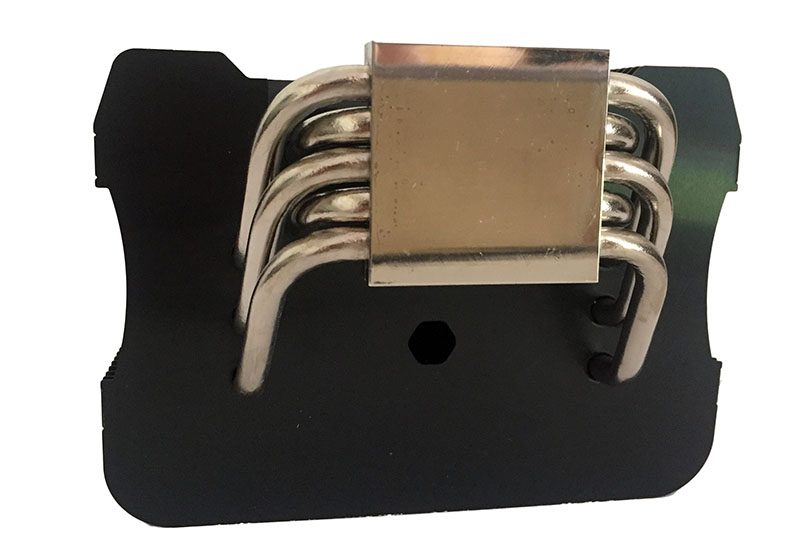
The off-center contact plate is nice and large as can clearly be seen below. You may also note that there is a small hole below this on the cooler block itself. I would ask you to remember this as I will be making a point on this further in the installation part of this review shortly.
In terms of the overall presentation, the Thermaltake Riing Silent 12 Pro is a very attractive cooler. While it is a little bulky, the off-set contact plate design should ensure that you have more than enough room in your system. In addition, the large size of the cooler itself should hopefully provide some good results in terms of temperatures.
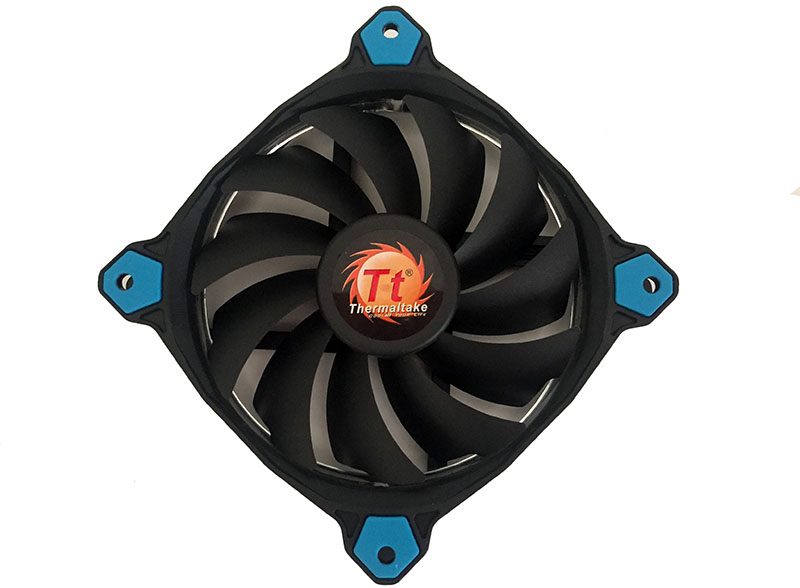
Fan
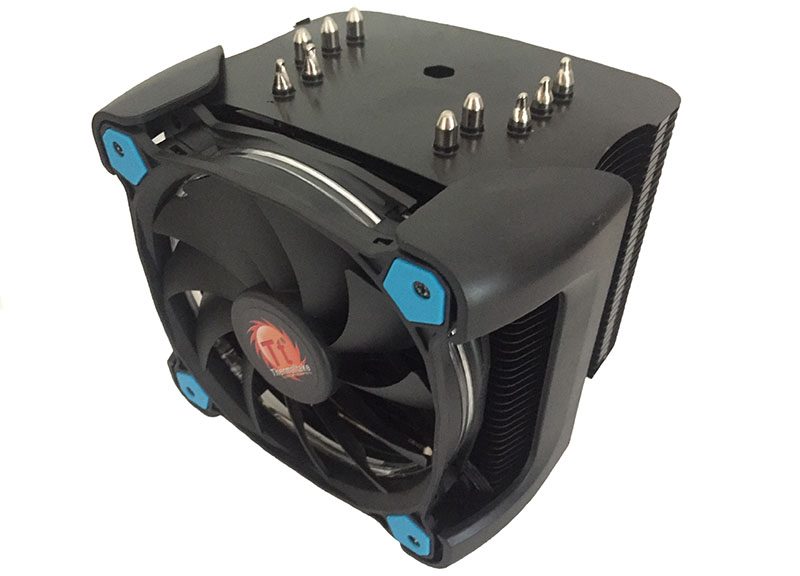
The Thermaltake Riing Silent 12 Pro is supplied with an own brand cooling fan. In terms of design, there honestly isn’t much to speak off beyond their patented RGB lighting ring. As above, this specific model only supports blue and as such, you’re limited to just that color.
In terms of the fan design though, while nothing looks especially noteworthy, we do like the blue coloring to the fixing points. It’s a nice minor touch that many other brands might not have bothered with.
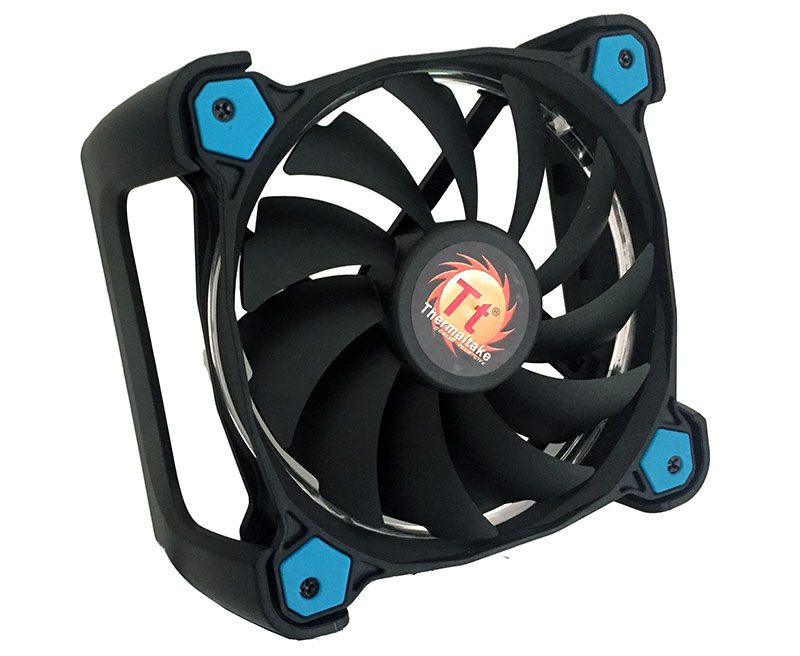
The fan has a rather unusual mounting system in which you install the fan directly to a plastic bracket. This bracket then clips onto either side of the cooler. In truth, I do quite like this design. Not only does it make the installation onto the cooler a lot simpler, it also means that if you wish, you can replace the supplied fan with any 120mm fan. While I suspect that Thermaltake would like you to stick with their own, you’re not limited to it by design.
I should note, however, though that the instruction for fitting this within the supplied manual is not clear in the slightest. It did take me around 10 minutes before I eventually figured it out for myself.
Lighting Effects
This cooler comes with a blue lighting effect on the fan. In truth, this is a little limited and its inclusion is borderline unnecessary. It is, however, nicely unstated and as such those who are not big fans of RGB lighting effects should be able to quite happily tolerate this. For those who do like all the lighting effects, there is an RGB version of this cooler available.
To Give you an idea of what it looks like, we have made a brief video to show the lighting effect in action on our test bench.
Installation
The off-center contact plate did make installation a bit tricky. The cooler was constantly wanting to tip over rather than stand upright on its own. As such, a little persistence will be necessary to get this fitted to your system. There is, however, a much bigger problem than this with the design.
Based on this design, while 1 fixing point to the bracket is exposed, to attach the other you have to go through the cooler from the top. Now, this isn’t unusual. We’ve actually seen this on various different manufacturers designs. The biggest problem here, however, is that the distance between the top and the screw fixing is quite large and you are not supplied with a screwdriver to do it.
I have a pretty decent assortment of screwdrivers for my work, but even I had to go and find one that was about 8″ long (top to handle) that would do the job here. If companies are going to make these sort of product designs, they really should provide their own little cheap screwdriver.


