Synology DiskStation Manager (DSM) 6.1 Review
Bohs Hansen / 7 years ago
Storage and Users
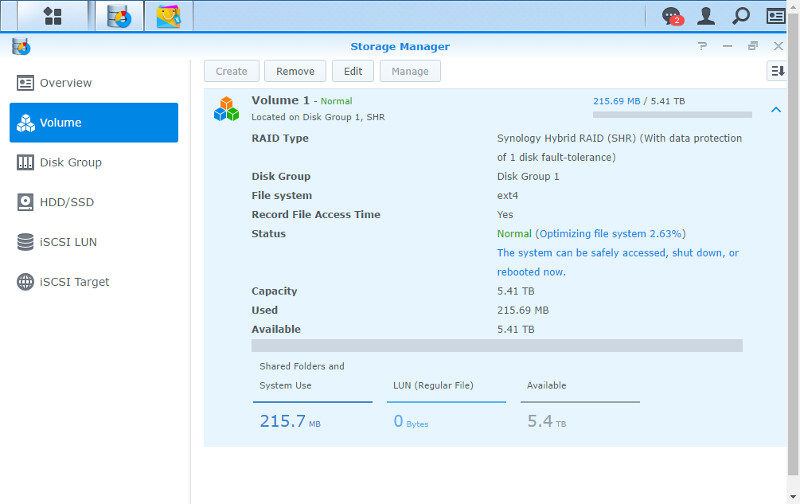
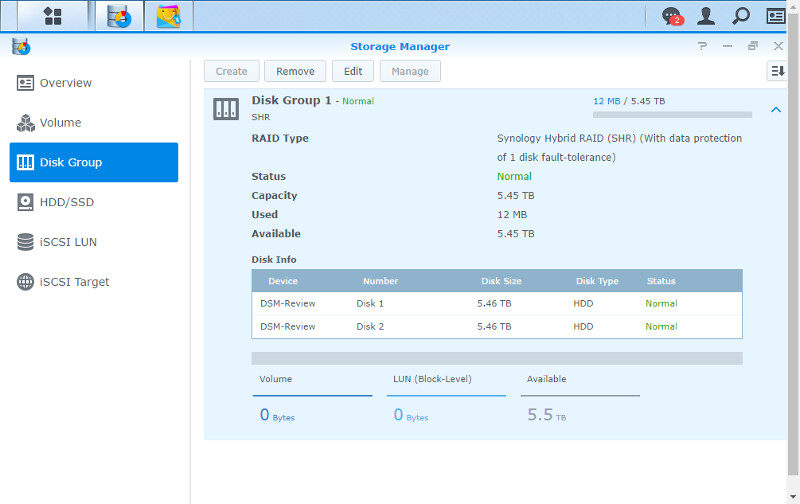
Storage setup
I told a lot about the Btrfs file system on the first page and all the cool new features we get with that, but this little DS216 sadly only supports EXT4 as internal disk format. While it’s a shame that I can’t fully show how to set it all up and take advantage of these features, it’s okay. There are plenty of other things that I can show you.
During my initial setup of the NAS, one of the drives wasn’t recognised – most likely because I didn’t plug it fully in. Reseating it made the NAS discover it right away, so let us remove the initial drive setup and get going with a new one instead.
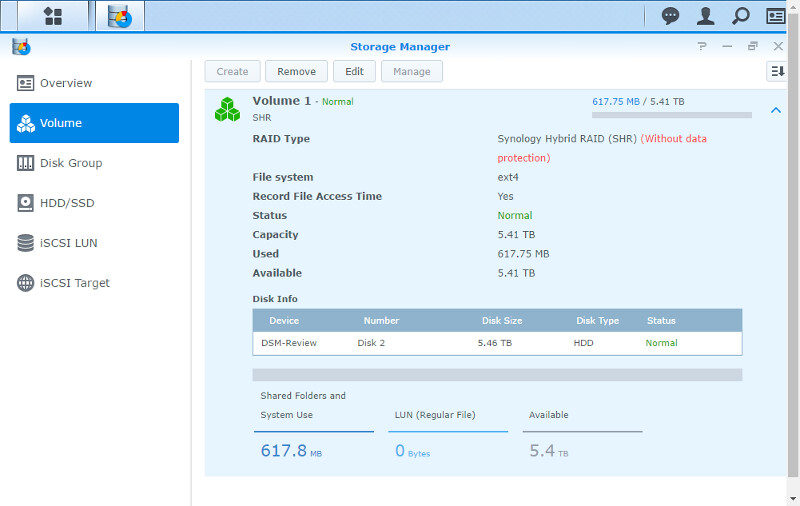
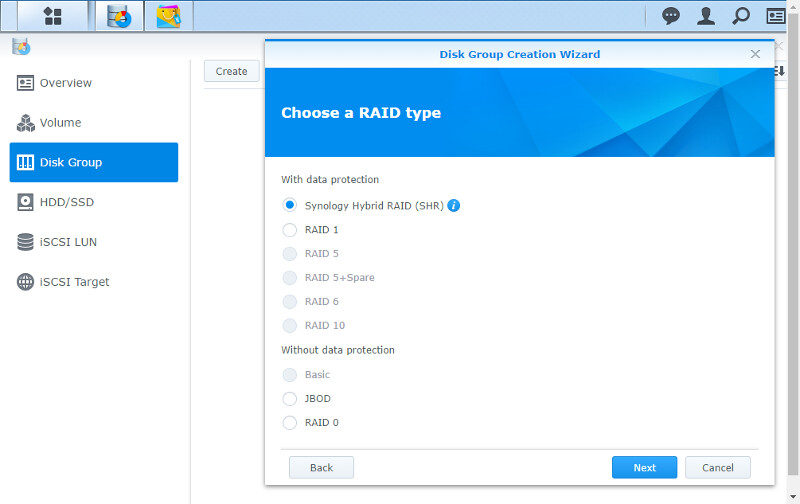
You can either create a volume right away and let Synology’s DSM handle the details, or you can create a Disk Group first and then set up a Volume on that group. This is also what you’ll want to do if you want more than one volume in the disk group. This is particularly important if you use 10TB drives in RAID 0 or JBOD setup. The DS216 only supports volumes up to 16TB due to the EXT4 and using 10TB drives for this kind of setup would result in a 20TB volume.
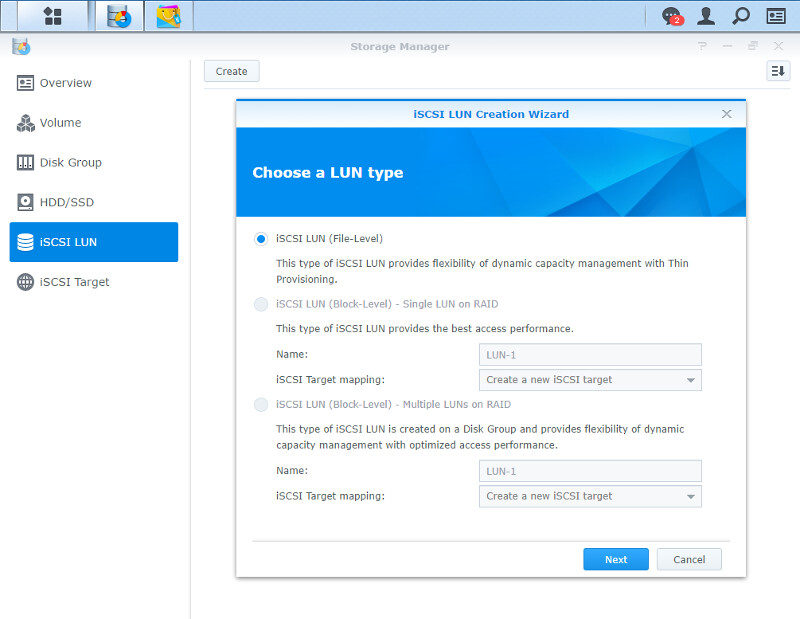
Most home users will be satisfied with a normal volume setup, but businesses probably want to setup an iSCSI LUN instead as it allows for a much better share utilisation. It is however not limited to business users and all newer Windows OS’ (Windows 7 or higher) also support it right out of the box.
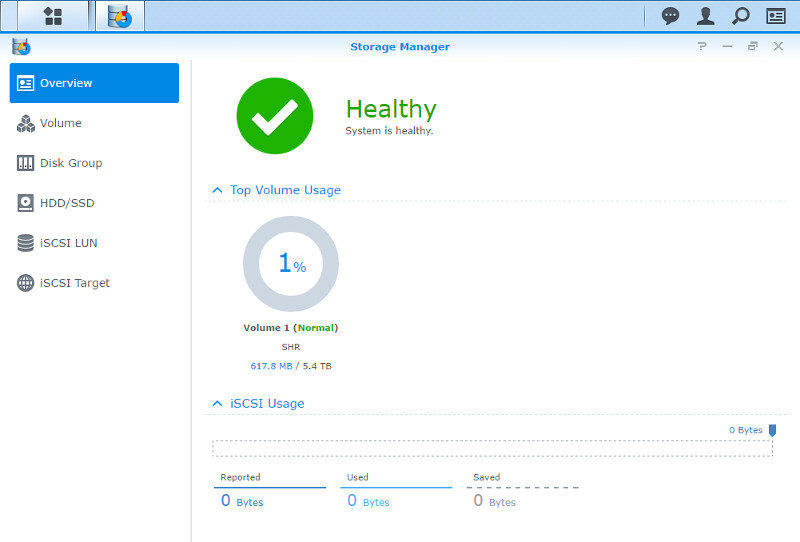
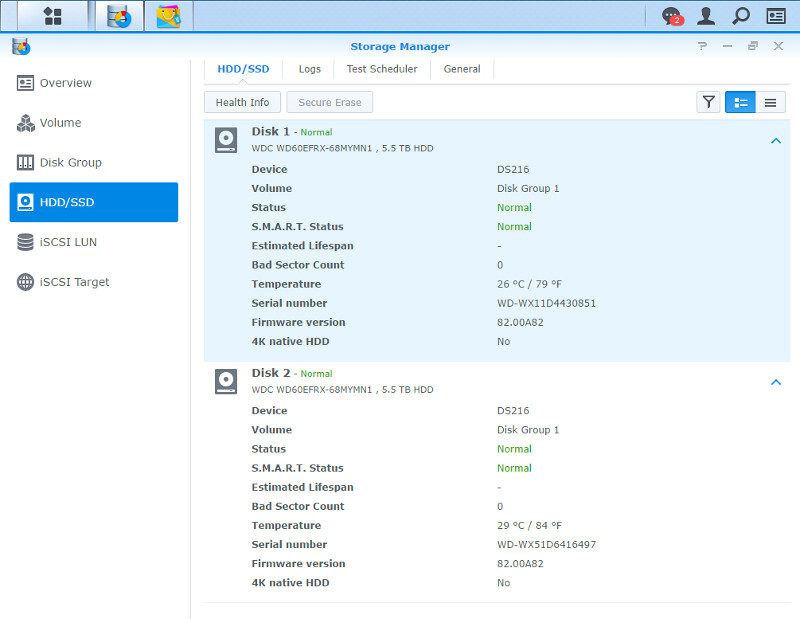
Users with NAS’ that feature more drive bays than two can also take advantage of the SSD cache feature for improved performance of frequently accessed files. We can also have a full look at all the drive details within the Storage Manager, and run SMART tests too.
Users and Groups
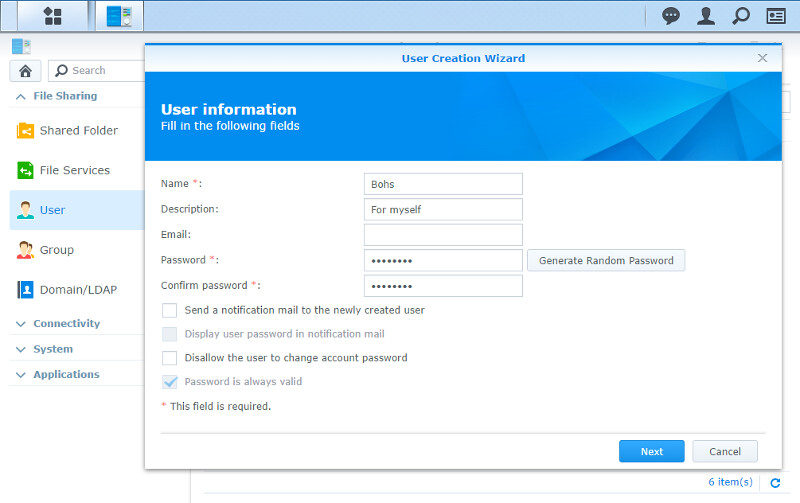
Users and user groups are another cornerstone of your NAS, and you’ll want to make individual users for everyone that needs to connect to your server, including yourself. It might be tempting just to use the administrator user you created during setup, but that’s bad practice for daily usage.
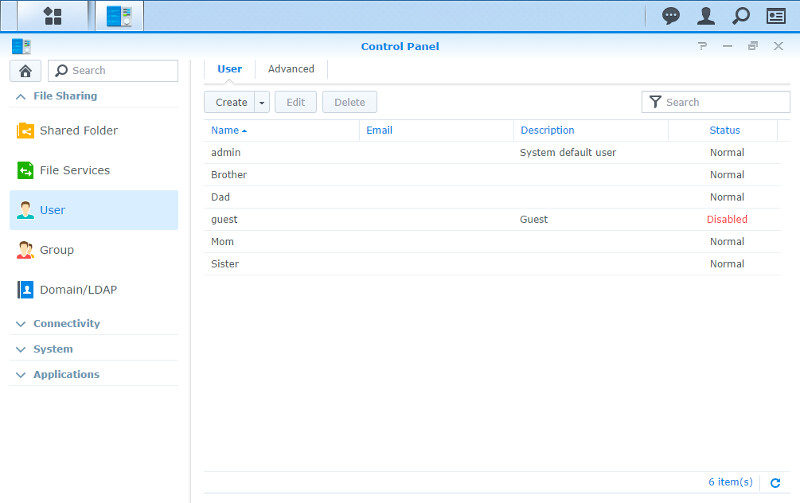
Creating new users doesn’t take long and the only required information is the name and password. Optionally, you can also add a description and email address as well as set a couple of rules for the new user.
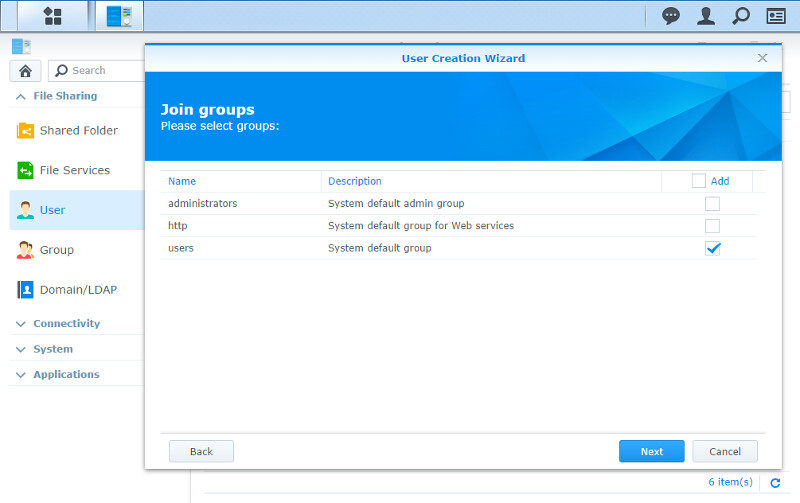
We haven’t created any new groups yet, so we only have the three default ones available. But not to worry, we can easily add our created users to new groups later on. For now, we’ll just add them to the general pool of all normal users.
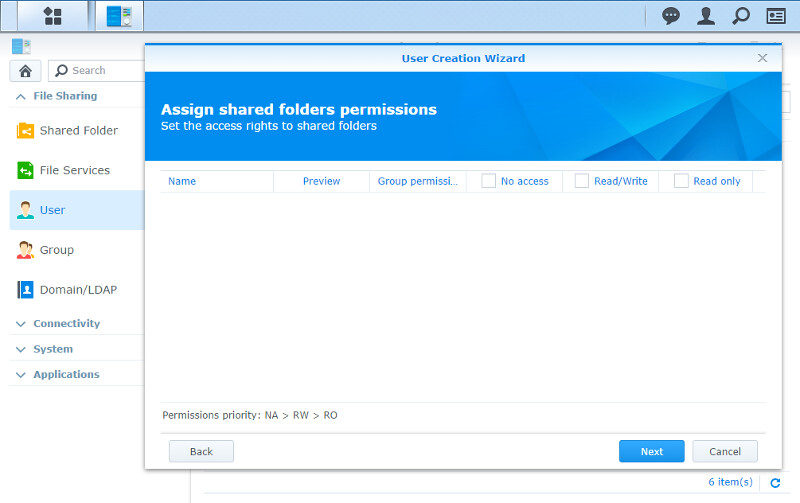
We haven’t created any shared folders yet either, so the list is empty for now. The same goes for this as for the user groups; we can easily add them when we create the folders. That’s great as it allows us to create users, groups, and shares in whatever order we’d like – it won’t make a difference in the end.
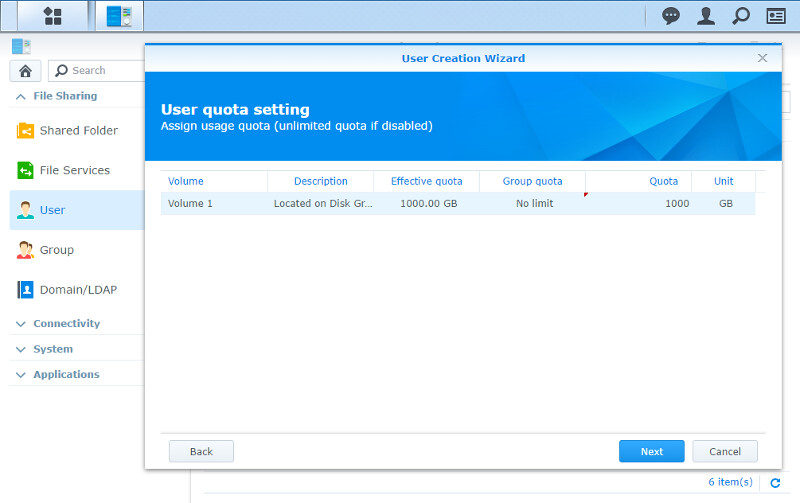
User quotas are another great feature, especially if you share your storage with hoarding users. Assign a maximum amount of space each user is allowed to use and make sure there’s enough free at all time for your needs and the vital functions.
We can also choose which installed applications each user has access to. You might not want to give everyone access to everything and this is an easy way to limit that.

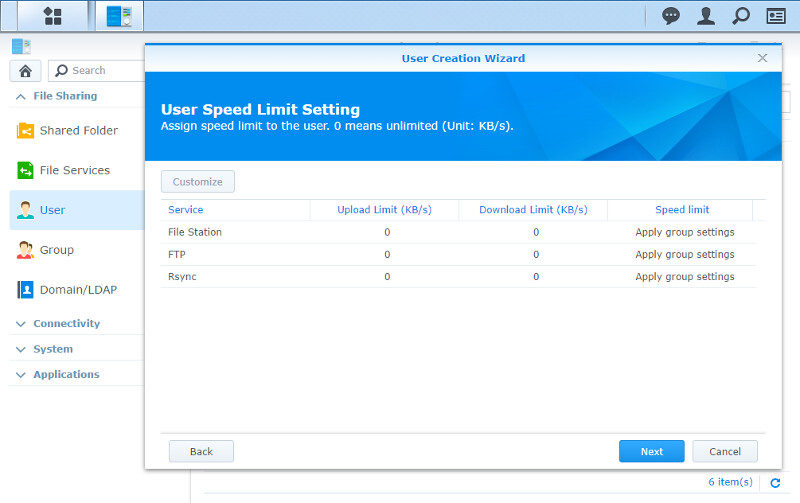
Last but not least, we can assign bandwidth limitations too for each user. Don’t let bandwidth hogs limit your experience.
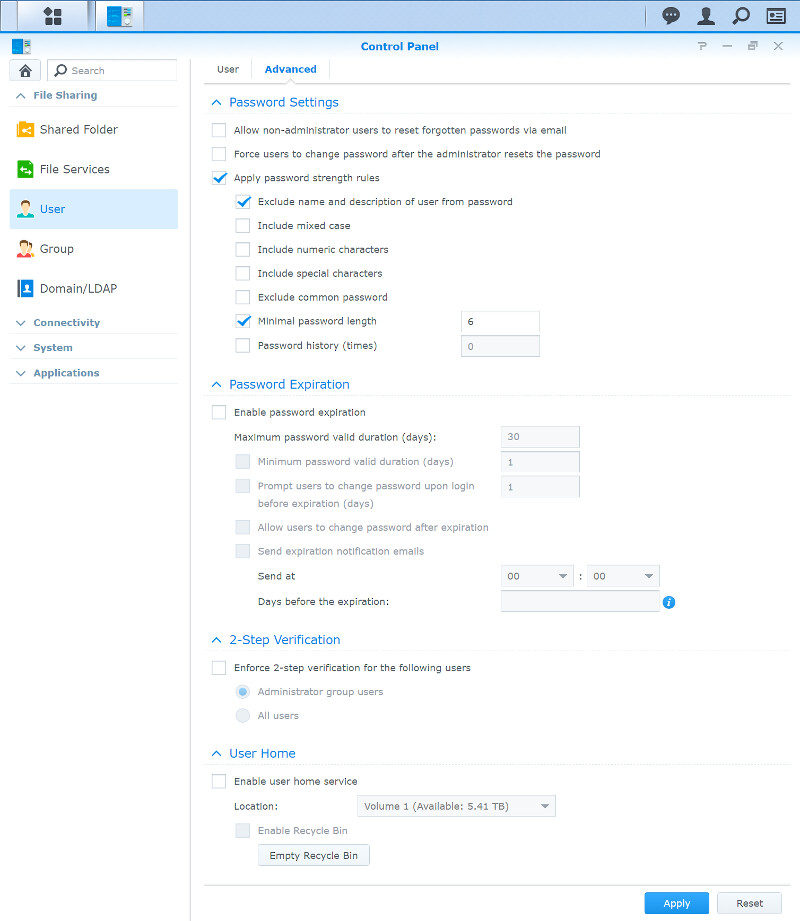
Now that we have created our users, let us have a look at the general user settings which apply to all. We can set rules regarding the passwords and enable 2-step verification for the login.
However, the main feature here is probably the user’s home folder. This allows every user to have their personal and private folder that the rest of the users can’t access.
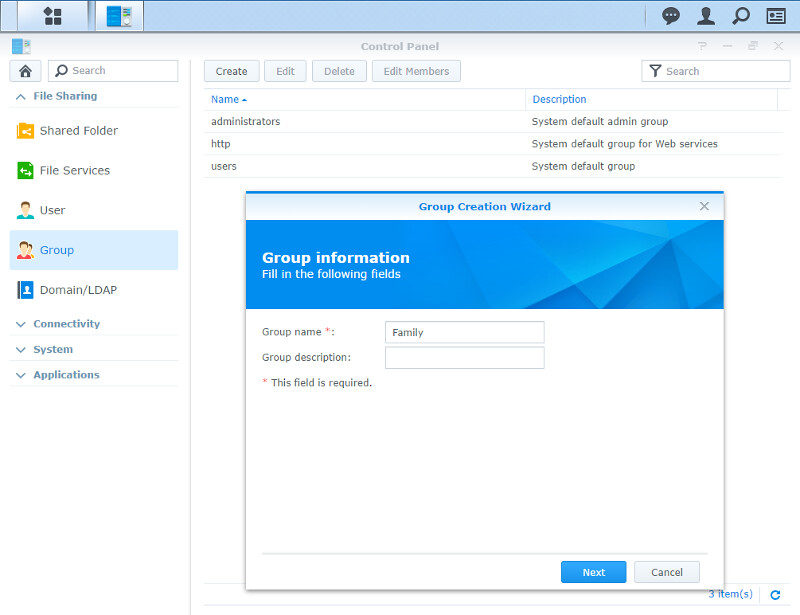
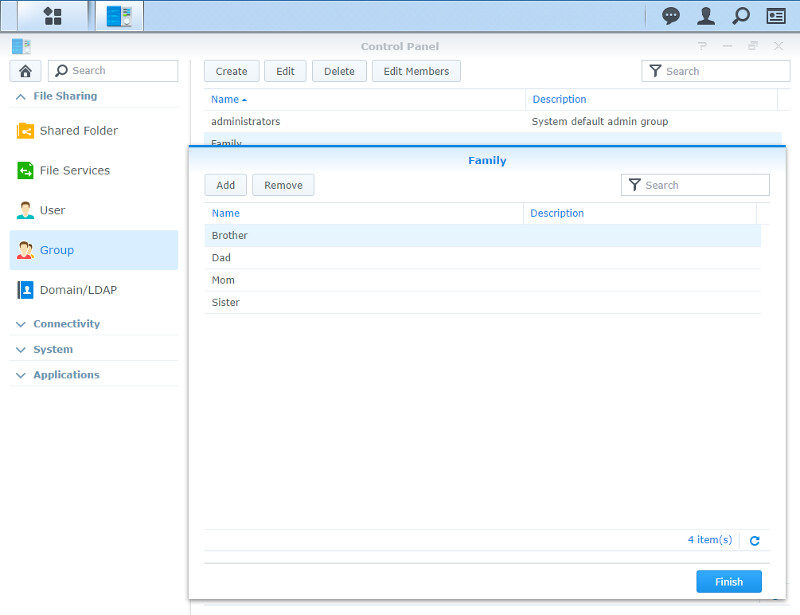
User groups are a great way to prevent all the micro-management of each user. Instead, you set the rights for the group and add users to it. That way, when you add more users at a later point, you can just add them a fitting group and they’re set up with all the correct rights.
It is very simple to add users, just edit the membership and add or remove the ones you want to. It takes a few seconds, and you’re done.
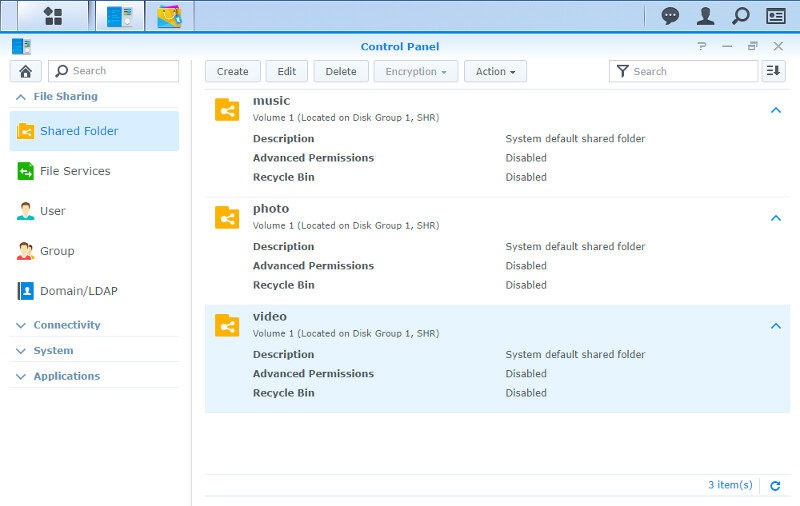
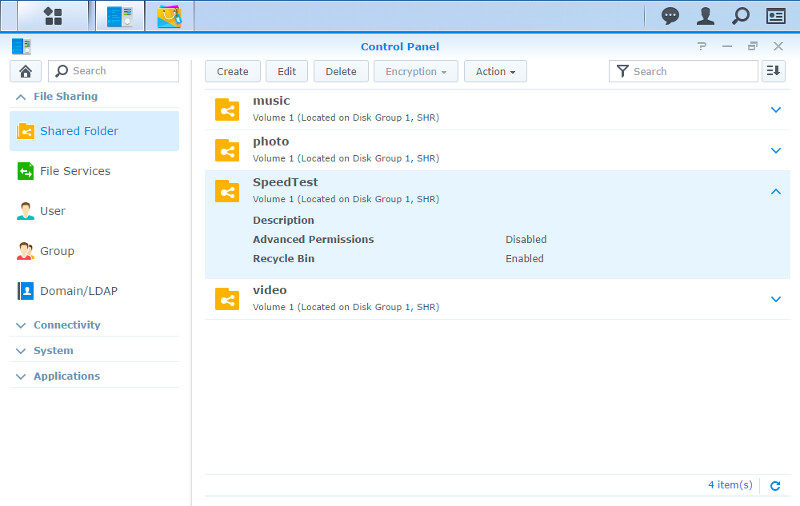
Shared Folders
Shared folders are the way to, well, share folders across your network. There will be some default folders depending on the apps and plugins you have installed and you can pretty much create as many more as you need and want to. Just as all the other features, it’s quick and easy and DSM will guide you through the process.
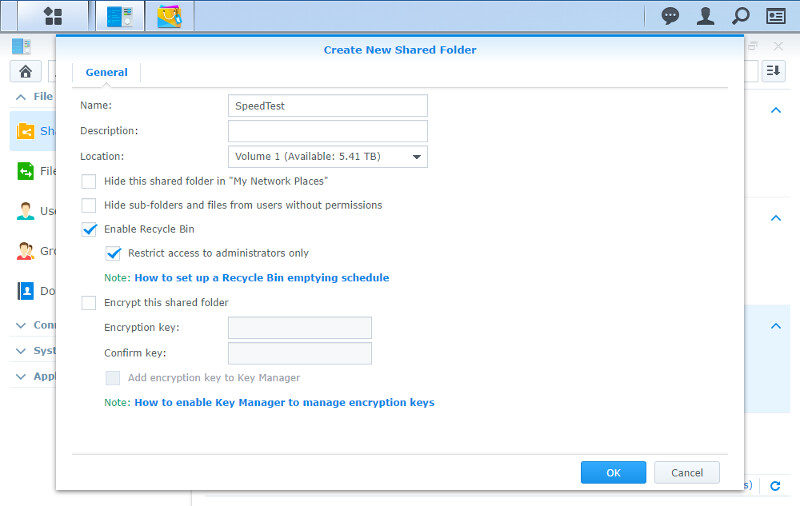
Creating a new share is real easy, just like the rest in DSM. Add a name, and you’re basically done. You can also set various other settings here including encryption and there are convenient links to the built-in help file too in the notes.
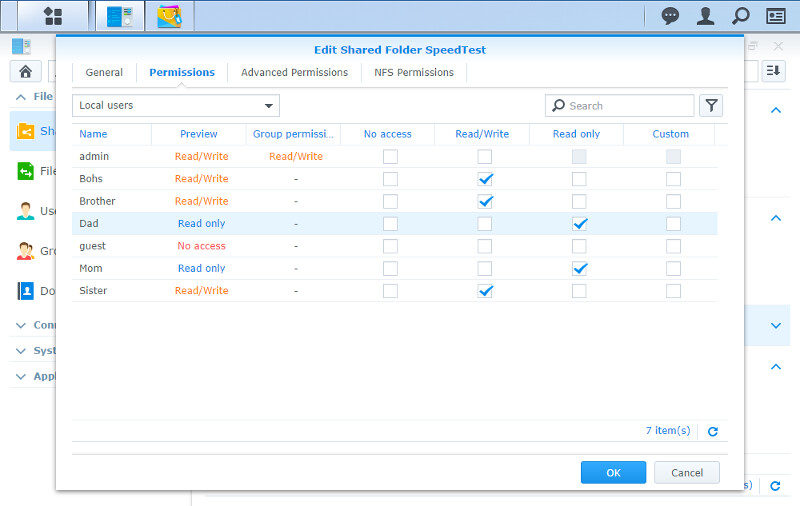
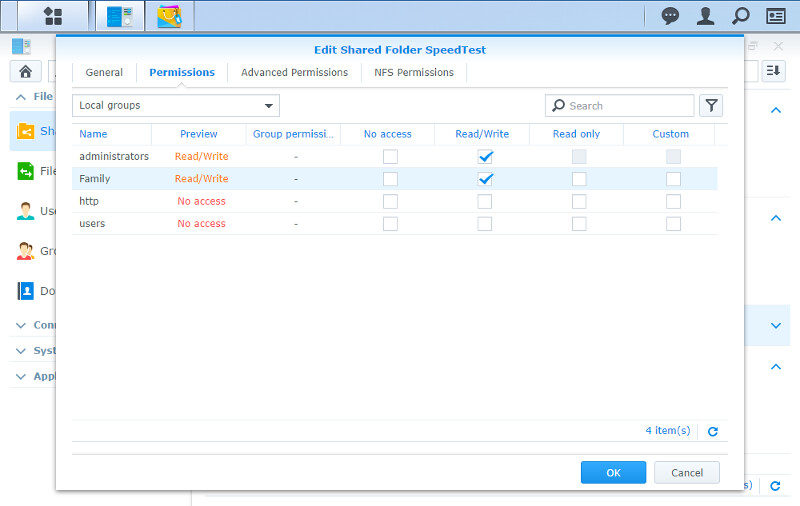
Access rights can be set by users or by groups. Which you prefer is up to you, but I’d do it for groups rather than users. It just makes your digital life easier. Especially when you need to change things later on.
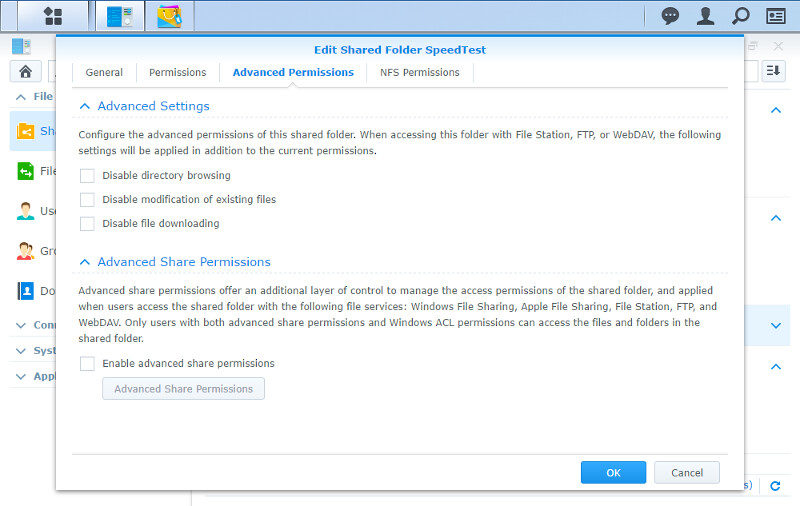
There are advanced and NFS permissions too for each shared folder. Here you can disable features such as directory browsing and disallow modification of existing files.
And that’s it. With the new additions, you can edit all of these features later on, including the encryption settings.
Businesses can also use Windows AD and LDAP to join their pre-existing settings automatically. Combined with an iSCSI setup, network admins can quickly provide storage to a lot of users without changing their habits.


